5.15.2020

Free Sticker Friday // Planner Girl Memory Planning Sticker Kit

It has been a long, long while since I have offered a free printable sticker kit on the blog.  I mean...a loooonnnggg while!  I used to post a sticker sheet nearly every Friday because I loved making them so much.  The last Free Sticker Friday post is from by birthday in 2017!  I've been making stickers for myself and for Patreon for a while but I thought I'd share this guy over here just for you all.
this post contains affiliate links, please read my full disclosure here.

Way back in the way back, you may remember, I did the no-white-space EC style planning.  I had an Erin Condren planner & I had inserts that mimicked the EC layout.  I did both my regular, everyday planning and my memory planning in this EC style.  My everyday planning really took on the no-white-space look while my memory planning had a little more white space showing.  Check out how I set up a Memory Planning spread here (that was way back in 2016!).

Then I went into memory planning in my horizontal Happy PlannerThat was fun because I did like to journal and found the layout inspiring for memory keeping.  I fell off the memory keeping wagon for real in about 2018 right before our wedding.  This post goes over how to print your photos at hom for memory keeping.
After getting pregnant with Marcus I wasn't feeling planning of any sort so I totally stopped all of it!  Now that he's here I wish, wish, WISH I was feeling it because it would have been very nice to have a document of all the things that happened & that I was feeling before and after his birth.  But we can't really go back in time, so we just gotta start now.

Since being in Quarantine, I've gotten inspired by the ECLP planning style again. I've been watching a lot of my OG YouTube planner channels - think like Scribble Prints Co - and getting back into that style of planning.  Since I've kept my Happy Planner starting in January and I've been documenting Marcus with a ton of pictures on my google photo account, I've been able to do some memory planning or rewind spreads in my new memory planner.
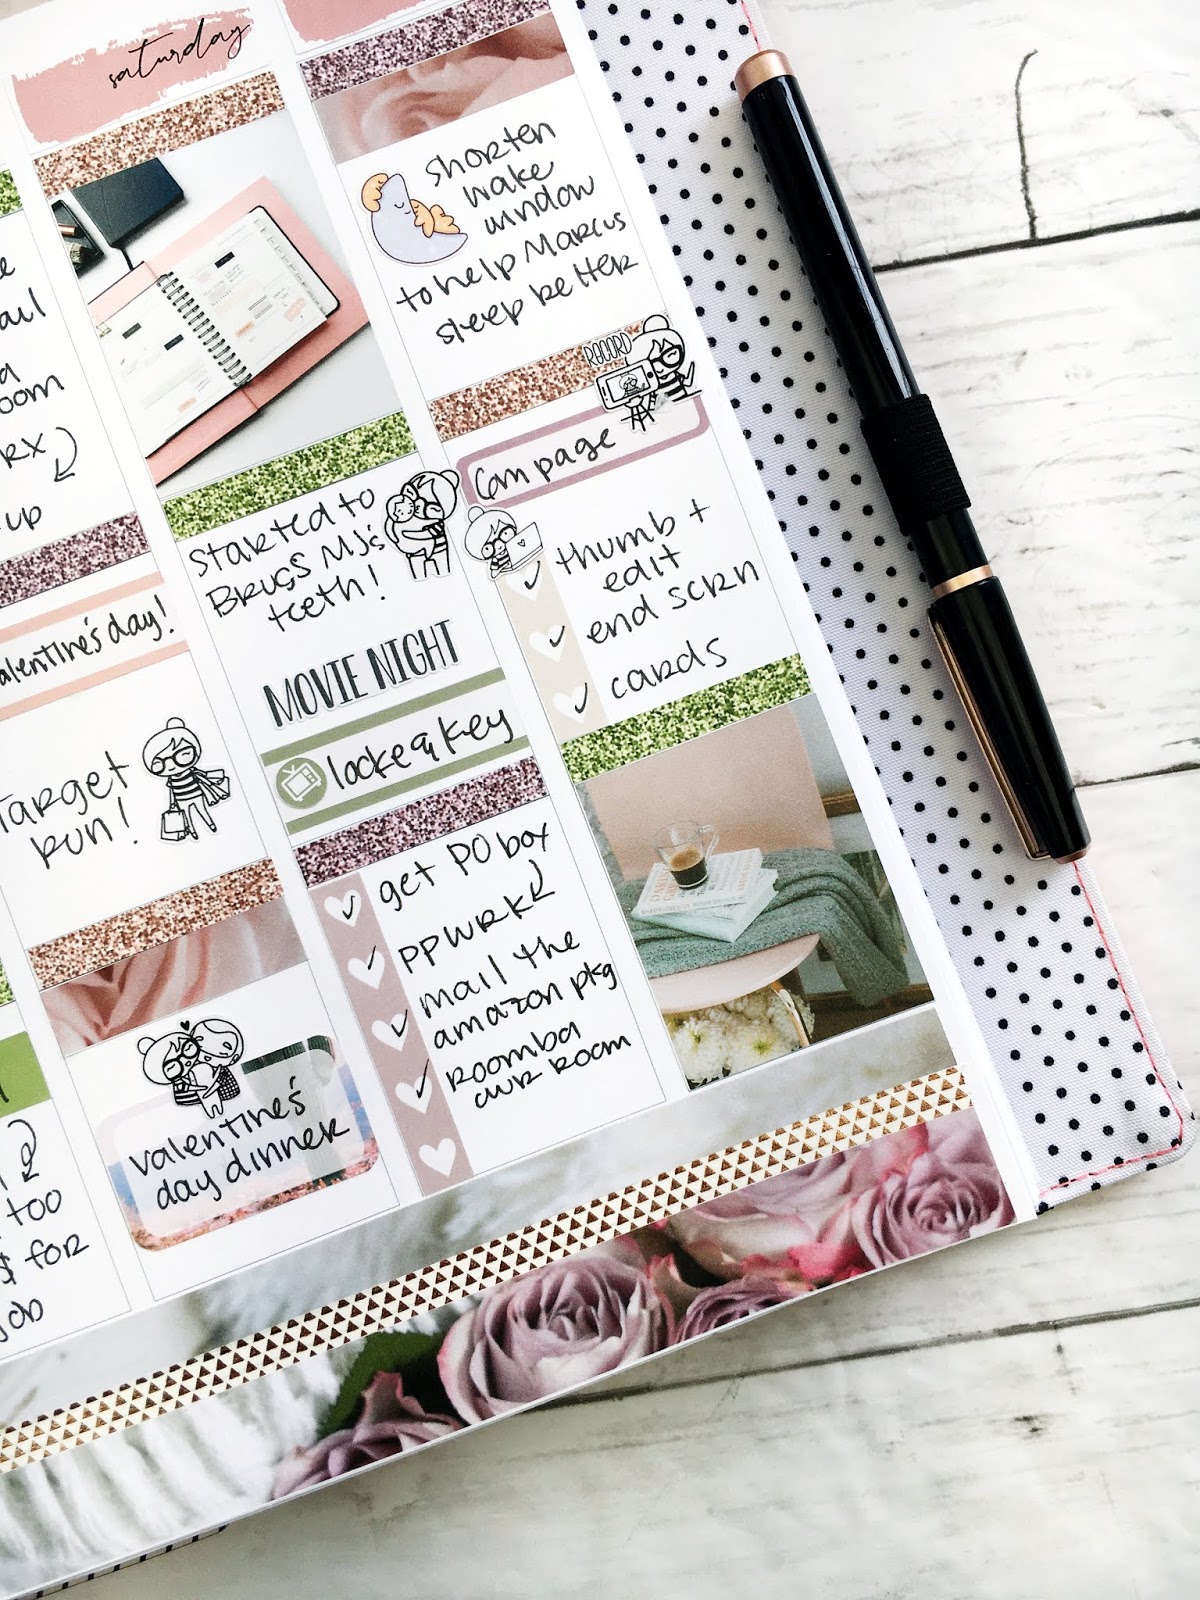
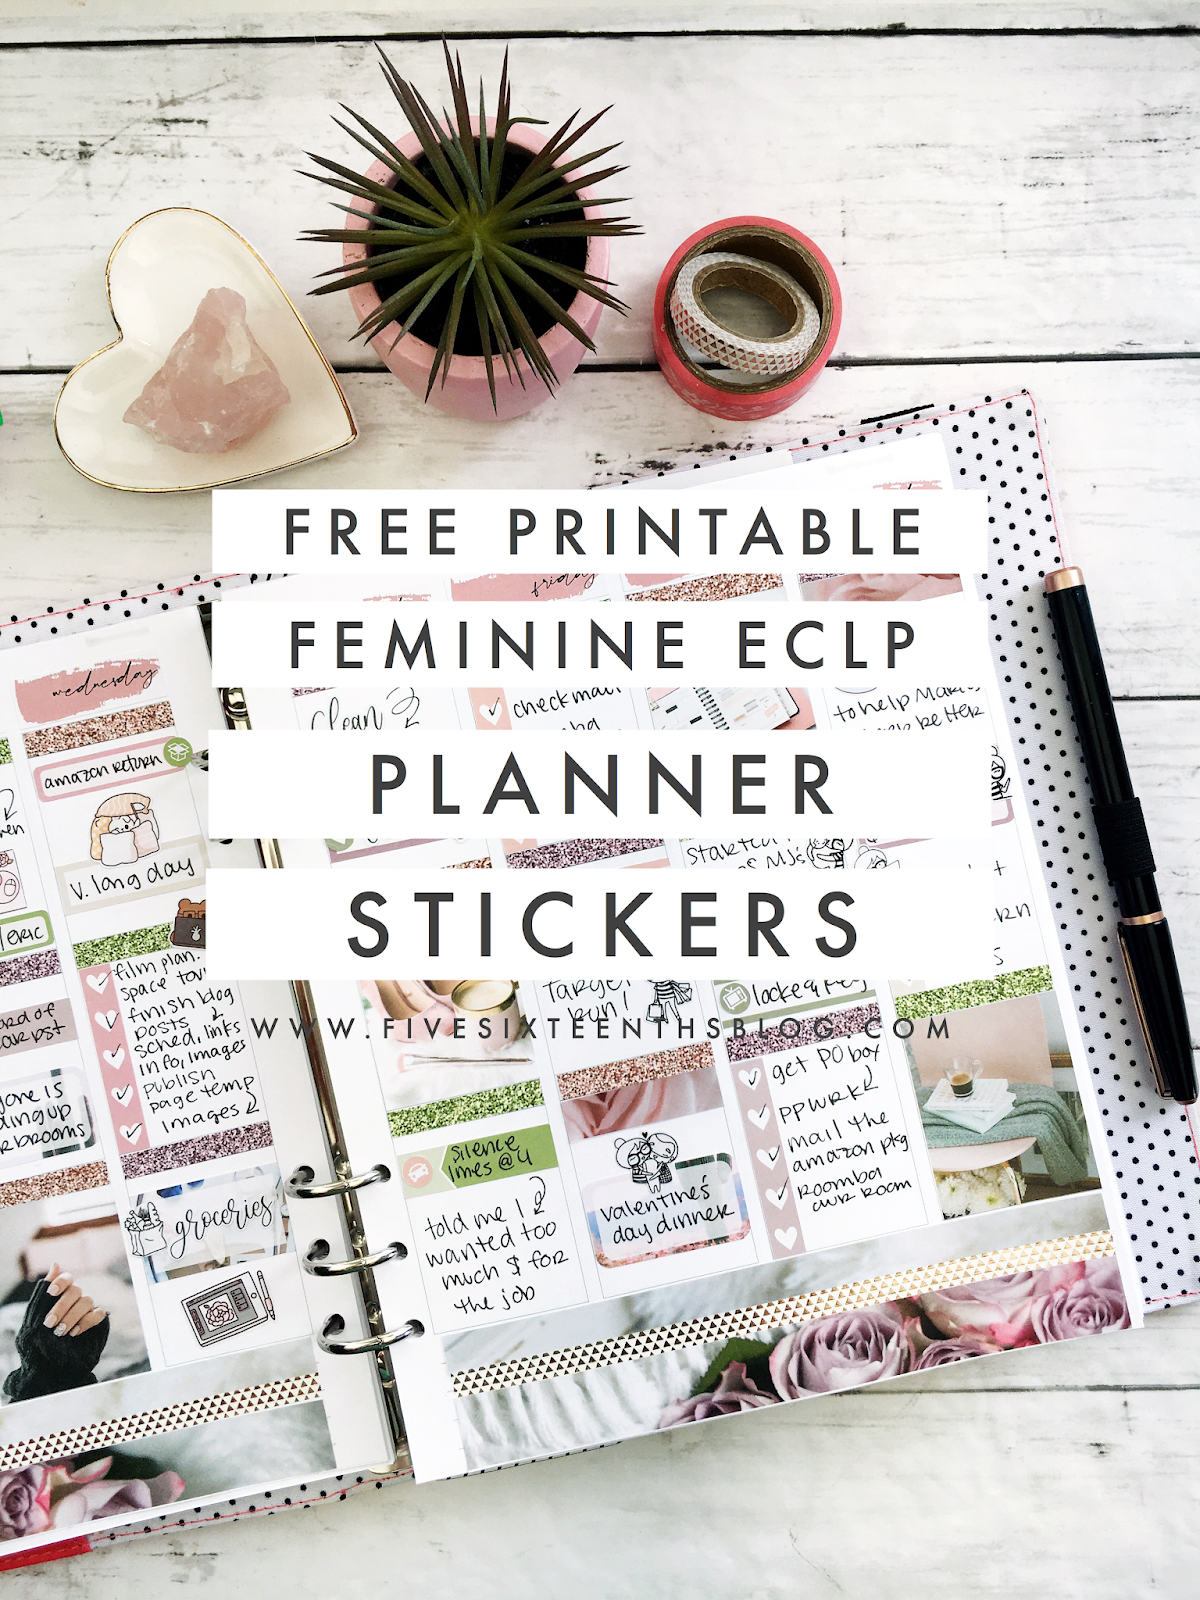
This kit is very pink & very feminine so I used it to memory plan Valentine's Day week of 2020.  (Check out my Happy Planner Plan With Me video for this week here.)  I think it has the perfect mix of checklists and functional boxes plus some little icons that you can just supplement a little bit with stickers you may have leftover from other kits or character stickers.

The stickers in this spread have come from the Papershire Facebook group & Print Petticoat Bandit.  I've made some script stickers myself (video tutorial coming soon!) and my own DIY glitter headers (check out the tutorial here!).  This kit comes with 7 glitter headers already but if you need more you can TOTALLY make some yourself, for free, to cut with your Cricut Explore or Cricut Maker!

DOWNLOAD THE PLANNER KIT HERE


Go ahead and download the kit above and let me know what you think! As always, these printables are for personal use only - do not sell or reproduce these guys.  You'll get a PDF to cut by hand, a PNG ready to cut with your Cricut Explore or Cricut Maker (size it to 6.75 in x 9.25 in in Design Space), and a Silhouette file to cut with your Portrait or Cameo.  
I'll also link above my favorite sticker papers to use.  I have two new favorites!  The weatherproof matte sticker paper from Online Labels is AMAZING.  I bought this a few years ago to make one sticker for Zach and then never used it.  I finally decided to bust it out again and it is perfect for super crisp, professional looking prints.  I also just found this Packzon sticker paper on Amazon too.  While not as durable as the weatherproof paper from Online Labels, it does give crisp prints and is much more affordable.  It is a bright, bright white just like the weatherproof paper too.  My OG favorite that is super affordable, kinda removable, and super thin is the Yens Full Sheet Labels on Amazon.  These aren't as crisp white as the other two but it doesn't look bad.  I've used this sticker paper for YEARS and it has only been recently that I've switched.  I like this paper because it is very thin and wont bulk up your planner.  The paper isn't marketed as removable but it comes up easily unlike the other two mentioned above.  The prints still come out acceptable...I was satisfied with the quality for years!  It takes inkject really well and delivers a fine print!  I recommend all three, and based on your needs, think there is a sticker paper in here for you!

I hope that you've been having a fun planner journey and if you're just starting out be sure to check all the previous planning blog posts here on the blog!

What have you circled back to in your planner journey?  What have you done from the very beginning?

xoxo, Moe
5.13.2020

5 Mommy Routines to Track in your Planner

As a new stay at home mom, there are several things I didn't know I'd need to keep track of in my planner!  With a little guy at home my routine has been shaken up, to say the least.  And then every dang month the routine changes.  Of course this is how it goes, right?  But when you're thrust into this for the first time, plus add in mom brain on top of that, keeping track of things can get daunting.
this post contains affiliate links, please read my full disclosure here.

I'm a planner girl and a planner person by nature.  With Marcus home for the first 3 months I was searching for anything that would give me a sense of structure.  It wasn't until he was about 4 months old that we got any semblance of a routine.  Then we were throwing starting food in the mix, gotta brush the teeth, now we're eating solids 3x a day, AND at one point he had a prescription to take.  That's a lot of stuff for one mamma to handle.  I've got like 77 habit trackers in my planner right now!
Before we dive into the 5 routines stay at home mom's should track in their planners I want to share with you two things: first, check out this video on how I made a daily routine page for Marcus at 6 months & second, check out this post on tracking spirituality in your planner because some of the tools can be the same.  But lets jump into the list.

Cleaning Routine

If you've been following the blog for a while you'll know that one of my biggest goals EVER is to have a sustainable cleaning routine.  I've got post after post on cleaning here on the blog but my two favorites are this one on creating a cleaning routine and this one on the 3 Waves Cleaning Method.  Just like with the old house, when we moved I broke our new house up into zones or sections and clean one zone a day.  I created a routine page for my planner and then each day I clean that zone for 30 minutes.

Morning/Evening Routine

Getting ready and unready for the day can really set the tone for yourself.  Waking up with intention and going to bed with intention can mean you get the most out of each part of the day.  I have a few chores I like to get done before the baby wakes and after the baby goes to bed.  It is also important to prioritize your time and couple time when you're a mom (or a dad).  Baby's shake up a lot of stuff and getting down a simple morning and evening routine that can revitalize you is important!

Feeding Schedules

I am obsessed with structure.  This is hard to manage when naps and appointments and big poop blow outs can throw things off.  But you can create a general daily schedule for yourself and the baby to track in you planner using hour stickers, daily pages, or an hourly planner.  I have a loose idea that Marcus will wake up at 7 am and eat, then eat cereal at about 8:30 am, then go down for a nap around 10 am.  I started with an app on my phone when Marcus was born to kind of gauge his schedule, but again it didn't get really cemented until about 4 months.  So don't stress about this in the beginning!  I don't want you to get stressed out when the baby's needs are all over the charts but I can understand the need for some semblance of a schedule.

Bath Time/Teeth Brushing

We bathe Marky boy everyday as a part of his night time routine.  (Night time routines are important for babies, why the heck wouldn't they be important for us!?!)  But not everyone does.  The Happy Planner has a Pregnancy sticker book with bath time stickers.  Use these to mark the days you give the little beeb a bath.  Things can get busy so maybe you can't bathe them one night.  If you start to track it then you'll know if you've gone a little two far between baths.  Marcus has just broken two teeth so we've been starting to brush his teeth and gums.  I can't tell you how many times I've forgotten to do this though!  So I have a habit tracker dedicated to it in my planner now!

Meal Planning

Of course we all know at the end of a long day - whether you're a stay at home mom or work outside of the home - the last thing you want to do is make dinner.  I stink at this right now but meal planning is a great thing to track in your planner.  Use something like a weekly sticker to write out what you're going to make and track the use of leftovers.  I've not been doing this like at all!  Even at the beginning of the day I don't want to think about dinner! And now that Marcus is eating food I've got to think about feeding him too?!?! I share in this post 3 ways I prep food easily for him.


Being a new stay at home mom has created a new routine for me and I need to keep track of it!  Whether you use different stickers for different routines or a planner layout (like the Teacher planner layout), tracking what needs to be done when can give you an idea that you've got your day under control!  I really have loved creating these little daily schedule pages for my planner.  Marcus is constantly growing so it's been wonderful to see how his schedule has changed as he's grown.

What mom life routines do you track in your planner?

xoxo, Moe

listen to this blog post below:

5.05.2020

My Happy Grimoire Book of Shadows

Going into 2020 I want to share more of my chosen spiritual path here on the blog.  This place has always been a space for me to share what I'm doing and has evolved with me in the 10+ years I've been blogging....so let's jump in with another post!  Today we're gonna talk about my Book of Shadows, my Happy Grimoire!
this post contains affiliate links, please see my full dislcosure here.

What the heck is a Happy Grimoire?  Well the Happy Planner has come out with quite a few woo woo type sticker books and collections (I don't blame them this stuff is super popular right now!) and that is the majority of what I've been using to set up this journal.  A Happy Grimoire is a Book of Shadows (or Grimoire) made with/from Happy Planner Products!  So let's go over the sections I'm working on right now and then we'll talk supplies

Grimoire Sections

Wheel of the Year

This is one of my favorite sections.  I love using the Happy Planner seasonal sticker books to create these pages.  Since there are a ton of these sticker books (and now the new Summer, Fall, Winter, Spring books) there are a ton of new stickers I can't wait to use.
This section cover the 8 modern pagan sabbats or holidays that happen through the year.  Ones you may be familiar with are are the Summer and Winter Solstices, the Autumn and Spring Equinoxes, & Halloween.  You may also be familiar with May Day/Beltane or Candlemas/Imbolc.  This section outlines the meaning of each holiday, when it occurs, what to do to celebrate, and any correspondences.  So far I have a few videos on making these pages in my Grimoire With Me playlist on YouTube

Spell Work

Any good grimoire is going to document any spell work you've been doing.  This section also includes any mantras or meditations I've been repeating or working with.  It's kind of like a prayer journal as I'll also reflect on spells, intentions, ore meditations.  Decorating this section reminds me of recipe planning too!
Right now I have my ritual set up/prep outlined there with invocations, etc.  I plan to also draw out an altar to use on the go (how fun will that be!!) and include any other prayers, affirmations, and invocations that I come across.

I ended up creating some headers for each page using the Belove font from DaFont.com.  This is nice because I stink at hand lettering!  I used my Happy Planner page templates over on Etsy to create a sticker page I can stick right into my planner.


General Information

This is sort of a catch all section.  Right now I have info on Goddesses, the planets, and crystals.  But I plan to break out things from this section as I gather similar information.  So right now Hera is the only Goddess in this section but as a I accumulate more information and create more pages I'll probably break this into its own section.  I also have astrology info in there, but again I'll probably break this one out as I gather more info.

Faith Planner

The biggest part of my Happy Grimoire is my faith planner.  I am currently using the Stargazer planner from the Happy Planner Girl line released in 2019.  I grabbed this planner up at the beginning of March when they all went on clearance and finally decided on the perfect way to use it!  You can check out my faith set up in this video but I'll share how I have it set up too.
I turned it into sort of an 'undated' planner by gluing the monthly view pages together and just using the other pages in the planner.  I use the first monthly dashboard to outline goals and plans for the month.  I love the intentions section on top of the right hand page.  This has helped me to outline what I want to focus on each month.  At the end of the month I go back to work on the reflection section.
The daily to do list pages are for daily gratitude.  I ended up just dating each section and writing out gratitude instead of a checklist.  At the end of the month there is a gridded section that I use to brainstorm stuff for the next month.

And finally the two blank notes pages at the end of the month are for my Full and New Moon intentions, ritual, and info.  I love that there are two pages right where I need them in this planner!! I used to use this planner for New Moon/Full Moon stuff and tarot work but I don't think it's made any more.  The monthly layout works perfect for my faith planning right now.  You can read more about setting intentions with the moon phases in this blog post here!

Supplies

Sticker Books 

I've pretty much dedicated using the Stargazer, Dream Seeker, and Free Spirit books to this planner/grimoire.  When it comes to the faith planner these three sticker books fit the design of the planner.  It's hard to use Squad Goals, for example, because of the swooshes on the planner pages.
For the Wheel of the year pages and other other general pages I do tend to use holiday sticker books where I know I'll find some correspondences.  The new seasonal books from 2019 are great for this!  The original Farm House book is great for Imbolc, the Dream Seeker book is great for Belatne, and a lot of the holiday books can have other correspondences for the other Sabbats.

Filler Paper

I did purchase a lot of accessories in the Stargazer line but I am also just using any filler paper that I like!  Grabbing up all the Happy Notes is a great way to build up your filler paper stash.  I really do like to use the lined pages as I'm doing a lot of writing and need to write straight but the grid or graph pages offer a way to add more info because the line spaces are smaller.

Pens & Markers

To write in this book I'm using my favorite pen - the Frixion Ball Slim.  I would love to use a nice marker but I'm too afraid I'll make a mistake and using a Frixion pen means I can erase.  I've not had any of the ink in any of my planners I've used these pens in disappear....yet!
When I need a marker to write I've been using the highlighters from the Happy Planner that came out with their faith line.  When I want to highlight I'm using Mildliners I like the thin, chiseled tip on the Happy Planner markers/highlighters for writing since I'm no good at hand lettering.  It changes my handwriting just enough to be fun and doesn't frustrate me.


I am loving working in this book.  I have tried to keep a Book of Shadows or a Grimoire before but the format didn't work for me.  I had it all at first in a traveler's notebook, which while so beautiful looking, didn't allow me to add pages where I wanted them.  I wanted something prettier than just a binder and I couldn't stand the idea of just a plain three ring binder!  The Classic Happy planner is the perfect page size for this.

Be sure to follow my playlist over on YouTube where I show you how I use my Happy Grimoire.  There are already a few videos on a few different pages!

Do you keep a book of shadows? Do you keep a book of prayers or affirmations?  How do you study your faith?

xoxo, Moe


listen to this blog post below:

4.28.2020

Let's Talk Baby Weaning // Easy Ways to Prep Solids for Babies

On the day I'm writing this post Marcus has turned 8 months old.  He eats 3 meals a day and eats a lot during those meals.  We moved quickly (I think) from purees to solids and he's been having fun with all of it.  At about 5 months we started rice cereal, then we moved onto jarred purees at about 6 months.  At about 7 months we'd progressed to eating soft things like puffs and mashed fruit.  And now at 8 months we're fully on board with Chex, eggs, pancakes, chicken, fish, cut meat balls, cut strawberries, green beans, pasta...I mean he eats a lot of stuff.  Most of the time we just modify what we're eating for meals for him and he's loving it.
this post contains affiliate links, please read my full disclosure here

I was super afraid to start solid foods because choking was awfully terrifying for me.  But I really did let Marcus lead the way and if he seemed interested we went for it.  If I could squish it between my tongue and the roof of my mouth I felt confident to give it to him.  Obviously you'll want to talk to your pediatrician about starting and continuing foods and food sizes, etc.  But there are a lot of resources online about traditional weaning, baby led weaning, and accelerated traditional weaning, books galore on the topic & other mommas out there that you trust can be a huge support system!  I think ultimately with Marcus's readiness, we went with accelerated traditional weaning.  Here are some definition breakdowns:

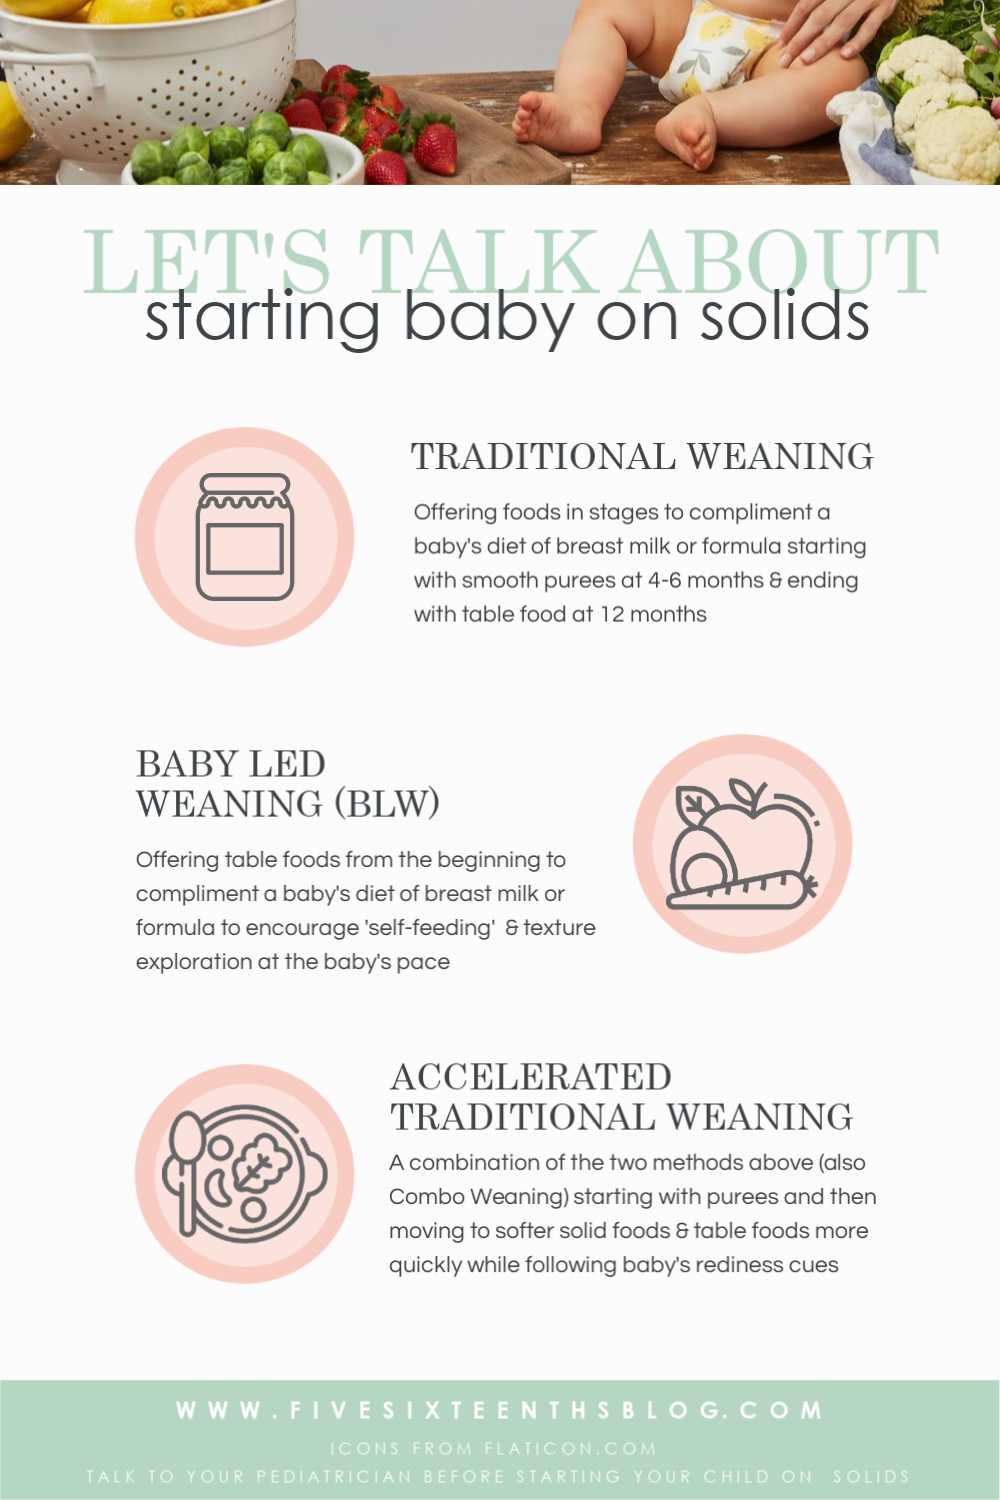
What are the Different Types of Weaning?

Traditional Weaning - this is when you start to offer purreed solids along side the baby's diet of breast milk or formula.  Most baby food manufacturers follow a system that involves different stages of foods based on age.  You'll start with stage 1 foods which are single ingredient, smooth pureed fruits or veggies for babies ages 4-6 months.  Then you'll move up to a stage 2 for babies 7-8 months which combine foods at a slightly thicker texture to introduce new tastes and textures.  Then to stage 3 for 9-12 month babies which are chunkier in texture and must be chewed.  Then you final out with table foods after 12 months old.
Baby Led Weaning - this is a method of introducing foods so that a baby starts to 'self-feed' as soon as they are introduced to solids.  You are also offering food to compliment their diet of breast milk or formula but instead of spooning food into the baby's mouth they are exploring food at their own pace.  While each method focuses on the idea of baby's readiness, BLW focuses on providing table foods in appropriate shapes so that a baby may reach, grab, pick up, and self feed.  This method also allows for spoon feeding of foods like oatmeal and yogurt so that a child can learn to self-feed with a spoon.

Accelerated Traditional Weaning - this method combines the two above when starting to complement a baby's diet of breast milk or formula.  Accelerated weaning takes into account babies readiness for foods and moves from purees to softer and then to solid foods more quickly.  This method offers purees and then softer solid foods to encourage the oral skills needed to eat more advanced foods.  The recommendations here are that a food should be squishable or dissolve so that the child can learn to move food around in their mouths and chew.  Offering purees and solids at the same meal, one at a time, can be helpful to develop these oral skills.

Like I mentioned above we totally followed Marcus's lead and when it seemed he was interested in food and interested in what mommy and daddy ate, we offered it to him.  Again, be sure to check with your pediatrician when it comes to offering solids.  I'm not offering any medical advice here, just sharing my experiences!


Three Ways to Prepare Solids Easier

I can hardly decide what I want to eat and now I've got to feed a baby an actual breakfast/lunch/dinner as well!?! This was overwhelming to me at first but as I slowly built the repertoire of foods Marcus would eat I found simple ways to offer them.  Here are 3 tips I have to prepare food for your little one.

Microwave Eggs

Something super simple to make for a baby is scrambled eggs.  But you may have to dirty a pan and a few utensils if you make them traditionally.  And sometimes in the morning I'm not eating a full on breakfast like I'm going to feed him!  Shallow salad bowls work best for this method of cooking eggs - simply crack and egg into the bowl, scramble, and microwave at 30 second intervals until cooked through.  You can an easier prepared egg and it's easier for them to grab with the second tip below.

Cut foods with a Pizza Cutter

Slicing up foods like the scrambled eggs above or pancakes or toast can be made much, much easier with a pizza cutter!  I spread some leftover puree on toast or a pancake and cut it into bite sized pieces with the pizza cutter.  No more knifing up the food and squishing it while dragging the knife through.  Less crumbs when it comes to cutting toast too!

Personal Blender for Meat

We've offered Marcus both chicken and shrimp after its been blended in our Nutribullet. Of course you can use a regular blender but a small blender like the Nutribullet (or any other personal blender) means you're not dirtying up extra parts and pieces.  You can store the leftover blended meat in the cup with a cap for a day or two and not have to empty it into another container and then clean your whole blender.  Plus I throw my blender blade thing into the dishwasher (not sure if you're supposed to) so it's way easier to clean.  (Honestly, if it can't survive the dishwasher, I don't want it in my house!)
Starting Marcus on solid foods has been and adventure.  I started off super scared he'd choke but gagging and what not is learning.  It is super important to listen to your baby as they start eating food.  I didn't think we'd go the accelerated route and BLW kinda freaked me out but as he developed skills I felt confident following him and also challenging him with textures.  We run into things that he has trouble with or doesn't like and we work through it.  Just the other day we tried something I can only liken to a thicker veggie soup and it was hard for him to navigate the smooth and chunky and chewy texture.  Which is fine, he'll develop skills like that as we progress.

I hope this post helped you navigate feeding your baby a little bit and inspired your to not dirty too many dishes when making up some food for them!  Hope you're feeding journey is fun & exciting!

Resources I consulted: Very Well Family, Wikipedia, Feeding Bytes

What was your feeding journey like?  What food are you most looking forward to sharing with your child?

xoxo, Moe
listen to this blog post below:

4.14.2020

Five Ways to Use Eggs for Ostara Spellwork

One of my favorite Sabbats to celebrate (after Imbolc) is Ostara or the Spring EquinoxIt it as this time that we mark the days getting longer, fertility of the earth, planting season, coming out of hibernating winter, and over all the birth of Spring.  The Spring Equinox falls in March (in the northern hemisphere) around the 19th through the 21st and marks when both light and dark are equal.  After the Spring Equinox, we'll start got longer days and shorter nights!  At Imbolc we've celebrated the midwinter mark and at the Spring Equinox we're celebrating bursting forth from winter just as plants are bursting from the earth.  Livestock are being born, eggs are being laid, and for our spiritual selves we can start to lay the foundations for things we'd like to grow and cultivate this year.  
this post contains affiliate links, please read my full disclosure here.

What better way to celebrate new beginnings and fertility than with the symbol of the egg.  There are a couple of symbols to work with around Ostara but I find that the egg is the easiest to use and the easiest to start with especially if you're new to celebrating.  The egg represents potential, it represents the womb, it represents the nurturing of mother earth, it represents the seed of life.  All of the things we can celebrate during this time.  The egg is a perfect representation of what we'd like to align our minds with during this season - to plant, to nurture, and to grow.  Here are a few ways to use eggs to celebrate Ostara:

Make Candles

Because we're now coming out of winter, the days are growing longer and the light is coming back. There is no better way to represent light returning than with a candle. You can either gently crack the eggs to create two halves or blow the contents of the egg out to create these small candles.  Blowing out the contents of the egg can add a bit of a personal touch - you're using your breath to make space for you intention to grow!  Simply poke a decent size hole in either end of the egg and blow.  Once the egg is empty, open the top hole up just a little more so that you'll have room for the wax and a wick.  Tape up the bottom of the egg so the wax wont escape and add your wick and a little wax.  You can color the eggs and/or color the wax to align with your intentions.  You can also write on the outside of your egg in wax or in marker the goal or intention you're making this candle for.  Have your family all make one (or two!) and put them in a ceramic egg holder to light at Ostara dinner.  Be sure to save those egg insides to cook with!

Write your Goals

Speaking of writing on your eggs, you can outline your goals, wishes, and dreams on the outside of eggsWriting in white or clear wax crayon and then dying the eggs will reveal your goals just as you'd like to manifest them into your life.  Or keep them secret by dying the eggs first then writing in wax.  Decorate your eggs with sigils you've created or spellwork you'd like to see to fruition.  You can even anoint them with essential oils corresponding to your goals or diffuse some that work perfect for the season.  Decorate your altar with these eggs and then bury them with a seed (either outside or in a pot!) that you can nurture as you move through your goals.

Seed Starters

The little shells of eggs are the perfect vessel to start seeds for your garden!  Carefully cracking eggs a little off center will create the perfect little cup to start your seed.  You can incorporate the activity above and label you seed starters with the goal you'd like to accomplish.  Consider growing an herb that corresponds to your goal or intention - like mint for prosperity, lavender for tranquility, rosemary for protection.  Once you're seeds are big enough to transplant either move them to your garden or into a pot on a windowsill.  This would be perfect for children to learn about growth and to give them a little responsibility to help their little plant grow.

Egg Hunt

This is an oldie but a goodie, everyone loves an good egg hunt!  This is a good, solid family activity to involve everyone.  You can fill the eggs with candy or even with different wishes for others.  Perhaps the eggs are filled with some wishes or hopes for others in your family - have everyone sit down and write these things and then stuff the eggs.  Then when they are all found have each person read off the wishes or hopes they'd like to cultivate this year.  Add this wish to the bottom of your seed starter and plant an herb corresponding to the wish. This is a great way to involve extended family in a tradition that could align with an Easter celebration as well.  It's not too out there if perhaps parents or grandparents don't celebrate the Wheel of the Year.

Bake or Cook with Eggs

This is my favorite.  I love to celebrate the Sabbats by cooking.  Saving the insides of your eggs means you can make a yummy breakfast, quiche, or cake.  My favorite way to use eggs is in Deviled Eggs.  This speaks to me because my mother makes the best Deviled Eggs ever so using eggs this way carries on the tradition.  Bake sweet cakes or breads.  Make egg salad sandwiches and head out for a picnic if it's nice out!  A picnic is a great activity to count the ways the earth is blooming and to listen for new little animals.

Ostara celebrates growth.  The Goddess is transitioning into her Maiden form.  We're celebrating fertility, protection, purification, and the nurturing nature of the earth.  Eggs are a great way to celebrate through the season and keep growth as your mindset as we move through Spring.  The easiest way for me to keep the reason for the season in my mind is to have a physical representation.  We keep eggs and hares/rabbits on our family altar and I keep a willow wreath decorated with eggs, lavender, and greenery on my personal altar.  (Check out that super easy and affordable DIY here)  Seeing these symbols everyday reminds me of what I'm working towards.  Having a physical representation of the things I'm looking to embody helps me to move through the seasons with purpose!

I also want to leave you with a last little tip: easy home made egg dye!  Of course you can use natural dyes but this works with quite a few things we've already got in all of our cabinets:
You can learn more about the Spring or Vernal Equinox in this post.  I share info about essential oils, how I align this Sabbat with the moon phases, and give you three oil blends to work with this season!

Blessed Ostara my friends!

What do you do to celebrate the turning of the wheel at the Spring Equinox?

xoxo, Moe

2.25.2020

The Anatomy of a Ritual Bath in 5 Simple Steps

One of my favorite ways to connect with my inner self & grow in myself is through the use of a ritual bath.  A ritual bath can sound super intimidating especially in our world of Instagram aesthetics.  As a new mom, my ritual baths have most times turned into intentional showers during baby nap times but that doesn't make them any less meaningful. 
this post contains affiliate links, please read my full disclosure here.

A ritual, put simply, is a "ceremony consisting of a series of actions performed according to a prescribed order." (definition here).  A ritual is anything you do in a certain order and, believe it or not, creating your own ritual bath is as simple as following 5 simple steps.  These steps can be followed each time you'd like to dive deeper and connect with yourself, your purpose, and your deeper growth.  Here is how to get started:

Choose an intention

This can be anything from 'I choose to feel relaxed' to 'I choose to embrace my femininity' to 'I choose to release the burden of the day'.  You can align your intentions with what you're currently going through, with the phase of the moon, with the current zodiac sign the moon or the sun falls under, with any spell work or meditations you're currently working with.  You can even base your intention around a mantra or quote you've been drawn to.  An intention for a ritual bath  just means you choose what you're intending to mull over while your in the bath.  

Choose corresponding oils, candles, crystals

Adding in this step can help to solidify your intentions by associating your thoughts with tangible things.  Looking for self love and relaxation? Choose something like rose quartz and feminine oils like lavender, neroli, frankincense, or rose.  Looking to ground yourself? Choose smoky quartz or jasper along with a woodsy oil like cedarwood or black spruce.  Scent has a powerful memory association effect so choosing an scent to associate with your desired feeling can enhance your ability to enter that state of mind when you smell the scent later.  Don't have essential oils? Scented candles work perfectly too.  And candle colors can help you to solidify your intentions by helping you to visualize the state you'd like to be in.  Check out this post on some essential oil pairings you may like and then read this post on candle magic.  My favorite book on emotions & essential oils is called Essential Emotions and you can find it here on Amazon.  (There is even a Kindle version!)

Set the mood

Turn down the lights, turn off the distractions, and take just this time for yourself.  Take a few deep breaths to clear your mind from any interruptions.  Take a the time to focus on the present moment.  Draw your bath deliberately.  Prepare your space with reverence.  Create a scared space for yourself and your intention by respecting this area for yourself, in this time.  Run the water and as the bath fills add in some Epsom salts and your essential oils focusing on your intention. Light your candles focusing on your intention.  Grab your tea or your wine and lower yourself in for a soak.

Relax, focus, meditate

Now that you're in the tub, relax.  Meditate on your intention.  Repeat a mantra that you may have chosen or thought of as you prepared your bath.  You can also speak your intentions to the universe or speak your feelings.  Use this time to contemplate on how you'll move forward to manifest your intentions.  What can you do daily to manifest you intentions?  What can you do daily to feel the way you'd like to feel.  Relax.  Be in the present moment.

Give thanks

As you decide your bath (or shower #momlife) is ending, give thanks for this time you've allotted for yourself.  Give thanks to the universe for what you've received so far.  A simple thank you spoken out loud can suffice but it's up to you and how you feel in that moment as to what type of thanks you can give.  Take the time to clean up your space as an offer of thanks, too.  Return the crystals and oils to their cabinets, wash any cup or wine glass you've had.  Thank yourself as well by wrapping yourself in your favorite robe, or pajamas, or outfit for the day.  Giving thanks is showing respect for the process.


A ritual bath doesn't need to be too complicated.  When you're taking time to connect with yourself or with your intentions you only need to take the time to create & hold space for yourself.  Creating that space and continuing to hold that space means you're respecting yourself and your need for self care.  We often rush through a lot of things in the day - shove the toast in our mouth while we grab the coffee and head out the door.  A ritual bath is a time to do things with reverence, to be present in the hear and now, and to listen & honor ourselves.

Sometime we can get caught up in the fluff of self care.  We hear that we need bath bombs and spa days and girls nights out but what we really need is the time and the space to honor ourselves.  If you need more simple ideas for self care, check out this post with 6 more ideas for self care at home.  You can also read more about mindfulness in your daily life through these posts.

What do you do that honors your current state?  How do you prep for a nice relaxing bath?

xoxo, Moe
listen to this blog post below:

2.20.2020

Boost Your Blog // 6 Places to Find Photo Props

If you've ever been super envious of those perfectly styled blog photos you see all over Pinterest, I've got the solution for you!  You don't have to spend a butt ton of money to build your library of styling props you just need a keen & creative eye.  
this post contains affiliate links, please read my full disclosure here.

First off, make sure you have a rough idea of your blog's style.  You can start by understanding and creating a style guide and creating a brand board of inspiring images over on Pinterest.  When you do this you're less likely to say 'hey that looks nice!' to something that may not fit in with your blog's (or other social media outlet) vibe.  Understanding the vision of the posts your write and the presence you want to create will help you say yes to better photo props.

I have six places I like to find my photo props, so here's my list:

Thrift Store

Right now thrift store chic is super huge as it has been for quite a while now!  You can find pieces like wooden cutting boards, baskets, & fabric for bigger background pieces but you can also find smaller accent pieces for your photos.  I like to look for colorful glassware & dishes to use in photos as well.  This is also a great place to find classic seasonal pieces that will stay relevant year after year.

Clearance Shelves

The Target clearance shelves are my jam!  Not only can you find discount seasonal items that may be relevant the next time that season comes around but you can also find really cool textiles to use as backgrounds.  Be sure to snatch up small rugs, table runners, scarves, etc that will be great to add color & texture into your photos.  You can also check the clearance shelves of Micheal's' for knick knacks, desk accents, and more.  I found quite a few variations of succulents at my local Mike's recently! 

Target Dollar Spot/Bullseye's Playground

This is another great place to get affordable seasonal decor.  While I like to pick up fall or summer or spring decor in this area to save money I also like to find smaller specific holiday things there too.  I'm not one to decorate that much for any holiday but Christmas so having an affordable Halloween prop stash is great.  Find things that can translate into multiple holidays - like silver can be for Christmas or Halloween, red can be used around Valentine's Day or Christmas, etc.  I found some fake apples in the Target Dollar Spot for the fall back in September!  So shop often & shop early!  You can also shop seasonally here to find specific color schemes to fit in with your aesthetic.  If your blog has a lot of pastel vibes shop during the spring.  If your blog has a lot of jewel tones or has a boho vibe, shop during the early fall.

Dollar Store

Another place to find affordable seasonal decor is the Dollar Store!  I've done a nice spring decor DIY featuring some of their seasonal products and this guy will last me many spring seasons to come.  You can often find some nice little accent pieces that imitate pieces found in higher end stores.  Their floral sprig collection is awesome too!  I also look back in the automotive section to find soft, fluffy polishing cloths that you can use as a faux fur background.  I use a piece of Dollar Tree foam core board with a plank style removable wallpaper vinyl as a backdrop for nearly all of my photos and YouTube videos.

Your Own Closet

In one of my first IGTV videos, I talk about using the fabrics from your own closet as backgrounds. You can style any cardigans, dresses, or fuzzy sweaters as fun accents in your background.  Beach towels would work nicely too.  Drape different fabrics different ways to create layers and textures.  Use your own bedspread for amazing flat lays, add jewelry as an accent.  You can see that I used jewelry to create some fun stock photos for you all in this post.  

Scene Creators 

Don't want to have a closet full of props to make your flat lays?  Well there is something cool out there I've recently found that can help you create amazing flat lay scenes...they are called Scene Creators!  You can find them on a ton of digital design websites - The Hungry Jpeg, Creative Market, Etsy, Design Bundles, etc - and some of them will even work with online design platforms like Canva & PicMonkey.  These guys allow you to mix & match digital elements on a background to create your flat lays.  This is perfect for a consistent theme and really great if you're more of a digital blogger.  If you don't really need to take or style you blog photos and you just need a nice, clean, on brand photo to overlay the post title, this is a great way to create consistent flat lays!  I'm playing around with this idea for that reason - I don't always need to take a photo but I don't always like the stock images I find.

Once you have your props on hand you'll be more likely to create a cohesive vibe to your blog's look.  Its also great to be able to have a pile of your own stock photography to choose from when you may not have time to shoot.  If you've got only a few shots get creative with your cropping to use the same photo more than once.  Get your design on by using this PicMonkey tutorial to create a blog image template to use over and over again.  You can also check out this Canva tutorial over on the YouTube channel on creating blog graphics.


Keeping your blog fresh can be fun, but it also can be daunting. I've created a FREE resource that can help you get back on track (or just remind you to stay on track) that shows you 5 ways to revamp your blog! This 10 page book will give you great tips on reviving old posts, automating your process, and keeping you on the right foot. You can download it by signing up for the newsletter above.

Ready to do more with your blog? Check out all the Boost Your Blog posts right here.

What is your favorite thing to photograph? Do you have a prop library?
xoxo, Moe

2.11.2020

Daily Actions to Use Your Word of the Year

Each year for the past quite a few years I've chosen a word to work with for the 365 days of that year.  Some years have been more successful than others.  Most years I choose a word and then say 'oh shit, I guess I picked that word 360 days ago.  Yikes!' near the end of the year.  But some years I've been super intentional.  
this post contains affiliate links, please read my full disclosure here.

Words I've chosen before have been Focus, Explore, Forward, Mindful, & Authentic.  I think that Mindful (2017) and Authentic (2018) were the first words that I really, really worked with a significant portion of the year.  In 2017 I did the Ali Edwards One Little Word journal class which was very helpful to work with my word consistently.  In 2018 I created a Journaling Challenge to help myself find my word and connect with it in the beginning of the year.  I intended to repeat the challenge in 2019, changing the prompts a little for that year but I honestly can't remember if I completed it or not.  Unofficially I'm going to say my word for 2019 was GROWTH, better yet how about TRANSFORM.  I grew a whole damn human and grew myself too.  If the word of the year is about transformation, boy 2019 was a transformation.  I wasn't able to do this in 2020, but the prompts are perfect for anytime of the year!  


In this post though, I want to share with you four simple exercises to connect to your word.  You don't have to get elaborate or feel intimidated.  This is to help you take actions each day while only putting in the effort to create the actions once!  Here is how to connect with your word and work with it consistently all year.

Define it

First, define your word.  Put this at the front of your planner or on your mirror or on your fridge or in your car or at your desk.  Put the definition in multiple places.  Just be sure you put it where you'll see it everyday.  When you define your word you get close to what it actually, truly means.  This will help you to decide which aspect of the definition you want to apply to your life.  Maybe there is a meaning you didn't know existed.  Maybe the official definition is surprising to you.  When you define it you'll have a literal grasp of what the word means and then you can find out what it means to you.

Choose 3 areas to apply your word

Since you'll want to work with this word each day choose three areas of your life that you want to improve with your word.  Start with a broad area you want to improve like family or home, personal, work, or health.  Then narrow that down with three more (or fewer) focus areas for each section.  When it comes to creating your focus areas, ask yourself how your word of the year can be applied to your broad areas.  My broad sections this year are family, personal, and online.  Then I asked myself how I'd find HARMONY in these three ares.

  • Harmony with my family means spending time together as a family of three, giving more, and nurturing our partnership.  
  • Harmony in my personal life means focusing on my spirituality, moving more, and finding time for self-care.  
  • Harmony for my online presence means prioritizing creating content for my blog, my Etsy shop, and my YouTube channel.

Create daily actions

After you've narrowed down the areas of your life you'd like to improve or focus on with your word, create a list of a daily action (or a few) you can take to apply the word to your life.  For example, to spend time with my family I can plan healthy meals, eat at the dinner table, and intentionally shut out technology (phones, computer, distractions, etc).  Once you create your daily actions you'll be more likely to take the steps to implement your word rather than just choose it and be done with it.  Creating these daily actions also gives you something that you can track.  Use a habit tracker in you planner or in your phone to remind you to take these actions daily.

Reflect monthly

Once you've outlined what you'll attempt to do each day to incorporate your word into your life, be sure to set aside time each month to reflect.  Maybe you keep a journal each day of how you implemented your actions.  You could even do a monthly or weekly habit tracker.  Take time when your planning the next month in your planner or calendar to ask yourself how you'll take these daily actions in the future.  Remember, everyday is a new day and don't think a missed day or a missed week is a failure.  Resolve to do better.  Outline how you will do better.  And then do better.  The only person you need to be better than is the person you were yesterday....and it's ok if you fall behind.  Just do the next thing!  Just keep going!

Bonus: Create a Vision Board

A bonus activity to connect to your word of the year is to create a vision board.  Choose your word and define it on your board.  Then create some branches off of that word with your three areas.  Under these areas clip pictures from magazines or your Pinterest boards that represent success in these areas.  Be sure to include some images of yourself succeeding at those areas too!  When you see yourself on your board you're more likely to identify with it!  In fact I have a whole post on creating a successful vision board right here.


Connecting with your word of the year can be a make or break type of deal.  Spoilers: if you don't feel like you connect with your word, go ahead and change it!  This whole thing is about growth so if you outgrow your word or if it isn't serving you, change it!  Doing the January Journaling Jump Start can help you to find a word that you can connect with by asking you questions about your current state.  But if that state changes...feel free to change your word.  It's your life to live!

I love breaking down my word in the these manageable chunks because I'm more likely to take action if I have an outlined action to take.  Saying to myself 'I'd like to find Harmony this year' doesn't really help me to find it.  It's about creating space for your word to occupy through daily actions and behaviors.

If you want some inspiration for a vision board or working with your word this year check out my Vision Planner video over on my YouTube channel.  You can also find a ton of Word of the Year posts on the blog especially this one on Mantras.  Mantras are my favorite way to work with words each year!  I shared on Instagram my mantra for my word Harmony, you can see it here.  Read more about my vision planner here.

What is your word of 2020?  How did you discover it?

xoxo, Moe 
listen to this blog post below: