3.29.2018

Four Tips to get Started with Visualization in Mediation

Day dreaming is something that I think nearly all human beings do.  We often think of something better we could be doing while typing up a long email or zone out on a thought while making our morning cup of coffee.  Raise your hand if you've ever been doing something and suddenly zoned out only to realize you've been unintentionally staring over the shoulder of someone in your office and therefore freaking them out a bit.  What if we could tap into this tendency to day dream and turn it into something productive?  Spoilers - we can.
Let's talk about visualization.  Whenever we think of an idea - what to eat, what to create, what to wear - we often visualize it first.  We pass a few images through our heads to find what entices us the most.  This imagery helps us to decipher our true feelings - do we want Italian or Thai food? - and helps us feel confident in an out come - how will I look in this dress versus this pair of jeans?  But there is a way to tap into visualization to make it a powerful energetic tool to help us align our actions and become the best version of ourselves.

Visualization can help us bring certain feelings, actions, or outcomes into our awareness.  I honestly like to think of it as playing pretend, but for big kids with big kid results.  I use visualization in nearly all of my routines.  It helps us to feel our goals & sink into a certain emotional head space.  It helps us to see the benefit of small actions.  It helps us to believe we can live our best life.  Here are some of my daily visualizations :
  • When meditating I visualize myself sitting on a big rock on the bank of a large lake in the midst of many trees.  When I inhale, the lake is still.  When I exhale, ripples form across the lake.  This visualization helps me to focus on my breath and focus on the present moment. 
  • When I've had an extremely hard day and I end up taking a long shower, I imagine the water washing away the stress and baggage of the day.  When I take a warm bath I often use a bath bomb, essential oils, and/or crystals and imagine that I am soaking in all the good feels I want to absorb.  That way, when I step out of the bathroom I'm restored and ready to face the next task.
  • When I need a boost of a little something, I often choose an oil or crystal to work with & imagine its properties - grounding, uplifting, calming, opening - hitting me where I need them.  This is especially powerful when it comes to working with my chakras.  If I want to communicate better I imagine an oil like peppermint opening my air ways and a stone like sodalite supporting the message I'd like to convey.  Affirmations can help with visualization as well to encourage you to believe in yourself.
  • The first ever example of my own visualization was when I was younger and I was told to clear my mind.  I used to (well I still do) love magic tricks, mind reading tricks, etc so the guy would say 'clear your mind....so I may tap into your unconscious. wooooooo.'  You know the drill.  So I'd imagine my mind as a giant attic with hardwood floors, white walls, and one round window.  It was a huge attic with all my thoughts stored up in it....so I would imagine all the boxes & junk being pushed aside so that there is a clear space to work.  I also used to do this when I couldn't sleep.  It seems kind of silly but it's a visualization that has helped me.

Visualization is big kid pretend with

amazing, positive results.


Here's the thing though, you've got to be open to it.  It's kinda woo-woo.  It's kinda weird.  But there is one question you have to ask yourself when it comes to this stuff: if it works for you, why would you stop doing it?  You never know until you try something.  As we grow out of childhood, logic  starts to take over.  Eventually we block out all of our connection to our highest and best self.  It is only through self healing practices - like mediation - that we can find our way back to our true selves.  So let loose and let your inner child allow yourself to believe in yourself again.

Here are three tips for a beginner when it comes to using visualization

Choose a specific space to which you feel comfortable and connected

This may be your bedroom, your craft room, your sun room, or the bath tub.  Choose any place where you feel you can be completely and utterly yourself.  There is no room for judgment or embarrassment when it comes to meditation and visualization.  For me, the best place for this is our downstairs spare room.  I've sort of turned that into my self care oasis. This is separate from our bedroom which is a space I share with someone else.  But I also find that my tub during a bath is a perfect place as well.

You need a place with out distractions where you're allowed to be you with out any judgement.  Setting the mood could mean burning your favorite candle, diffusing your favorite essential oil blend, or burning incense.  You can also choose some calming music with nature sounds or singing bowls or flutes.  Dim the lights, sit comfortably.  It is easier to get in the head space for meditation & visualization when you've made a specific time and space for it.  Eventually you'll be able to slip into this head space in your car on your lunch break.  But you've got to get over yourself first.

Don't believe yourself when you tell yourself it's silly

Speaking of getting over yourself....you're gonna sit down and you're gonna get ready to visualize, and you're gonna picture something - how it feels, how it looks, how it sounds - and you're gonna suddenly feel like a noodle for being a grown ass adult pretending to be on a rock in front of a big lake.  You're going to tell yourself that this whole thing is silly.  And your going to want to believe it.  But don't.

So here's my example, it has to do with Santa Clause.  If you've ever believed in Santa you've probably felt the magic & excitement of the holidays.  The sparkle and mystery in all the Christmas movies, decorations, stories, etc.  And as you grow up you realize that there is no Santa & that the magic and sparkle lives in all of us when we come together to give, celebrate, and love.  That the spirit of Christmas isn't in this jolly character but in the hearts of us all.  If you've ever believed in the magic of anything you've got to get that innocent feeling back.  It will take practice and you've got to keep at it.  But if you believe what you're visualizing and go through your day with that belief you'll start to notice how visualization will help you keep a positive attitude, allow you to communicate or listen better, or enable you to do what ever you visualized yourself doing.  


Start with baby steps

While you can go ahead and visualize yourself on the beach sipping Mai Thais, that may not help you in your day to day existence.  I'd qualify that as daydreaming unless your visualizing the steps you need to take in order to create a life where you lay on the beach and sip Mai Thais.  So, start small.  Visualize something that will have a direct effect that day.  Start with something like envisioning yourself on a rock to calm your mind.  Once you can hold that image and hold yourself in that space, begin to visualize small actions you can take to improve your life.

You can, of course, visualize the outcome but more importantly you need to visualize yourself working through the process.  Break down the thing you'd like to improve on into smaller steps so that you can see yourself making action on them each day.  Visualization isn't magic.  You're not instantly going to get what your wishing for.  Just like affirmations, visualization is a tool to give you confidence that you can take action and make movement towards what you'd like to improve. 

Try something tangible, like a vision board

If you're not too fond of hanging out in your head, then try something more tangible like a journal or a vision board.  Making a plan is a great way to visualize an outcome.  You can layout the whole process and follow it.  You can also physically see it and edit it when needed.  If you find your imagination is lacking, find images you'd like to embody online or in magazines.  Then you can set your mood, dedicate your time, and imagine yourself in the image.

This is one reason why I use a vision planner.  I can't keep track of all the things I want to be in my life or bring into my life so a book of all of this stuff is extremely helpful to remind me of exactly what I'm aiming for.  Breaking your life into areas you'd like to improve - like in the January Journaling Jump Start - can help you create a visual plan of action.  The more these things are in front of you the more likely you'll be able to make small actions.

Visualization is a bit woo woo, but it can also be a fun tool.  It can be a serious way to help you unwind, visualize a process, or see how something new might make you feel.  There is magic when we believe in the power of ourselves!  It is a way to encourage us to respond differently to certain emotional stimuli, help us align our actions with our desires, and help us fell confident our in our abilities.  

This tool has helped me to pull out the best in myself so I can show up authentically and compassionately for myself and for others.  I struggled previously with being self depreciating and this visualization process as well as working with the emotional balancing properties of essential oils has given me the ability to respond better under stress.  It has also given me the confidence to step out of my comfort zone, sometimes, to take a chance ... and to remember how that chance feels!

Do you use visualization for self development?  How has it helped you respond better or take action in your daily life?

xoxo, Moe

3.28.2018

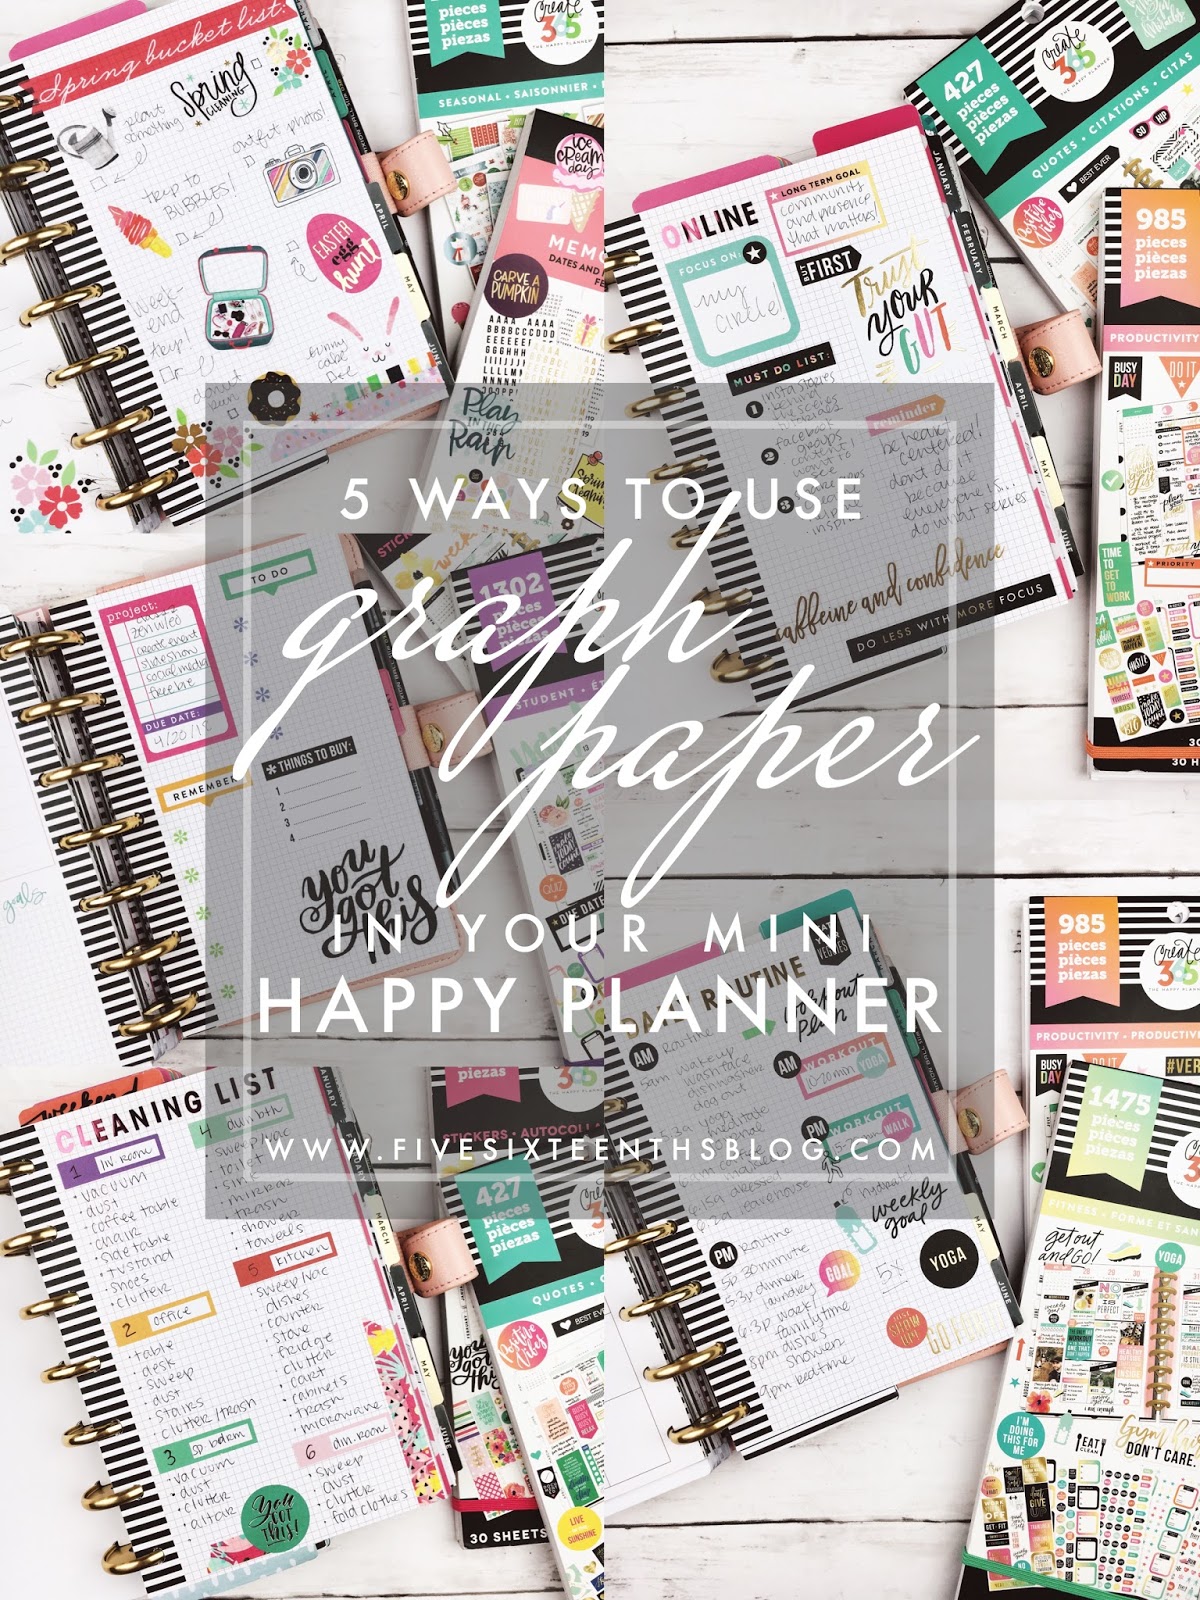
5 Creative Ways to use Graph Paper in your Mini Happy Planner

My Mini Happy Planner is currently the only planner I use on a regular basis.  It holds EVERYTHING for me!  There are two major reasons why I use the Happy Planner brand exclusively for my weekly planner - the disc bound system & the cute yet functional accessories.  
this post contains affiliate links, please read my full disclosure here.
Prior to the emergence of the Happy Planner (which, side note, can we just reflect on how much the planner options have grown in recent years?) I relied on making inserts myself for various ring bound planners.  It was perfect for me...until it got overwhelming.  I would spend painstaking hours trying to create the perfect planner page for myself.  It got to be that I was spending too much time working on a planner page than actually using my planner.  Being too dang specific with my layouts really bummed me out.

When I found the Mini Happy Planner I was sold on the ease of it all.  It was already done for me, there was nothing for me to fenagle, I could just use it as is.  But once the brand started adding cute yet functional accessories I found myself getting right back into my love of planning.  Planner peace?  I'm not quite sure....but I sure am happy with it!

One of the first accessories or extensions I bought was the lined & graph filler paper pack. This was just supposed to be for quick notes and ideas but has become one of my favorite products from the brand.  They are blank & they are versatile!  Pair these perfectly gridded and beautifully lined pages with the hundreds of stickers & sticker books from the Happy Planner and you're set for creating fun & functional lists, trackers, and dashboards right in your planner.  Here are 5 of my favorite ideas for using graph paper in your planner:

Cleaning Routine

One of the unintentional themes of my life, my planner, and my blog is cleaning.  I've been obsessed with coming up with an effective & simple cleaning routine that I just flipping do!  Who else struggles with keeping their house neat and tidy?  Just me?  Lordy I hope not!  Back in January I shared a post on being your best self and this post inspired me to write out practical routines that will make my life better....and cleaning was one of them. 

The graph filler paper plus some of the more functional stickers from the MAMBI Today is the Day pack & Quotes pack packs make creating your cleaning routines fun.  Sprinkle in some washi & some quotes and you'll be inspired in no time.  I broke my cleaning routine in to zones, though not the traditional zones that I believe are in zone cleaning.  This is just what works the best for me.  Learn more about my journey developing a cleaning routine here.

Vision Board

I have a whole separate vision planner that I use as a place for visual inspiration to align myself with my goals (or vision) for the year!  But in my everyday planner I like to have a reminder of the things I'm working towards in the year.  
Again, I pair some functional stickers with some of the quotes and washi to make an inspiring place to fill in my goals.  The old Productivity Sticker book as well as the Student Sticker book and the new Colorful Boxes sticker book would be great for this little project.  

Bucket List

The seasonal MAMBI sticker books already have seasonally inspired bucket lists for you to stick in your planner, but you can totally get creative with what you put on yours.  By using the different decor stickers you can create a custom bucket list for a season, holiday, vacation, etc.
A cool idea for this would to do a weekend getaway bucket list using some of the seasonal stickers especially if you're going away with family and have a few memories you want to check off.  The Memory Planner sticker books would be great for this!

Daily Routine

Back to visualizing your best self here!  What does you're ideal daily routine look like?  You can use the graph paper to outline hour by hour what you'd like your day to look like.  I know that the new Fill In Productivity sticker book has hourly stickers designed for the classic size, but you could trim them to fit down the Mini Happy Planner for your morning and evening routine. 
I also like to make a weekend routine so that I stay on track with prepping for the next week.  Sticking to the routine is the hard part!

Project Planner

As a blogger sometimes I have a lot of things going on at once so it's nice to be able to breakdown a project into steps.  I usually do this for the essential oil classes I offer but sometimes I'll do it for bigger projects like ebooks as well. 
Both of the Student Sticker books (this one & this one) hav these project stickers where you can name the project, add a few details, and then add a due date.  Now I have a whole sheet dedicated to that project!

The lined & graph filler paper is such a versatile addition to your planner especially if you need a little bit more space to write and plan things or if you find yourself going to too many different notebooks for what you need.  It's fun to get creative in your planner and these creative projects can also be functional!  If you want to see more ways to keep your planner fun yet functional check out this post, too.

The whole Happy Planner line is both fun & functional.  I love collecting everything I can from the line so I have a bunch of options when it is time to create something new.

How do you use graph paper in your planner?  What fun yet functional things to you include in your planners?

xoxo, Moe

3.26.2018

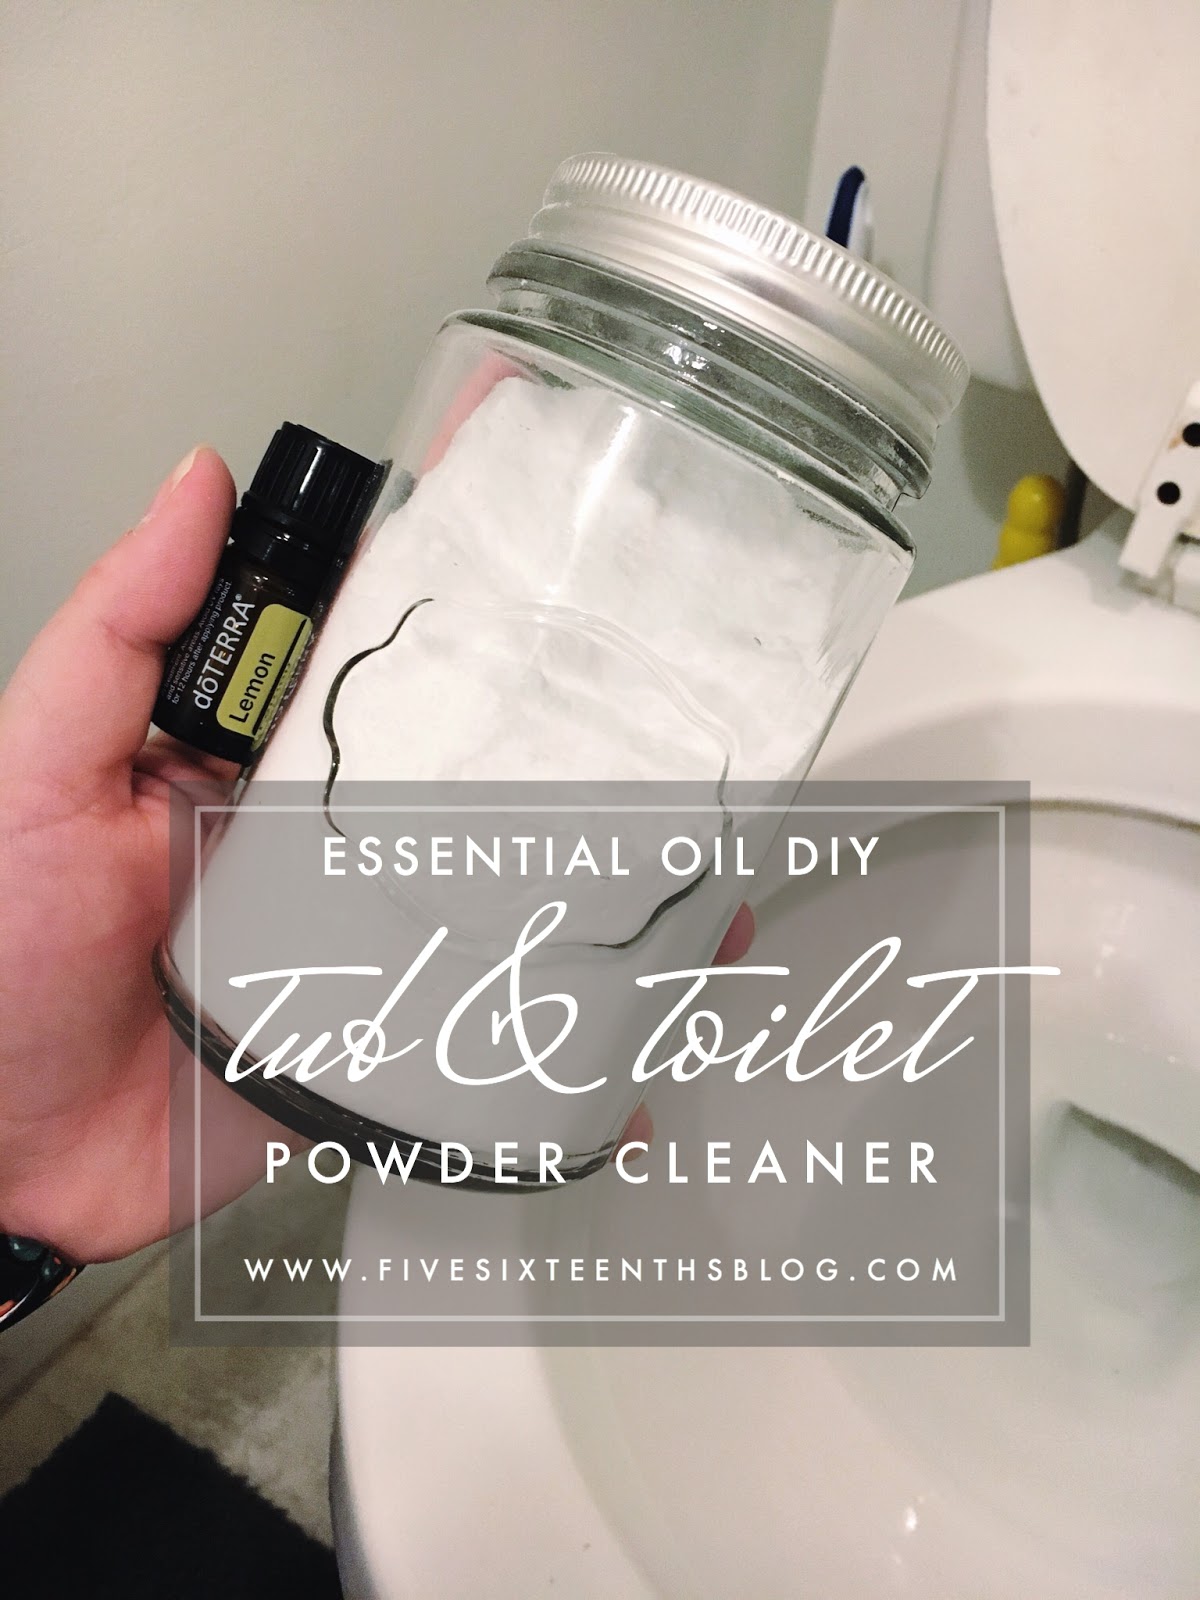
Make it Monday // DIY Tub & Toilet Cleaner with Essential Oils

Tonight I'm hosting my second essential oil class!  This one is all about cleaning with essential oils but it's not your average class - instead of just saying 'hey essential oils are great to clean with! I want to share with you the science behind why essential oils make effective cleansers.  We'll talk about the science behind the chemical make up of oils that makes them effective - because chemical isn't always a bad word!

Today I want to share with you how to make a tub & tile cleaner for your bathroom that is super simple and effective.  Prior to using this scrub, I'd use a pretty common cleaner that I actually found very effective - except for the fact that I would cough every time I sprayed it!  Listen, I'm not here to tell you what to do.  I am not here to preach to you about certain harmful chemicals that can be in our everyday cleaning products because I'm sure you've already heard it.  I'm not here to make your life more complicated because now you have another thing to worry about.  I'm just here to share with you a simple and effective cleaning recipe that can save you a little bit of money and not make you cough when you clean.

Why do essential oils make effective cleansers?

Essential oils are the natural, highly concentrated essences of various plant parts.  Chemically, these concentrated plant essences are made up of various compounds with different chemical identities that make them effective cleansers.  For example an oil that consists of Alcohols, Phenols, and Ethers have surface cleansing properties.  Alcohols are mostly denoted with and ending of -ol.  Essential oils with alcohols include Peppermint (menthol) & Melaleuca (terpinen-4-ol).  These oils are naturally repellent & cleansing.  Phenols are a subcategory of alcohols also denoted with names ending in -ol.  Thyme & Oregano have these phenols.  Peppermint and Melaleuca also contain ethers that boost their surface cleansing properties.

Everything is chemistry & everything is made of chemicals.  Chemical isn't a bad word and it isn't always synonymous with toxic.  Though there are certain toxic chemicals sold in the cleaners you can purchase off of store shelves, it is also important to note that essential oils aren't a cure all or novel item.  Essential oils are highly concentrated essences - which is why we use or apply a few drops at a time.  As an example, excessive exposure to Peppermint oil has demonstrated toxicity.  It is important to note that this excessive exposure goes far beyond the recommended daily amount but it is still important to take caution when using essential oils, not just peppermint) around children.  It might be a good idea to keep children & pets from areas you've sprayed with a peppermint cleanser until the solution has dried.  Here is more information about the chemical make up of Peppermint and Eucalyptus essential oils.  I implore you to use common sense when using essential oils with your family including, but not limited to, storing essential oils properly - up and out of reach of children.

What essential oils are best for cleaning?

In the Cleaning with Essential Oils Class we'll talk mainly about Peppermint, Lavender, and Lemon as they are a part of the mini cleaning kit offered to anyone who signs up as a Wholesale Customer or Wellness Advocate during this class.  Below is a list of doTERRA essential oils that work great in homemade cleaning supplies:

How do I make an effective tub & tile cleaner?

What I look for in a cleaner for my bathroom is versatility.  I would really like to clean my toilet bowl with the same thing I can clean my tub with...because #lazy.  So a foaming, fizzing, and bubbling cleanser that will break up the grime really calls to me!  After making the bath bombs in a previous essential oil DIY I've grown to love the combination of baking soda & citric acid.  Here's how to make your own tub & tile cleaner:
supplies // baking soda, citric acid, lemon (or other citrus oil), glass jar or container, mixing bowl & mixing utensil reserved only for essential oil projects, dust mask
optional : vinegar, spray bottle
as a side note: Arm & Hammer baking soda is not cruelty free.  I keep forgetting to make searching for cruelty free ingredients a priority.  Just because it isn't make up doesn't mean it is automatically cruelty free.


Combine 2 cups of baking soda with 1 cup of citric acid in a bowl.  You'll want to wear a dust mask for this as the powders will enter the air, so protect your lungs!  Add in 10-20 drops (though I am usually heavy handed!) to the dry ingredients.  Mix to combine the ingredients well.  This makes enough to store in one large pasta jar or in two Target Dollar Spot large glass jars.
Store in a glass jar in a dark place.  Though dark amber or blue glass is recommended for storing essential oils, I've used jars I found at the Target Dollar spot & recycled pasta jars.  These should be fine containers if you plan to store your products under the sink or in a dark space.  Again, take care to store essential oils and cleaning products out of reach of children.

If your bottle doesn't have a sprinkle/shaker top, use a nail and a hammer to create holes.  Sand down the top of the jar to prevent cutting your skin on accident after holes are made.
To clean a tub, lightly moisten the inside of the basin & walls of the shower with water.  Sprinkle the cleaner generously over the surface.  Leave for 15-30 minutes then scrub, wipe, & rinse.  To add another level of activation, spray the surface with vinegar then clean.  The citric acid will react with the water on the walls of the tub/shower.  This will bubble and help to lift the grime.  Adding vinegar to the concoction will activate the baking soda which will also start to fizz.  Lemon essential oil is known to cut grease thus making it perfect to remove the soap scum and all around gross stuff left in the shower.  Yuck!
To clean the toilet, sprinkle the cleaner in a slightly drained bowl.  Make sure to get the powder on the side of the toilet bowl.  The citric acid will react with the water & begin to fizz.  Leave the bowl fizzing for 15-30 minutes then scrub.

If you're interested in joining in on the class being offered tonight, be sure to check out the Facebook event here & sign up for the class here.  The only way to attend is to register for the class through this linkYou'll get a free Ultimate Cleaning List with Essential Oil tips when you register.  You'll also find the link to the class in the email after you register.
Essential oils have changed the way I interact with cleaning products.  I find it super simple to make various cleansers using some ingredients I already have on hand and these powerful aromatic compounds.  If you'd like to learn more about essential oils, you can check out all of the posts on the blog here.  If you're reading to jump into using essential oils for emotional & physical wellness, click here for how to get started with doTERRA essential oils!

How do you use essential oils in your cleaning routine?

xoxo, Moe

*These statements have not been evaluated by the Food and Drug Administration. This product is not intended to diagnose, treat, cure, or prevent disease.

3.06.2018

Essential Oils to Support your Beginning Yoga Flow

One of my favorite self care activities is yoga.  I've mentioned yoga on the blog recently because it is really been a a zen/chill session for me all while being active & connecting into my body.  The latter is something that is super important to me right now in my health & wellness routine - I need activities that honor my body.  Self care has been something that I've really been trying to focus on and both yoga & essential oils meet right there!
this post contains affiliate links, please read my full disclosure here.
Essential oils are perfect for your personal practice, especially since you'll be able to customize a routine that fits your flow.  If you're new to essential oils & their emotional properties, this post will go over how these aromatic compounds can support your yoga flow!

Why Use Essential Oils in Yoga?

Emotional & Physical Support

Yoga is a way to connect in with yourself and really tap into & listen to your body.  With yoga we are really able to communicate with and gently push our physical bodies in ways that are supportive and nurturing.  Essential oils can help us communicate with and gently push our emotional bodies in those same ways.  Essential oils set the mood & connect us to emotion.

Since our sense of smell is super powerful when it comes to associating feelings, using essential oils to help us foster certain desired feelings can help us shift our thinking while we're experiencing the zen of yoga.    These scents can also help support our current emotions - if you're feeling very empowered right now and want to do a yoga sequence that challenges you, you can try something like a citrus blend of Bergamot, Grapefruit, and Cypress.  These oils work with your Solar Plexus and Heart Chakras to support your sense of power & love for yourself.

Physical support can also be achieved with essential oils.  Starting with a minty oil will energize and open the air ways*.  Clear and open airways will help you focus on your breathing.  Peppermint & wintergreen are found in the Deep Blue blend that is perfect for soothing sore muscles if you've stretched a little too far.

When to Use Essential Oils

In Home Practice

The best place to use essential oils is in your at home practice.  You may find a class that is specifically offered combining yoga and aromatherapy, but it is always best to keep a neutral scent when in a community class.  While Essential Oils are commonly accepted as to be less irritating that synthetic fragrances, you may find someone that just doesn't prefer the scent of Grapefruit!

Of course if you do find a class that is receptive to the use of essential oils to enhance everyone's yoga experience, make sure if you're applying oils to your skin that pure unadulterated oils are used.  This is why I prefer to use doTERRA oils in my wellness practices.  I don't have to worry about weird stuff entering my skin as the oil is absorbed.

How to Use Essential Oils During Yoga

There are a couple of ways you can use essential oils during your yoga flow - aromatically through a diffuser, topically by direct application, or layer the two

Diffuser

The easiest way to use essential oils is through a diffuser in your space.  This way you can get the aromatic benefits of a specific oil or a certain blend.  You'll be able to focus on your flow & won't need to stop your flow to apply oils.  Sometimes this is the best, especially if you have a core desired feeling or a goal for your yoga flow that you know one constant scent can help you with.

Topically

If you're looking to add in a few different oils and blends for different emotional & physical support, it might be easier to create (or purchase!) some prediluted roller bottles.  Roller bottles will work seamlessly into your flow if you take the caps off and prepare the layout before hand.  Think about where you're body will be and in what motion you will be that will help with application.  You can also apply the oils prior to starting your flow so as not to disrupt your whole routine.  Be careful that you let the oils absorb completely to prevent slipping on your mat.  Check out this post on the benefits of using oils topically.

Both!

Combining the two can be the most supportive in your practice.  You'll be filling the space with a supportive aroma and directly benefiting from the essential oils as you apply them locally.  You'll also be focusing on mindfulness as you intentionally use each oil.

Which Essential Oils to Use

My top 5 essential oils for a beginner yoga flow are Peppermint, Bergamot, Grapefruit, Cypress, & Balance.  

Since yoga involves many parts of your body interconnecting and working with each other, each of these oils assists you in listening to your body & your emotions to create a complete flow.  Personally, the Heart, Solar Plexus, and Root chakras are the chakras I like to connect through my practice.  These chakras give me the support and care that I like in my yoga flow.  My core desired feelings when I do yoga in the morning are feeling grounded, feeling honored, and feeling empowered...these oils are awesome for all of these feelings. 

Heart Centered Oils

Peppermint & Cypress work together with the heart chakra to create a sense of self love & support.  Peppermint is known as the Oil of a Bouyant Heart and the scent uplifts and expands the chest.  Not only does it offer respiratory support*, but the expansion of the chest can help you connect in with your heart.  Cypress is considered the Oil of Motion & Flow.  It can help you release some past or pent up emotion & is really great for yoga to encourage you to be flexible - both physically & emotionally.  This is a great self-love/self-care oil as it encourages us to release what doesn't serve and move into more flowing state.

Empowering Citrus Oils

Bergamot & Grapefruit work great with the Solar Plexus.  Applying them to the back of the neck (while not where the Solar Plexus is located) assists in energizing & uplifting.  You'll be able to inhale the aroma easily since you're applying the oils to the upper body.  Bergomot is considered the Oil of Self Acceptance.  It's citrus aroma aid us in feeling uplifted and empowered. It helps to release feelings of self doubt and limiting beliefs.  Grapefruit is a great oil to pair with Bergomot as Grapefruit is the Oil of Honoring the Body.  Working with Grapfruit during a yoga routine will support your ability to listen to your body.  It's bright, uplifting aroma encourages us to treat our bodies well.

Grounding Tree & Root Oils

The final oil is Balance which is a blend of tree oils perfect for the Root chakra.  Tree oil remind us to live in the moment & to root into where we are.  They reminds us to bloom where we are planted.  Since trees have no concern for what has been since they've grown through it, or what will be since they haven't reached that height yet, this oil reminds us to focus on our inner strength.  Tapping into this strength will help you be balanced and powerful in poses that challenge balance.

If you've been looking for a way to connect in & honor your body, Yoga can be a great way to do this.  Bringing in that emotional connection can take your practice even further.  I'd also suggest taking sometime to work with each oil individually - whether through a mediation or through your daily life - to see how each oil affects you.  Forming a personal connection to the energies & aroma of each oil will greatly enhance the emotional support you can receive from these powerful plant essences.

Grab the Free Ebook!

* indicates required

If you don't feel connected to any of the oils I've mentioned, connect in with your own intuition and discover which chakras work with your yoga flow.  Perhaps you'd like more of a floral scent to open the Third eye & connect into opening yourself.  Or maybe you'd like spicier oils for your Sacral Chakra.  It's you're flow...customize it to your emotional needs!

What essential oils do you use in your yoga flow?

xoxo, Moe

*These statements have not been evaluated by the Food and Drug Administration.  This product is not intended to diagnose, treat, cure, or prevent any disease.

3.01.2018

Three Ways to Save Money While Building your Make Up Collection

I'd consider make up to be one of my many, many hobbies.  For me personally it's the thrill of the hunt (finding limited edition products or being the first to find something new on the shelves), the thrill of saving at the check out counter, and the thrill of the comparison.  Make up is really something I collect - of course I use it too - but it's fun to have a lot of things at your disposal when you want to play around.  It's also great to be able to find some amazing things for a great price, here are my 3 tips for saving money while building a collection:
this post contains affiliate links, please read my full disclosure here.

Clip your coupons and hunt for deals

The place I like to shop for drugstore make up is CVS mainly because of their coupon program.  I've written a post on it here but mainly you can join their beauty club and for every $50 spent you get $5 Extra Bucks to spend in the store.  Additionally, they have in store coupons that print when you scan your rewards card.  And you can stack a CVS coupon with a Manufacturer's Coupon with your Extra Bucks to get the most bang for your buck.  I shop at CVS for everyday things - cereal, tooth paste, anything really - to build up my extra bucks to buy beauty products.  This is a great way to try things you're interested in but don't really want to shell out cash for.  They also have really great sales every week.  The only thing I can complain about is the selection of some brands is very poor.  For example my CVS doesn't have a great selection of Wet n Wild.

Follow your favorite brands on social media & keep an eye out on places like HauteLook.  You can find amazing (& sometimes secret) sales but keeping up with the brands you love.  HauteLook also runs sales on some of my favorite brands - like the Balm - quite often.

Know the Best Drugstore Brands

When it comes to affordability there are a few brands that are on the top.  Wet n Wild & Eyes Lips Face (ELF) are the tops for me.  They are easily accessible, start off at a really low price point, and the quality pretty much rocks.  CVS often has buy one get one free on Wet n Wild and even if it's just BOGO 50% off, you're still getting a steal.  The Eyes Lips Face website is constantly running sales (really get on their 50% off everything sales) but they are also available at local retailers.  Here's the breakdown:  If you want an affordable foundation that lasts all day the Wet n Wild Photo Focus foundation rocks.  Wet n Wild has the best eyeshadows & lipsticks.  Plus, they are constantly releasing amazing limited edition items which can fulfill you're need to hunt.  Eyes Lips Face is probably found in your local Target or Walmart and sometimes at Walgreens.  In recent years the brand has expanded to be more readily available and their product lines have only increased in quality.  In this line the blushes are a good range for what is available in store.  There are also a few blush & highlighting palettes that really impress me.  You don't have to place an order online to get a good grasp of the brand, however there are far more things online than in stores.  Their brushes are amazing and if you're just starting out your brush collection picking a few of their Studio Line Brushes will really build your collection fast.  (Here is a video on the essential Elf brushes that you have to have!)

Shop the Holiday Sets

If you want to get the most bang for your buck when it comes to high end, or prestige brand, make up be sure to shop the limited edition holiday sets.  You may be spending $45 but you might be getting a $100+ value.  First, save you're money...then weight the odds.  Whenever I want to try a brand or try something new from a brand, I look at these sets.  You'll often be getting a steal and getting a good sampling of that brand.  Additionally you're often getting smaller sizes of products in these sets so you're not tied to something you might not like.  You'll either work through it quickly or not feel as bad passing it to a friend because you didn't pay full price for a certain item.

If you're worried about bulky packaging you can also depot the things you like into Z Palettes to maximize you're storage space.  Brands like Elf and Physicians Formula also do holiday sets at the Drug Store and often you'll get more bang for your buck that way.  My personal philosophy when it comes to holiday sets is to shop for what you want.  Because these things are so, so popular I like to snatch up the things that I would be really sad if I couldn't find after the holidays.  Then, after the holidays, I'll go shopping to find any leftover sets that might be on discount.


You can really save a ton of money building your collection if you're patient and you build your collection one or two pieces at a time.  It's easy to do this if you coupon, coupon, coupon.  I stop into CVS quite often to see what deals I can get with my Extra Bucks and MFG coupons and that way I'm only spending a few bucks at a time but building a collection of things to try!

What are some of your money saving tips when it comes to make up?

xoxo, Moe