11.28.2013

Boost Your Blog // 5 More Topics to Write About

It's no lie that I've been struggling to keep the inspiration flowing with this blog.  At one point I took a little break & at another point I considered closing down these virtual pages for good.  I felt uninspired and that there was nothing great to share anymore.  But then I realized I couldn't imagine not sharing my life/my amazing ideas with the world wide web.  It's a bit vain, I know but blogging has become such a part of me it's so weird not to do it even when I don't know what to do.  So I thought about some things I could write about when I had nothing to write about & I came up with this list!  I've done this sort of post before but these are amazing ideas, dude - amazing ones!
blog topics when you're uninspired
Post an App Review or Tutorial - I love my iPhone & my iPad.  I looooove finding new apps that I haven't heard of or that have just rolled out.  Posting a review or a tutorial will show others how to use the app, what the app is good for, if any upgrades are good, or if they need to stop any productive thing they are doing and play a new game/learn a new skill/edit photos with different filters for the next 16 hours.  Plus everyone is nosey about what is on your phone.  I've done a few app reviews & tutorials here & there, but there are so many apps it's truly endless.  Pick apps you love in genres you know.  Or, to change it up, try out an app you're not totally interested in to give an alternate take on it.  Show how easy or hard it is to master the app if you're a noob.

Post a Review or Tutorial on a Website or Software Program - The best example I can think of as an example is posting tutorials using Picmonkey.  I love using PicMonkey & since it's free, it's accessible to loads of people.  Who doesn't want to edit their photos?  You could also post a tutorial on using Microsoft Word creatively or Picasa or how you organize your calendar.  This is also endless!  You could post a review on a website that's supposed to be a resource or on how to use Zazzle to make a holiday card (hey, that's a good tutorial!)  If you are a pro at using something like a digital die cutting machine (like the Cricut or Silhouette) share some tips!

Post on an Issue you Care About - While this can get into dangerous territory (some people don't like hearing other's opinions you know, but hey - if you don't stand up for it, who will?) post on something you care about.  Are you joining a team for Relay for Life? Share it.  Running a 5k? Share it.  Care about the March of Dimes? Share it!  This shows that you are of substance & care about the world you are a part of.  Go to a protest? Share it.  Want to share more about women's rights? Write a post!  Share your resources, the local things you are a part of, etc.  Share ways others can get involved because it's good for the community.  Share a good cause.  As much as I dislike the term raise awareness posting on an issue you care about raises awareness about it.  Just make sure you're doing something instead of just talking about it - I think that's why I don't like the term raise awareness.

Post about Something You've Just Discovered - Have you recently fallen in love with something? Share it with us.  The greatest way to become a pro at something is to learn so if you're passionate about it, you should share it.  Others might have insights or you might interest someone else in joining your passion.  But don't worry if your passions change because you blog should reflect your life which is ever changing since you are always growing.  For example I'm getting really into make up some I'm doing something I've never done before - post make up related videos!  You can read here on why I use my blog to teach.

Post a Recipe - It doesn't have to be anything fancy or complicated at all.  Post that you tried something new & what you learned.  Or post a tried & true recipe that you make all the time.  Don'g give away your grandmother's secrets but do share tips & tricks to make the perfect whatever it is.  Or for a fun twist post on the worst recipe you've ever tried. Was it plain ol' gross or did you fail horribly at following directions?  Sometimes it's ok to laugh at ourselves & share our memories!

I've been on a blog post writing kick lately & I love it.  Currently I'm back to scheduling posts about a week or so in advance!  I love doing this because it gives me time to go out & live my life so I can blog about it.  It also helps me plan & keep my head on straight so I'm not stressing on writing posts when I don't feel like it.  That just generates horrible content.

I hope you enjoyed this list & hope it brings you a bit of inspiration when you're a bit out of it!

xoxo, Moe

11.26.2013

Trend Tuesday // Poppin' Bottles - Bubbly Holiday Manicures

In this past Ipsy bag & Birchbox I got two nail colors inspired by - how do I put this nicely - cocktail hour?  And I have to say I'm smitten.  I'm so loving the two colors I got this month - Nailtini's Caviar Cocktail & Color Club's Top Shelf.  Wonderfully shinny, metallic colors that are perfect for winter & any holiday celebrating you need to do.  Here are some bubbly & party inspired nail polishes I'd love to toast to:
poppin' nail polish bottles

one - Spoiled's I Don't Drink Cheap Wine // two - Wet n' Wild Fergie Collection in New Years Kiss // three - OPI in Mimosas for Mr. & Mrs.  // four - Wet n' Wild Mega Last in Break the Ice // five - Color Club in Top Shelf // six - Essie Holiday Collection in Hors D'Oeuvres // seven  - Nailtini in Caviar Cocktail

I love these silvery, sparkly manicures in the winter time.  I can't get enough!  All of these polishes would be wonderful for Thanksgiving or any sort of Holiday celebrating you might be doing.  My favorite colors for the winter are creams & whites along with the metallics.  It just looks so cozy!  The names of polishes just kill me sometimes.  I love turning over nail polishes to discover the names!  

xoxo, Moe

Connect on Twitter // Follow on Pinterest // Peep me at Hello Cotton

11.25.2013

How to Write A Helpful Product Review

Lately I've be loving writing reviews on products I've been using on websites such as Influenster, Birchbox, Ipsy, & this blog.  While I'm by no means a professional critic I've found there are something that make a review more successful than others.  For example, when I'm looking to know if I should buy a certain product I like reviews that give me the most information about the product & information about the user in the briefest way possible.  The nine word this product is so great, I just love it! reviews are not helpful.  So since I've been reviewing my butt off on these sites - did you know you get points for reviewing the items in your Birchbox?  And that those points can give you credit to purchase things!?! - I thought I'd share with you how to give helpful reviews if you're looking to get into that sort of thing.
How to Write Helpful Reviews
Title with Key Words - Just like with writing a blog post, you're review title should be descriptive & give an indication whether you liked the product or not.  You can touch on the performance, the price, the quality, the way it affected you, etc.  For example below is a screen shot of the review I was writing on my current favorite shampoo - Suave Professionals Moroccan Infusion Shampoo (I also love the conditioner, the mask, & the styling oil!).  You can see in the title I've used key words to sum up the gist of the review - it's affordable, feels luxurious, & does give shine.  This is the review in itself & will have people reading your review since it's very descriptive.  You can also use this technique if you're writing a review on your blog.  Having a descriptive title gives readers a reason to click & also appeals to search engines when others are searching for products.

Informational yet Brief Review - The body of your review should give a lot of information but doesn't (necessarily) need to be five paragraphs.  In the example above, I used two short paragraphs to describe the product.  First, I started off with information about myself - I have oily hair & this product isn't targeted towards oily hair, but it works on this hair type as well.  This is helpful for others who might shy away from the product since it's not necessarily targeted towards them.  Then I elaborated on the product & it's affect on my hair type.  I once learned in an english class that the best way to write an essay is to create the previous sentence into a question & then answer it in the next sentence.  This is sort of hard to describe but has really helped me take writing seriously.

It might be small to read, but the first sentence is: Even though this shampoo is targeted towards normal to dry hair, it works great for oily hair as well. If we turn that into a question Why does this shampoo work great for oily hair as well? then you'll see that next sentence answers the question: This shampoo (and the whole Moroccan Infusion line) works wonders for adding shine while not adding greasy-ness.  Shine with out turning your hair into a greasy mess is a challenge for those with oily hair.  Keep turning your sentences to questions to elaborate.

Continue to answer these questions, briefly, and expand on the title.  You might find it helpful to write the review first then pick the most relevant words to create your title.

Consider the Cons (or the Pros) - If you're in love with a product you might want to consider the cons, just in case.  (Or vice versa).  In this particular review I noted that the moroccan oil scent is strong so if you're sensitive to smells, you might not like this product.  Influenster has a section to list the pros & cons of a product.  These pros & cons go at the top of the review to help readers get the overview of your review.

I think that product reviews are very helpful - if your writing on your blog or as a part of a subscribtion service or you just plain like a product - others get to know what might be right for them.  A helpful review gets more credit than an OMG this is great! review, if you know what I mean!

xoxo, Moe

Connect on Twitter // Follow on Pinterest // Peep me at Hello Cotton

11.22.2013

4 Things I Absolutely Will Not Tolerate

The other day someone said something completely homophobic to me in a horribly joking way & with out skipping even a heart beat my mood changed and I said 'I'm going to have to ask you to refrain from using that term.'  That is some serious verbage there.  

Then on the morning show I listen to while driving to work, they were talking about one of the DJ's sister & here new boyfriend.  Well apparently, the DJ was getting a little cozy with the sister's boyfriend.  The theme of the segment was something like who do you know that you can't bring around your boyfriend.  This aggravated me because I can not stand when other women shut out or don't stand up for other women - you know what I mean?  

So while this seems like sort of a negative post, it's also about the things I believe in.  If that makes sense.  I've realized lately that I've been really feeling passionate about some new things recently - more than I would normally, or used to, care about.  So here's a list of things I absolutely will not tolerate no-way, no-how.

Homophobia - I really think that the statement you're not homophobic, you're just an asshole is true, but I will not stand for any sort of disrespectful language when referring to someone who is gay or, for that matter, any disrespectful language towards anyone in the LGBTQ community.  I just can't tolerate it.  It doesn't make you cool it makes you look like an ass.

Fat Shaming - My eyes were opened to this after following the lovely Rachelle from the Near Sighted Owl.  I love the way she stands up for her size & for others.  There is no right or wrong size, there is only health.  I avoid any youtube video, any article, anything that is going to shame me into feeling bad about the way I look.  We only get one life & we need to feel secure enough in living it.  It doesn't help to shame others.  Along with this I wont support any criticism that is geared towards changing your body.  Unless your health is in danger, it is of no consequence as to what anyone does with their body to any other person.  Unless it's something rad like you should totally dye your hair red, you could so pull it off.

Woman Shaming - I don't know how else to put this because this goes beyond (yet still includes) sexism, rape culture, and slut shaming.  It also includes the fact that so many women see other women as their enemies.  When someone takes your boyfriend is what I'm talking about.  While this goes into sexism, there is no reason for women to fight over a man - or fight over anything really.  The thing I'm talking about is when you are at a social event & you hear someone hating on the way another girl looks or using adjectives like slutty to describe someone.  (Oh, also I won't tolerate the word whore. Nope.)  There's just no reason to see other women as your enemy.  We already have so many enemies (yes, that statement was sexist but I don't know how to phrase it) we need to unite with each other to offer support & guidance.

Racism - Um, I still can't get this.  It's 2013. Are you kidding?  I don't really know what to say here because I feel like it's something we should be beyond by now.  But yeah, no to any racial slurs, innuendoes, etc.

These are just a few of the things that I'm realizing I can't tolerate in my everyday life, I will stand up for, & will not condone.  There's just no reason for being a jerk.  It must be so hard to be so hateful, you know?

What are somethings/ideas/beliefs that you stand up for?  What made you stand up for them?

xoxo, Moe

Connect on Twitter // Follow on Pinterest // Peep me at Hello Cotton

11.21.2013

Boost your blog // How to Create a Watermark with PicMonkey

I just got an email (well, on last Friday night when I'm writing this, I just got an email) from PicMonkey about a really cool option now offered over at my favorite online photo editor - a blank canvas option is available!  You know what this is great for?  Creating watermarks!  While I don't do this on my blog, watermarking your photos is great because it credits you back if someone decides not to play nice & steals any of your images.  I love that PicMonkey has bloggers in mind here - you can also make perfectly proportioned Facebook covers, blog headers, etc but for now let's focus on creating a watermark!
First you'll want to head over to the PicMonkey page & hover over the Design tab.  It is here you'll see all the options you can create.  There's even a custom option!  This is great for perfectly sizing a blog header, etc.  Oh, and you can create this with out signing up for the Royale feature - free is fine!
Select the square option for right now.  A few things I should mention right now before we get started is that you should keep some basic design principles in mind when coming up with your watermark.  If you already have a set of fonts you use on your blog (maybe you made your header with PicMonkey already) be sure to use these same types of fonts in your design.  Also, don't go overboard - a watermark shouldn't be so intricately designed that it takes away or is distracting from the original picture your sharing.
Now check the box by transparent canvas and click apply.  You'll see that the white background suddenly turns to a white & gray checkered pattern.  You should feel like a pro because that pattern universally means transparent!
Then create your design.  You don't have to use the whole canvas since it will be transparent in the end.  So get your designing on.  Change the color if you wish - I made it a light gray so it would look better & not take away from photos.  I would suggest making a gray one like this, then a white one, & a black one.  To create multiple colored watermarks, save the design to your computer.  Once it's saved you should be redirected back to your design, just change the color & save again.  
This is important - make sure you are saving your watermark as a .png!  If you don't, it won't be transparent & you can overlay it onto your photos.  See how it's transparent below - meaning you can see the background behind the image.
Here's how to use your watermark in PicMonkey:
Go to PicMonkey & open up the photo you want to put the watermark on.  Click on Overlays then select Your Own and locate your watermark.  Once you've found it, upload it, & arrange it how you want on your image.  You can play with the color of the watermark from here as well & even play with the Fade or transparency of the watermark.
Now you have a watermark you can use on all the photos you don't want others taking credit for! This is also pretty cool for branding - it's like you have a digital stamp now!  So you could even create a watermark in the signature colors of your blog, etc.

Hope you found this helpful!

xoxo, Moe 

Connect on Twitter // Follow on Pinterest

11.20.2013

Wednesday Decor // Virtual Living Room Tour

I'm retro posting this post because I realized I never got it up for Homevember! What was my problem?  Well here it is now & as a video none the less!  Stick around for a little bit of a blog make over here soon adding my YouTube channel & a little refocusing of the online shops.  Anyway, here's the video:

Read about the before & after here.  Hope you enjoy!

xoxo, Moe


Connect on Twitter // Follow on Pinterest // Peep me at Hello Cotton

11.19.2013

Trend Tuesday // 3 Ways to Tie a Scarf

It's getting chilly here - I mean we had snow this past week!  So it's officially scarf weather.  I love wearing scarves & since my office is cold during the day I can wear scarves all the day long.  Currently I've been wearing a lot of infinity scarves because you loop them & go - so simple!  But I've been neglecting my other scarves so I thought I'd play around with them to see how I can create simple looks as easy as wrap & go like my infinity scarves.  So here's how to style both light weight & thicker scarves for the winter:
This first one is how I wear my thicker scarves all the time.  This works great for those pashmina style scarves & also works with light weight scarves.  First you'll need to wrap the scarf around your neck with one side significantly longer.  Bring the longer part around your neck, leaving a bit of a loop.  Then bring the long part to the front & under the shorter part.  Next reach through the loop (to the left side of the shorter part) and pull the longer part through the loop.  This style is super simple once you practice & I literally loop this around running out the door.
This one is a little more complicated to set up but once you have the braid in, you don't have to do it again to the scarf (unless you take it out!).  This style works better with lighter weight scarves since you'll be weaving the scarf through itself.  First start off with the scarf around your neck with one side longer than the other.  Grab the longer part & create a loop at about armpit level.  If you're familiar with crochet, you're sort of using your hand to create a small chain stitch.  But anyway, once you have that loop, reach through it & grab another section of scarf pulling it through the loop. Now reach through the loop you just created & grab another section of scarf.  Keep doing this about two more times to create this little braid.  Pull the rest of the scarf, you should only have a little bit, through the last loop.  Now the scarf should be about equal lengths on each side.  Grab the end of the scarf with out the braid & pull it through the last loop.
This is the simplest of them all - Start by wrapping the scarf around you neck like the first picture, leaving one side a bit longer.  Bring the longer side under the shorter side & push it through the top loop.  Fluff & go!

Scarf weather is here & I can't wait to get more wear out of some of my favorite scarves!

xoxo, Moe

Connect on Twitter // Follow on Pinterest // Peep me at Hello Cotton

11.15.2013

My Favorite (& One Unfavorite) Volumizing Mascaras

Along with all things make up, I'm really into mascaras.  I think I've always liked mascaras even when my make up collection was small but it's just now that I'm really getting into trying different ones.  Mainly I go for mascaras that give volume & not length because I've been blessed with lashes a mile long.  I have currently been obsessed with giving the outer half of my lashes thickness.  I love a thick, black set of lashes & am no good with false lashes.  I can't ever get them to be even!  Anyway, in addition to mascaras that give volume, I've also found that tight lining or lining your upper water line gives the illusion of thickness as well since you see no skin between your lashes.  Oh, ps - sorry that the Rimmel Scandal Eyes is gross!  It was much loved before finding these others!
So as far as it goes for volumizing mascaras, I've found that mascara wands with a more traditional bristle brush work best - these brushes aren't the ones with crazy spikey bristles or plastic bristles, just plain ol (regular?) bristles.  Here are my favorites & my one unfavorite.
Before I get t the volumizing I like to get to the separating.  After curling my lashes (with my elf $1 curler!), I use a CoverGirl Lash Blast Fusion in brown-black to separate my lashes since it does have a plastic bristle wand.  This is the first step to my volumizing routine and I apply one or two coats.  This is the same mascara I use every day to separate.  Then I use different volumizing mascaras depending on my mood.
It's So Big Mascara - I got this mascara in a Birchbox (??) I believe & instantly fell in love.  I love small samples of mascara because they are perfect for precision application & for applying to the lower lash line.  Since the brush is so small & the bristles are so short I feel like I can really get the product on my lashes near the lash line with out the fear of getting mascara on my upper lid.  I hardly ever do a liner on the top of my lid - only the upper lash line - so with longer bristles I get dots of mascara on my lid.  I love this mascara because of the formula - it's a bit dryer so it doesn't take the curl from my lashes and it gives me slight volume (I think each of these have different grades for me!)
Rimmel Scandaleyes Lycra Flex - This was the first volumizing mascara I'd picked up from the drugstore & it's what got me into volume.  I wasn't intending on going for volume it just sort of happened.  This is one of the types of brushes I was talking about above - it's a bit too big & can sometimes leave dots on my upper lid.  But I like the brush because it applies product nicely over a bigger section of my eye.  I also think it gives great volume.  The formula is a bit wet at first but I've used this one for a bit & it's now at the right consistency.  I'd say if you're looking for volume from the drugstore this is your best bet.  I plan on repurchasing this one!
Pixie Last Boosting Mascara - This was another sample in either my Birchbox or Ipsy subscription (I should really keep track huh?) that I love for using on the lower lashes.  The brush is small so it's precise.  The formula on this one is right in the middle not too wet not too dry.  This one is great for travel & I like this one for on the go over the It's So Big.  I like the shape of the wand for upper & lower so I guess it would just be easier to bring rather than a few mascaras - one for upper & one for lower lashes.
Mally Volumizing Mascara - Again this was in a subscription box!  Pretty sure this one was Birchbox & it was the thing I was most excited about!  I don't know if this is full size but it sure looks like it!  I love that it's not a small sample & I can actually test out the product the way I would buy it.  The wand is super traditional - not too big, not too spikey.  I think this one gives me the most volume because the formula is so wet.  While that's not good for the curl of my lashes it's great for volume on the far side of my eyelashes.  I love this when I'm going for a more dramatic look.
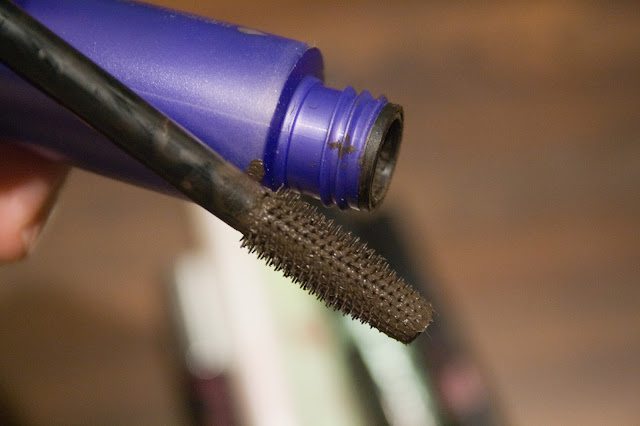
Benefit Bad Gal Lash - I really wanted to love this one, I mean look at that wand.  And at first I did but after wearing it a few times I realized it flaked like crazy on me!  This is yet another sample from a subscription box, too!  I don't rub or poke my eyes often during the day because I don't want to all of a sudden have raccoon eyes, but this flaked just from blinking all day.  No bueno!  So while this one I think performs just like the Rimmel Lycra Flex, it's definitely an unfavorite.

If you're looking for volume & not length check these mascaras out!  I'm so glad I keep getting sent mascaras in my subscription boxes.  They have to be (on of) my favorite things to get.  If you're interested in getting more of your favorite things, sign up for Ipsy here.  You can take a style quiz to get things catered to your taste.  Birchbox will send you a fun assortment each month & if you like surprises each month, sign up here!

xoxo, Moe

Connect on Twitter // Follow on Pinterest // Peep me at Hello Cotton

11.13.2013

Wednesday Decor // Our Total Basement Redo

You probably know if you've been reading this blog for a while that we undertook a total basement redo when we moved into the house.  I've shared it here before, but for Homevember I thought I would corral all the pictures into one big post for posterity.  When we moved in, the first floor of our house - sort of like a basement if you will, was a two bay garage with a bedroom.  Now we have a smaller garage & great big living room/office area!
Here's what our idea was when we first started talking about it.  It's changes a whole lot!  For reference, the long part in the front with the lving room & work area was the first long bay of the garage.  The dotted line at the top of the living room area was open - no wall - and went into the second smaller bay of the garage.  I don't think I have pictures of this part but we tore out a huge closet that was to the left of the stairs where that door is crossed out there by the desk.  Here's what the downstairs looks like now:
As you can see a lot has changed!  We put up 5 walls - one to divide the garage from the living area, one to replace the garage door at the end of the living area, moved the one in the spare room to make the bathroom, utility closet, & closet bigger, and walls to separate those!  Here are some in progress photos:
I don't think I have the original image before I added the text for this post
So here's what separated the bays of the garage.  We put the wall there.
Above is the wall that had a closet on it.  We ripped out the closet to give more space & we ripped out another doorway by the closet into the garage so the space would be open.
Below starts a peak at the spare bedroom & the bathroom/closet/utility room.  We split up the long bathroom into utility room that was there before in order to give the bedroom a closet.  I believe in order to be considered a bedroom it had to have a closet - so we made the tiniest closet on the face of the earth!
Those are all the in progress pictures of the spare bedroom! We're still not totally done with the spare bedroom so no photos this Homevember go round - but keep a look out next year as we keep on updating!

Also, next week will be pictures of out Living Room & how it's styled etc.  Then the week after will be pictures of the office area.  It's not totally done yet either - we've got some adding & styling to do but you can get a peak at it!

This basement redo was exhausting & fun and I'm so glad we have more room in the house now.  I would have felt like I was living in an apartment if we'd just kept the upstairs.

xoxo, Moe 

Connect on Twitter // Follow on Pinterest // Peep me at Hello Cotton


11.12.2013

Trend Tuesday // Top 6 Places for Jewelry & Accessories

I do this thing where in the Fall I get really into layering - I think everyone does this - but I love layering clothes & accessories!  I'm always on the hunt for affordable jewelry, accessories, & purses even though I don't need any more.  While I'm doing a No Buy November with make up & accessories (though I think it might turn into a Low Buy November!) I thought I'd share with you my favorite places to buy jewelry & accessories!  This list is great if you're shopping for yourself or shopping for a gift or looking for something to ask for from Santa:
These are my fall back shops when I don't know what I want but know I want something.  Working for Claire's/Icing was a highlight in my job experience I think because I got to develop a real sense of style. I also saw a lot of little girls come in with their sense of style too!  Of course, Icing is geared towards older teenagers to early twenties.  But sometimes you can find great things in there being a little older.  They always have sales on earrings & hair accessories (both Icing & Claires) and don't forget to check out the clearance.  I think that lately a lot of my jewelry has come from the clearance section of these two stores.  Something else you might be able to keep a lookout for are the stores that tend to get all the sale stuff - these stores often have a huge clearance section all the time.  You might be able to snag some goodies up for cheap every time you go in.  Also these stores have 10 for $10 sales - buy ten items & each is a dollar - or 5 for $10 sales - buy five items & each is two dollars.  I love Icing for purses & scarves as well.  Oh, did you know their websites are now shopable!  So excited they launched that!

I just discovered this shop & I'm in love!  I haven't bought anything yet but there are a few items on my Christmas list!  This site is set up like a marketplace with individual sellers but you can search through all the stores from the home page.  It's most comparable to Etsy with categories, individual sellers, storefronts, etc - but not everything is hand made.  This is a lame explaination but it's like a virtual mall with a bunch of different sellers all in one site.  My favorite part about Shop Lately are the Sale Events where you can see all the sale items from all shops.  I also like the Marketplaces or Market Bashes that feature a collection of similar items from different stores - so like all belts, or all skulls, or all crystal jewelry, or all animal print, or all scarves, etc.  Some of the sales you just can not beat & they often have free shipping!

This is another place I love to just pop in when I'm at the mall.  You never know what you might find.  I love that it's all arranged by color & I can go directly to what catches my eye.  Right now I love all the rose gold accessories they have at Charming Charlie.  My current favorite watch is from there & I just feel so elegant in it even though it's a chunky metal watch.  They too have awesome sale items - can you tell what I'm getting at with this blog post?  I've picked up three perfect for Fall necklaces there recently (mentioned in my October Favorites video!) for super cheap - they must have been under $8 each.  Usually a necklace will come with a set of matching earrings so you don't even have to try to match them.  But since it's all color coordinated you wouldn't have a hard time with that anyway.  Their regular prices aren't that bad either and they carry shoes, bags, and other accessories.  But I'm sure you know that already.

I never really thought of Bit Lot's as a place to find accessories but I've found a set of cute scarves there for $6 each!  They were all animal print which is so in for Fall & have held up pretty good.  When I was poking around there back when I was looking for affordable Fall decor I saw some really great looking black & gold earrings that were really on trend.  For the most part Big Lot's is one of those places you have to dig to find the gold - but don't over look the sale items either!  While I had convinced myself that Big Lot's was only good for home decor & pretty candles I ended up surprising myself on a recent trip by finding these on trend things.

Of course Target has to be on this list!  But we don't have a Target where we live - it's about 30 minutes away - so I don't get there often.  Their bags, purses, & accessories are super cute you just can't say no.  I love browsing the clearance here too!  Nothing much to say here since I know you're already out the door heading to Target.

These marketplaces are great to find handmade goods - Etsy more so than Storenvy.  With Etsy you can find a lot of handmade jewelry that you know someone has taken the time to craft just for you.  Often you'll find one of a kind jewelry pieces that can hold a special place in someones heart.  You can also scour vintage finds to discover the perfect gift for someone special.  I love Etsy because it's a way to tell a story.  Etsy is more than a storefront it's a narrative.  You can get to know a seller better.  Storenvy isn't that much of a marketplace as Etsy is - it's more just a place of markets.  It's like a whole bunch of unrelated stores decided to get together in one place.  So there's less of a story there.  Sometimes you can find gems but sometimes it's mass produced stuff.  A lot of stores are carefully curated collections of items the seller loves.  So these stores can really give you a narrative.  I like hosting my store Five One Six on Storevny because the storefronts are a bit more professional than on Etsy.  But to each his own.

So now that I totally want to get my shop on I hope that you've discovered or rediscovered some fun places to shop for affordable jewelry & accessories.  What did you just add to your wish list?

xoxo, Moe

Connect on Twitter // Follow on Pinterest // Peep me at Hello Cotton

11.10.2013

Sum Up Sundays // October Favorites

Well Sunday is here & it's time for me to seriously get to work on the laundry pile up stairs.  Also, time to vacuum the downstairs to pick up all the pine needles from the Christmas wreath making I undertook last night.  Oh & throw away the pumpkins - they are gross!  Seems like I've got a lot to do today. Sometimes I feel like I need a weekend from my weekend.  Hopefully I can snap some photos for this week's Homevember Wednesday Decor post of the living room.
Today I wanted to share my October beauty favorites.  I'm working on the quality of these videos & think I might have figured it out - for the next one!  So this one is still a bit poorer quality...but we'll see.

xoxo, Moe

Connect on Twitter // Follow on Pinterest // Peep me at Hello Cotton

11.08.2013

Buying Make Up // What to Look for in a Neutral Eye Shadow Palette

I've got another little video for you here today!  Pardon the lighting/quality in this video - I'm playing around with lighting since I don't have that great of a camera to film with.  Annnnnnndddd this video was filmed a week or so ago, so don't mind the talk of snow.  It's actually been raining like crazy here! And finally, sorry for the weird thumbnail - I changed it, but I don't think it stuck!
I love wearing neutral eyeshadow - I seriously go to it everyday.  It's easy, clean, and just plain great looking.  The key things I'm looking for in an eye shadow palette are mainly the shade range & range of finishes.  I want to get multiple eye looks with one palette & get the most bang for my buck.  I want to be able to pick up one palette to do my eyes - not two or three different palettes, single eyeshadows, etc.  You want to look for not just pretty colors but ask yourself it's its really something you're going to go to & use often.  This is what I do now that I know I'm looking for a range of shades & finishes in a palette.  My favorite form this video is the NYX Parisien Chic palette because it's small yet varies in shades & finishes enough to create different looks with a single palette.

I also talk about comparing what you want to what you already have - for example, I didn't pick up the Sonia Kashuk Eye on Matte palette because I knew I had an Elf Palette that I could get an all matte look from.  But I hardly ever do an all matte look!  I'm also thinking about ease of travel.  While I don't travel a lot it's nice to have your favorite things come with you with out bulking up your bag!

I'm turned off from palettes if they don't have a good range of matte transition or blending shades - shades to blend other colors from the eyelid to the crease - or palettes that are all shimmer or all matte.  One exception is the Sonia Kashuk Eye On Shimmer palette that just has the most beautiful shades!  I couldn't pass it up!  I also think the shades in the Eye On Shimmer palette are able to be used by themselves.  This palette I could use by itself just because the colors are great.

My recommendations:  Elf Neutral Eyeshadow palette at Walgreens, Elf Weekender palette, NYX Parisien Chic, Bare palette from Profusion at Walgreens (I found last year's edition & the shadows look the same for the same price at Dollar General)

I'd love it if you subscribed to my youtube channel as well!  You can find it here.  I'm having fun exploring beauty & make up and sharing it with you! 

Other things mentioned in this video: Fall Must Haves, Fall Dollar Store Haul, DIY Make Up Palette post.


Connect on Twitter // Follow on Pinterest // Peep me at Hello Cotton

11.07.2013

My November Wishlist & No Buy November

I can't believe it's November!  I feel like I just shared my October wishlist!  Which I have an update - remember that scarf I had in the post?  Well I totally made one, I just haven't shared it yet - lazy is the excuse.  But here is my November wishlist:
I'm actually doing a No Buy November.  Because I don't need to buy any more make up or beauty related items.  But I just love trying new things!  I think the only exception will be Black Friday Weekend & Cyber Monday - because you can't beat those prices!  So a lot of these things are sort of out of reach, dream items!  I think the only things I'll try to buy this month are Decorations for Xmas - I need lights for the tree & a wreath.  But then I might just go to the dollar tree for these things :)

What are you lusting after for Novemember?

xoxo, Moe

Connect on Twitter // Follow on Pinterest

11.06.2013

Wednesday Decor // Our Bedroom & My Vanity

There are two rooms I'm very proud of in our house, whoops there are three - our bedroom, the living room, & our office.  These are the three main rooms I'm going to highlight this Homevember with bits from other rooms thrown in.  The first room is our bedroom! I really like our room - at first it was very hard to decide on how to decorate since we both have very, very different tastes, styles, ideas, etc.  But I think we did a good compromise - I hope Zach thinks so too, even though a lot of my things seem to spill onto is night stand - but the Make it Monday from this week is supposed to fix that!  On to the pictures of our bedroom & my vanity!
 View from standing in the doorway facing into the room
 View from the left corner of the room, the door is to the right
 DIY from Monday, check it out here
 Bird's eye view from the left corner
 Bird's eye view from the door way
View from standing by my vanity

Our room, if you can't tell, is very tiny.  And actually when I'm not lazy the bedroom often looks like this though I have been lazy lately.  Often the overflow of make up ends up on Zach's night stand - but those new decor boxes are supposed to prevent that!  We haven't added any artwork yet and I'd like to add mirrored doors to the closet, but I'd say it's pretty nice.  Here's where everything is from:

Bedspread - Walmart.com // Sheets - Amazon.com // Standing mirror - yard sale, painted // Dressers - mattress place Virginia // Nightstands - Big Lot's (I almost missed out on a matching one for Zach, phew!) // Vanity (comes with the mirror propped up on the tall dresser) - Amazon.com // Mirror over vanity - Big Lot's // Lamps - brought from our own places before we met

Connect on Twitter // Follow on Pinterest

11.05.2013

Mybelline Baby Lips Review

I'm a chapstick & lip balm junkie when it comes to the cooler months.  I'm a chapstick & lip balm junkie any time of the year actually.  My main jam is usually the Chap Stick Moisturizer stick - it's in a blue tube.  Currently I have a tube in my vanity, in my night stand, in the bathroom, in the coffee table drawer, in my purse, & on my desk at work.  I need these little tubes.  But in an effort to feel a bit more fancy when I need some lip hydration I've picked up some Baby Lips from Maybelline.  I've grabbed a few from the new lines since the summer - some of the regular line, some of the Electro line, & some of the new Doctor Rescue line.  In fact I'm very proud that I actually finished a whole tube of one of them, who ever does that! 
These are the four that I have.  Honestly I don't know why I keep trying the different lines - because Baby Lips are not my favorite.  I think it's neat that they are tinted balms....but I don't think they hydrate for as much hype as they get.  They are also a bit expensive for a tinted balm that doesn't moisturize to suit my taste. :(
The top two are from the Electro collection from earlier in the summer - the colors are Oh! Orange! & Pink Shock.  These were the second tubes of Baby Lips I picked up because the first ones were just clear.  I like the clear ones (the blue one on the bottom right I use in the morning while I'm getting ready) but wanted to try out the sheer tint the colored balms give.  The colored ones don't hydrate as well as the first two clear ones I picked up in Quenched (the blue one above) and another one that was in a green tube with a mint flavor.  I actually finished that one & tossed it since it was in my desk at work.

The one to the bottom left is the newest one I grabbed up because the Dr Rescue line is supposed to be sort of a healing balm for dried, chapped lips.  In fact these are the claims from the website - medicated care + 12 hr hydration, soothes quickly with a hint of eucalyptus, cools sore lips with a touch of icy menthol.  I find that this one from the Dr Rescue line is more hydrating than the ones from the Electro line.  The Dr Rescue is definitely soothing & calming and feels great on sore chapped lips.  I like putting it on when I've been outside & this one stays in my purse.  Another plus is that it has a sheer hint of a nice plummy shade, which I think is great for fall.  However, it's still no comparison to my Chap Stick!

The one on the bottom right there is left over from the first two Baby Lips I picked up at the beginning of this past summer.  I actually like using this one to preserve the moisture in my lips when I'm getting ready in the morning.  This one actually sinks in & provides hydration & I think it's nice to use before applying lipstick.  I like using this before applying lipstick rather than my chap stick - shocker!
Here are the swatches on my hand.  I liked the Electro collection in the summer but didn't really use the orange color because it smells like oranges.  I don't really like things that are supposed to smell like oranges - they smell so gross!  Here you can see the difference in Pink Shock & Soothing Sorbet as well.

My final verdict on these guys?  They won't replace my Chap Stick Moisturizer.  The clear one isn't too bad to moisturize in the morning, I don't like the ones I have from the Electro Collection - mainly because the orange one smells like oranges (yuck), and the Doctor Resuce's only saving graces are that it's a nice berry color for fall & does feel soothing if I've been outside.  Other than that, I don't think I'll buy any more.  They are too expensive for what you get.  If you're looking for moisture, might as well keep stock in those .99 cent chapsticks - unless you want a bit of color.  Then throw one in your purse - but you could also just throw in your lip color, a Chap Stick, or one of the Jordana Twist & Shines! (Those are my new favorites!)

Do you like Baby Lips?  What's your go to for lip moisture?

xoxo, Moe

Connect on Twitter // Follow on Pinterest

11.04.2013

Make it Monday // Fabric Covered Storage Boxes - 1st Homevemeber Post!

A long while ago - like even before we moved into the house - Zach bought me a set of two cute little storage boxes that were shaped like suitcases.  I'm pretty sure he got them from a garage sale.  I loved them (still love them) but they were a brown color & covered with like faux newspaper clippings to make it look a bit vintage.  I liked them the way they were but the didn't really fit into anything we had in the house.  A few weekends ago I sat down to do something with them.  My first thought was to get some fabric & cover them - but I scratched that not wanting to spend any money on fabric.  Fast forward a bit & we needed a new (bigger) bedspread.  A queen on a queen size bed is just not big enough for two blanket hogs.  I'd kept an eye on the bigger size of a similar style of our old bedspread, waiting for it to go on sale.  When it did, I snatched it up.  It came in the mail and I put in on the bed, discarding the king sized pillow shams I knew we wouldn't use.  Then it hit me - I now had fabric to cover the boxes & it would totally match our room!  I had already painted the small one black but was all over covering the bigger one in this fabric.  So, if you're interested in seeing what I did then stick around!
Supplies  :: box you want to cover, pencil, paper to make your template, ruler/yard stick/straight edge, scissors (for fabric & for paper), mod podge for fabric, sponge brush, screw driver if your box has any hardware you have to remove, straight pins, fabric (vintage fabric would be beautiful) or old pillow case (one half of a king size pillow case covered all of this!) , old credit card or plastic card to smooth out your  fabric
First, remove all the hardware from your box with a screwdriver.  If your box has little feet on it, they probably will screw off....just give it a little try & use pliers if you need to.  Now you can move on to the fun part.
If you have a funky style box like I did, you'll need to create a pattern so that the fabric sits in the place you want.  I taped two pages of used printer paper together & used a pencil to trace around the inset to create a pattern.  I cut it out a bit bigger then trimmed away making sure it fit.  You'll want to mark the top side of your pattern so you know how to place it on the fabric & how it will fit on the top of your box.
Pin your template to your fabric.  Make sure to cut out two of these patterns so you have one to cover the lid & one to cover the bottom of the base.  Remember to cut bigger than you think, then trim.  You can always trim but you can't put it back!
Next I used a little ruler thing (it's for sewing, if you know the name let me know!) to measure out how much fabric to cut for to wrap around the perimeter of the box.  Here is where I should have measured better or made another template - the measurements were not the same all the way around so there's some gaps between where the fabric meets the stitching on the sides!  So measure everything!  Then I just transferred the measurements to a straight edge of my fabric by marking every few inches or so & used a straight edge/ruler to create a rectangle long enough to fit around the box - you should have one long fat rectangle & one long skinny rectangle.  Then I repeated the measurements to cover the back of the box where the hinges are - this creates another fat & skinny rectangle.

Here are the pieces you should have:
Now using the mod podge, apply a thin layer with your sponge brush.  You may have to work in sections - I found I had to so I didn't get glue bits or sticky fingers on my fresh fabric.  Place the fabric on the box smoothing it out as you go.  Use the credit card to smooth out any bumps if you need to.  Per the instructions on my mod podge, I let the whole thing dry for two hours before applying a sealing coat.  Don't mind my messy desk - but I didn't think using mod podge on the carpet was a good idea.
Once you've applied your sealing coat let it dry for a good while - I let mine dry over night.  Then screw all your hardware back on & smile because you are awesome!  You now have a beautiful box that if you wanted could match any decor you desire.  I wish we used all my vintage sheets because I'd have covered this in pretty floral fabric & would have just melted.  But this damask pattern is just fine.  If you have a matching box you can paint it like I did using two coats of acrylic paint.  I like that these don't have the same coverings, the look more collected that way.

Hope you enjoyed this Make it Monday!  This is one of the first posts in a new little series this month for Homevember - something I really wanted to do right after we moved in last year, but it was so impossible to do.  So there will be a few posts on home decor, home improvement, etc this month to share with you our year old little home!  Of course there's a lot that isn't finished but such is life.

xoxo, Moe

Connect on Twitter // Follow on Pinterest