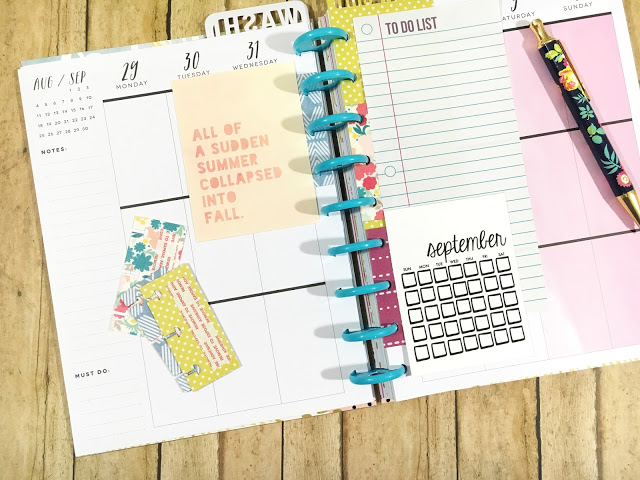
5.31.2017

Minimalist Monthly Planning in a Mini Happy Planner

I have shared quite a few posts regarding my every evolving planner journey.  Every few months (like 6-8 months) I think 'Oh wow, I've got it this time' and then....I don't.  I've gotten away from planning because I like to plan my planners and usually that means just sit around and not use them all while feeling completely unorganized.
Minimalist Mini Happy Planner
this post contains affiliate links, please read my full disclosure here
.
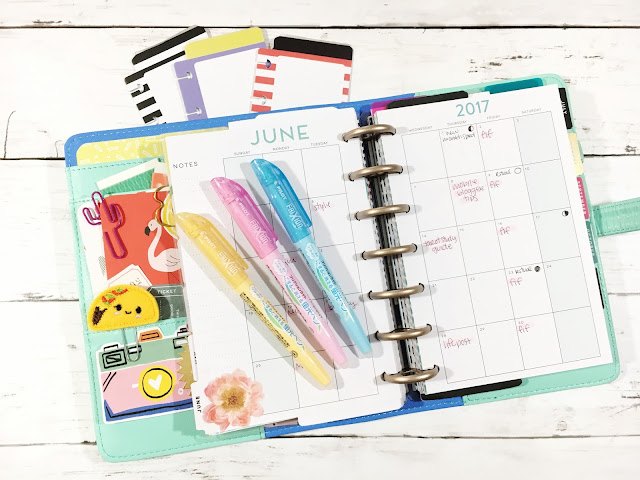
Here is my minimalist monthly layout in my Mini Happy Planner:

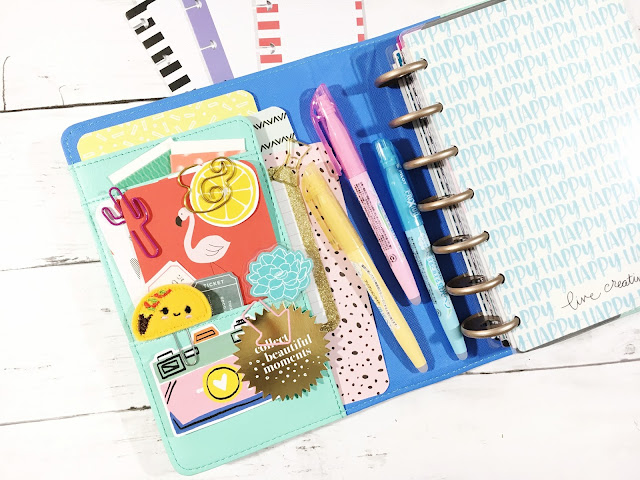
I use this planner for my blog planning, YouTube planning, & everyday life stuff.  All of these things require rescheduling more than half of the time so my favorite pens to use are the Pilot Frixion pens.  When we were in Japan I went into a store called Itoya (thank you Zach for being the map man and finding it for me!) where I saw a bazillion Frixion pens.  We were leaving the store and I was like holy heck, all the pens!  I picked up my favorite guys - the Frixion Slim - in a few colors but I really only use the black.
Monthly Layout Mini Happy Planner
I love this pen because the point is very fine and is perfect for writing in smaller spaces like the monthly spaces of the Mini Happy Planner.  I also think the slims erase easier than the .07 tips of the original Pilot Frixion pens.  I do use the .07 tip for my cleaning tracker that I draw on some graph paper and transfer every week.

To differentiate between the blog and YouTube calendar, I go back to my old school color coding - pink for the blog and blue for YouTube.  This is the same color coding I've been using forever and I go back to it each time I need to simplify.  I also will tend to write the blog post at the top of the box and the YouTube video at the bottom of the box.  This spacial coding I've been doing since the days of my OG editorial planner.  This just helps me know visually when I look at a page, a long with the color coding, what is what.  The only other color I will use in my monthly view is yellow.  Yellow marks the new and full moons so I know when to plan my rituals.
Mini Happy Planner Set up
The highlighters I use also have to erase - so I use these wonderful pastel Frixion Highlighters. The colors are soft but vibrant and they erase just as well as the Frixion Slims.  This is great for adding in post names because usually I just lay out the frame work for my posts and then add in the names/titles later so I know what to work on for the week.

All other events in my monthly planner are simply written in pen. I don't color code events mainly because I find it confuses me!  If it's not highlighted then it's just regular life.  So doctor's appointments, bills, and events are just written in pen.  That way I keep the whole aesthetic of the layout simple, clean, and uncluttered.
Pen Only Mini Happy Planner Spread
There are some other Frixion markers I want to mention in this post.  I picked these up in Japan thinking they were the highlighters...but they are markers.  This might be better for something like the Erin Condren Planner where the boxes are bigger.  For me, they don't work in this layout but I had to throw them in since we are talking about my Frixion pen love!
Mini Happy Planner Monthly
Above is an example of what the month usually starts out like.  I map out the blog post themes, then the videos, any classes/meetups, bills, and the new, full, & quarter moons.

Keeping this guy as simplified as possible keeps me focused.  It has just enough decoration to be inspiring but not enough to for me to feel it is tedious to work in.  I've moved on from doing a lot of my memory planning because I find it too tedious and it's not where I want to focus my energy right now.  While that makes me sad....I find it important to move on.  I try to keep some decor in my weekly layouts in my Mini Happy Planner though to get some creativity in there.  

Shop Related Products on Amazon!

So if you're looking for minimalist, pen only style layout...it is totally doable and totally inspiring.  And if you need to change things up all the time, Frixion pens got your back.  OH! Did you know you can fit the classic Happy Planner rings in the Mini Happy Planner covers? You totally can!

How do you organize your monthly layout?  Are you into pen only spreads?

xoxo, Moe

5.29.2017

Make it Monday // Create & Use an Energy Clearing Kit

During this new spiritual journey I've embarked upon, I've found quite a few things that have resonated with me.  One of these is energy clearing in order to align myself with my highest good.  Clearing the stagnant, negative, or all around garbage energy from myself and my space allows for a clearer area to work - both spiritually and mentally.
DIY Energy Clearing Kitthis post contains affiliate links, please see my full disclosure here.
My favorite part of energy clearing is using the scent as an identifier.  If you cleanse your home or space enough you'll begin to associate the scent with positivity.  That gets you in the right head space already!  Rituals should be sacred to you.  The best part of an independent spiritual journey is that you can decide what is special and sacred to you.  This is a personal journey to connect with your higher self, to develop your best self.

Shop Supplies on Amazon!


supplies :: fire proof bowl or surface (I use a metal trinket tray - similar)*, Palo Santo (incense or sage can be used instead), crystal (optional), essential oil (optional), drawstring bag, printable instructions, diffuser necklace (optional)

To assemble your kit simply print & trim the instructions.  There are folding instructions included but the image below shows how it should look once you've folded it up.  Fold the paper in half along the longer axis, then flip the pages until you have a little book.  Place each item into the drawstring bag.

When it comes to choosing the crystal and/or essential oil to work with, I have some tips below, but the over all purpose is to consider the intentions you're setting when clearing your home.  It can be as simple as ushering in positive energy or more complex as wanting to open lines of communication for all inhabitants of the home.  I often cleanse my home/space on the New Moon and cleanse myself when I do a bigger tarot reading (New Moon, Full Moon, month ahead or week ahead spreads or when I read for others.)
Using Essential Oils to Cleanse your Home
This kit is perfect for gifting.  It is seriously great for this grad season.  Imagine embarking on a new life adventure with a way to center and cleanse yourself + cleanse your new dorm or apartment.  I need to assemble one to give to my sister who has just moved into a gorgeous apartment with a gorgeous view.

I chose Palo Santo rather than Sage for this kit mainly because I find that Sage smells like burnt hot dogs!  I don't quite like the smell and I find it more distracting.  I can't center myself because it smells so....funky.  You can also use incense to bless and cleanse your space.  My favorite to use is sandalwood.  This whole thing is about intent.  The ritual is unnecessary but I find the motions help with the intentions and make it more real

What is energy cleansing?

Energy clearing is either the physical removing (like working with herbs such as sage & Palo Santo or incense) or visualization of removing negative energy with in a space or from a body.  Whether you are using smoke to waft away negative energy or visualizing the space being filled with positive energy, this cleansing process has roots in age old traditions from many cultures. You may have seen incense used in churches and you may have heard the term Smudging.  I've been trying to do some research to understand if the term Smudging is being appropriated when used to refer to any energy clearing and it seems that the consensus leans towards yes, it is.  I choose to respect the word and therefore will continue to call the process of removing negative energy from yourself or a space as Energy Clearing.  The best part of a spiritual journey though, is using this technique as it speaks to you.  Using Sage, Palo Santo, or incense to cleanse your space or body also draws upon one of our most powerful senses - the sense of smell.  Which is why I choose Palo Santo, or sandalwood incense, over sage.  
Cleanse Your Home with Palo Santo

How to use the energy cleansing kit

Once you've assembled your kit, it's time to start using it.  As mentioned above, this kit is perfect to break out when you need to clear the air.  Staring something new - a new job, new home, new relationship, new adventure - is a great time to cleanse yourself and your space.  Cleanse yourself before big events - interviews or stressful social obligations - or before meditation.  Cleanse yourself after sicknesses, arguments, or returning from trips.  It is like a mental and spiritual shower, resetting your energy or ridding your of leftover negative or stagnant energy.  For this post I'll be sharing how to cleanse your home, space, or yourself with the motivation of setting new intentions but you can simply sweep away the negative and usher in the positive.

Blessing & cleansing your space
Before you start and if you're so inclined, walk through your house and clap (or bang a pot if you're brave) in each room.  This will break up the energy, especially stagnant energy, and prepare the room for blessing.  You can also use this time to decide if there are any intentions you'd like to set - to bring love into this space, to bring abundance into this space, to bring creativity into this space, etc.

Light the Palo Santo until it starts to smolder.  If the wood catches fire (don't worry, it's not going to combust!) gently blow out the flame until there are only embers smoking.  There isn't a need to place the Palo Santo in your fire proof bowl, you can simply hold the other end of the stick.  However, if you feel the need place it in the blow and carry both with you.  You may need to carry the lighter or box of matches with you if the smoke begins to dwindle.
How to Spiritually Cleanse yourself
Begin your blessing ritual.  This ritual is completely personal to you but consider starting at the front door of your home and working towards the four corners.  Using your hand, waft the smoke into the rooms and corners of your home.  Recite your intentions (aloud or in your head) and work intentionally around your house.  If you're blessing a small space, like your altar, waft the smoke over the altar, recite your intentions, cleanse any tools you use (tarot cards, crystals, etc) with the smoke as well. This is the perfect time to work in mindfulness.  Concentrate & focus at the task at hand.  Carve out time to perform this ritual with dedication and connect with yourself and your intentions.
Once you have finished your blessing ritual, you can either extinguish the Palo Santo and safely pack it away until it is needed again or let the wood smolder a little longer while you meditate (place it in the bowl this time).  I prefer the later option.  Again, this is your personal thing.  You do you.

Blessing & cleansing yourself
I usually cleanse myself while in front of my altar (or in front of any working altar) when I am sitting to read tarot or meditate.  So you can light the end of the Palo Santo as before, place it in the fire proof bowl, and set the bowl on your altar.  Using your hand waft the smoke over your altar, cleansing your tools, and waft the smoke over yourself.  Again, do this process with mindfulness.  Set your intentions, clear your mind, and usher in positive energy.
Quartz Crystal with Doterra Purify
If you don't have an altar, you can find the room you feel most comfortable in and set the fire proof bowl down on a table and waft the smoke over yourself.  If you're standing in your kitchen or your bathroom or your bedroom, light the Palo Santo and while holding the stick waft the smoke on to you.  You can wave the stick around you if you wish (be careful of smoldering embers, I've never had this problem though!)  Keep your mind clear, focused on your intentions. and usher in positive energy.  

Again, I like to meditate after this process as it's normally why I'm cleansing myself to begin with.

Cleansing & using the crystals
While performing your blessing rituals, waft smoke over the crystal in the kit.  Focus your intentions on the crystal as well.  Different crystals will have different effects on you and your space.  If you're choosing to gift this kit to someone, look into crystals that will work with that person.  Some crystals to work with are

  • Quartz - The 'master healer', use this for all around positive vibes
  • Sodalite - Use this stone for opening communication, better intuition, & developing truth
  • Amethyst - Use this stone for stress relief & peaceful sleep
  • Citrine - The stone of happiness! Use this crystal for happiness, abundance, and good things
Since working with crystals is a purely personal endeavor, you may choose to place this crystal in a prominent place in your home or in a more private place where only you will see it.  Hold the crystal, interact with the crystal, mediate with the crystal.  Work the benefits of the crystal into your everyday life.  For example, place rose quartz in a prominent place to draw love into your home or place sodalite in your pocket to remind you to focus on communication through out the day.

You may choose to work with different crystals at different times in your life or spiritual journey.  You can also omit this whole section if it doesn't speak to you!
Sodalite Crystal with Doterra Breathe
Using Essential Oils
Just like the crystal in this kit, you can include an essential oil for yourself or the recipient of the gift to work with.  You can choose to include the essential oil as well as or instead of the crystal.  This is another way to connect with the intentions of the cleansing.  Some essential oils to work with are:


  • Purify - This blend has a pleasant odor that freshens the air & lifts the spirit.
  • Breathe - A blend that opens airways.  It is said minty aromas help with the throat chakra of communication.
  • Lavender - Peaceful, calming aroma that relieves stress & helps with sleep.
  • Lemon - Bright aroma with uplifting & energizing


Using an aromatic diffuser, diffuser jewelry, or applying the diluted oils topically can reinforce the intentions you wish to set.  If you'd like to make your own diffuser necklace (as show in this post) click here for the DIY tutorial!
Amethyst Crystal with Doterra Lavender
Now that your space is cleared you can carry on with your regular life.  Hopefully this little ritual has brought some mindfulness into your life and created a sense of peace & positivity in your home or space.  Your ritual doesn't have to be so involved, please do as you see fit!
Citrine Crystal with Doterra Lemon
This ritual is simply to bring you into alignment with your intentions.  I find that I can say "you know what, I want to listen more" but if I don't do anything to reinforce it....I won't give a crap about it less than 24 hours after uttering those words.  This is a way to keep yourself accountable to your goals and a way to better yourself.

ps. You can also print and gift a set of these positive affirmation cards to go along with the cleansing kit!

Do you cleanse yourself before or after a big change?  What intentions have you set in order to advance your personal growth?

xoxo, Moe

*Please use caution when working with flame.  Not all bowls are fire proof!
** Additionally, information provided in this post is not intended to diagnose or treat any ailment.  Please see a licensed practitioner for professional advice.  Information on essential oils has been taken from the Doterra website, personal experience, and personal research.


Ready to get started on your Essential Oil Journey?  Click here to learn more about doTERRA!

5.26.2017

Free Sticker Friday // Essential Oil Bottle Stickers

Raise your hand if you're into essential oils. I know I am now into essential oils like its going out of style.  When I started working towards Mindful as my word of the year something I really wanted to incorporate into my routine was meditation.  Meditation involves a lot of things but I read that one way to help with focus is to use essential oils to tune yourself in.  Different smells have different associations and they can have certain effects on your mood.  Even if you believe this is all mumbo jumbo, but you like nice smelling things it is worth talking with one of your friends (you know you have them) that sells essential oils.  They are knowledgeable and if all you come out of it with is some nice smelling air....I think you've one.
this post contains affiliate links, please read my full disclosure here.
So I've been using my essential oils like everyday!  Blends after blends after blends!  I currently have a wholesale account with Doterra and each month I have a recurring order that I need to remember.  So far I haven't ended up with the same things twice & that is because at the last second I remember to switch it up!  These bottles are perfect for marking blends, orders, or even oils that worked for you in a certain mood.  I see a little tracker at the bottom of your weekly page marking which oils used and which moods you were in...hmmmmmm.
Included in this download is a PNG file to cut with your Cricut Explore, Silhouette file to cut with your Silhouette Portrait or Cameo, as well as a PDF to cut by hand (though I hear this tool is really nice too).  Remember to size the PNG to 5.5 x 8 inches in Cricut Design Space!


As with all printables here on the blog, these guys are for personal use only.  Do not claim any part of this work as your own.  Do not disseminate in mass quantities, do not print and distribute these files.  Do not sell the digital or printed version at all. Thank you for playing nice!
I do hope that you enjoy working with essential oils.  You can find some of my favorite blends in this post and even learn to make your own diffuser necklace!  I hope you're having a wonderful and relaxing week...cheers to the weekend!

xoxo, Moe
Shop Related Products on Amazon!

5.24.2017

My Mindful Morning Routine

Mornings for me have become the time of day I nurture my relationship with myself.  I spend time in my sacred place, I meditate, and I get to know me.  Working with my word of the year - mindful - I've realized that it is up to me to see the good or the bad in everything.  I started meditating in the morning - hell, I started meditating in general - to get a hold on my emotions.  With living my life and the stress of my job, it started to seem as if things were just happening to me - emotions, feelings, my reactions.  If stress hit me all I could do was breakdown and cry.  It kept coming in waves.  As soon as I'd catch my breath another exhausting emotion would overtake me.  I would beat myself up for these perceived emotional failures for days on end until after some turn of events my load would lighten.  I'd have one good day.  Then it would happen again, another storm to force myself through.  Mindfulness has helped me realize that by letting go of the things I can not control, I can regain control of myself.
One of my quotes this year is to live less out of habit and more out of intent.  I want to be the one choosing to feel a certain way when a certain thing happens.  I want to gain more control over my emotions and thus having more control over how I live my life.  Making mindfulness a habit & a state to enter when needed is my goal.  The only way to develop a habit or a skill is to implement it and practice it.  Since I knew that I wanted to center myself before work in order to react appropriately to shit happening, mornings became the perfect time to implement this self-care, mindfulness routine.  Here's a look into my mornings:

Wake up early
Each day I try to wake up around 5:30 am.  Some days are later than others, but I've realized once I overcome that hurdle of actually pushing myself out of bed this early rising makes me prepared for the day.  Not just because I'm spending time with myself but because I'm awake, alert, and mentally ready to get shit going.  Waking up early means I'm not rushing around trying to fit too much in.  I need to get better about not hitting that snooze button though - I'm working on it.
Do tasks with intention
When I wake up I immediately go into the bathroom.  I brush my teeth & wash my face.  Doing things with intention means I'm focused on these tasks.  I am aware of the toothbrush in my hand, how the bristles feel against my gums, the minty fresh taste of the toothpaste.  I also try to move with rhythm.  I find this helps me to be aware.  My time spent in the bathroom is one even tempered movement with concentration on each action.  

After I leave the bathroom, I quickly flip on the coffee maker then slide out of the door to take Sweetie out for the morning.  This is the best part because I get to really greet the day.  Doing tasks with intention is about refocusing your mind.  Mindfulness is about being aware and every task is a chance to focus your mind on that task and stop the jibber-jabber from your brain.  So focusing on that first breath of air out in the open, feeling the chill on my skin, feeling Sweetie gently tug as we trod across the grass, then asphalt to reach our front lawn.

Meditate
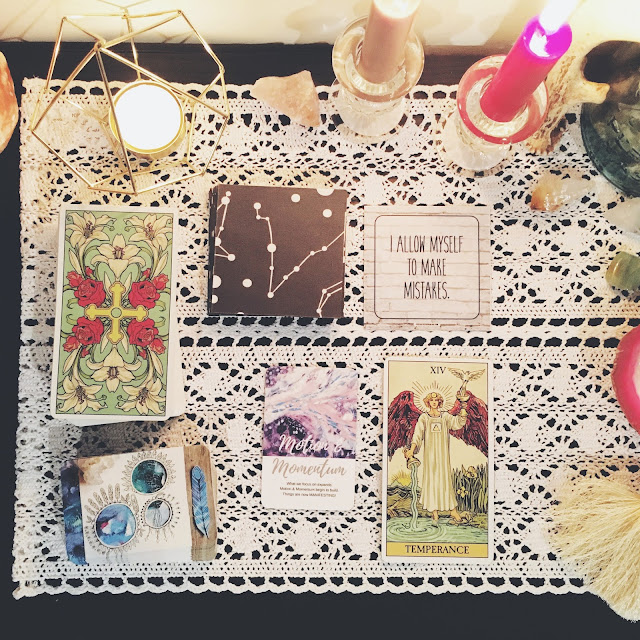
After we come in and I pour a bowl of food for Sweetie, I head downstairs to my altar.  I've mentioned my altar before and it is simply the place I go to meditate.  It is a scared me space.  It is not an altar to any deity or god, it is an altar to the person I'd like to be.  Here I light my candles with intention, I light incense or diffuse essential oils (my three current favorite blends here), I clear my head again, and I do my daily tarot one, two, or three card pull.
After I pull my cards and interpret them, I will often pull an affirmation card to either inspire me for the day or to use as a mantra for meditation.  I sit on my pillow in front of my sacred space, clear my mind and focus on the mantra.  If I don't use the affirmation card as a mantra I simply clear my mind and focus on my breath.  For me, focusing on my breath means I imagine sitting by a giant lake in the woods.  When I inhale the water is still.  When I exhale ripples form across the still water.  It is this that helps me keep an even mind.  If my mind wanders, I simply imagine this lake again to bring the focus back to my breath.  Meditation isn't necessarily about escape it is about learning to move into this stillness with ease.  If I have about 10 minutes to spare I listen to this 10 Minute Chakra Meditation and focus on each of my chakras as the music progresses.

Get ready for the day
Once I have finished this, I round up Sweetie and we head back upstairs.  I brew my coffee, gather my lunch things, and head back to the bedroom.  It is now that I sort of rejoin normal life.  YouTube usually plays in the background while I sip my coffee and browse social media.  At about 6:20 am, if I'm a good sport, I get dressed for the day, kiss Sweetie good bye and then head out to the car.  On a good day I'm out of my driveway by 6:30 am, leaving enough time to get to work.  
I continue to practice mindfulness through out the day - changing the paper in the copier with intent, taking a few minutes to center myself, diffusing calming essential oils through my jewelry, and recognizing when emotion gets the best of me and moving through it.  Over all, working mindfulness and meditation into my morning routine has helped me overcome disappointment I've had in myself.  And when I do get emotional, I try not to let it bother me.  I try not to see it as weakness.  I embrace it as a moment that will pass.  

The biggest thing I've learned from the word Mindful is that mindfulness is a habit that replaces self-destruction (thank you Pinterest!).  Before I embraced this sense of self-acceptance, self-alignment, and self-forgiveness I was wearing myself down by blaming myself for not having control...of myself.  I can tell you right now that I didn't know mindfulness was the thing I needed in my life and I didn't know mindful would be so powerful for me when I picked as my word of the year for 2017.  I have since come to realize that these storms that I would have to exhaust myself to push through were mere rain clouds.  In one of my most recent full moon readings I pulled the Tower for what I should release.  I read that as I should release the drama - not every rain cloud is a hurricane.

Since I think I suck at summing up the importance of mindfulness in this post, please check out my Pinterest board filled with mindful quotes, mindfulness guides, and mindfulness habits.  The only way you'l get it (like the only way I got it) was to have the right quote speak to you at the right time.

If you feel slightly overwhelmed in your day to day life, perhaps a journey toward mindfulness is for you.  However, this practice is not the end all to self care.  I encourage you to seek help, if needed.  Please do not use the internet to self diagnose...not everything can be solved with even breath.  I do hope that you can find peace with your emotions and align yourself with your highest being.

Do you practice mindfulness?  Do you have a morning routine or ritual to prepare you for the day?

xoxo, Moe

5.22.2017

Make it Monday // 8 Planner DIY's for the Cricut Explore Beginner

One of my favorite creative tools is my Cricut Explore.  I bought this guy a few years ago, and let me tell you - best investment ever!  If you oohh and ahhh over tons of lovely planner stuff but you really want to save some dough and make it yourself - invest in a digital die cutting machine.  For planner DIY's my machine of choice is the Cricut Explore.  While I do also own a Silhouette (read about my unboxing experience here) I prefer me Cricut Explore because it is a work horse.
this post contains affiliate links, please read my full disclosure here.
You can cut though tons of materials & even add custom depths, the software and interface are easy to use, plus the machine itself is a lot quieter.  And the newer Explore machines cut even faster!  The best part is no only does this guy cut through laminated scrapbook paper like butter but you can also print then cut planner stickers as well- that delicate kiss cut is key.  If you're down to learn some designing tips & trick, check out my whole YouTube playlist here.

Today's post is a round up of eight DIY's for someone who's just opened their Cricut Explore.  In a few tutorial you'll learn how to use certain Design Space features like weld, slice, and flatten.  If you're just into cutting things out, some tutorials provide the cut files for you.  Simply upload, size, & cut!  Here's the round up:

Create Planner Stickers

Using only simple shapes and Cricut Design Space, learn how to create an easy image to Print then Cut using the Cricut Explore.  Learn how to use the flatten feature and assemble your own unique images using basic shapes.  Plus here's a post on some tips & tricks for the print then cut feature.  Find the DIY here.

Planner Pocket

Do you have a planner that just doesn't have enough pockets?  (ahem - Filofax original) Make an extra pocket with this SVG cut file for your Cricut Explore.  Fits perfectly in Personal size planners - or punch it to fit any size planner!  Find the DIY here.

Washi Bobbin Storage

If you have enough washi to fill a bath tub you may find it hard to take all your favorites with you on the go.  If you don't have a Happy Planner and can't utilize the DIY above why not check out this DIY on making your own little washi bobbins.  Learn to use the weld & slice feature in Cricut Design Space.  Find the DIY here.

Printable Planner Paper Clips

In this tutorial you'll find a video on how to clean up an image for Print then Cut.  This is a super simple way to make planner clips - still one of my favorite ways!  Find the DIY here.

Sushi Bookmarks

Get ready for some summer sushi dates with this easy DIY.  You'll learn how to use the Print then Cut feature with laminated paper.  Make three different magnetic bookmarks to use through out your planner.  Keep them for yourself or make a set to gift to a friend!  Find the DIY here.

Unicorn Paper Clip

Speaking of clips - how about a beautiful unicorn paper clip!  Using card stock and glitter scrapbook paper you can whip up something magical in no time. Find the DIY here.

Happy Planner Clip in Tabs

Need to add something you your Happy Planner but don't want to punch the object itself?  With this SVG file you can cut out custom tabs from scrapbook paper, add adhesive, and snap in some precious memories.  Find the DIY here.

Happy Planner Bookmarks

Speaking of the Happy Planner if you need some day or week markers as well as some on the go washi storage - check this DIY out.  Create 3 clip in book marks to help you mark your place!  Find the DIY here.

I hope you've found a simple project to work on this week - I mean, 8 brand new things for your planner all in one week seems like a good deal!  Be sure to check back often to find new Cricut Explore DIY's.  If you want to find all Cricut Explore related posts on the blog, click here.  If you'd like to find a bunch of free printable stickers ready to be cut with your Cricut Explore, click here.  Don't forget to subscribe to my YouTube channel for more Cricut Explore tips & tricks as well.

ps.  Don't forget to join my Cricut Ready Stickers Facebook group too!  Request a join here & find even more free printables as well as tips & tricks from a learning community.

What is your favorite thing to make using your Cricut Explore?  How have you become creative using that tool?

xoxo, Moe

If you like the content you see here on the blog, please consider becoming a patron!  Joining the Patreon Family as a financial contributor means you get access to exclusive content only for you!

5.19.2017

Tarot Diaries // The Fri-YAY Spread

Some weeks just kick your butt, don't they?  Then it's finally Friday.  You're home with your bottle of wine, trying to unwind and relax.....time to crack out the Tarot deck!  I've found in my recent journey with mediation and reflection that even the hardest weeks have their successes.  I know that sounds like a lot of happiness bullshit - believe me the idea that everything is unicorns is not true and I really dislike the everything is awesome mindset, maybe that's another blog post - but for me positivity can be a real thing.  The trick to positivity is knowing that things suck sometimes, some days are bad, shit doesn't work out, but to realize that with in that which sucks is a little bit of awesome.  We just have to search it out.  Ahem, imagine the Wheel of Fortune card.
Encouraging  Tarot Card Spread
this post contains affiliate links, please read my full disclosure here.
The Fri-YAY! spread is intended to open you back up to positivity by focusing on your accomplishments & breakthroughs while giving you more positive energy to focus on as you move into the weekend.  The Tarot is simply a reflection of ourselves, and sometimes we need a reminder that we're doing something good.  Choose a deck that makes you feel happy & that you can see happiness in (the Radiant Wider Waite is my choice!)  So...here we go.

cards 1-3
What have I accomplished this week?
For this position choose a few areas of your life you'd like to know your successes this week.  Maybe the areas you feel really kicked your butt this week!  For the most part I choose work, passions, and then sometimes I choose the third card as spirituality or as relationships.  Depends on what I want to focus on at that time.  Choose areas that you've struggled with but also areas you feel that you may have a break through.  This spread is all about positivity.

card 4
What positive energy can I focus on this weekend to keep up success?
You can pull this card intentionally if you wish.  Perhaps you want to focus on the Wheel of Fortune to remind you that things change, to everything there is a season, etc.  Perhaps you want to focus on the energy of the 10 of Cups or the 10 of Pentacles and realize that your successes make you feel bountiful.  Or maybe even the Ace of Cups or Ace of wands - the feeling of being brand new or having renewed inspiration.

If you choose to pull a random card you may be surprised!  Don't be scared if you draw something unexpected.  Use your intuition & don't get down on yourself!

card 5
How can I embody this energy to have a great weekend?
After choosing or pulling a card for card 4, this space is for developing and channeling the positive energy into the next few days.  If you need to elaborate on the spread and pull another card for clarification - especially if you pulled a card intentionally for card 4 - do so here.  But don't just keep pulling until you get the answer you want!! Pull a clarification card for understanding not for yearning.
Fri-YAY! Tarot Spread
After working through this spread, if it's been an especially hard week, I like to mediate.  You can find some Reflecting, Refreshing, and Relaxing essential oil blends in this post if you need some inspiration.  Take a bath, sit at your alter, or seriously cuddle with a loved one (four legged furry friends count for this too) and realize that you are enough & what you do is enough.

I've been pulling a Positive Affirmation Card (print your own here) each time I do a big spread too.  Heck, I've been pulling them everyday!  I really like to have a positive thing to meditate with all day everyday.

Shop Related Products on Amazon!

Keep your head up!  We've got a whole life to get through...keep the good vibes coming.

How do you keep your head up when a week kicks your butt?  What moves you to keep positivity?

xoxo, Moe

5.16.2017

App Review // A Color Story

100% of my blog & Instagram photography is taken with my iPhone 6.  I can not wait to upgrade to at least an iPhone 7 (maybe a plus?? who knows!) because of the portrait feature!  I am a strong believer in the best camera to get is the one you will use...and with the ability to have an amazing camera right in our pocket, why should be assume we need the DLSR to take the best photos?  I'm not knocking the bloggers that use high end equipment - but if I didn't have my iPhone, this blog would not exist.
I want to say it was about 2013/2014 or so that I gave up using my DLSR for blog photos.  It became too much of a hassle to import things to my computer, edit and the export.  The files were huge and I felt the headache was unnecessary for the reward I was getting from the process.  Plus I find it much easier to shoot, edit, and upload photos (and video!) right from my iPhone.  I can shoot a batch of blog photos on the weekend, edit on Monday's lunch break, and throw them in to blog posts Monday night.  BAM! - A whole week or two of blog posts done and done.

I've mentioned before my favorite apps for subtle edits and the apps I use for blog photos.  Today I want to do an in depth app review of my go to app for blog & Instagram edits.  Honestly, if you see a picture from me it has most likely gone through A Color Story first.

What it is
A bright fresh photo editing app that has over 100 filters, 40 effect, & 20 tools.  Subtle, professional edits imitating the perfect color balance and lightness achieved in professional software.  Professional tools (such as a curves feature) wrapped up in an easy to use interface.  Free download includes all tools, essentials filter pack (my personal favorite), ability to save editing steps, plus more.  Available on iTunes & in the Google Play Store
A Color Story website here

What it does
A Color Story allows you to edit your mobile photos with the precision of a professional software.  I've always had a thing for Photoshop actions.  These preset edits are subtle enough to enhance your photos with out looking too processed.  A Color Story app allows for this subtle edit perfectly.  While I personally feel some packs are better than others, each filter is distinctly different.  In some photo apps the wide range of filters are so close to each other that it is hard to tell the difference.  This app offers filters the vary widely, perfect if you find it hard to make up your mind!  The best part about this app is the Essentials Pack - the best pack for natural edits to blog photos - is free in the app download.
 Original // Edit
Filter - Everyday 40%
Filter - Lite Bright 27%
Original // Edit
Filter - Everyday 75%
Filter - Lite Bright 27%
Filter - Lipstick 75%
My four favorite filters for naturally and subtly editing my photos are Pop, Everyday, Sharp, & Lite Bright. These filters are all from the essentials pack.  After I apply one or a few of these filters - not at their max strength, of course - I find that I often don't have to do much brightening or contrast editing.  I do take my photos under pretty good lighting (see my lighting set up here) so I find that a combination of these few filters work perfectly for me.
A Color Story also allows you to save your edits as presets to apply later.  So lets say you're always styling your photos in the same or similar lighting - like flat lays for your blog or always taking outfit photos around the same time of day - applying these presets will save you a ton of time if you have multiple photos to edit.  Applying the same types of edits over the same style of photo will give your blog a look of consistency as well.
Another feature I love is effects.  My current favorite set of effects is not included in the free download - but to me, all the packs offered are worth the price tag for the creativity!  This effect pack is called Glow.  The hazy, light leak effect gives an otherworldly feeling to photos.  
With the newest update you can also save your favorite filters, most used effects, etc so you don't have to remember which pack they belong to.  You can also find a Recent Edits feature under the Saved edits tab.  That way you can see which pictures you've applied edits to and decide if that edit would look great on a picture today.

Obviously I didn't touch on the most professional option in this app - ability to edit curves.  I think that this option is a great feature to get photography buffs to play around with the app...for the everyday iPhoneographer I feel it's not a necessity.  Personally, I hardly ever use it (mostly because I've never understood curves!) but it is fun to have if you need to subtly tweak something.  All other editing tools closely resemble the native editing tools in Instagram.  I've found that I love Instagram's brightness, shadows, and fade feature over any of these same features available in other apps.

How it helps you
As a professional or casual blogger A Color Story offers professional edits at a cost considerably less than professional photo editing software.  If blog photography seems daunting to you and perhaps its the reason you stopped blogging or the reason you won't start a blog of your own, pick up your iPhone and download this app.  You'll achieve professional looking photography in a few taps.  The ability to save your editing steps is key to achieving a cohesive look to your blog or social feeds.  This app has the best combination of filters plus the ease of applying the same style over every image.
Original // Edit
Filter - Pacific 62%  Filter - Pop 38%
Filter - Ice Ice 16%  Filter - Punch 49%
Effect - White 100%  Effect - London 38%
Effect - Positano 100%

Instead of spending late nights editing your photos perfectly using some tools you may not quite understand, this app will simplify it for you.  Because this app returns professional edits to you in a single tap you can feel confident fitting blogging in to your everyday schedule as you edit photos on the go.

I hope this review was helpful.  I love finding new, go to apps for photo edits!  If you have any recommendations, please let me know!

xoxo, Moe

5.15.2017

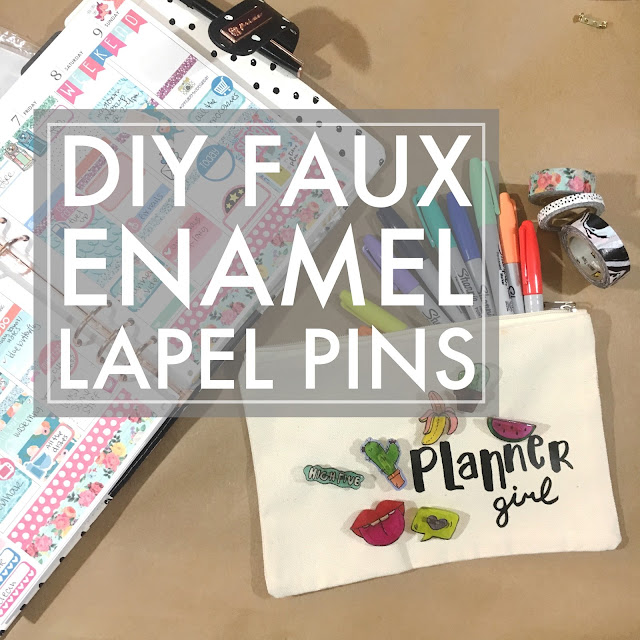
Make it Monday // DIY Faux Enamel Pins

I am in love with enamel pins.  They are super popular right now and I even featured my jean jacked covered with them in this video on my YouTube channel.  I've searched Pinterest and Amazon and have been drooling over way too many of the cute designs.  Since I can't afford every single pin out there and I'm 100% into DIYing anything I can, I'm excited to share with you a fun and easy way to make cute pins at home!
this post contains affiliate links, please read my full disclosure here.

If you're into adult coloring you'll have a fun time coloring in these pop/retro inspired designs.
supplies // this digital download, black or metallic gold permanent marker, assortment of colored permanent markers (my favorite Sharpie collection) or colored pencils, ShrinkyDinks shrik plastic, scissors, pin backs (I used these but these work too), E6000 adhesive, oven, printer, optional: ModPodge Dimensional Magic

First, print the digital download on to printer paper.  You can do this at home or take the file to a local printing place.  If you're really ballsy and don't have a printer but you have an iPad or the like you can try to gently trace the image on to the shrink film from the screen.  These images are around 3 inches wide/tall because the shrink plastic will shrink to about a third of its size so we need to make sure we don't end up with baby tiny pins!  They should shrink to around an inch.
Using the black permanent marker trace the outline of the shape onto the rough side of the shrink plastic.  When using permanent markers, it is best to trace just the outline first, color the shapes, then trace the details - like the lines in the palm of the hand and the seeds on the watermelon or prickles on the cacti - so as not to start blending the back marker with the main color of the shape.  You can also use a metallic gold permanent marker to outline if you'd like that traditional enamel pin look.
Color the shapes in using either permanent marker or colored pencils.  Using colored pencils will allow you to have more control over blending but permanent markers will give you a bolder color.  Once finished coloring, use the black or metallic gold permanent marker to add in the details.
Cut out the shapes close to the edge of the design.  Do not leave a boarder of shrink film as this will not achieve the enameled pin look.  Bake them in the oven according to the shrink plastic instructions.  Be sure to let the shapes cool once they have been removed from the oven.  They can not be pliable for the next step.
Optional - add ModPodge Dimensional Magic to the matte surface for a glossy look or spray with a clear sealant.  If you use the ModPodge Dimensional Magic..don't use too much!  You'll end up with crazy globs everywhere.  Also, work slowly to avoid any bubbles.  Let them dry for 24 hours.  Yo don't have to add this glossy top coat to the pins, the flip side off the pin is rather vibrant and glossy.  I've included two downloads since some of the words or signs would need to be flipped if you aren't using the Dimensional Magic.

Because the shapes are still a little bit see-through, you can paint the backs either black or white so that the pin back doesn't show through.  Let dry before attaching pin backs. Adhere the pin backs to the back of the cut out with E600 adhesive.  If you did not use Dimensional magic, adhere the pin back to the matte side of the pin for better stick.  Let dry for 24 hours.
Now rock your pins!  I love this because now I can own all the pins with out breaking the bank.  Pins can go on a ton of things - my personal favorite is the jean jacket..but I also love decorating little pouches.  Learn how to digitize your handwriting and use it to make a personalized pouch here!
Stay tuned for another DIY using your inkjet printer + your Cricut to create even more awesome pins.  If you want to learn how to make this Planner Girl pencil pouch, check out this post!

Are you loving the enamel pin trend?  What pins would you make?

xoxo, Moe

5.12.2017

Free Sticker Friday // Spring Time Marble Mini Kit

The marble & agate pattern is all the rage right now.  I've found these mesmerizing patterns in home decor and planner stickers.  The organic shapes and swirling lines really suck you in!  In soft pastels, these patterns are perfect for spring - so I threw together a mini kit for you planner!  I love these small kits for my memory planner and for my mini happy planner.  (Check out my Plan with Me videos here!)
Spring has finally spring and even though it is still chilly up here in Indiana....at least it's not snowing!  The grass is growing and the flowers are starting to peek through.  I just can't wait until I can wear flip flops, honestly.  This kit is getting me into the mood with it's soft pastels & groovy patterns.  I think the set goes perfectly with the new Heidi Swapp Magnolia Jane Decorative tape & the Petals + Blooms tape from Hobby Lobby.  So gorgeous!

(ps. did you know you can get cash back from Hobby Lobby through Ebates?  I didn't either!  Sign up for Ebates here.)

DOWNLOAD SPRING TIME MARBLE STICKER HERE


Included in this download is a PNG file for your Cricut Explore, a PDF to cut by hand (though I hear good things about this tool), and a .Studio file to cut with your Silhouette.  And guys if you're not in my Cricut Ready Stickers Group on Facebook you may want to join.  There are a ton of helpful members in there sharing tips + tricks for your Cricut Explore.  Plus a member shared recently that Design Space 3 had a soft launch and when it goes live for everyone the print size will be bigger!  I'll continue to offer stickers in the 5.5x8 inch size for Cricut until this happens - so sit tight, a bigger print area is coming!! Thank the sticker cutting gods!
These files are for personal use only.  Do not share the file itself - if you'd like to link to or Pin these stickers, please link to or Pin the main body of the post.  Do not print & distribute these stickers in mass quantities, do not sell the design or final product.  As always, thank you for playing nice!

Shop Related Products on Amazon!

I hope you're enjoying spring where you are.  Happy planning!

xoxo, Moe