12.21.2017

Expertly Blend Essential Oils for the Winter Solstice

We are entering winter time now!! December 21st marks the first day of winter or the Winter Solstice.  This is the shortest day & longest night of the year.  While we're entering the coldest time of the year, the days will actually start getting lighter.  I know that the winter months can become a bit depressing with the lack of light, the cold, and the over all less-spending-time-outside...but the good thing is the darkest days are behind us!
this post contains affiliate links, please read my full disclosure here.
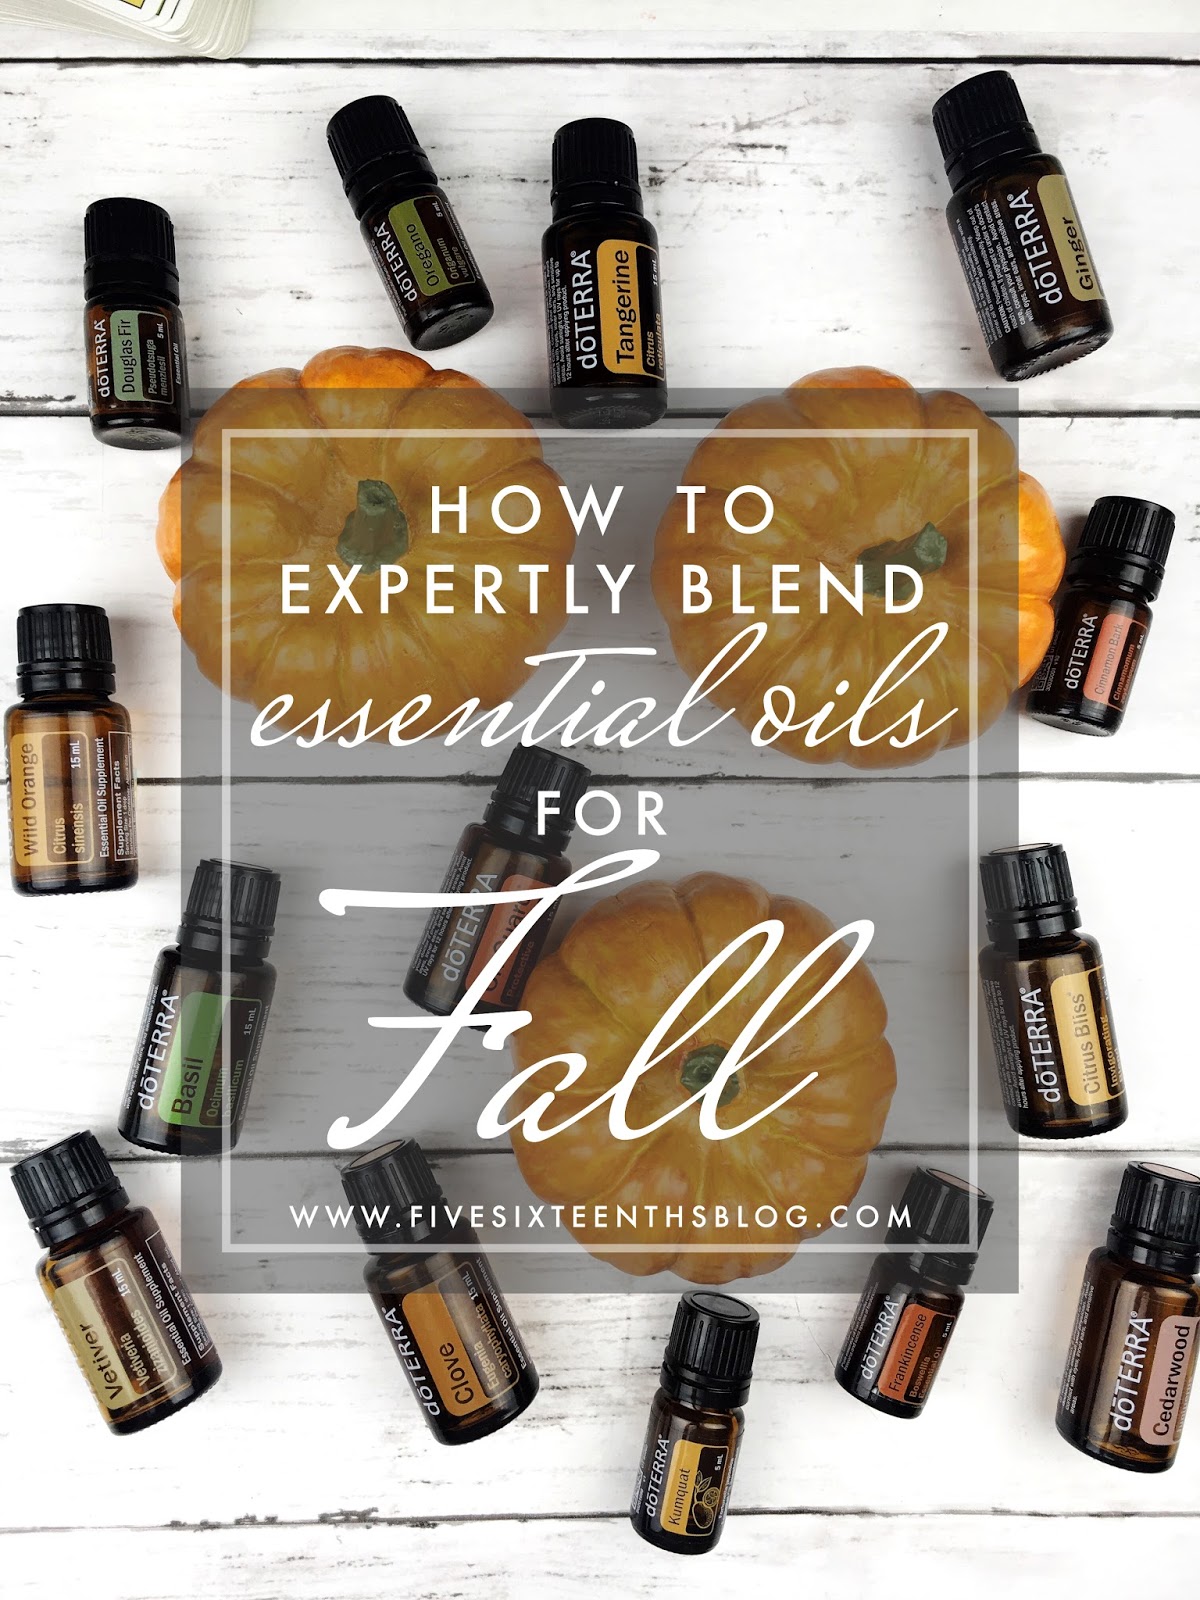
In this post about blending essential oils for fall, I talked a bit about Mabon.  Today I want to talk to you about Yule.  Yule falls at the Winter Solstice.  We get two solstices a year - one in the summer (Litha) and one in winter.  At this time, rather than the light & dark being in balance, one falls longer than the other.  In the case of the Winter Solstice the length of day light hours is far fewer than the length of the night.  This sabbat of the Wheel of the year is a solar festival - celebrating the return of the sun.  It's kind of hard to think about the fact that we're getting more sunlight in the middle of winter and that at the Summer Solstice we're dropping into fewer sunlit hours.  Kinda messes me up personally with the cold of winter.  Now, December 22nd is not going to immediately see an enormous uptick in daylight hours....but we will begin to slowly creep up as the days go by.

Reason for the Season

Winter Solstice and the celebration of Yule are pagan traditions that have since evolved into more well known festivals of light during this season....Christmas being the most dominant.  We are celebrating the return of the light and the hope for warmer, longer days.  Bringing in an evergreen tree, decorating with lights, etc have roots in solar celebrations.  Saturnalia, celebrated by early Romans around the 17th-23 of December, is said to also be a solar festival.

I like to associate each solstice or equinox with a phase of the moon.  While my correspondences don't coincide with more common associations....I still like to mention it.  I associate the Winter Solstice with the last quarter moon.  A time to move into reflection, releasing, and preparation.  As we move into sort of a hibernation mode it is time to sit with what is the rest of the year and plan for the new, to release what is no longer needed, to reflect on how far we've come and decide where we need to go.  I sort of follow the astrological year with the new year starting at the end of March when the new moon is in Aries (the first sign of the zodiac) so I see the Spring Equinox as the New Moon season of the year....but we'll get to that in another blog post!


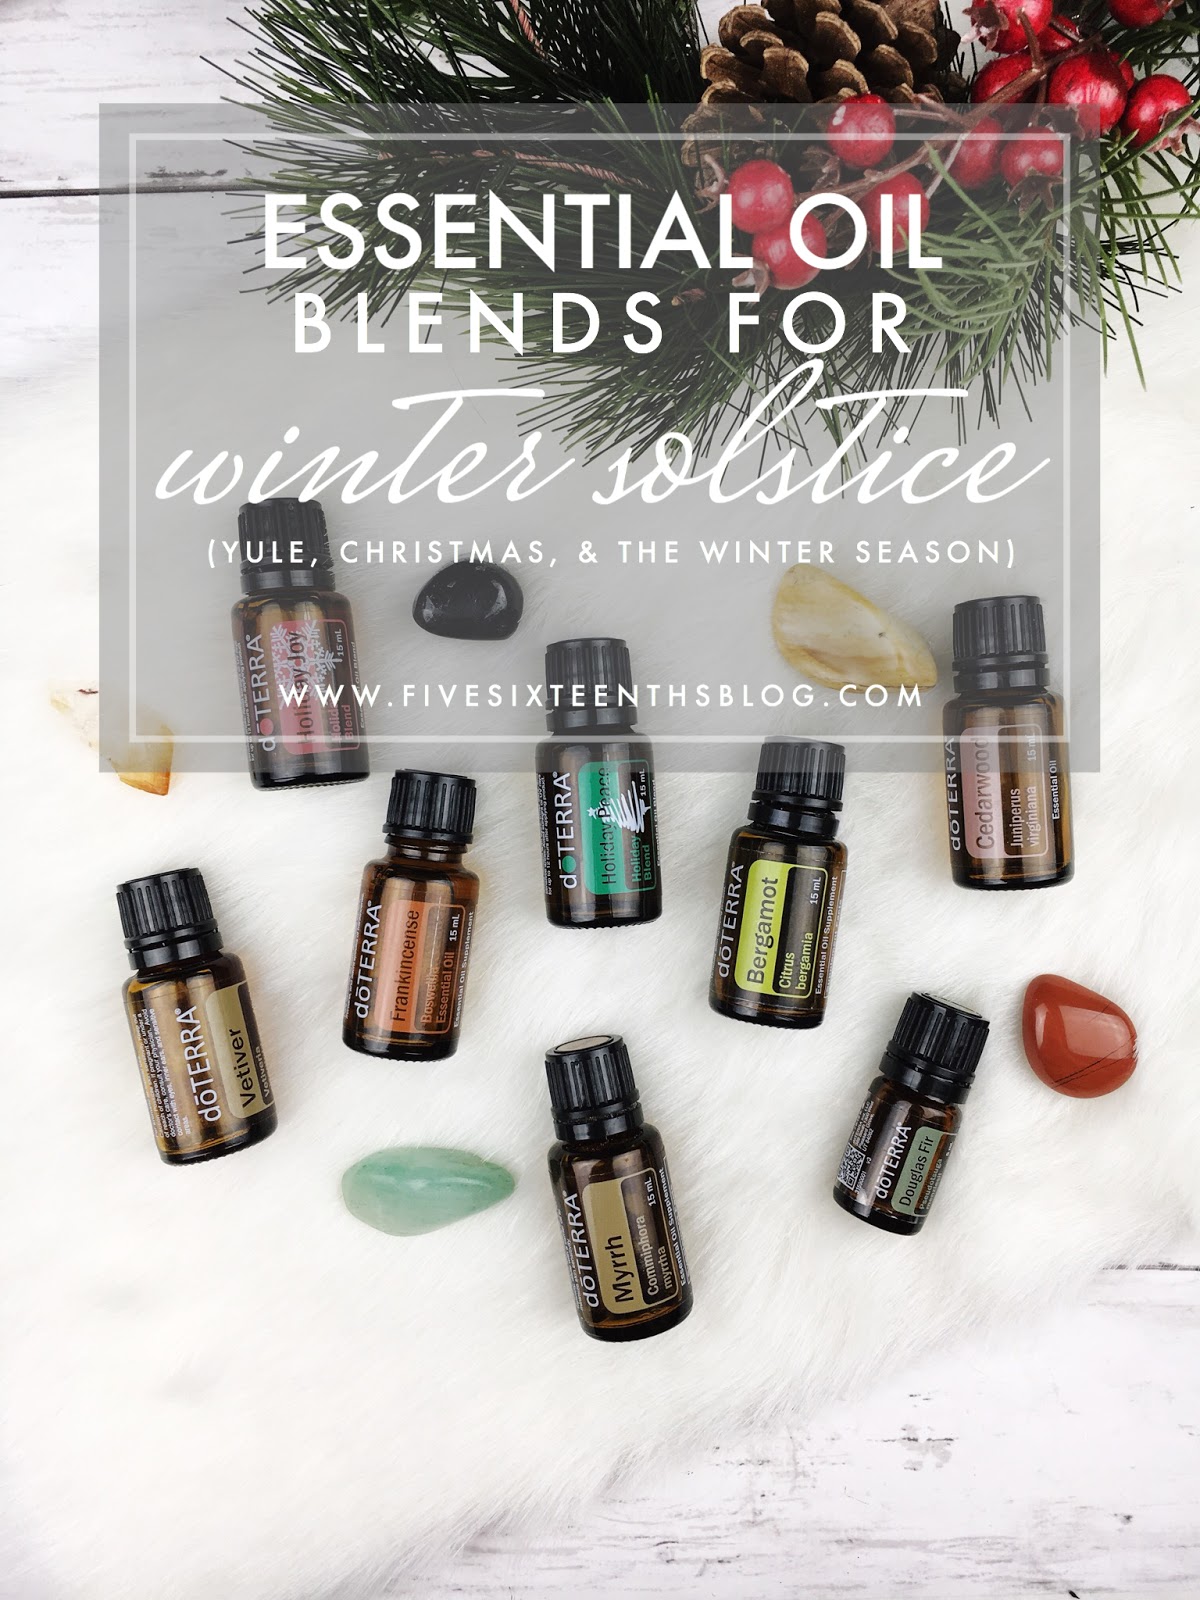
Essential oils for the Season

So even though the days are creeping lighter, we're still faced with a lot of darkness.  There are a few types of oils that we want to work with - I think of them in three categories:

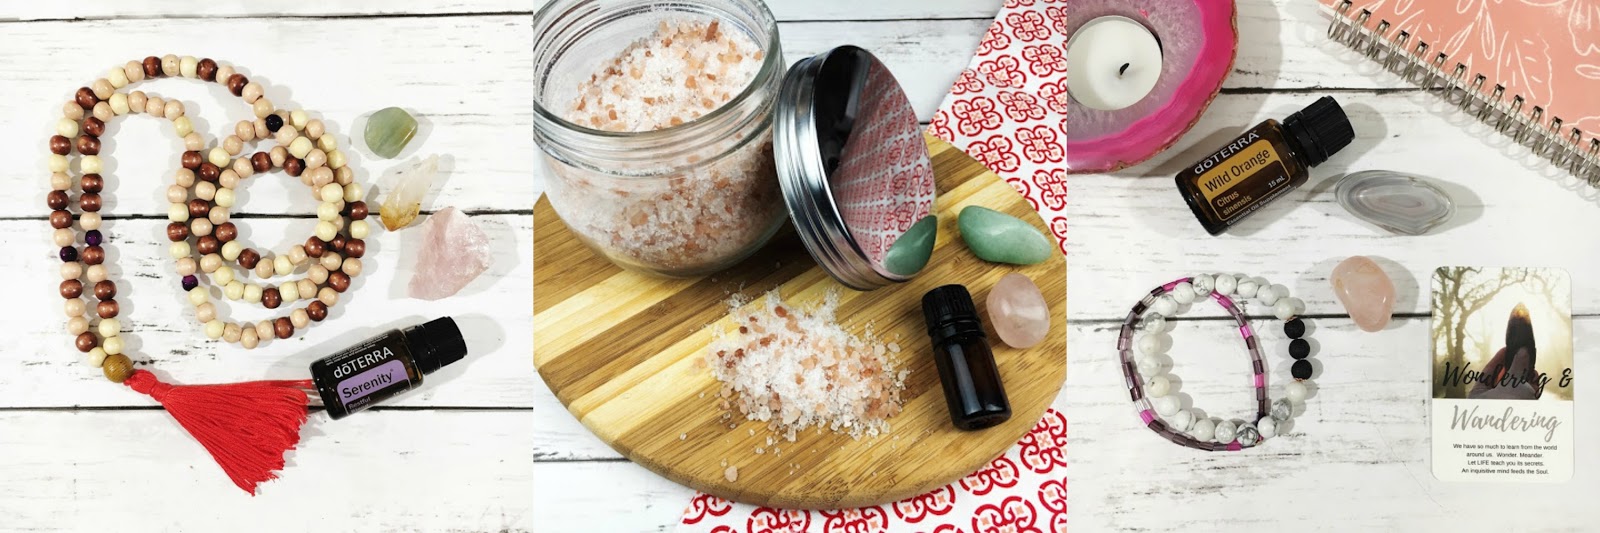
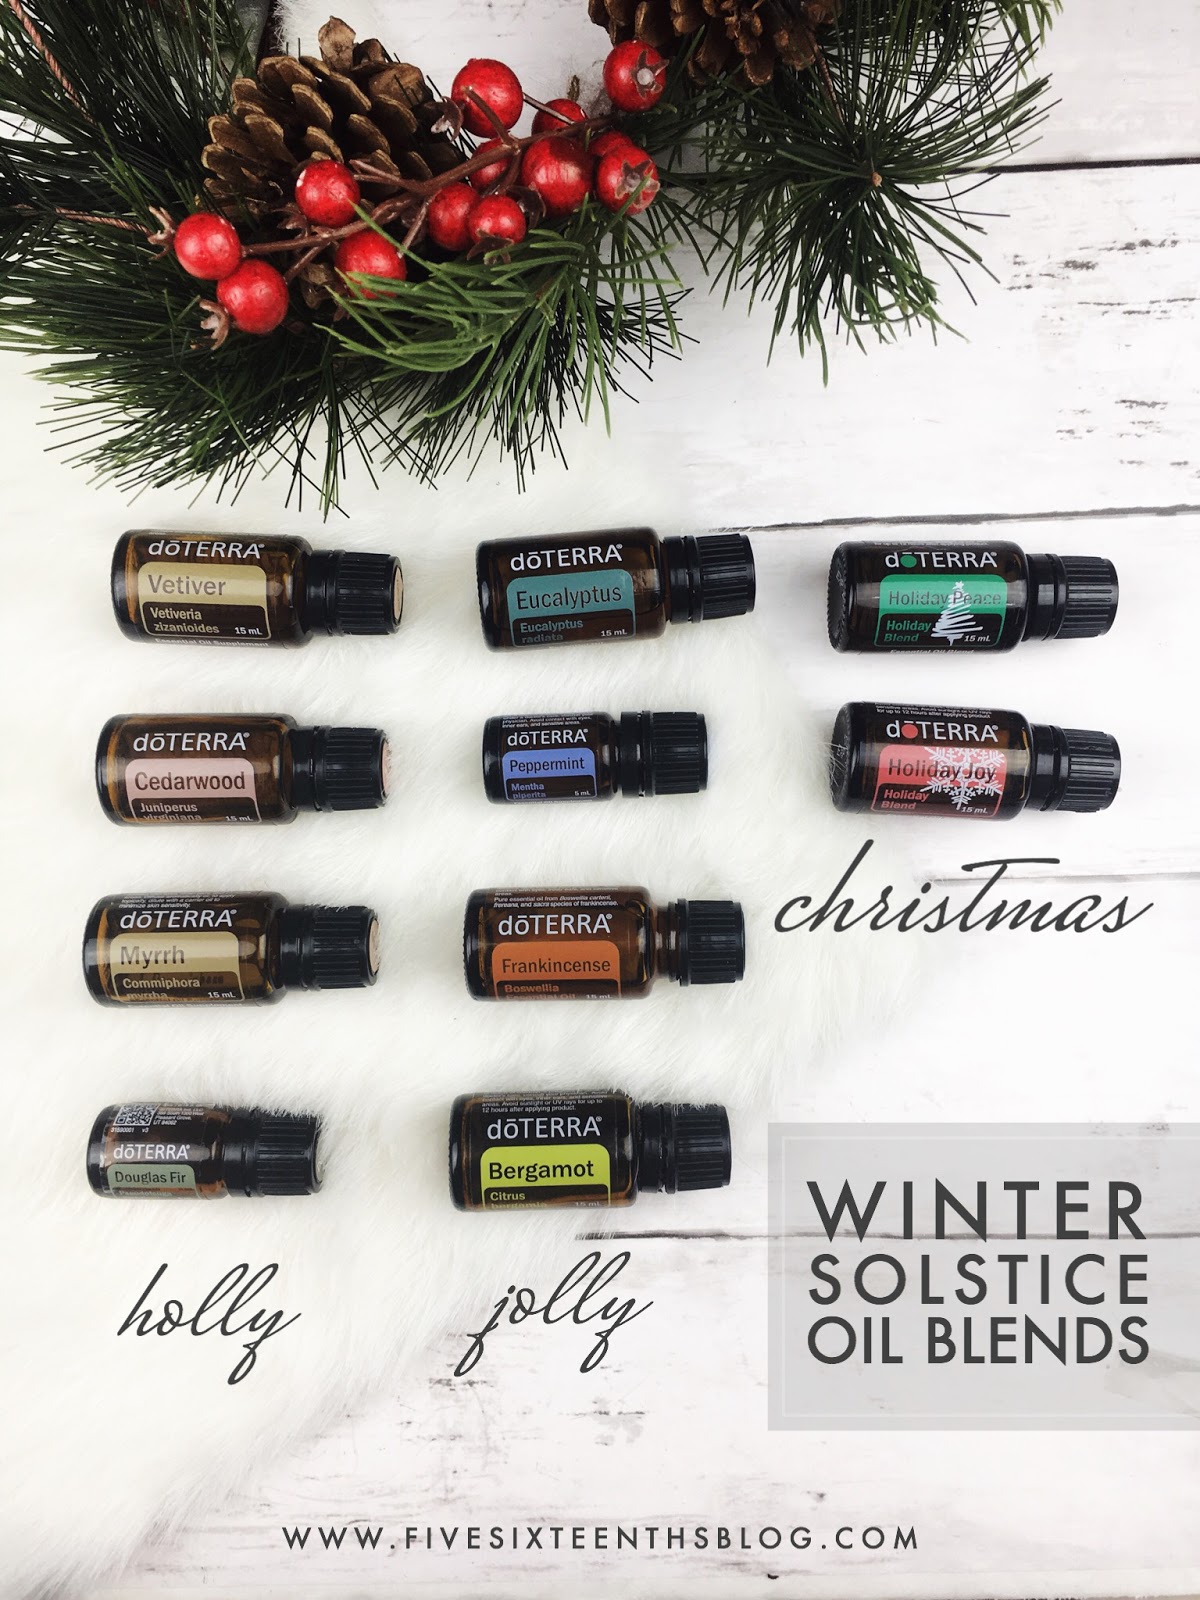
Holly - grounding, Jolly - uplifting, and Christmas - doTERRA holiday blends

These three categories will help you create multiple blends inspired by the season.  Taking one oil from each category will mean an amazing blend, perfect for the season.  Here's a breakdown of each category:

Holly - grounding

Choose tree, root, and fir oils.  Since these oils are derived from trees or roots they are close to the earth, stable, & unmoving.  Arbovitae, Birch, Cassia, Cedarwood, Cinnamon, Douglas Fir, Myrrh, Sandalwood, & Cedarwood are great examples of these oils.  

Jolly - uplifting

This category is comprised of mints & citrus oils.  Minty oils do a great job of invigorating.  They can give us open airways and a burst of motivation.  I often use peppermint as a quick energy boost and pick me up.  Mint oils include Eucalyptus, Melaleuca (Tea Tree), Peppermint, Spearmint, & Wintergreen.  Citrus oils are also uplifting and since they come from sunny fruits, they give us the hope & joy that is needed for the season.  Citrus oils give brightness to the oil blends of this season.  Oils to use are Bergamot, Grapfruit, Citrus Bliss, and Wild Orange.  Another uplifting and citrus-y oil is Frankincense.  While not derived from a citrus fruit but rather from tree resin, Frankincense has an uplifting and inspiring effect.

Christmas - doTERRA Holiday Blends

There are two Holiday Blends thrown in from doTERRA this year - Holiday Peace and Holiday Joy.  Both are fine blends on their own and if you don't have either you can sub in something like On Guard for Holiday Joy and Balance for Holiday Peace.  Each scent is a great blend of oils for this season - spicy oils like cinnamon & cassia, with grounding oils like douglas fir and birch, as well as a bit of citrus like grapefruit and wild orange.  

Here are four blends perfect for the holiday season:

Comfort & Joy

Blending traditional scents of the season, this pairing gives you a supportive aroma.  Holiday Joy is composed of many of the protective oils in the On Guard blend, but also also adds Douglas & Siberian Fir.  The emotional properties of On Guard - strengthening boundaries & encouraging independence - blend well with the properties of Douglas and Siberian firs - generational wisdom & connection to the present.  Frankincense uplifts the spirits while Myrrh grounds the soul.  Diffuse equal parts of each oil or combine in a roller bottle with fractionated coconut oil to carry this protective yet connecting blend with you.

Peace on Earth

Bergamot is my personal favorite essential oil.  It is the oil of self-assurance and it is just sunshine in a bottle.  It is similar to Lemon, but it is deeper yet brighter.  If you don't have Bergamot you need to get two bottles!! Holiday Joy is a blend of tree & root oils with a bit of Frankincense.  This oil reminds us to seek our truth and stand strong & peaceful.  Adding in Bergamot, the oil of Self-Acceptance, allows us to rest self assured in our truth.  It is an oil of hope & brightness in this dark season!  Equal parts of each oil will create the perfect blend.  Too much citrus and it will be overpowering.  Equal parts create the perfect balance.


Grab the Free Ebook!

* indicates required


O, Christmas Tree

Composed of all wood and tree oils, this blend is a true Christmas blend.  Just as if you're standing in a calm forest Vetiver brings us into the now, it centers us back to our bodies.  Douglas Fir enlightens us to generational wisdom & learning from the past - reminiscent of traditions during this holiday time.  Cedarwood is the oil that connects the here & now to the past...it is the oil of community and brings us together this holiday season.  Cedarwood supports us in knowing we are not alone.  Sometimes in these cold winter months we may find it hard to connect - especially if we are away from family - but this blend helps us remember that there are traditions to carry on and new traditions to create as we move through this season of light.  Equal parts of this blend work together as well.  Each oil balances nicely with the next.

Winter Wonderland

Douglas Fir & Peppermint blend together to create a fresh scent.  Peppermint is an extremely joyful oil.  It is uplifting and invigorating!  Pairing it with Douglas Fir creates an openness and willingness to learn from the past.  Equal parts of each oil works perfect for this blend.  Each is a strong scent but they balance each other nicely.

This season is a season of connecting with each other but also connecting to ourselves, connecting to our spiritual paths and connecting to the movement of the seasons.  I think the best part about celebrating the Wheel of the Year and the changing of the seasons is that we can learn how the seasons affect us emotionally and spiritually.  And then from that we can grow!

So, bright blessing for Yule everyone!  Merry Christmas, Happy Holidays, Happy Solstice....however you're celebrating this season of light.  If you want to learn more about essential oils click hereI'd love to chat with you about essential oils and your spiritual journey, so hit me up if you have any questions!

xoxo, Moe

All info in this blog post is from my own personal experiences with essential oils.  Emotional associations are from my favorite resource book Emotions & Essential Oils.  The doTERRA website also has more information on essential oils.


Ready to get started? Click here to learn more about doTERRA Essential Oils!

12.18.2017

Make it Monday // Last Minute DIY Holiday Gift Guide

We've only got 7 days until Christmas, Hanukkah is in full gear, and Kwanza is starting soon.  Not to mention we've got Yule or the Winter Solstice on the 21st and I'm sure I'm missing other solar & seasonal festivals that are going on around this time of year.  Today I wanted to share with you some last minute gifts you can put together for some of the rad gals (and guys) in your life.
this post contains affiliate links, please read my full disclosure here.

Whether you need stocking stuffers or just a small gift for friends, check out the gift guides below for some easy. last minute ideas.

The Planner Girl

These little gifts make the perfect individual stocking stuffers or blend them all together to create a gift set!  Get the cut file for the Happy Planner tabs here, make washi bobbins or portable washi storage here & here, then digitize your hand writing to cut with your Cricut Explore here!  Looking for more planner DIYs?  Click here!

The Essential Oil Enthusiast

Whether the recipient is on a spiritual journey or just plain into scents that smell amazing, handmade gifts for the essential oil enthusiast are sure to excite!  Create a special mala necklace for your loved one to help them focus on their intentions and meditate.  Learn how to make and use a mala here.  Create a nice, soothing bath salt with your favorite blends of essential oils.  Throw in a crystal or two and you've got a great gift set.  Find the DIY here.  Crystals and essential oils go together like holly & jolly.  Make this howlite and lava bead bracelet so that your loved one can diffuse their favorite blend all day long.


The Handmade Aficionado 

If your best friend, sister, mom, or aunt loves any & everything handmade consider getting creative with these three gifts.  Create this mixed metal pennant necklace with some simple jewelry making tools.  Crochet a quick boho inspired bag with scrap yarn - only 3 granny squares are needed!  Got some more scrap yarn?  Whip up some easy coasters using a large crochet hook to make the project go faster.

The Memory Keeper

Journalers and scrapbookers love new paper products to play with!  Spruce up a store bought notebook with a fabric spine.  Create a custom travelers notebook from cover to accessories using your Cricut Explore.  Make a mini spiral bound journal using your Cinch and a few leftover journaling cards.

Quick, creative, and super easy gifts.....now you've just gotta wrap them.  Happy holidays everyone and don't forget to use Ebates when doing your holiday shopping!  You'll get cash back to spend!  Sign up here.

xoxo, Moe

ps. Check out more gift guides here.

12.15.2017

Free Sticker Friday // Birthday Week Planner Stickers

So this week (today actually) I turn the big 3 - 0.  That's right...I am 30.  Over the past few years I've had to change my bios on various websites like Twitter, Pinterest, and even this blog.  What started out as 'a post grad southern girl' changed to 'twenty-something Indiana transplant'.  But as I've moved through my late twenties, I changed most of my bios to say something like : 'I'm Moe, a 9-5er, Southern at Heart, Indiana transplant & sweet tea enthusiast'.  So no longer am I post grad or twenty something...I'm 30!! 
this post contains affiliate links, please read my full disclosure here.

One of the the biggest things I've learned in my 30 years is to make sure I'm doing what makes me happy.  Over Thanksgiving when I was at my parent's house, I was sitting on the couch putting stickers in my memory planner & my everyday planner.  I thought to myself 'You know, some may think this is pretty childish.....playing with stickers.  But it makes me feel creative and expressive, and it relaxes me.  So I'm going to keep doing it even though I'm 30.'  Life is too short not to do the things that make you happy.  Life is also too short to keep doing things that make you annoyed, sad, frustrated, etc.  So I need everyone to resolve with me to continue to do the things we love...no matter what it is.
So, in honor of my birthday - and for the fact that I figured out the sizing for the Mini Happy Planner - here is a free printable you can use during your birthday week.  This week I left the icon circles blank because I really loved using my planner stamps for the icons.  Leaving these blank means that you can customize them with planner stamps or digital icons of your own!  How many times have you purchased a weekly kit only to find that you  don't use all of the icons or don't even need some of them?  This way you can create the ones you need.  And hey, bust out those planner stamps if you haven't been using them.  Learn more about how I use planner stamps here.


Remember, all printables on the blog are for personal use only.  Do not sell the printed or digital design, do not claim any of these as your own, do not print an disseminate in mass quantities.  As always, thank you for playing nice.  The glitter textures are from EyeInspire and all photos are from Unsplash.
Included in the download are the files for both the Erin Condren sized & Mini Happy Planner sized stickers in the following formats - PDF for printing & cutting by hand, PNG for uploading to Cricut Design Space, and Silhouette Studio file to cut with your Silhouette.  Be sure to size the PNG to 6.75 x 9.25 inches when you upload it to Design Space.


If you're interested in the birthday cake die cut, you can join the Printable of the Month Club over on my Patreon page!  For $3 a month you'll get access to an every growing library of printables totally unique to that subscription.  That means the printables you find over there will not be replicated in the shop or on the blog....they are exclusive for my Patreon family.  Check it out & subscribe here.

What is something that makes you happy?  What is something you want to start doing?

xoxo, Moe

ps. my planner cover is from Sew What Else is New on Etsy.  I love it, I have 2, and I need more.  Check out the shop for amazing planner covers & traveler's notebooks!  Don't forget to use Ebates when shopping on Etsy for the holidays (and any time really) to get cash back on your purchases!  Sign up here.

12.01.2017

Freebie Friday // Printable Buffalo Plaid Mini Happy Planner Cover

Oh my goodness you guys...the holiday season is heeerrrreee! Who has their tree up?  Who has lights up?  Who is wearing holiday leggings?  I am only doing the last one because I am waiting for Zach to come home to start decking the halls!  However, as soon as set down my last piece of pumpkin pie I started to deck my planner!
this post contains affiliate links, please read my full disclosure here.

I have for you today a free printable Mini Happy Planner cover!  This guy is in a PNG format so you know what that means....it is ready to print then cut with your Cricut Explore!  Don't have a Cricut Explore yet? Better get to asking Santa! (Oh! There is a new Cricut Machine that does print & cut AND so much more.  It is the Cricut Maker!)  This cover is perfect for the current season.  I mean buffalo plaid is all the rage.
On the week of Thanksgiving, I posted in the Cricut Ready Stickers Group on Facebook how to make your own buffalo plaid prints using an oldie-but-a-goodie website/tool : a tartan maker.  I've been using this site for ages (I even mentioned it in this post!) and love to go back to it when I need simple tartan/plaid pattern.  So easy!  And you can import these patterns right into Cricut Design Space too.  Learn how to do that in this video over on the YouTube channel.

DOWNLOAD THE BUFFALO PLAID PLANNER COVER HERE

As with all the free downloads on the blog, these are free for personal use.  Do not sell the final product or the file.  Do not distribute in mass quantities, and do not claim any part of this as your own.  If you want to share or Pin this project, please pin the blog post and not the file itself.  I appreciate everyone playing nice!


When you download this guy, be sure to size it to be 7.5 inches tall.  Keep the proportions locked and the width should auto populate.  To fit this guy on my happy planner in my Recollections binder that I deconstructed I did have to trim a bit off of the right side.  Then I rounded the corners with my corner chomper.  So if you're using approved Happy Planner deluxe covers (the little binder style guys) you won't have to trim this.  Additionally, you can see this post for how I laminate & then cut the planner covers with the Cricut Explore.

Happy Holidays & Happy Planning!

10.28.2017

Hooray for the Holidays // Print your Holiday Cards with Minted

Last weekend Zach and I packed it up and headed to his parents' house in Michigan to take photos for our first ever official holiday card.  We've been talking about do a card off and on for like the entire time we've been together...but it always seems to be too much work, so we just don't do it.
this post contains affiliate links, please see my full disclosure here.
This year though, Zach was gung-ho so I thought I'd better ride that wave while I have it!  We set up a tripod (on a chair!) and found a gorgeous spot in his parents' backyard under this beautiful pair of trees whose leaves were bright yellow.  I used my iPhone (you all know I use my iPhone for everything) to take the pictures and my Apple Watch as the shutter release.  Three quick poses & about 50 + shots later, we were done in about 45 minutes.  I was so surprised!  The phone + watch combination made it super easy to shoot.  I didn't have to set a timer, run over, click, run back to see if we got the shot.  I could compose the shot right on the face of my Apple Watch, tap to adjust the focus and brightness, then use the 3 second timer to shoot a burst of about 10 photos at a time.  Easy, peasy.

Now....all I have to do is decide on the card!


I love Minted because of the uniqueness of their card collections.  Of course they don't just do cards - see more posts about Minted's offering here - but that's what we're focusing on today.  They have HUNDREDS of card styles with great colorful touches and the most popular trends.  Choose a die cut shape for a fun touch, hand lettering if you're creative, or tartan if you're down for traditional.

I think I'm deciding on these three cards, the last one even features gold foil! :

You can choose from a Holiday theme or get specific with religious touches, traditional Christmas or Hanukkah, or even send a Thanksgiving card.  Whatever happiness you're wishing your friends and family this year Minted has you covered.  

And don't forget you can enjoy up to 15% OFF + FREE SHIPPING on holiday cards

Do you send holiday cards?  What style do you like the most?

xoxo, Moe

9.25.2017

Make it Monday // 4 Halloween Planner DIYs

We've still got a week left in September but now is the perfect time to get our Halloween themed items in line for October.  100% I am going to do a Halloween each week in October!  I just love it!
All of these DIY's can be used for any planner.  I'm currently using a mini Happy Planner & personal size inserts still fit perfectly!

Personal Size Halloween Countdown Insert

I am printing this ASAP!  I love this little guy because it has a list on the back of movies to watch this October!  If you make this guy yourself you can add places to go or a Fall Bucket List to the back...or maybe a Halloween Bucket List.  You don't have to be a professional designer to use PicMonkey to create awesome inserts.  Grab the printable or learn to make your own here.

Halloween Note Pages

Speaking of inserts....who loves to pick out themed or seasonal notepads from the Target dollar spot?  I do, I do!! But you only use one or two of them because they are too pretty to actually write on.  Well, in this DIY you can make your own so that you don't feel guilty hoarding notepads.  Just print as many as you'd like then store them in PicMonkey's cloud storage system Hub or on your computer until next year.  Best thing?  You can make them in your own colors!  Grab the printable or learn to make your own here.

DIY Halloween Planner Band

This is such a fun & freaky DIY.  All you need is ribbon, elastic, a fabric flower, and some freaky faces...and you've got a fun planner band.  Adjust the elastic to fit around different planners (and you can even wear it as a hair bow if you're down!  Check out the post here.


Printable Halloween Countdown Stickers

If you want to countdown to Halloween another way, print out these stickers.  These are great for bigger planners like an Erin Condren or Happy Planner.  Check it out here.

I do hope you have a frightful month!  I'll be sharing some Halloween inspired marquee stickers too so you can mark all the Halloween movies you'll be watching, so keep a look out for those.

How do you mark Halloween in your planner?  Any specific spreads you're looking forward to?

xoxo, Moe

9.22.2017

How to Expertly Blend Essential Oils // Fall Edition

Today marks the Autumn Eqiunox.  During each equinox - one in the spring & one in the fall - the length of the day and of the night are nearly equal.  It officially marks movement into fall and gives you the proper permission to wear those boots you've been wearing since September first.  And you can officially hang your fall wreaths and sneak in Halloween decorations (don't worry, I do it to!)  If you'd like to get a little woo woo, this day also marks the start of Mabon one of three harvest holidays of the Wheel of the Year.  This holiday asks us to make time to express gratitude & observe balance (as night and day are nearly equal).  Since this is a harvest time, we can celebrate our successes or reap what we have sown through the past year.  We can also reflect up on what hasn't worked for us - what crops, ideas, or projects may have fallen short.   
Ultimately this time is a great big full moon.  If you follow along with the lunar cycles the New Moon (Spring) is a time for setting intentions, the First Quarter Moon (Summer) is a time for action, the Full Moon (Fall) is a time for gratitude and realization, and the Last Quarter Moon (Winter) is a time for reflecting & releasing.  Mabon marks the realization phase where we can celebrate the accomplishments towards our intentions or goals of the year.  Kinda like a check in with our resolutions.

You may be wondering why I'm throwing some woo woo into this blog post (or woo woo into this blog in general). I've found that honoring cycles to be the best thing for my mental clarity right now.  Since mindful has been my word of the year, I've connected so deeply to it.  Mindfulness is being aware.  Connecting to this word has made me realize that there are cycles to everything.  I mainly focused on this word in order to get a hold on my emotions and to swing fluidly through their cycles instead of getting overwhelmed and lashing out.  I want to experience and express the full range of emotions I am capable of feeling in a controlled, mindful manner.  I've realized there are cycles to this range of emotions.  Stress and overwhelm at my job, if not dealt with head on, will result in a manic uncontrollable episode where I am unable to control what I am feeling & end up exploding and running to the bathroom in tears.  This has happened multiple times.  The lighter emotions I can deal with, it's the cycle of the darker ones that I have trouble with.  So working with these cycles has become important to me it just so happens that there are already naturally occurring cycles - the moon phases, for example, as well as the seasons - that I can work with in this personal growth.  It just so happens that these cycles happen to fall into a traditionally woo woo area.  So this is the woo woo I bring into the blog because I believe this woo woo can help us all in our personal growth to our highest good.  Now onto the real meat of this post....essential oil blends!

Essential Oils for this Season

The best type of oils to work with during this season are ones that bring warmth, are grounding, & are uplifting.  Spicy & herbaceous oils like cinnamon, clove, basil & oregano will bring in warmth.  Grounding oils like root, wood and tree oils - cedarwood, vetiver, and fir oils - will connect you to the earth.  And citrus oils are uplifting, so mix in something soft & bright, like orange.  These are all the types of oils you can mix and match this season.

Warm Oils

There are several oils that are considered 'warm'.  This is for a multitude of reasons, but we're going to focus on two primary reasons - they can physically feel warming to the touch or their scent can evoke a sense of warming.  This is most commonly associated with spicy oils like cinnamon or clove, but can also extend to herbaceous oils like oregano.  Since we're going to diffuse these oils, we're not too concerned with a skin reaction here.  But be sure to use essential oils safely when applying them topically.

Diffusing different oils will have different emotional effects:
Spicy oils are known to affect the Sacral Chakra and evoke or balance energies associated with this center.  Spicy oils give connect us to our sense of self & our sense of empowerment and help us feel supported and protected in our community.  The Sacral Chakra has both to do with our relationship with ourselves and our relationship with others.  The spicy oils I like to use are the On Guard blend, Cinnamon, Frankincense, Ginger, & Clove.
Herbaceous oils connect with our Heart Chakras and evoke or balance energies associated with this center of love, kindness, & forgiveness.  Oils like Basil and Oregano are oils of emotion & contentedness.  Something I love to think about with these types of oils is that they come from herbs that we use to cook.  When cooking we're infusing our love & caring into the meal.  These are oils of nourishment and work great with the idea of harvesting crops.

Grounding Oils

These oils are made from roots & trees.  Because these oils are harvested from trees & roots, the emotional association is grounding, balance, and support.  Grounding oils connect with the Root Chakra.  This center connects us to the basic needs for life, it connects us to the earth.  Perfect for this season where we grow fond of the changing leaves and walks in nature.  Oils in this category for this season are Cedarwood, Vetiver, and Douglas Fir.

Uplifting Oils

Most citrus oils are bright & uplifting.  Uplifting oils connect with our Solar Plexus Chakra to bring a feeling of happiness to us.  They bring spontaneity, excitement, and creativity to us.  Warm, uplifting oils to use this season are Wild Orange, Kumquat, Tangerine, & Citrus Bliss.

Blending Essential Oils 

Diffuser blends are rather easy to create & the best ones come from a bit of experimentation!  A blend of 3 oils is best to begin with, and honestly the simplest blends often work the most effectively.  To start, choose 2-3 oils (one from each category) and unscrew the caps.  Hold the bottles towards your nose and move them around so that you're inhaling a blend of each of the scents.  You may find that two of the scents blend well together while the third may make the whole blend seem off.  You may choose to stick with just those two, or keep subbing in a different third oil until you find a blend that smells divine.  You may want to make a note of the blends you like so you can refer to them later.
When it comes to adding the oils to your diffuser start off with 2 drops of each oil.  If you want one scent to be more powerful, add more drops.  If a scent is too powerful, reduce the number of drops.  For example, I love Douglas Fir but I find the scent can be overwhelming so perhaps starting with one drop is better.  I find this same effect with Oregano.  Be sure to record how many drops you've used so that you can recreate your blend in the future.

Another tip when creating blends is to think about the emotions you'd like to align with & how you personally identify with each oil.  I've generalized the oil groupings here in this post, but you can use this as a base to research the emotional associations with each oil.  Or you can throw that all out of the window and go with your gut!  The later is my favorite way to work with oils!

****

Feel free to add in any other oils you feel called to add when creating these blends.  Cypress, Peppermint, Juniper Berry, & Myrrh are great oils to add into this season.  I get my oils from Doterra to ensure they are of high quality.  If you'd like to learn more about getting started with the spiritual & emotional ways essential oils can enhance your life, I'd love to talk to you!  We can even get you set up with a Wholesale Account so that you can start to save some moolah on your essential oils!  If you're just looking to dip your toes in the water. join the email list below and grab your free copy of the ebook Getting Started with Essential Oils - Practical & Spiritual Uses.


Grab the Free Ebook!

* indicates required

Even if you only get a wonderfully scented home from this post, that's enough for me! My goal is to share with you how essential oils can enhance your life....your job is to take that info and make it your own!  If you'd like to find more essential oil posts on the blog, find the articles here.  And don't forget to join the Five Sixteenths Blog | Live Creatively group on Facebook for more creative inspiration + some other fall blends!

xoxo, Moe

Ready to get started on your Essential Oil Journey?  Click here to learn more about doTERRA!

9.20.2017

Tarot Diaries // Tarot Birth Cards & Life Path Numbers

If you haven't noticed, there's been a lot of woo woo around these parts! Especially over on my instagram.  Tarot & oracle cards have quickly become my go to way to align myself and focus on my highest good. (oh and working with my Chakras! The Connected Chakras Affirmation deck is available here!)  There are a ton of ways to work with Tarot cards beyond choosing a spread, asking a questions, and reading or interpreting them.  For example, choose a specific card that appeals to you - like the 7 of Swords - and bring the meaning into your life.  Study it, work with it, journal with it....and then in the next week or month, choose another!  Today, though, I want to share with you Tarot Birth cards and why I love working with mine!
this post contains affiliate links, please read my full disclosure here.
Tarot can reveal to you a lot about yourself.  I've said before that to me Tarot is not a predictive tool but rather a reflective tool.  Tarot reveals to us what we may not be seeing in our current situations.  Working with your Tarot Birth card can reveal a lot about who you are and where your path might be in life.  Coming back to these guys when you're feeling down, confused, and misaligned will help you remember your purpose & nudge you back on the right track!

What is a Life Path Number?

Your life path number is determined by adding the month + the day + the year of your birth.  For example:

March 29, 1978

Month : March is the third month, so 0 + 3 = 3

Day : 2 + 9 = 11, then continue to add the numbers until there is a single digit. 1 + 1= 2

Year : 1 + 9 + 7 + 8 + 25, continue to add the numbers until there is a single digit. 2 + 5 = 7

Life Path Number : 3 + 2 + 7 = 12, continue to add the numbers until there is a single digit. 1 +2 = 3

This persons Life Path Number is 3!

Each number has an assigned meaning based on numerology.  Each number can give an individual an idea of their life purpose as well as any challenges, obstacles, opportunities, and habits that may appear in the their life.  These numbers are reduced to single digits, though there are resources that list Life Path numbers as including both 11 & 22 as master numbers (this also comes into play with your Tarot Birth Card).  My favorite resource for reading more about your Life Path Number is Astro Style because of how in depth, but clear the outline of each number is.  I also love that the site shows you what alignment with your number looks like and what being out of alignment looks like!

Now that you have your Life Path Number you can translate this into your Tarot Birth Card.

What is a Tarot Birth Card?

Your Tarot Birth Card is three things - firstly it is the card of your Life Path Number, secondly is is the card of the numbers that create your Life Path Number, and finally it is only pulled from the 21 Major Arcana cards of the standard 78 card deck.  Most often the Fool is excluded..though I have see that used as 22 in some cases.  So from the individual in the example above has the Life Path Number of 3.  This means their Tarot Birth Card is the Empress, the third card in the Majors, but also the Hanged Man, the twelfth card of the Majors.  This is because 3 = 1 + 2, so 12.
So, your Tarot Birth Cards can also be a way to help you discover your purpose in life.  They can reveal the combination of archetypes that will be prevalent in your life.  Another thing to mention is that in the persons example above, the first birth card for this individual is 12, and the second card is 3.  Some find this unimportant but if you'd like to sort it as the primary theme and then the secondary theme, this will help.  So if the sum of your birthday reduces down to a single digit first, that number is your primary birth card.  Then the numbers that make up that number is your secondary card.  Hope that makes sense!

Working with Tarot Birth Cards & Life Path Numbers

My life path number is 7, which is the Chariot & the Tower.  The Tower scares the crap out of me and when I realized this was part of my Tarot Birth Card combo....it all sort of made sense.  This also goes a long with my Zodiac signs too, but that is another post!  I first learned about Tarot Birth Cards from the Biddy Tarot Podcast (part 1 & part 2) and found this article about the card pairings on one of my favorite Tarot blogs, Labyrinthos.  I also tend to use my personal Tarot associations as I work with my birth cards.
Working with your Tarot Birth Cards & Life Path Numbers can be personal to you but journaling can be a great way to connect with your numbers:

Start & Keep a Journal
Designate a place to keep all your information, reflections, and realization when it comes to your numbers.  Start off with the basic info you have about your number & your cards and build upon that foundation as time goes buy.  Use this as a place to reflect on how these numbers are showing up in your life.  Journal about how you feel aligned or out of alignment with these numbers.  Keep track of all the times you feel you're on your path & all the times you're off.  You can even journal about how you may feel this is bullshit too!  But chances are if you're journaling about it....you're at least a little bit open to it.

Gather Your Cards
Pull out your Tarot Birth Cards from the Major Arcana and pull out all of the cards from the 4 suits that match the single digit number.  So, I'd pull out the Tower & the Chariot as well as all of the sevens.  Keep these cards, or images of these cards, in your journal in order to have physical reminder of what each card looks like.  It might even be helpful to find the cards in multiple decks as the imagery of one deck may speak to you more than the imagery of another.  My two favorite decks to work with are the After Tarot & The Wild Unknown.  The imagery between the two is vastly different but comparing two decks like this can bring information forward that you may not identify in one deck by itslef.  Begin to work through & journal about the meaning of that number in each of the suits.  You can get started by reading more about connecting with the Tarot Card meanings here & downloading the study guide in the same post.

Implement What you've Learned
The most significant way to become aligned with your Life Path Number & your Tarot Birth Cards is to release what isn't serving you in order to get in line with your highest good.  If anything, these numbers give us a reason to be a better person.  These numbers allow us to strive to be our best selves.  It may be helpful to set intentions that will help align you with your path at the New Moon in order to form new habits.  Working with the moon & moving with the lunar cycle has really helped me discover more about myself!


*****

The whole point of these numbers is to be our best selves.  Here's the thing, there are some people out there who have no problem living their best life without things like Tarot cards, mediation, essential oils, and crystals.  But for me all of those things are physical reminders of the person I'd like to be.  They help me to switch into the mindset I'd like to be in.  And that is why I find things like this important.  We all want to live the best life we can, I just want to share with you reflective ways we can do that!

Lunar Newsletter

Get on the List!

* indicates required

If you'd like to learn more about working with the lunar cycles, consider signing up for the newsletter!  You'll get lunar advice every new & full moon as well as other important 516 info through out the month.  I'd love to have you join the creative community over in the Five Sixteenths | Live Creative group too.  There you'll find creative inspiration, resources, & lunar guidance to express your authentic self!  Can't wait to see you there.

If you'd like to read more about Tarot & my Tarot Journey, find all the posts here.

xoxo, Moe

9.18.2017

Make it Monday // DIY Traveler's Notebook from Scrapbook Paper

This past lunar cycle journaling has become my go to creative & self care outlet.  I love to sit and reflect, I love to decorate, and I love to see my page evolve!  In fact, over on the Printable of the Month Club on my Patreon page I shared a printable insert designed for a standard size traveler's notebook!  This has been the size I've been using recently and I love it.  It is perfectly portable but big enough to really feel like I'm getting some where. 
this post contains affiliate links, please read my full disclosure here.
Today I want to share with you my take on this video tutorial on making your own traveler's notebook.  When I found this video, my mind was blown!  I couldn't believe she was able to make her own notebook!  There's even a tutorial on the popular B6 size now.  Not sure if I'm down for that size yet...but that's an option.  I've even created a cut file for you to use with a beautiful cut out in the front!  Let's jump in.
supplies // scrapbook paper, 3 mil laminating sheets, laminator, Cricut Explore, elastic, scoring tool, bone folder, scissors,  crop-a-dile big bite, planner charms (optional), adhesive pouch (optional), pocket page inserts (optional)
Start by choosing the scrapbook paper that you like.  You can create coordinating inserts by using a full paper collection or mix & match to your hearts content.  Double sided scrapbook paper works great for this project but I chose the Wildflower paper pad from American Crafts that I had in my stash.  This pad had some cut-a-parts which would be great to create a cohesive look.
Upload the SVG images to Cricut Design space.  Each file has a different sizing so make sure you size it properly - size the pink notebook cut file to be 10.5 inches wide, size the blue folder cut file to be 9.5 inches wide, size the yellow rectangle cut file to be 8.25 inches high.  Keep the proportions locked so that when you size one side, the other automatically sizes properly.  This part is also important - set all of the black lines to score.  Select the elements of each file & click attach.  This will make sure the score lines stay with the correct group.  Select Make It in the top right.  Place your scrapbook paper on your mat & let the machine cut it out.
Heat up your laminating machine and place the notebook template just cut by the Cricut Explore into the 3 mil pouch.  Put it through the laminator a few times until it is sealed.  You'll noticed I didn't to my standard 'laminate first then have the Cricut cut' because I like the look of the lamination on this project!

DOWNLOAD THE CUT FILES HERE!


Remember, the printables & files offered on the blog are for personal use only.  Do not pass this cut file or resulting project off as your own.  This project is not for commercial use.  As always, thank you for playing nice!
Trim down the laminated cover.  Be sure to leave a small outline of the laminate around the book.  Don't cut down to the edge of the paper.  Using the Crop-a-dile, repunch the holes in the spine.  The big bite is the best for this because you will be able to reach the center hole for the elastic that goes around the notebook.  Next, gently rescore the scorelines using your scoring tool ensure they are easy to fold.  Fold up the project and use the bone folder to crease the fold.

To thread the elastic into the notebook follow these instructions.  If you read slowly and thread with out distractions...you should be good to go!

Starting from the inside of the notebook, thread the elastic through hole 1 to the front of the notebook.  Thread the elastic from the outside of the notebook to the inside through hole 2.  Thread the elastic from the inside of the notebook through hole 3 to the outside of the notebook.  Thread the elastic from the outside of the notebook through hole 4 into the inside of the notebook.  Thread the elastic from the inside of the notebook through hole 5 to the outside of the notebook.  Thread the elastic from the outside of the notebook to the inside of the notebook through hole 6.  Thread the elastic from the inside of the notebook through hole 7 to the outside of the notebook.  Thread the elastic from the outside of the notebook through hole 8 to the inside of the notebook  And you're done!  You can now tie a knot.  Make sure that the elastics aren't too tight.  This may take a little bit of adjusting, so just fidget with it and be patient!
Now add the center elastic that binds the whole book together.  Cut a length of elastic and thread the two ends through the center hole from the outside of the notebook.  Measure it against the side of the notebook then tie a double knot so that the knot doesn't slip back through the hole.

Assemble the folder using the bone folder to crease each fold.  Glue the flaps down.  I use binder clips to keep the folder together while the glue dries.  I tend to use a corner rounder to make notches in the fold of the folder to better sit on the elastic.  But that is personal preference!

To create a mini dashboard or photo pocket, trim the binding off of a pocket page and fold it over.  Use the bone folder to crease the edges.
The final little embellishment is a little pocket on the inside back cover.  If you hoarded the Target Dollar Spot adhesive pockets, now is the time to bust them out!  Works perfectly!
You can make your own notebooks if you feel so bold - that's why the rectangle cut file was included!  As I mentioned above, if you're a part of the Patreon Printable of the Month Club you get access to an awesome planner insert!  I'm using mine for memory keeping.  If you'd like to join the Printable of the Month Club, it is only $3/month and as long as you're a patron you'll get access to an ever growing library of printables!!  Join here!
So, you can bind your own notebooks with this tutorial if you'd like or just staple them.  I don't own a long arm stapler, but I need one!  This traveler's notebook will fit any standard size notebook inserts so you don't have to bind your own.  The best part of this guy, though, is the wild & free cut out that shows the pattern on your first notebook!  I love it!  Here's how the book looks all put together:

Phew.....that was a long one!! But I hope it was helpful! I am going to make a thousand of these!  This is a great way to work through your paper pad stash too.

As always, I can't wait to see what you make!  Be sure to join the Cricut Ready Stickers group on Facebook to get your Cricut on and join the Five Sixteenths Blog | Live Creative group on Facebook to get your creative inspiration on!

xoxo, Moe