Showing posts with label Home decor. Show all posts

9.11.2018

How to Create a Personal Altar in Shared Spaces

Sometimes our spiritual practices might weird people out.  Why do you have all those rocks? people ask.  What's all this stuff on this table? they'll say.  Often as their picking items up and turning them over in their hands.  Keeping a discreet altar - whether in your home, office, or dorm room - can have an array of benefits with out having to explain things to curious folks.  Though, I am always down for it personally...it can be kind of distracting.
this post contains affiliate links, please read my fulls disclosure here.

Creating an altar in your personal space is important.  Whether it is for ritualistic practices or a place for peace and meditation, we often don't want to have our personal spaces invaded or feel odd for having them in the first place.  Keeping a discreet altar space can be perfect for those still in the broom closet or those who share a common space - like a shared apartment or dorm room, or for a more intimate office setting.  Personally, I have a big ol altar at home in my spare room that I don't care if anyone sees but when it comes to keeping somethings on my office desk - for personal power, calming vibes, and just all around comfort - I choose to do something discreetly that doesn't even seem like an altar at all!

Items to Include on your Altar

While everyone has different things on their altars here are a few key pieces to keep in mind:

The Elements 

You can represent the elements - fire, air, earth, water - in various ways.  Add plants for earth, an essential oil diffuser for air & water, etc.  You can also charge these things with your intentions as you set up your work space.  The great thing about a diffuser is that you can choose certain oils with certain correspondences but you can also charge the water with your intentions as you fill your diffuser for the day.

Deity Correspondences 

Different knick knacks on your desk can have different associations to certain deities if that is a part of your practice.  You don't need to have an all out dedicated statue that may seem out of place (we're attempting to be discreet here) but just a little tchotchke with your personal deities will add just a touch of reverence to your space.

Current/Relevant Spellwork

This may be something that might only apply if you're currently doing any spellwork around your place of business - maybe keeping a money spell present, etc.  Not something totally necessary but you may find a place for it.

Personal Power Objects

While a little woo woo for my office, I used to keep the current crystals I was working with on my desk.  These were visual reminders for me throughout the day for certain energies and emotions I was attempting to usher into my life.  Same with the essential oils I'd use.  You can also choose other tchotchke like items that have a certain personal power significance to you but that aren't necessarily woo woo.

Creating Your Altar, Discreetly

Like I mentioned, at home I go all out with what I've got on my altar - crystals, boxes, oils, incense, animal totems, sabbat decorations, I mean it's endless (and often a mess!).  But in smaller or more public spaces, we can be more choosy or specific.

 Work Space Altar

Shop this Look

Depending on where you work, your personal space may have very different types of decor.  The example above has a sleek look and features a lot of light.  This is a great little space to feel inspired!  I imagine the person in this office getting so much stuff done!

My personal desk space at work isn't as elegant as this so I choose to express my quirky fun side with some plant Shopkins (yes, I'm a 30 year old woman who thinks shopkins are the cutest), my diffuser, and other objects that remind me to lighten up.  My job can be kind of intense with a lot of frantic energy so fun little objects that lighten the mood and cheerful essential oils keep me in the good vibes category!

Dorm Room Altar

Shop this Look

I think most of the time in a dorm room or shared apartment we're among like minded people so it might not be too weird to have some of these things around your space. But we still might not be ready for a ton of questions.  Creating a small altar space on your desk, night stand, or little shelf in your room can make our shared spaces seem a little more sacred.

When I was in college I loved to have small collections of inspiring nick knacks.  These little collections of things really made me fill at home and gave me a space to feel inspired.

Creating these personal altars bring a feeling of safety to our spaces.  We feel at home and we feel like we can still work on our personal goals.  Sometimes we are asked to be different people in different spaces - at work I'm not going to blabber on about chakras (unless someone asks) - so bringing elements of ourselves into these spaces can give us a sense of purpose.

If you'd like to learn more about crystals, essential oils, chakras, etc head on over to join the Live & Create Facebook group where we talk about mindful & creative living through productivity, planning, and personal growth!

Do you personalize your spaces?  Do you have a personal altar at work?

xoxo, Moe

6.12.2017

Make it Monday // Easy DIY Meditation Bolster Sewing Project

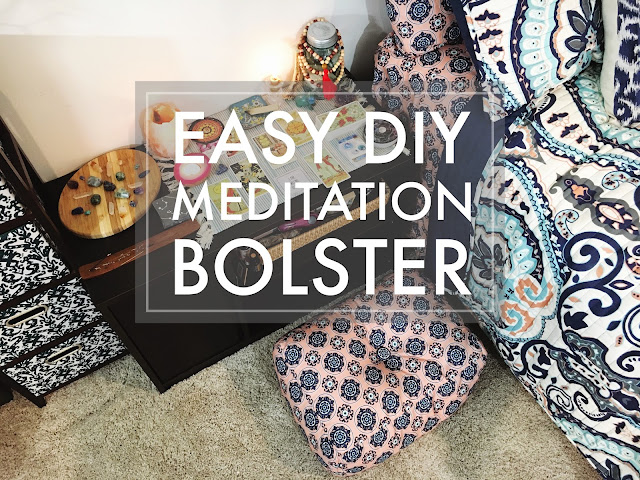
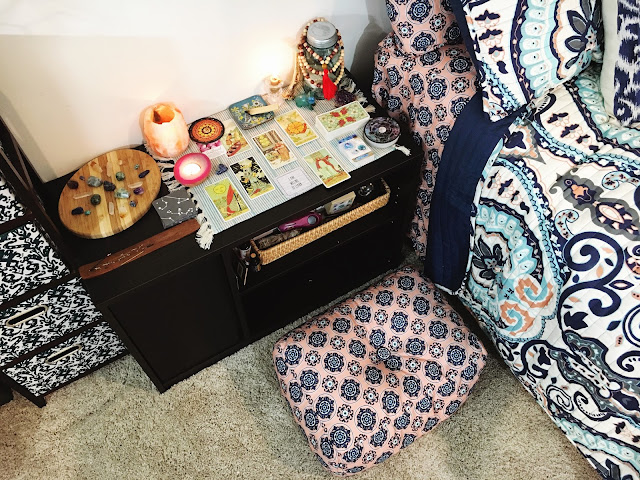
I'm in the middle of redoing the spare room downstairs with some bohemian inspired bedding I got for a super great deal from our local Meijer.  One of the key parts of the spare room downstairs is my sacred space!  This is where I go to meditate, journal, and all around connect with myself.  I love that this space of mine is separate from my actual bedroom because that means it is a place I can go to.  It is a place I can show up to when I need to. 
Easy DIY Meditation Bolsterthis post contains affiliate links, please read my full disclosure here.

Today I want to share with you how to make a comfortable meditation bolster.  This project was easy...yet annoying.  You'll totally love the results...but you may not ever want to make a pillow again.  Before I made this guy, I was using a small pillow.  Once I realized that pillow wasn't high enough and just wasn't supportive enough I went on to use one of the chairs from my craft table.  In the end, neither of these options had the right height or support for my booty.  So I thought to myself 'hey, you can make a bolster!'  and that's what I did.
How to Sew an Easy pillow
Shop Supplies on Amazon!

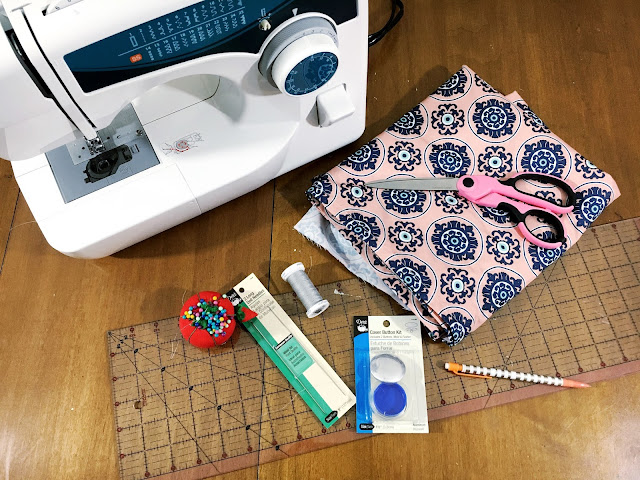
supplies // fabric (I used an extra sheet set to match the new bedding), sewing machine, matching thread, ruler/measuring tape, pins, bean bag chair beans, 1.5 inch button cover kit, doll needle

I started with 6 fabric peices - 2 14 x 20 inch pieces, 2 14 x 9 inch pieces, and 2 20 x 9 inch pieces.  This pillow will be stored in the bottom shelf of my meditation altar so I took these measurements to ensure it fits.  Feel free to make your pillow a different size, but this guy is the perfect height to elevate your bum enough so your legs don't fall asleep during mediation!

Pin the right sides of the 4 squat pieces together and sew up the short sides to create a long strip of fabric.  The seam allowance here is set to be .5 inches.  In hindsight, I would have used just a long, single piece of fabric as the sides of the bolster rather than sewing these 4 pieces together.  I also suggest using a zig zag stitch for strength.  I'm using some cheapo fabric so the zig zag stitch gives the seams a little more substance.  Leave an opening to add the beans
Turn Corner on Sewing a Pillow
Pin the top and bottom pieces (the 20 x 15 pieces) to the top and bottom of the tube you've created - make sure you're pinning everything right sides together.  This is the tricky part & where the single long strip might have been better.  As you're sewing around and reach the corners be sure to pull the extra fabric out so that you're not sewing over the corners too much.

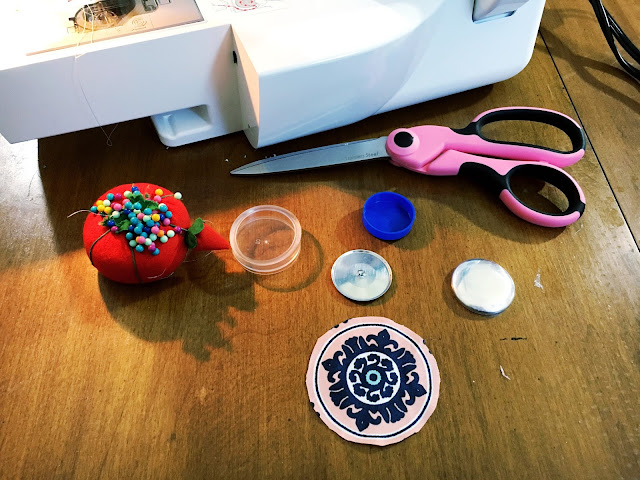
Turn the pillow inside out so the right side is now facing outward & fill it with beans.  This is going to be the messy & most annoying part.  The end result is so worth it though.  I used a paper funnel and measuring cup to funnel the beans into the pillow.  Once you get the pillow good and full, test it out.  If it feels overstuffed just shake out a nice chunk of the beans.  Hand or machine stitch the little opening closed.How to Make a Covered ButtonTo finish the bolster, add a coordinating covered button.  You can pick up these covered button kits at your local sewing shop so this isn't something special you'll have to seek out.  Simply follow the directions on the back of the package.  Cut a circle to the required shape, place it over the form, push the button into the form.  Fold the extra fabric over, place the button backing on top, and push it down to secure.  Bam! Button.Add a Button to a BolsterDIY Mediation Pillow
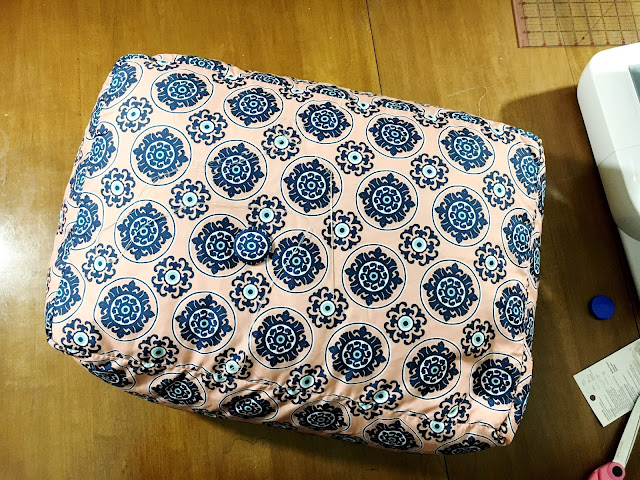
Using the long doll needle and doubled over thread - you can even use two strands, doubled, for extra strength - attach the buttons to both sides.  Poke the needle through the center of once side to the center of the other side of the bolster.  This may take a few tries. Once you reach the other side, slip a button through then pass the needle back through to the first side.  Add the second button, pull taught, and secure with a few knots.

And you're done!  See, easy peasy. Though slightly annoying.

Using this bolster now relieves the pain on my hips, allows the blood to circulate, and gives me the right height to see my altar.  It also fits perfectly into the space under my altar table.  The altar table itself is a TV stand from either Walmart or Meijer, I can't remember. (Oh! Walmart is also a part of ebates!  Be sure to sign up here if you haven't started to use ebates yet!).  It has shelving space plus a little door with some shelve too - perfect for hiding away journals, etc.
Sacred Mediation SpaceSacred Meditation Space
I am in love with this little space.  Be sure to check back soon to see the whole room put together + some other decor DIY's!  If you'd like to check out some of the other rooms in my house I've got a living room tour + a craft room tour over on my YouTube channel.  You can check out the bedroom tour here on the blog.  Need more DIY decor inspiration? Click here!

Do you have a sacred space?  Where do you go to connect with yourself?

9.13.2016

Trend Tuesday // Dollar Tree Home Essentials

Saving money is an important thing to me.  I like to spend money but I like to spend it wisely!  The Dollar Tree has become essential store for me & my budget.  Finding affordable solutions for various areas of the home is sometimes hard to do.  I know the Dollar Tree hasn't always been my first choice for anything but recently I've found affordable and attractive decor & storage solutions as well as quality everyday essentials.  Not to mention you find something new nearly every time you walk in!  Here are my home essentials from the Dollar Tree.
(this post contains affiliate links, please read my full disclosure here.)

Kitchen Utensils
I break a lot of things in the kitchen.  I can't tell you how many times I've broken a glass just by looking at it.  So I buy a lot of my kitchen essentials from the Dollar Tree.  The main thing I purchase from the Dollar Tree are wooden spoons and various other serving style utensils.  Wooden spoons aren't supposed to go in the dishwasher (this is why I try not to have wooden handled knives as well).  I was everything in the dishwasher.  If it isn't dishwasher safe, I don't buy it.  So I purchase a lot of my serving utensils from the Dollar Tree because I'm only out a few bucks when they eventually crap out on me, I break the, or they just don't make it through the dishwasher one last time.  The Dollar Tree has a great array of kitchen utensils to choose from (some even name brand like Betty Crocker!)

In this post about creating various cleaning caddies with Dollar Tree products, I used some super cute plastic bins.  I also mention how those caddies help me with the 3 Waves Cleaning Method here.I love the Dollar Tree for the various storage solutions they offer.  If you want the best selection of storage containers in store, I've found the best time to go is at the beginning of the year.   If you're looking for a specific color I'd suggest looking during a holiday that color would be more common.  For example - pastel durring Spring/Easter, brown during Fall/Thanksgiving, purple during Halloween, red during Christmas, etc. They do offer an array of colors in general but shopping for storage solutions seasonally will give you the best chance to match any existing colors you my already have going on in the space you need storage for.

Fall is nearly here and Halloween will be around the corner.  Dollar Tree is my favorite place to go for some essential crafting supplies.  While sometimes the supplies may not be as full - like a bundle of flowers, for example - I love picking up smaller filler pieces and wreath bases.  These more affordable starting points and accents are great to add more to a project you may have started from the craft store.  I love to purchase things like wreaths to use as a base to make a fuller wreathe because I'm paying $1 for a base rather than upwards of $3-$5 to start my project.  Their Fall selection of decor is warm & inviting while the Halloween offerings are creatively frightening.  If you haven't checked out the Dollar Tree blog for creative inspiration you should check that out as well.  They've got quite a few fund projects to try using their seasonal products!

The bulk buying option also means you'll always have what you need on hand.  While that may not be the best for kitchen utensils, it is great for gifts & decor as you get more bang for your buck!

Do you frequent the Dollar Tree?  What are your money saving must haves?

xoxo, Moe

2.24.2016

Wednesday Decor // 5 Monthly Habits I'd Like to Start

I've fallen off the cleaning routine train in the past week and this week I'm determined to get back on it!  Because I've had cleaning on the brain I've been thinking about things that I really need to get going on every month.  This is all house/personal related stuff in regards to inside the home.  Here is a true fact - I am no good with outside home maintenance.  I'm just not.  I don't know where to begin, I don't know what to do, I don't want to do it.  So mainly the grass is just mowed and maybe the flower beds are weeded (but honestly probably not).  But all of that is for another post....hopefully.
There are a few things I know I need to do more than the blue moon that I do them.  The first step to that is making a list and acknowledging that these things need to be done, right?  Here they are:

Clean out the fridge
I hate the fridge being full of old stuff.  I am also a horrible leftover eater - meaning sometimes I don't eat all the leftovers.  I just can not eat the same thing 4 days in a row.  I can't.  Plus, being by myself means if I cook a full meal, there are leftovers.  I've started trying to cook things that I will eat all week....so far that has sort of worked out.  Anyway,  I'd like to clean out the fridge, wipe it down, throw things away, once a month.

Clean out my purse
As I'm sitting here, I know that my purse is a wreck.  I did have this purse organizer I used for a little while in my old purse so I'm thinking I may need to bust that guy out again.  Mostly I use little bags (like ipsy bags) to organize all the mess in my purse.  Right now one of those bags has fallen completely open and there are receipts in the bottom, maybe I'll find some treasure in the bottom.  Who knows.

Clean the washer
Our front loading washer tends to hold water in all it's little crevasses so I need to clean it out so it doesn't stink up the clothes.  I need to do a little bit of research on this too.  I did clean our old top loading washer when we moved in and that was pretty interesting.......

Monthly declutter
I'd really like to go through the house monthly and get rid of somethings.  I'm thinking of starting a bin in the utility room or something where I can just throw things I want to get rid of.  Currently I have a few bags of clothes and boxes of things that I need to take to the thrift store (they should really have an exchange thing going on - I'd be all over that....but then I'd have more crap!).  I've been waiting for it not to be so cold to really get rid of it.  I do want to start thinking about things to get rid of each month.

Cleaning the forgotten places
Ugh......have you ever looked up an was like WTF is that? when you see your fan?  Our kitchen fan is the grossest because of all the grease and what not that settles up there.  Our stairs also gather a lot of hair from the dog.  I should probably vacuum those when I clean the downstairs but I often forget because you don't see them until you turn the corner.  So I'll put everything away, turn the corner and then bam! pet hair stairs.  I also need to do a quick zip around the washer and free standing bureau in our laundry room.  That gathers dust bunnies like no ones business!

These are 5 things I need to mark off in my planner - I'm thinking in my home/routine section - so I can track their completion.  Here's hoping I get back on my cleaning routine.  My life would be so much easier!

What are some monthly tasks you complete?  How do you fit it all in?????? 

xoxo, Moe

1.20.2016

Wednesday Decor // Incorporating the 3 Waves Cleaning Method

Oh goodness, another cleaning related post.  Whoooo Hoooo!  I've recently found something referred to as the Three Waves Cleaning method in this blog post on Clean My Space.  That blog post really spoke to me, mainly because of the 'get in the right head space' rule listed.  That is the only way I'm able to clean - to have a plan and be in the right mindset.  The more I make myself do it, the more likely I am to be able to convince myself to do it!

Anyway, recently I've incorporated this 3 Waves method to get myself prepped for cleaning.  I will lay on the couch all evening if I let myself, so this really prepares me mentally for getting stuff done. It's like a warm up routine for me that guides me into the rest of the routine.  Plus, if I'm in a hurry I can stop after each step and feel that I have gotten something accomplished.

Here is how I define the Three Waves for my cleaning routine - I clean a room/section of my home a night for 30 minutes (read about how I created my perfect cleaning list here) :

Wave One - Garbage & Gather
In this wave I grab a new garbage bag for random garbage/trash, a new garbage bag for the trash can in that area, and a basket I got from the Dollar Tree for random items that need to be moved to other rooms where they belong.  This wave means I just start throwing away things that have cluttered up over the week in the certain room/area I'm working in.  I'll be going through this using our down stairs area of the house which I've lumped into one 'room' to clean on Monday nights  (see our first floor layout here & here).  I start in the living room area and work into the office and then into the spare room by picking up any trash - receipts, junk mail, a left over fast food cup, etc - as I go a long.  This is what the first trash bag is for.  I also put a basket in a central area to catch things that don't belong so I can move them into their homes later.  This first bag will also be used to catch the dirt when I empty the vacuum.  I pull the trash bag from the trash can in the office and set it by the door and place the second trash bag in it so it's fresh.

Since this first wave is little, mini tidy session, if I'm in a hurry I can just complete this step and feel accomplished because things are tidy.  This type of situation changes for each room too - in the bathroom or kitchen, for example, this first wave would also include changing the towels.

Wave Two - Swish & Swipe
I get my cleaning tools ready. Pro tip: keep the tools you need in each room/area - I have two vacuums (because my boyfriend came with one lol).  One stays downstairs and one stays upstairs.  I keep a Swiffer Duster in the closet with the vacuum and then some Clorox wipes under the sink in the downstairs bathroom.  This means I have all the tools I need in one place.  I don't have to keep running around, back and forth, to find the tools I need to get the job done.  In each bathroom is Windex and paper towels so I don't have to run upstairs to clean the downstairs bathroom.  It is all at my finger tips.

This second wave is dusting and wiping.  I get my Swiffer Duster and start with the tops of our bookshelves and work my way down, and around, the downstairs.  I also take a Clorox wipe to wipe down door handles, the coffee table, the top of my craft table, remotes, etc.  This is a quick swish and swipe session that is made easier because everything is moved off of the surfaces it shouldn't be on.  The Swiffer duster makes everything so much easier!  I even have one of the long ones to dust our fans (which I have to admit most of the time doesn't get done!)

I can also finish after this step because the room looks even more put together than after the first step.

Wave Three - Suck it Up & Take it Out
This is the final phase - vacuuming & taking the trash out.  Vacuuming is one of my favorite chores and I really have zero idea why.  I do two passes with the vacuum in our living room (dog =  shedding), one pass in the guest room, and the use my Swiffer Sweeper on the laminate wood flooring and tile in our entry way and office area.  That thing can suck up some pet hair, let me tell you.

I empty the vacuum bin into one of the trash bags and take each trash bag out to the garbage bin.  I also do a quick put away of any of the items that end up in the basket used to corral odd items that don't belong.

This is the final step!  Our downstairs area often takes either the whole 30 minute time or more because it is such a big area.  I star with this one on Monday evenings because it is the most lived in area and gets the most cluttered/dirty - especially after the weekend.  It is nice to know that I can move through the rest of the week with a clean space to relax and come home to after a hard days work.

These three waves really helped me to break down my chore into something more manageable.  It made the whole thing seem easily accomplished rather than staring at a room wondering where the heck to start.  It helps me come at the room with a plan.  Each wave slowly builds up and I know it's really not that much just to tidy up a bit with the first wave, and that generally warms me up in to the second wave, and then because I'm 2/3 of the way done might as well finish out the third wave.

I hope this helped you out a little in developing a small cleaning routine or at least figuring out how to tackle a room.  If you want to read about how I tackle a really, really messy room, read this post.  You can also find all my cleaning related posts here.

How do you clean?  Do you break it into small steps?  Any other tips?

xoxo, Moe

1.21.2015

Wednesday Decor // Upstairs Remodel Update

About 3-4 ish months ago we tore up the carpet in our upstairs bedroom and the old living room of the house in hopes of turning our home into a 3 bedroom house.  First off...how amazing will it be to have 3 bedrooms?  We don't need three bedrooms, but boy there will be so much room for activities!  
The upstairs sans carpet before all the walls:
I'm standing with the dining room behind me looking down our long empty space.  The bifold doors on the right are the laundry doors (it's just a closet type deal) past that is our old bedroom.

While Zach was off at the end of last year, he had our contractors come in and help him tear out a wall, replace some vents, and map off where the new door to our old bedroom would be.  We had to move our bedroom door in order to fit a hallway in front of it.  When you come up our stairs to the second floor the kitchen is in front of you  Right now, we're leaving that alone but when you turn to the left there is our dinning area.  We are expanding that to be bigger and putting a wall up to frame the closet of the 3rd bedroom.  Along the wall where the bathroom and laundry room is will be a wide hallway.
In the image above, to the left is the beginning of the laundry table deal.  It is across from the laundry room and we really needed more storage for cleaning supplies etc.  We'll move that into cabinets above the counter (which could be used as a mini command station!) and put a stacking washer and dryer in the laundry room to free up space for a linen closet type deal.  The right image is the walling off of the closet to our new room and our room.  The laundry counter thing sticks off the outside of the side wall of the closet.  Where the ladder is in the images above is the inside of the closet and on the other side of the door is our room.  These two images were taken from the same angle and the ladder only moved a couple of feet towards the outer wall.
Standing a few feet back from where I was standing in the first image you can see the dry wall is covering the wall that is the back of our closet.  It is also the back wall (or front wall?) to our dinning room.  The hallway me made was huge - to make sure we can fit the furniture around the sharp corners and to give room for someone to walk by with the laundry doors open.  Right behind that wall is our closet and the laundry counter thing is behind it as well.  If you go down the hall and turn left at the end you'll enter our bedroom.  If you go down the hall and turn right you'll end up in our old bedroom.
Behind that leaning drywall is the laundry counter thing.  Our new bedroom is on the left and then our old bedroom is on the right.  The third bedroom will be slightly bigger and we'll move in here once it's all said and done.  There will be a small walk in closet as well.  All in all we're finally getting some work done on the place.  Man do I hate the work part!  Can't wait to share it with you!

xoxo, Moe

10.01.2014

Wednesday Decor // Renovation Staring Again

Around this time two years ago we started the renovation on our bottom floor. We took a two bay garage and turned it into a pretty awesome living room & office combo, separated by a gorgeous hand built bookshelf. Well, we're at it again! We've started to tear apart the top floor were the old living room used to be.
We've torn up the carpet, padding, and tack strips and Zach has begun trying to move some of the electrical around. I think that we've learned a lot from our first go round with the downstairs but the upstairs might be a bit of a challenge. We want to move the door to our current bedroom over to give some more room to the othe room we're adding on. We need to do that and erect about 4 or 5 walls to extend the dining room, add a hallway, and add a closet to the new bedroom. It's going to be a challenge working with existing skylights and a slanted ceiling!

At the end of it all we hope to have a less awkward set up and have a three bedroom house. So much room for activities. I have to say that having a huge house is so very helpful for all the things that Zach & I are into. We do too many things and having a tiny little house would not cut it. When he was originally looking at houses, he found a 5 bedroom house and boy did I imagine all the space we'd have to do all the things we like to do. But three bedrooms is just enough I believe, maybe Emrys will have his own room and his own bed. What do you think? Wish us luck!

xoxo, Moe

3.19.2014

Wednesday Decor // 5 Things I Do, That You Should Do Too

About a week or so ago I posted the picture below with the following caption: 'so I've been doing thist thing where I CLEAN SHIT UP AFTER MYSELF.  My weekend routine of cleaning the house involved very little this morning.  Now I don't know what to do with the house clean so early'  I've always been a messy person.  Literally always.  You should have seen my room through my entire life up until now (well sometimes on the off chance, it might still look like a tornado went through - but I try to keep the tornado on the baby side.)  I would always be so jealous of others who could just keep their things in place.  I was never the organized person!
I've noticed that I've become a bit more organized with having an entire house to store my things in.  If you're messy like me - maybe you're in college or just have one room to call your own - it's much easier to stay organized when you have a place for everything.  When I'd just have one place like my dorm room or bedroom to store things, I was trying to do too much with my small space.  It was a place to sleep, a place to work, a place to create, a place to lounge, etc & not to mention the fact that the closets were always sooooo small!  Zach & I are both messy by nature - which is horrible.  But I've noticed with a house & having multiple rooms our things stay in their respective places.  It's amazing.  So I'm here to tell you that if you're messy buy a house - no, if you're messy it's probably because you're using one space in too many ways.  Now, I'm not saying that my house can be on the inside of Southern Living (side note: did you know there's a magazine called Midwest Living?  What? No, Southern Living all the way) because I do like the house to look lived in.  We live here, we love here, we're building a life here, there's going to be a bit of mess.

So what is the point of all this blabbing?  I want to share with you 5 things I do that make cleaning up my shit a lot easier & helps when you don't want to clean up your shit:

Give Everything a Place - Now this might take a while but I've been going through drawers & cabinets in order to give everything a place.  This is helping me clean out stuff we don't use & don't need and putting things where they go.  I mentioned this in my affordable organization video here that if you can see that everything has a place then there's no room for anything else.  The best example of this is our coffee table drawers - you can see where the remotes go, where the matches for the candles go, etc.  Nothing that doesn't need to be in there isn't going to be in there.  Same for our bathroom cabinets - I've found places to put extras, kept the cleaning supplies at the front so they are accessible, organized little bins with pins, face masks, etc.  There is a place for everything so you know what you have, where it is, & where to put it back.  If you have a generic drawer then shit goes in & never comes out.  This is the biggest thing you'll need to dedicate time to doing but it's very worth it.

Put Extra Bags at the Bottom of your Trash Can - Does your bathroom trash can over flow because you don't wan to take it out?  Yeah, I know, it never does.  But if you have a friend that this happens to tell them to put extra bags in the bottom of the trash can so you can change bags in one swoop.  I love this because I don't have to be running all around the house finding trash bags - I can stay in one room, lift the bag tie it up, pull up another bag, loop it over the top, & leave.  This is something I recommend for smaller trash cans like in the bathroom or under a desk.  If you have a bigger, kitchen trash can you can try this but I don't really want to reach down in a gross trash can to pick up another trash bag (that might be gross, maybe).  Our kitchen bags are right there under the sink.

Pick up One Thing When you Leave the Room  - This is a lot easier than it sounds.  I always thought that picking up one thing means I'll start cleaning at 6pm and then have to clean everything when I just want to be watching YouTube videos.  But it's actually not that serious.  I try to pick up something that will be going to the room I'm going to.  Like take a glass to the kitchen when I'm going to get a snack or putting the nail polish back in the bathroom when I go to pee, etc.  Another way to think of it is bringing things to it's pair.  Like right now I see my pencil case and it needs to go meet my planner in my purse.  So when I get up from here that might be the thing I grab.  I try to just do one or two things and be done.  That way I'm not feeling like I have to clean.  Starting out with a clean place though can help with this little tip.  So go through & clean and do the first tip up there - this makes it less daunting.

Load the Dishwasher - I hate loading the dishwasher.  It's not that hard & I'm not even doing the dish washing!  But man it's my least favorite chore.  I'd clean a toilet over load the dishwasher and I don't really like cleaning toilets.  (My favorite chore is vacuuming, actually.)  But a clean sink makes me happy so sacrificing the few minutes it takes to load & unload the dishwasher instantly makes the kitchen look cleaner.  It also rounds up all the dishes from night stands, coffee tables, etc.

Keep Yourself (& others) Accountable - It's easy for me living with one other person to keep accountable for cleanliness.  It's not like I'm forcing a child to please put his plate in the sink (literally that was me when I was little, sorry mom).  Raising expectations between you and your family members helps a lot.  I've always been good with room mate cleaning chart sorts of deals because if it's important to one person that the things are done then it's important to me because we share the same space.  Continually put things away as an example & remind (not in a nagging way, because you're not trying to be annoying) others to do the same.  Asking is the first step.

Those are my tips on keeping things clean & organized especially if you're a messy person like me!  My number one thing is just putting things away!  I still have a lot to go through in the house to get organized but we're on the way.  You ever feel like you've had something in the back of your mind you've wanted to do but just haven't been ready for it?  That's how I feel about this organizing/cleaning thing I'm on - I've always wanted it but never really succeeded at it!

How do you keep your home organized & put away?  Let me know your tips!

xoxo, Moe

Connect on Twitter // Follow on Pinterest

2.19.2014

Wednesday Decor // Home Organization Plan for 2014

What is up 2014?  I'm taking total control of you lately!  I know it's only the 2nd month of the year - which means I'm sure to burn out on my new year momentum soon.  So far I think I've been owning 2014 with my Three Great Things project as well as setting my Four Simple Goals each month (and sort of sticking to them!).  But I want to focus on a greater theme this year which is Organization.  Since focus is my word for this year I want to take time to actually make a plan of attack instead of just say 'I want to do this _________'.  Planning will help me focus on what needs to be done in order to complete the task!  There are several home related organization things I want to tackle this year & here they are:
Clean out the closets
This goes for the bedroom & the guest closets.  They have both become catch alls for everything under the sun.  Clothes need to get donated & things just need to get moved around.  I need something to organize my shoes (oh god, my shoes!) & just plain need to get rid of clothes.  This was part of the February goals - but I think it's getting pushed back unless it stops snowing.  I also want to add mirrored doors to the bedroom closet to make it look bigger!

Kitchen Organization - Under the Sink
Um, under the sink is a plastic bag graveyard & also some dish soap, etc.  Pretty much it's not a fun place to look & I know I'm not using it very well.  I am pretty sure I don't know half of whats under there.  Yikes!  What needs to live under there are sponges & cleaning supplies, and maybe some plastic bags.  We have a lot of shelves under there but nothing is being utilized properly.

Kitchen Organization - Cabinets
One thing I looooove about this house is the amount of cabinet space we have.  It's unreal.  I also love that because of all these cabinets we have so much counter space!  There are quite a few cabinets that just have random junk in them.  I need to make better use of the space we have.  We also have a little cart that is becoming a catch all - I don't know how many times a week I clean junk off of the top of it!  I also want to designate some of this cabinet space for Zach to organize some of his paperwork & our paperwork for the house.  

The Garage
Oh, god the garage.  So this was supposed to be a January goal but it was way too cold to pull out all the junk & organize it.  This is going to be something for the spring.  Oh god, we need to get the garage under control.  Seriously, I don't even like to look in there!  We need to create space for both of us to work - it's already designated, just covered in random things.

Under the Bathroom Sink
Both the upstairs bathroom & the guest bathroom sink storage need to be organized like woah.  Again, I just shove any bathroom related items in the cabinets & shut the door.  Out of sight out of mind - until I need more shampoo.  I've seen at Dollar Store & Big Lots little stackable bins - the remind me of kindergarten classrooms but they look so helpful!

I've gotten a lot organized so far though.  The living room has a pretty good organization thing going on:  baskets under the shelves for board games, candles, game systems, and wires, the coffee table drawers just got organized, there's a basket under the coffee table for a blanket, heating pad, & laptop storage, and a coat rack & storage box by the side door.  Our bedroom is also pretty much organized, though there's always room for improvement in there & I always organize my make up at the end of the week.  The office area is pretty organized, too.

My plan is to incorporate these into my Four Simple Goals for each month & tackle one a weekend since a lot of it is going to be purchasing organization stuff for our house.  I'm also keeping this list pretty low (& full of the big things that need to get done) because completing a lot of things is not something I'm great at.  So with a smaller list I'm pretty sure I'll get through all of it!

What is one of your greater goals this year?  Have you been tackling it like you own 2014?

xoxo, Moe

Connect on Twitter // Follow on Pinterest

2.05.2014

Wednesday Decor // Planning for Planting

Is it too early to be talking about planting?  Perhaps, since there's about a foot of snow on the ground when I'm writing this.  (I'm writing this post in advance but I'm 90% sure there will snow from here until September.  What the actual hell?)  I can't help it.  I'm dreaming of warmer weather while I snuggle under the heated blanket.

Last year I tried very hard to plant flowers & herbs and keep them up.  But after I was done I hated what I'd done outside & somehow the herbs all died.  Well it's a new year & I get a new try as soon as the weather warms up.  I've been pinning a lot of inspiration lately because I really want to give it a hard try - I love the look of greenery & I want to have it both inside and out.  We've got two big windows at the front of our house & I sit in front of one at my desk so putting some greenery in there would really make the most of these windows!  Here's some of my inspiration:
This tutorial form All Things Heart & Home really has me inspired to spruce up plain, terra cotta pots instead of spending zillions on fancy pots.  I think this is going to be my go to pot style of choice I think.
I like that tutorial above because I really want to make this Herb Tower (found on Martha Stewart) for our deck of the kitchen.  I think it would be great to step outside, grab some herbs, & keep on cooking!
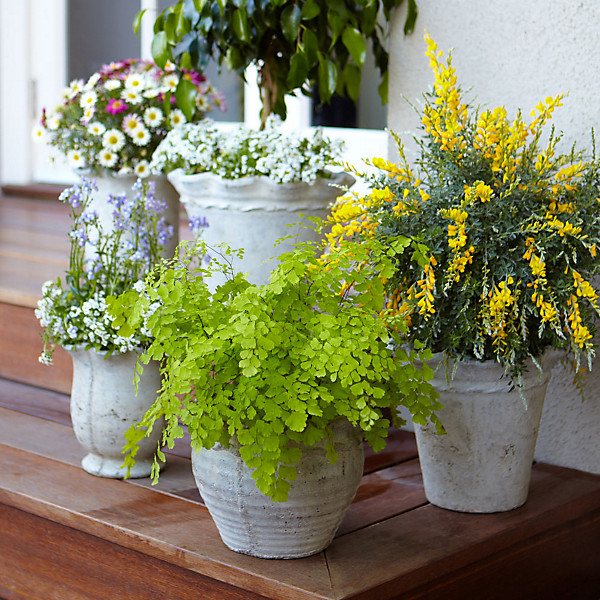
And I love the look of these aged pots in this post!  Good thing I found a way to spruce up plain ones right?  I'm hoping I can find affordable ones to age so I can have an arrangement like this around an entry way.  I'm thinking about doing something near our side door with pedestals so there can be some varying heights with the varying plants. 
This is what I'd like the front of our garden to look like.  Currently we have a big space for planting & it has four large hostas in it.  But at the front is like a little sub-planting area & I want to add a bunch of plants that will over spill from the box to give fullness.  I need a gardener.
I also just want plants everywhere in the house.  I'm much better at taking care of those, even though I still suck at it!  Sorry plants!  I love the random assortment of things going on here & am thinking about adding all the plants I can find to the windowsill above my desk!

What are you planning for the warmer weather?

xoxo, Moe

Connect on Twitter // Follow on Pinterest // Peep me at Hello Cotton

1.07.2014

January Wishlist

Hello 2014!  What a way to kick off the recovery from Christmas spending than with a Wish List post.  I know, I'm full of sarcasm lately - #sorrynotsorry.  Wish list posts are fun to compile but seriously we just celebrated Christmas!  I have to say that there's not too much I'm lusting after this January except for warm weather & all the new drugstore make up.
January Wish List


Things I want to do : Straighten up & organize my vanity // Clean up the Guest Bathroom // Clean up the Guest Bedroom

Of course a lot of drugstore make up brands are coming out with a zillion new things, so it's time to raise that credit limit & pick it all up. (just kidding! sort of)  What I'm looking forward to the most are all the new things from Wet n Wild.  A great drugstore brand in general.  They are coming out with chubby lip pencil balm stains, new lip glosses, a mattifying powder, a BB cream, and a few more things.  I can't wait to pick up some neat stuff.  Also, CoverGirl has a new Bombshell mascara that has a dual ended applicator.  One end is like the Lash Blast mascaras & the other end is a standard brush type wand.  If you read this post about my favorite volumizing mascaras you know I use Lash Blast first then top it with other volumizing mascaras that have more of a traditional wand.  So I'm excited to see how this one works.

Not new at the drugstore is the L'Oreal Youth Code line.  I already have the Serum & got the Day/Night Cream for Christmas.  So I thought I'd round it out with the cleanser.  You may remember mentioning the oil cleansing method earlier on this blog - but I got bored and wanted to try something new.  Whenever my skin in thirsty, like right now in the winter, I pull back out my coconut oil & hydrate my skin.  I've realized now that you can have oily & dry skin at the same time.  How weird!

Part of my Four Little Goals for this month are to get the guest bedroom & bathroom together.  I want it to look put together for our friend we have coming soon but also want to put a little table in there for sewing.  Time get get crafty again!  My bed is in the room (so it's super comfy, lol) so all of my floral sheets are in there.  I can't wait to really have that as a bright & happy room.  We also need to hang the bathroom mirror.  This is included in my wish list because I totally can't wait to get back to working on the house!

Something just thrown in here is reorganizing my vanity.  Since my collection keeps growing I keep out growing what I already have.  I need to figure out a way to store it all!

What are you wishing for this Januray?  Anything you want to accomplish?

xoxo, Moe

Connect on Twitter // Follow on Pinterest

11.20.2013

Wednesday Decor // Virtual Living Room Tour

I'm retro posting this post because I realized I never got it up for Homevember! What was my problem?  Well here it is now & as a video none the less!  Stick around for a little bit of a blog make over here soon adding my YouTube channel & a little refocusing of the online shops.  Anyway, here's the video:

Read about the before & after here.  Hope you enjoy!

xoxo, Moe


Connect on Twitter // Follow on Pinterest // Peep me at Hello Cotton

11.13.2013

Wednesday Decor // Our Total Basement Redo

You probably know if you've been reading this blog for a while that we undertook a total basement redo when we moved into the house.  I've shared it here before, but for Homevember I thought I would corral all the pictures into one big post for posterity.  When we moved in, the first floor of our house - sort of like a basement if you will, was a two bay garage with a bedroom.  Now we have a smaller garage & great big living room/office area!
Here's what our idea was when we first started talking about it.  It's changes a whole lot!  For reference, the long part in the front with the lving room & work area was the first long bay of the garage.  The dotted line at the top of the living room area was open - no wall - and went into the second smaller bay of the garage.  I don't think I have pictures of this part but we tore out a huge closet that was to the left of the stairs where that door is crossed out there by the desk.  Here's what the downstairs looks like now:
As you can see a lot has changed!  We put up 5 walls - one to divide the garage from the living area, one to replace the garage door at the end of the living area, moved the one in the spare room to make the bathroom, utility closet, & closet bigger, and walls to separate those!  Here are some in progress photos:
I don't think I have the original image before I added the text for this post
So here's what separated the bays of the garage.  We put the wall there.
Above is the wall that had a closet on it.  We ripped out the closet to give more space & we ripped out another doorway by the closet into the garage so the space would be open.
Below starts a peak at the spare bedroom & the bathroom/closet/utility room.  We split up the long bathroom into utility room that was there before in order to give the bedroom a closet.  I believe in order to be considered a bedroom it had to have a closet - so we made the tiniest closet on the face of the earth!
Those are all the in progress pictures of the spare bedroom! We're still not totally done with the spare bedroom so no photos this Homevember go round - but keep a look out next year as we keep on updating!

Also, next week will be pictures of out Living Room & how it's styled etc.  Then the week after will be pictures of the office area.  It's not totally done yet either - we've got some adding & styling to do but you can get a peak at it!

This basement redo was exhausting & fun and I'm so glad we have more room in the house now.  I would have felt like I was living in an apartment if we'd just kept the upstairs.

xoxo, Moe 

Connect on Twitter // Follow on Pinterest // Peep me at Hello Cotton


11.06.2013

Wednesday Decor // Our Bedroom & My Vanity

There are two rooms I'm very proud of in our house, whoops there are three - our bedroom, the living room, & our office.  These are the three main rooms I'm going to highlight this Homevember with bits from other rooms thrown in.  The first room is our bedroom! I really like our room - at first it was very hard to decide on how to decorate since we both have very, very different tastes, styles, ideas, etc.  But I think we did a good compromise - I hope Zach thinks so too, even though a lot of my things seem to spill onto is night stand - but the Make it Monday from this week is supposed to fix that!  On to the pictures of our bedroom & my vanity!
 View from standing in the doorway facing into the room
 View from the left corner of the room, the door is to the right
 DIY from Monday, check it out here
 Bird's eye view from the left corner
 Bird's eye view from the door way
View from standing by my vanity

Our room, if you can't tell, is very tiny.  And actually when I'm not lazy the bedroom often looks like this though I have been lazy lately.  Often the overflow of make up ends up on Zach's night stand - but those new decor boxes are supposed to prevent that!  We haven't added any artwork yet and I'd like to add mirrored doors to the closet, but I'd say it's pretty nice.  Here's where everything is from:

Bedspread - Walmart.com // Sheets - Amazon.com // Standing mirror - yard sale, painted // Dressers - mattress place Virginia // Nightstands - Big Lot's (I almost missed out on a matching one for Zach, phew!) // Vanity (comes with the mirror propped up on the tall dresser) - Amazon.com // Mirror over vanity - Big Lot's // Lamps - brought from our own places before we met

Connect on Twitter // Follow on Pinterest

11.04.2013

Make it Monday // Fabric Covered Storage Boxes - 1st Homevemeber Post!

A long while ago - like even before we moved into the house - Zach bought me a set of two cute little storage boxes that were shaped like suitcases.  I'm pretty sure he got them from a garage sale.  I loved them (still love them) but they were a brown color & covered with like faux newspaper clippings to make it look a bit vintage.  I liked them the way they were but the didn't really fit into anything we had in the house.  A few weekends ago I sat down to do something with them.  My first thought was to get some fabric & cover them - but I scratched that not wanting to spend any money on fabric.  Fast forward a bit & we needed a new (bigger) bedspread.  A queen on a queen size bed is just not big enough for two blanket hogs.  I'd kept an eye on the bigger size of a similar style of our old bedspread, waiting for it to go on sale.  When it did, I snatched it up.  It came in the mail and I put in on the bed, discarding the king sized pillow shams I knew we wouldn't use.  Then it hit me - I now had fabric to cover the boxes & it would totally match our room!  I had already painted the small one black but was all over covering the bigger one in this fabric.  So, if you're interested in seeing what I did then stick around!
Supplies  :: box you want to cover, pencil, paper to make your template, ruler/yard stick/straight edge, scissors (for fabric & for paper), mod podge for fabric, sponge brush, screw driver if your box has any hardware you have to remove, straight pins, fabric (vintage fabric would be beautiful) or old pillow case (one half of a king size pillow case covered all of this!) , old credit card or plastic card to smooth out your  fabric
First, remove all the hardware from your box with a screwdriver.  If your box has little feet on it, they probably will screw off....just give it a little try & use pliers if you need to.  Now you can move on to the fun part.
If you have a funky style box like I did, you'll need to create a pattern so that the fabric sits in the place you want.  I taped two pages of used printer paper together & used a pencil to trace around the inset to create a pattern.  I cut it out a bit bigger then trimmed away making sure it fit.  You'll want to mark the top side of your pattern so you know how to place it on the fabric & how it will fit on the top of your box.
Pin your template to your fabric.  Make sure to cut out two of these patterns so you have one to cover the lid & one to cover the bottom of the base.  Remember to cut bigger than you think, then trim.  You can always trim but you can't put it back!
Next I used a little ruler thing (it's for sewing, if you know the name let me know!) to measure out how much fabric to cut for to wrap around the perimeter of the box.  Here is where I should have measured better or made another template - the measurements were not the same all the way around so there's some gaps between where the fabric meets the stitching on the sides!  So measure everything!  Then I just transferred the measurements to a straight edge of my fabric by marking every few inches or so & used a straight edge/ruler to create a rectangle long enough to fit around the box - you should have one long fat rectangle & one long skinny rectangle.  Then I repeated the measurements to cover the back of the box where the hinges are - this creates another fat & skinny rectangle.

Here are the pieces you should have:
Now using the mod podge, apply a thin layer with your sponge brush.  You may have to work in sections - I found I had to so I didn't get glue bits or sticky fingers on my fresh fabric.  Place the fabric on the box smoothing it out as you go.  Use the credit card to smooth out any bumps if you need to.  Per the instructions on my mod podge, I let the whole thing dry for two hours before applying a sealing coat.  Don't mind my messy desk - but I didn't think using mod podge on the carpet was a good idea.
Once you've applied your sealing coat let it dry for a good while - I let mine dry over night.  Then screw all your hardware back on & smile because you are awesome!  You now have a beautiful box that if you wanted could match any decor you desire.  I wish we used all my vintage sheets because I'd have covered this in pretty floral fabric & would have just melted.  But this damask pattern is just fine.  If you have a matching box you can paint it like I did using two coats of acrylic paint.  I like that these don't have the same coverings, the look more collected that way.

Hope you enjoyed this Make it Monday!  This is one of the first posts in a new little series this month for Homevember - something I really wanted to do right after we moved in last year, but it was so impossible to do.  So there will be a few posts on home decor, home improvement, etc this month to share with you our year old little home!  Of course there's a lot that isn't finished but such is life.

xoxo, Moe

Connect on Twitter // Follow on Pinterest