Showing posts with label blog planner. Show all posts

5.31.2017

Minimalist Monthly Planning in a Mini Happy Planner

I have shared quite a few posts regarding my every evolving planner journey.  Every few months (like 6-8 months) I think 'Oh wow, I've got it this time' and then....I don't.  I've gotten away from planning because I like to plan my planners and usually that means just sit around and not use them all while feeling completely unorganized.
Minimalist Mini Happy Planner
this post contains affiliate links, please read my full disclosure here
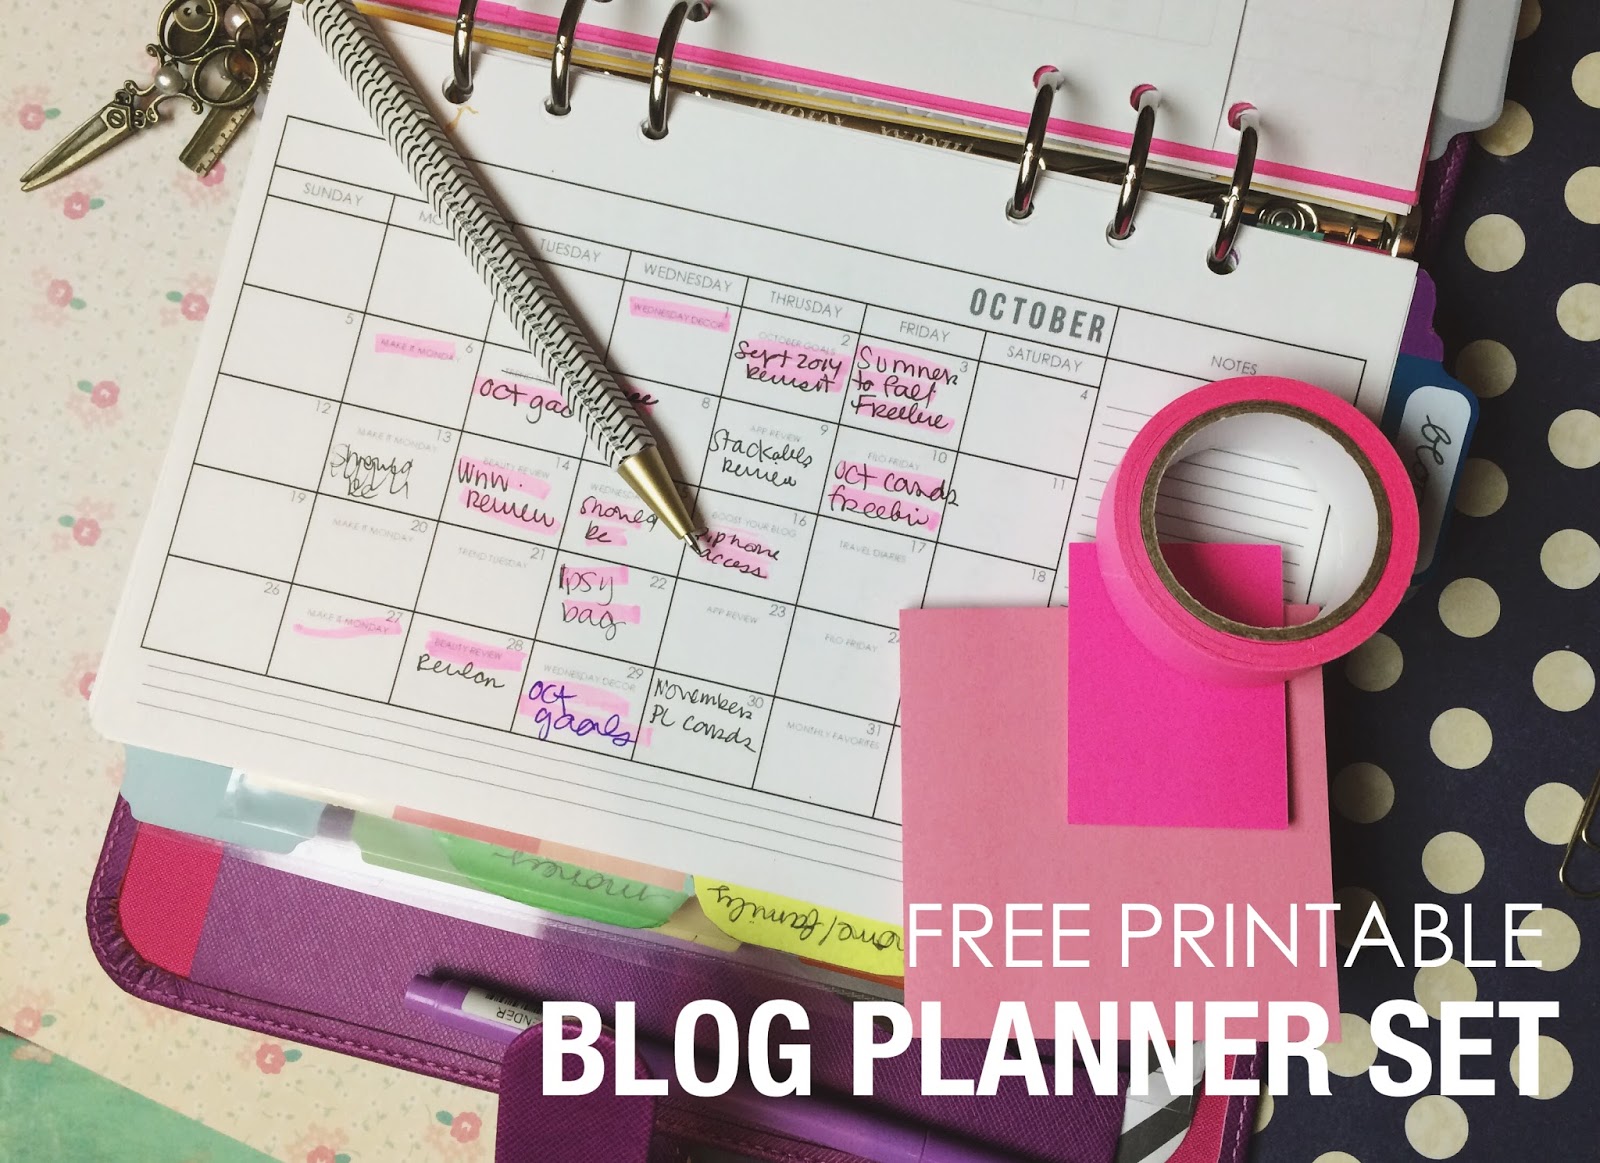
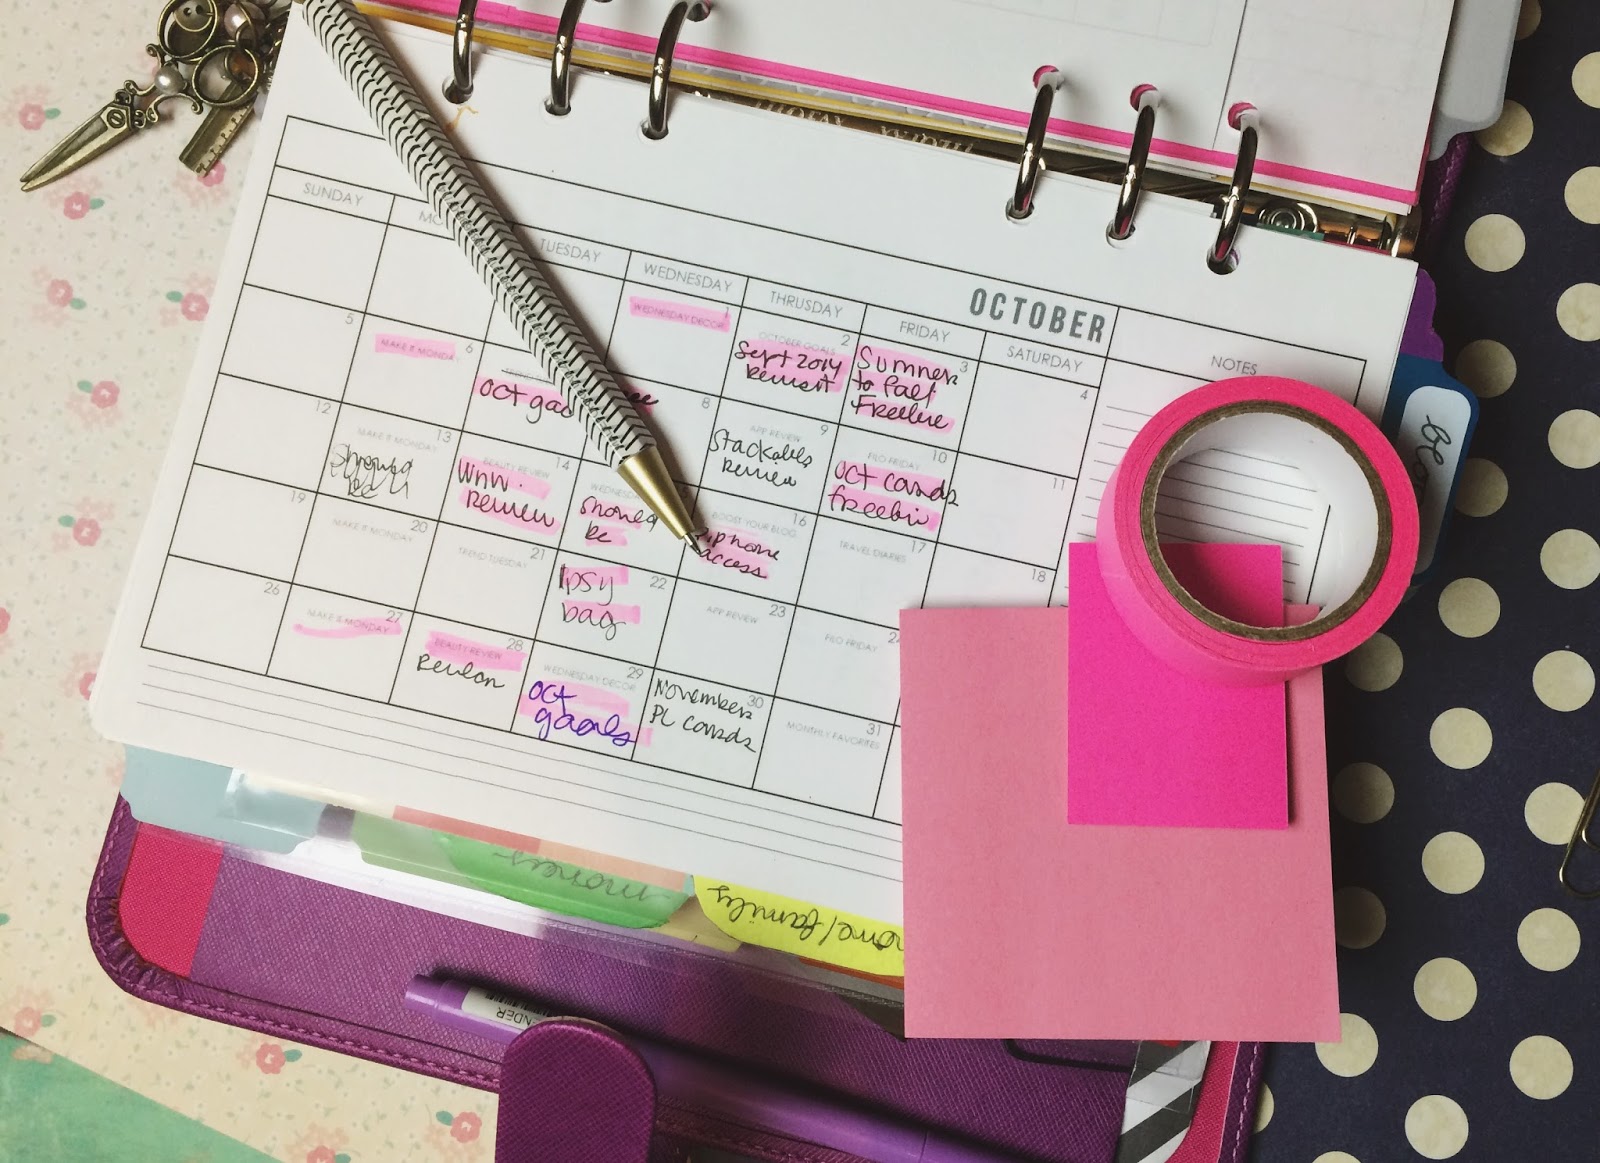
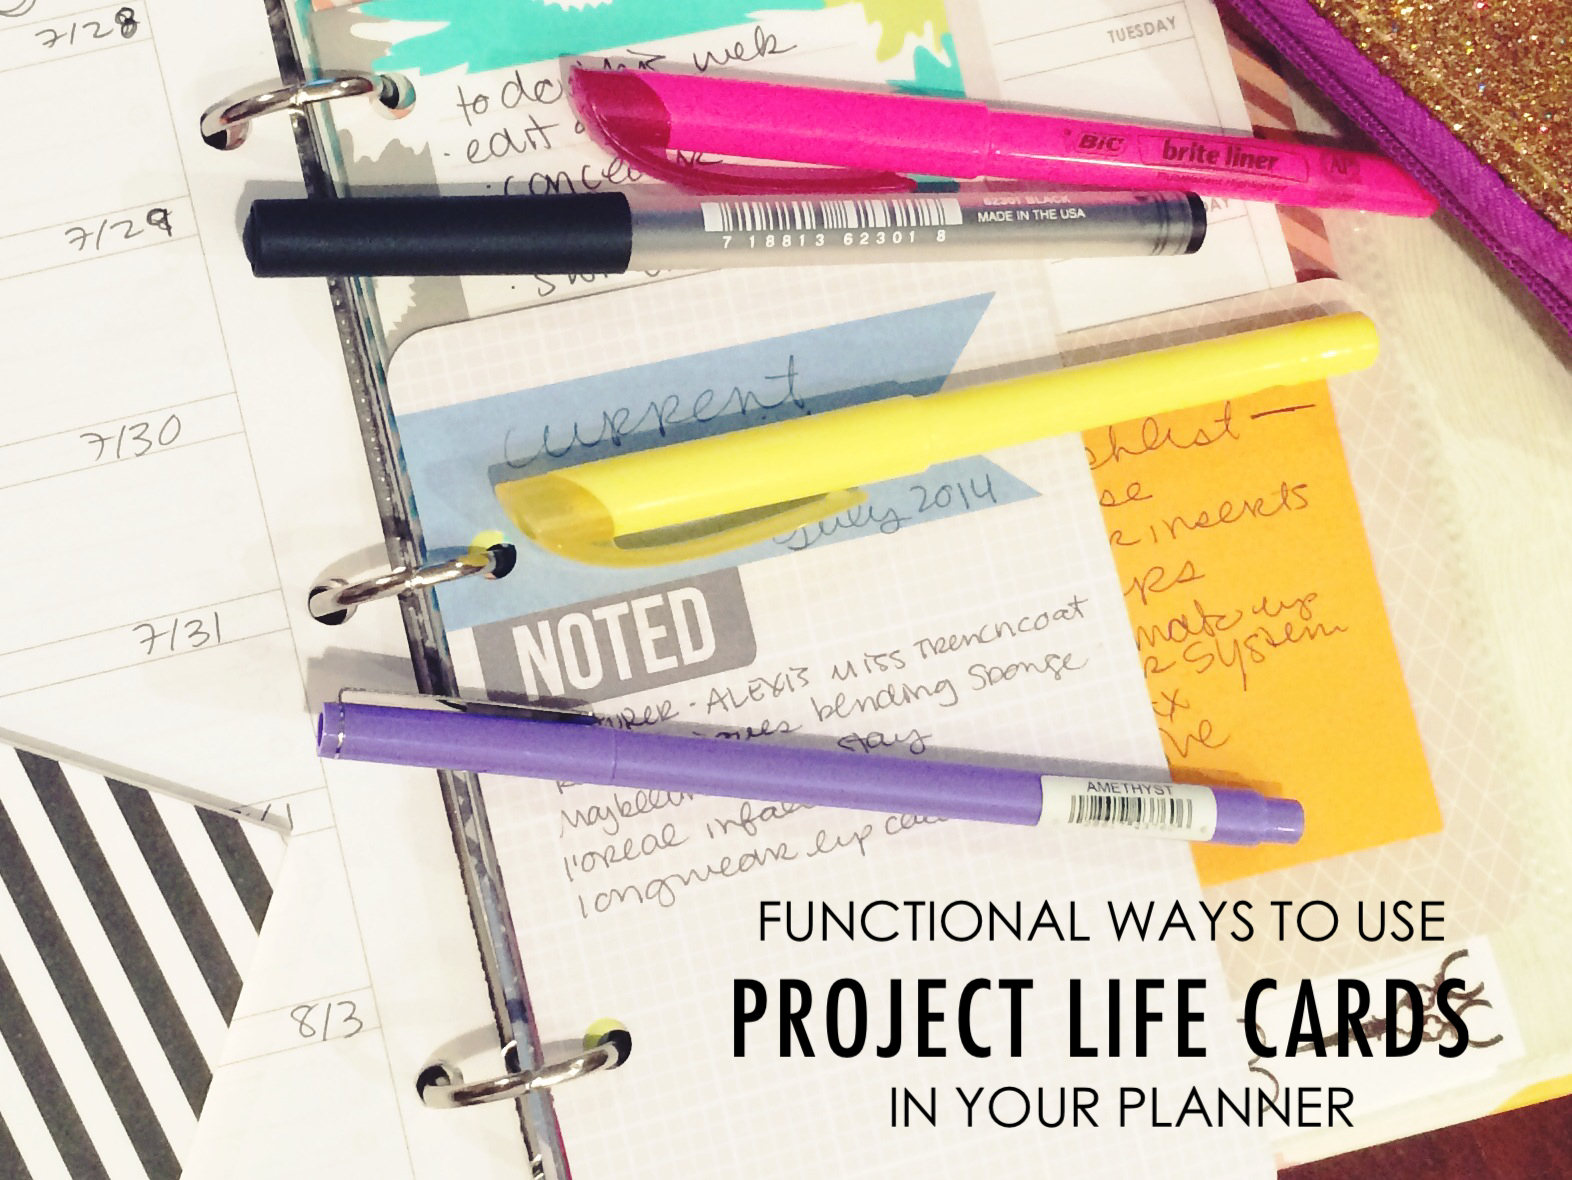
.
Here is my minimalist monthly layout in my Mini Happy Planner:

I use this planner for my blog planning, YouTube planning, & everyday life stuff.  All of these things require rescheduling more than half of the time so my favorite pens to use are the Pilot Frixion pens.  When we were in Japan I went into a store called Itoya (thank you Zach for being the map man and finding it for me!) where I saw a bazillion Frixion pens.  We were leaving the store and I was like holy heck, all the pens!  I picked up my favorite guys - the Frixion Slim - in a few colors but I really only use the black.
Monthly Layout Mini Happy Planner
I love this pen because the point is very fine and is perfect for writing in smaller spaces like the monthly spaces of the Mini Happy Planner.  I also think the slims erase easier than the .07 tips of the original Pilot Frixion pens.  I do use the .07 tip for my cleaning tracker that I draw on some graph paper and transfer every week.

To differentiate between the blog and YouTube calendar, I go back to my old school color coding - pink for the blog and blue for YouTube.  This is the same color coding I've been using forever and I go back to it each time I need to simplify.  I also will tend to write the blog post at the top of the box and the YouTube video at the bottom of the box.  This spacial coding I've been doing since the days of my OG editorial planner.  This just helps me know visually when I look at a page, a long with the color coding, what is what.  The only other color I will use in my monthly view is yellow.  Yellow marks the new and full moons so I know when to plan my rituals.
Mini Happy Planner Set up
The highlighters I use also have to erase - so I use these wonderful pastel Frixion Highlighters. The colors are soft but vibrant and they erase just as well as the Frixion Slims.  This is great for adding in post names because usually I just lay out the frame work for my posts and then add in the names/titles later so I know what to work on for the week.

All other events in my monthly planner are simply written in pen. I don't color code events mainly because I find it confuses me!  If it's not highlighted then it's just regular life.  So doctor's appointments, bills, and events are just written in pen.  That way I keep the whole aesthetic of the layout simple, clean, and uncluttered.
Pen Only Mini Happy Planner Spread
There are some other Frixion markers I want to mention in this post.  I picked these up in Japan thinking they were the highlighters...but they are markers.  This might be better for something like the Erin Condren Planner where the boxes are bigger.  For me, they don't work in this layout but I had to throw them in since we are talking about my Frixion pen love!
Mini Happy Planner Monthly
Above is an example of what the month usually starts out like.  I map out the blog post themes, then the videos, any classes/meetups, bills, and the new, full, & quarter moons.

Keeping this guy as simplified as possible keeps me focused.  It has just enough decoration to be inspiring but not enough to for me to feel it is tedious to work in.  I've moved on from doing a lot of my memory planning because I find it too tedious and it's not where I want to focus my energy right now.  While that makes me sad....I find it important to move on.  I try to keep some decor in my weekly layouts in my Mini Happy Planner though to get some creativity in there.  

Shop Related Products on Amazon!

So if you're looking for minimalist, pen only style layout...it is totally doable and totally inspiring.  And if you need to change things up all the time, Frixion pens got your back.  OH! Did you know you can fit the classic Happy Planner rings in the Mini Happy Planner covers? You totally can!

How do you organize your monthly layout?  Are you into pen only spreads?

xoxo, Moe

1.22.2015

Planner Printable // Free Blog Planner

I've been loving using my Raspberry Saffiano Filofax that I picked up on Amazon for a steal way back in August/September of 2014.  And the part I've been loving the most is my Blog Planner that you probably saw in my Blogging Kit 2.0 post (ps - original Blogging Kit is here).  I had this section in my old planner and just moved it over to my Filofax & fine tuned it.  Today I want to share with you a free printable blog planning calendar like I use when I sit down to blog.  I've gotten a lot of requests on YouTube and in general to share the actual inserts - and I'm here with them today!  (All downloads are at the end of the post!)
Editorial Calendar
First off I sat down with my calendar open in word and mapped out all the reoccurring posts on my blog.  I used to this in my original blog planner - see that here - and it worked really great to keep me organized and motivated.  I just did a digital version in word this time on a month on one page calendar I designed.
By filling in all the reoccurring posts, I know exactly the open spaces in the month and exactly what needs to be done the week before.  There are weekly segments - Make it Monday, Trend Tuesday, Wednesday Decor - and monthly segments - Boost your Blog, Monthly Favorites, Goals, and Goal Review - and new segments I've added bi-weekly - app reviews, Beauty Reviews, etc.  This gives me a good outline but because it's my blog nothing is really set in stone!

I don't hold myself to this, though.  If things need to be moved around - I move them around.  I'd rather go with inspiration than feel limited to a rigid schedule.

Weekly Scheduler
Between my calendar and my idea pages I have small 1/4 page weekly planning pages.  These pages are where I write down exactly what I have scheduled for the week.  Since my editorial calendar can get to be just a generic overview these weekly pages get the name of the post on the corresponding day/date after it's been scheduled.
I try to plan a few weeks in advance and this just gives me an idea of exactly what is happening on what day and I can see more clearly exactly what is going on in a specific week.  I can also see what week is missing posts.  I don't pressure myself - if I have a full week of posts, amazing! But I try to shoot for 3 completed posts that I'm proud of.  I focus on quality over quantity!

Blog Post Idea Pages
The next part of my blog planning arsenal are blog post planning pages. Once I have an idea that I want to really focus on developing in to a blog post I move it over the these Idea Pages.  Because of the 3 columns I can see the idea to completion more easily.

I like that I can compartmentalize my ideas.  I find that if I have a broad idea that I can't break down I get overwhelmed & it gets pushed aside.  I have plans to reopen my etsy shop but because I can't compartmentalize the designs I want to sell, I can't find myself working towards it.  I need to create a system for that!  So the first column is for the topic idea which may turn into the name of the blog post.  In the second column is a notes feature.  Here I write any notes about what I want to share, any steps I need to remember, etc.
Then I can move it to my to do list area in my weekly planning pages.  From there I can work on the post during the week checking off the boxes in the 3rd column.  Since I try to squeeze in blogging where I can I might photograph for a few posts one day, right the draft post another, etc.  If the post is checked off as scheduled that means I'm totally done with it and I can just wait for it to go live.  The publish check box just lets me know what ideas have been seen all the way through.

So today I have for you the downloads of all three of these things!!  Now, don't hurt me but I'm not 100% sure these will work!  I designed them in Word and that calendar should be editable - there is a Word document and a PDF inclueded.  You should be able to type into the template your own editorial calendar.  Additionally, these are made to print on paper trimmed to 5.5x8.5 inches - so half-letter size.  I use half letter size in my A5 Filofax because it fits just fine for me!


I hope these printable planner pages work for you!! These would be great for an A5 size filofax, a half size binder like I used to use, or you could bind them however you wish!  You could trim and punch them to clip into a coil bound planner as well.

Please remember that these pages are for personal use.  Please play fair - don't disseminate these as your own, only link to the blog post, don't sell these, and just all around be nice.  Hope you enjoy!

xoxo, Moe

12.23.2014

Three Inspiring Blog Planning Notebooks

Blog planning is something that I find so fun to do.  The one reason why I love it is because it is so fluid.  Depending on the attitude you have towards your blog, you can plan away and stick to the plan or plan away and then move things around.  I'm more fluid in my planning because I know there is a thing called life that I have to live (bummer, right? Just kidding!) and sometimes things get thrown out the window.  I like to plan out the month with what I'd like to do and then if it happens great....if I live my life and something else happens, that's great too!  So here are three inspiring blog notebooks I found while searching Pinterest for some blogging inspiration.
This crazy old post from the blog A Beautiful Mess is super inspiring!

Why I Like It:
I love the creative fluidity of this notebook.  It's totally customizable because of the rings - you can move pages here and there.  This also adds to the fluidity for me.  I love the sticky note idea to sketch out an idea and move it around the notebook in the various stages of planning.  You can also color code your notes making it ever more organized.  I also l
the hand written tabs.  This takes creativity to another level.  I think in your planning you do have to be creative as well...that is where you can draw some inspiration when you're feeling uninspired.

This daily planner from Turquoise Home from her post on being an efficient blogger.

Why I Like It:
When I was unemployed a looong time ago I was working all day on my blog and my various shops.  If you're a blogger thinking of taking the plunge into full time blogging an hourly breakdown of your day can really keep you accountable.  This split page design has the hourly breakdown on the left and a to-do list on the right.  I found that the hardest part about not having a boss was having no one to be accountable to.  It was the realization that I had to be the one to set the schedule and then I also had to be the one to fulfill it.  I also like the to-do list because I often forgot to focus on social media so adding this as an important check mark means you're going to focus on it every day.

This amazing planner in a Moleskine from Andrea.  I first saw the photo above on her instagram account.  You can read about here blog planner here.

Why I Like It:
If you head over to her blog and read her post on her planner you'll get a lot more info that just this picture.  I like this blog planner because it is a place for all things blog.  She created an index so she'd be able to find everything that she puts in this notebook.  She also has the photo sizes for her photos at a quick glance at the front of the notebook.  Doing this means you'll always have your blog style guide at your finger tips.  You could also throw in any hex codes for colors and a list of fonts and standards for your blog planning.  I also like that she has a monthly calendar.  I plan my posts much like she does - map out the reoccurring posts for the month so you have a place to start.  On the opposite page is sort of like the bullet journal system (a concept I really want to get into!) with the dates and posts she's working on.  The black & white lover in me really finds inspiration in the simplicity and organization of this planner.

I am thinking of moving my blog planner out of my Filofax even though I really do love having all my planning all in one place.  I may just add some graph paper so I can do set up like Andrea's.  I've already started something like that for my YouTube channel planning.  I just love planning!

If you want to see more of my blog planning process you can read these posts: My Blog Planner (an old post from 2012!), My 2014 Blog Planner (my first ring binder type of planner), Functional Ways to Use Project Life Cards in your Planner, My Blogging Kit 2.0.

How do you blog?  Do you plan with pen and paper or just go with the flow?

xoxo, Moe

11.20.2014

Boost Your Blog // My Blogging Kit 2.0

About two-ish years ago I did a post on creating a blogging kit if you were moving, traveling, or just somewhere that you weren't used to.  I created this kit to keep me sane in my transition period from moving up to Michigan.  Which, let's talk about how young I was 2 years ago for a minute.  I stumbled up on some of the emails between Zach & I while we were apart (read about our long distance thing here).  Oh my gosh we were so, so, so young!  Some days, when I find things like that, I wonder why I felt so confident in my decision to move up here - I was so young what made me so positive this was going to work out?  Don't get me wrong, this has been the best thing but it could have gone so bad.  We've grown a lot together and it's so weird to look back on how young we were.  You sure don't know time has passed until you turn around and look at it.  Jeeze.  Anyway, that's not what this post is about.  This post is about my blogging kit 2.0.
Now, I don't travel with Zach at all any more (sad face!) and for the most part our travels involve going to different SCA events and during that time I'm not really connected to technology because we're usually camping.  But currently I'm in the state of a remodel and in order to gain control over my surroundings I thought I'd assemble my blogging kit just to give me some control.  I think I am more than slightly Type A when it comes to some things!  So here is the Blogging Kit 2.0 :

iPad & ClamCase
Something that has become super convenient for me is my ClamCase for my iPad.  It turns my iPad into a mini laptop which is perfect for on the go blogging!  This is great if we're making a little weekend stop to Zach's parents or a small weekend trip I can still get some work done.  It would be even more helpful if I had a 3G plan but wireless is just fine for most things.  (Read about blogging from an iPad here.)

Filofax Planner
This takes the places of my blog planner and blog idea notebook.  This planner is filled with everything from plans for my daily life, blog plans, contacts, to do lists, and other planning things.  I feel like this is the big girl version of the planner I used to have.  I've sort of updated how I plan for the blog but it still follows the same principle.  Also this planner holds my sticky notes and pens so I don't have to bring another case with me.  If you want to see an easy an affordable DIY binder planner check out this video on my YouTube channel.  I also posted a current planner tour here.

Camera/iPhone + Mophie Case
I hardly pull out my DSLR anymore.  I'm still fighting with it so I've just been using my phone.  I currently have the iPhone 5s, and upgrade from the iPhone 4 I had in the previous Blogging Kit post.  With the 5s comes a better camera so I can really have blog worthy photos.  I'm hardly ever worried about my phone dying because I have a Mophie case that has one full charge as a back up.  So I can take really great photos and not worry about lugging around a camera or a camera dying on me.

App Arsenal
I talked before about the ways you can blog from you iPad and there really are tons of apps out there to help you along (currently I'm liking using the actual Blogger app).  But the other thing I worry about is the fact that I have the lowest memory option for my iPhone so I need to back up my photos incase I need to delete.  My whole blogging app arsenal includes Blogger, Blogsy, Google Drive, Afterlight, Phonto, and PicFrame.  All of these give me everything I need (nearly) to compose a post.

Storage 
In the last blogging kit post I talked about storage for some bits and bobs you may collect from events, travels, etc.  Because my Filofax (the Saffiano in Rasperry) has quite a few pockets and inserts I can slip anything I need to keep in the various places in my planner.  There's really no need to have any extra baggage.  All my sticky note are on various flyleafs in my filofax, washi tape is around an old gift card and my pen is in the pen loop.  If I do need highlighters, I do have a separate pencil case in my purse.

So that is my big girl Blogging Kit 2.0!  I love that everything fits in a space no bigger than my iPad.  I guess the kit grew but I think it also got more efficient now that I have a whole app arsenal to create pretty sophisitcated blog posts on the go.

How do you blog on the go or when you're in a state of transition? Are you a control freak when it comes to spending time in unfamilliar territory?

xoxo, Moe

9.01.2014

Make it Monday // Three More Simple DIY Tabs

If you can't tell I'm in back to school mode - even though I'm not going back to school. Sometimes I want to cater to everyone & share an idea in a way that it can apply to a lot of different people - students included. I'm using my planner daily & making it a creative place but customizing a lot of things. This DIY can be used to make any notebook, book, journal, planner, binder, etc a creative space & customize it a little bit.  I think this would be perfect to divide off a blog idea book (thats what I used this little black, white, & yellow Kate Spade notebook for!)
Supplies: scrapbook paper, craft knife/box cutter, paper cutter, paper clips, washi tape, corner rounder, ruler

Start by selecting scrapbook paper in colors to match your planner/binder/etc - I have a loose black & white thing going on in mine so I chose black & white patterns.
Slice your scrapbook paper into 2 inch strips (or however wide you want them to be). From here you can decide what exactly you want size wise. I made some that were about 2 inches square for smaller tabs and some that were a few inches long that I could clip into the rings of my binder for more stability.

If you're down for it, round your corners on each side with your corner rounder.

To make sure your tabs stay in place grab coordinating paper clips & slice a small horizontal line 1/4 of an inch to 1/2 an inch down from the top. Slip your paper clip into the slip to attach to your planner page.
If you're using a half size binder like I am you can only get a row of three tabs in but if you're using a six ring planner there are six tabs (that don't overlap) there for you. These removable tabs are good for notebooks & binders to separate classes, important notes, etc.

Hope this was helpful!

xoxo, Moe

8.11.2014

Make it Monday // Create Journalling Cards with PicMonkey

Last Friday I mentioned my love of using Project Life cards for practical yet pretty uses in my planner.  Today I want to share with you how to make your own journalling cards for use in your scrapbooks, mini albums, or planners using the free photo editing site, PicMonkey.  I'm not going to be using some Royale features here in this post so if you can totally do this for free....but if you want a free day to access more of the awesome features through Royale, click this link <- that's the only link to the free Royale feature in this post.....so click there if you want the free day!
Let's get started:

First, head to PicMonkey & select your canvas.  I started with the 4x6 option since thats the size of the largest Project Life style cards.  These cards I'm going to show you are very, very simple...mainly because I'm loving black & white right now.  But please, make your cards fit your layout with colors, overlays, text, etc.
Now let's add some text.  I used some quotes from my Quotes board on Pinterest.  The best thing about PicMonkey is a new feature where you can use fonts already on your computer!  You can download a whole slew of free fonts all over the interwebs so this feature is awesome - especially because PicMonkey gives you amazing freedom to design!
Simply add the text, arrange & save.  I loved using the thin, bold font Bebas Neue for the quotes.  A fun font to pair with Bebas is Halo Handletter.  The bold lines and curvy swirls are really nice!

You can also create a texture with your text if you use a really scripty font, like in the example below.
In this design, I used the font Eight Fifteen to create a fun texture.  I stretched it out and copied my text of the best things in life aren't things to create a beautiful texture.  For this one, play around a bit....you might be here for a while finding the best layout.
If you start out with 4x6 cards you can crop the design down to the 3x4 (or 6x4 to 4x3).  To get the design to be horizontal rather than vertical, select the rotate option.  
Creating fun things for holidays is super easy as well!  I chose to create some halloween options because I'm wishing Summer away & can't wait for Fall right now!  But you can make Spring, Christmas, Back to School, etc themed cards.  When I was looking at Project Life style cards, I found that the themed cards - for certain holidays, seasons, etc - came in packs that had a lot of cards.  What if you only want to do one layout with them?  Or you're not using them for scrapbooking but for a mini album or your planner?  That's a lot of leftover cards.  If you're like me, you think well I'll use them next year but you know you'll be wanting to do something else or not into it at all.  So this is a way not to have a zillion cards in your stash!

Just as a little side note - if you make any cards you just looooove why don't you go ahead and make the canvas color transparent and save it as a .png file.  Select transparent canvas under the canvas color tab.  You can add your design before or after you make the canvas transparent.
Make sure you save it as a .png file because there will be another DIY using these little cards or images on your photos when editing them on your phone very shortly......

Now onto printing.
Now you can print your cards various ways - the easiest for the sake of this video was using Picasa .  Simple select your images using the control button (command on a mac) to only select the images you want to print with your mouse.  Hold down the control (or command) key while selecting each of your images.  If you use Shift+select option you will select every photo....including things you might not want to print.  Then from the bottom of the screen select the print icon.  On the next screen select 4x6 and two will print to a page.
To add guidelines for cutting, click the Border & Text Options button.  Ever. So. Slightly. Move the little guide under Border Width to the right.  Select a light gray color for the border, and uncheck even with border.  Now you have a light border around your card to make it easier to cut out.

Printing the 3x4 cards are bit tricky but still pretty easy.
The easiest I found to make two 3x4 cards fit on a page is to select the two 3x4 cards, create a collage, and then print two 4x6 to a page with the border.  Then you can just slice down the middle - either eye ball it (if you're that good) or make that your first cut by measuring to the middle & slicing.

The best way to cut these guys out is with a paper slicer & a fresh (or pretty fresh) blade.  The guides make it very easy.
I used a corner rounder on some of the cards but found out afterwards that the roundness of my corner rounder didn't match the roundness of my collection of cards.  If you're using these in Project Life layouts....you might need to find a smaller rounder to match the other cards.  But for my planner, the round corners were fine.

Other ideas.....
Use this post to create color palette for your cards/planner/mini album/scrap book.  Create a few and then decide which palette you're feeling.  You can also use the palette to go shopping for cards/paper to match your idea.

Use this post to create fun backgrounds to use on the background of your cards by uploading the image to PicMonkey, cropping it, and adding your text or overlays.

Use this post as inspiration to create a cover page for your planner or mini album with descriptive words all about yourself.

Hope this post was helpful and that you got some ideas for journalling cards!  If you are loving black & white or really want ones I've made you can click the links below & download the cards:

Happy With a Calm Life
4x6 | 3x4

If Your Dreams Don't Scare You
4x6 | 3x4

The Best Things in Life
4x6 | 3x4

Halloween Faces Light
4x6 

Halloween Faces Dark

xoxo, Moe

8.08.2014

Three Functional Ways to Use Project Life Cards in your Planner

Since I've gotten back in to my planner I've been wanting functional, yet pretty ways to divide & use my planner so I stay inspired to use it. Not only does this house my editorial calendar - which is what I was planing on only using it for - but it also houses some life plans & inspiration. I wanted this place to be a place where I can dump all my inspiration & thoughts and then draw from later. I want to keep it functional yet pretty.
While at the craft store the other day I found some Project Life & other Project Life style cards on major clearance so I picked some up. I was surprised at the amount of cards that come in these packs & I'm totally stocked up for life. I found the Midnight Collection on clearance and am so excited because it's pretty much all black & white which means I can rely on colorful accents to create an inspiring place. Don't tell Zach but I'm really into black & white right now.....I used to complain about black & white sooooo much! But I find that these cards - both the B&W and the colorful ones I picked up, washi tape, sticky notes, etc add the color I crave and the organization I need.
Dividers - The bigger, 4x6 style cards are great to use as dividers! If you punch them on the longest side you can create a top divider & if you punch it on the shorter side you can create a side divider. Then the bigger space offers a place to put relevant sticky notes or goals for that section. I think these are better to divide a bigger section into smaller, more manageable sections. I also use them to flip to the current day.
Note Jotters - The smaller size cards are great to grab & write a small note on. If something is important - like an appointment or date or phone number - I keep a stack of pre-punched small cards in a pencil case for easy access. Since they are smaller, storing them clipped into my planner I find bulks up the planner and makes it uneven. But these small, decorative scraps are perfect to fill out and then toss when you're done with the task.
Running Lists - I currently keep a Project Life card on the current week in my planner with my cleaning schedule on it. The card itself is broken into a Sunday - Saturday schedule perfect for a cleaning list. I do this because I realize when I don't clean during the week I am unhappy on the weekends. Project Life cards offer a lot of prompts in addition to plain cards so these are great for keeping running reminders or lists that need to be carried over from week to week.

Another thing I want to accomplish with my planner is to use the stationery I love to hoard. My problem is that I buy stationery too pretty to use - and that's not what it's for! Getting some of these PL cards on clearance means I don't feel too bad about ripping them out when I'm done.

How do you use your favorite craft supplies to stay organized? Any other tips for Project Life Cards?

xoxo, Moe

8.04.2014

Make it Monday // Create Dividers for your Planner or Notebook

Welcome back...I believe I'm officially back from my Summer break. I'm still going to be posting to the Tumblr that I also ignored after saying I was going to post there, but lets move on. I'm getting back into my planner recently & I know school time is just around the bend so I thought I'd share a fun, recycle DIY to make dividers for a ring bound planner. Of course you can always scale this up to make dividers for your school binders or any organizing you need to do. I feel like I've never really grown out of the need for school supplies and starting back into my planner is an excuse to break it all back out.
Supplies: cardboard cereal box or snack box, knife/box cutter, paper cutter, scissors, washi tape, corner rounder (optional), ruler
Start off by opening your cardboard box to lay flat. You may have to trim around it to get the cardboard to fit in your paper cutter. If you don't have a paper cutter, a craft knife or box cutter + a ruler will do just fine. Next lay out your pages to see how big to make your dividers. This will depend on what you're making the dividers for so you can use a piece of paper (or the measurements) from your planner, binder, etc. My pages are 8.5" x 5.5" since I cut down copy paper to fit into a small binder.
Leave enough room between your measurings to account for the actual flap of the divider. I left more than I needed (I originally left half an inch) so I could trim later if I needed to.
Use your paper trimmer or knife to trim your cardboard down to size. Then start to work on your tabs.
I decided to make three tabs with the tabs each 2 inches in length. I lined them up & used my ruler to measure where they would fall when alternated.
Using your craft knife or if you're pretty good with your paper cutter, cut out your tabs. I used my paper cutter kind of like a matboard cutter by slicing down to a mark then repositioning the blade to continue the cut on the other side of the divider.
Next decorate your dividers. One side will be a nice, plain cardboard and the other side will be Froot Loops....so cover that up. I used some of my ever hoarded Kid Made Moder Paper Tape that I don't even think they make any more and some washi tape. The reason I used the Kid Made Modern tape is because it was thicker & would cover the design easier. Another option would be to glue down scrapbook paper. Of course, trim your edges and trim down the tabs if need be. Round the corners of your tabs with scissors and round the corners of your dividers, if you wish, with your corner rounder.
Finally punch your dividers to fit in your planner or binder.

This is such an easy & affordable DIY for your planner or binder - and just in time for Back-to-School. There are two times to get really excited about planners - January 1st and right before school starts. Also, any other day is a good day to get into planners as well!

I use my planner currently mainly for blog stuff but I also have life stuff in there too. My blog planning routine hasn't really changed from this post but I'm going to go over my planing routine again here shortly. Hopefully I'll be sticking to it but honestly I feel like my whole life is just change. I don't know how people can stick with one thing for, like, ever....I can barely get a project done!
xoxo, Moe