5.23.2013

Things I Thought I'd Never Say // I'm Taking A Break

As I sit down to write this I don't even know if I'm going to hit publish....but I think when I do I'll have a huge relief off of me.  First, I never understood why bloggers took breaks.  I always thought 'I get it, it's your life, do what you want.....I love your blog & want you to feel great writing it but what is this pressure you're talking about? It's just a blog.'  Well now I know.  It's not pressure from anyone else that I'm feeling.  I'm not trying to compete, I'm not trying to be better, or keep up...I'm trying to be me.  But somehow or another me has gotten lost.

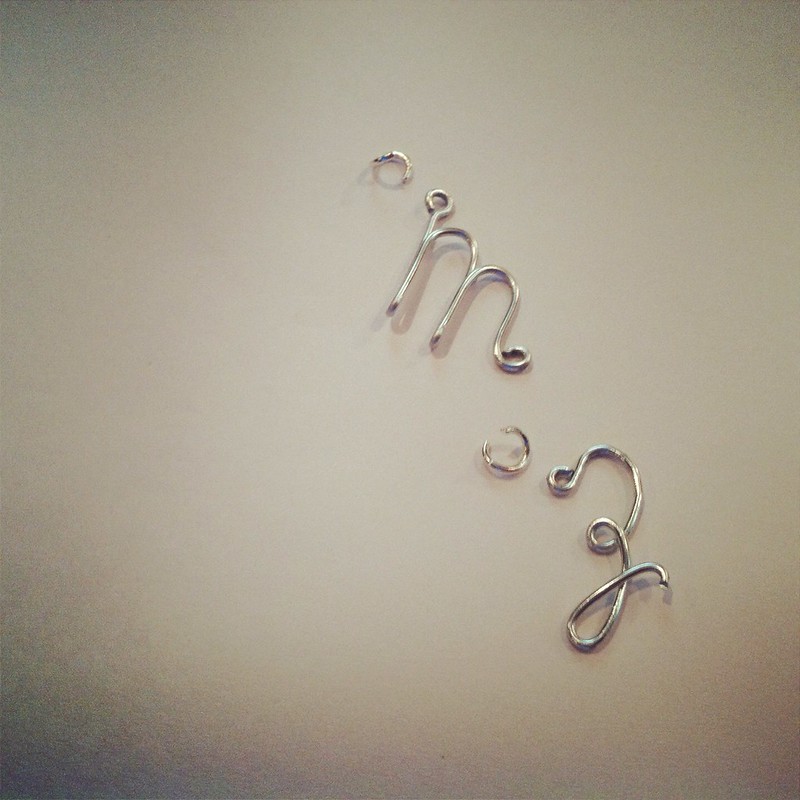
I don't know what to post.  I come home every night & just want to sit on the couch.  I'm pushing myself to be creative when I really just want time with me & time with Zach.  When I had all that free time, I was able to brainstorm & develop a lot of ideas.  Now in my free time I can hardly bring one idea to reality - that initial necklace from Monday was the best thing I'd made in months & I couldn't even take good pictures!  That's what I'm talking about.  Not being able to try & fail...but feeling like I need to get content up because what kind of blog am I running here??

I mean it when I say it's not pressure from others.  It's pressure from myself to share the most honest, straight forward tips, tricks, DIY's, inspiration, etc.  And if I'm throwing something together, I'm not doing that.

So in the essence of honesty, I'm taking a break.

I don't know for how long...but it's happening.  

I do want you to keep up with me on twitter & instagram because I'm still going to be active there (of course) but I am closing down custom blog design orders.  I'm hoping to wrap one up here soon & that's it.  I'll still keep some customized options up in the design shop.

The 516VINTAGE shop will be open still as well & I really hope to get more items in there soon!  As well as the Five One Six shop.  That will have updates sometime this summer too!

I'm going to continue to blog, but it may only really appeal to my family who use this place to check up on what we've been getting into.  So perhaps expect less picture posts, more what we're doing posts, and little updates.  

I just can't focus on worrying about posting the way I'd like to right now.  Who knows....maybe in a week I'll get back to it...but right now, expect a little silence.  And I thank you for your understanding!

xoxo, Moe


Connect on Twitter // Follow on Pinterest

5.21.2013

Revisiting Must Haves for Spring // Long Live Moisture Review

A while ago I posted my Fun Beauty Must Haves for Spring where I mentioned using Olay Fresh Effects Long Live Moisture lotion in my face routine.  Well after using it for a little while, I decided to see if I really liked it by switching back to my old moisturizer.  I switched for a day to see how they compared and I found out I really liked my old moisturizer!  I decided to film a little vlog about my experience.  Watch below:


What products have you tested & rejected?  Any products you tested & loved?

xoxo, Moe

Connect on Twitter // Follow on Pinterest

5.20.2013

Make it Monday // Wire Monogram Necklace DIY

A really long while ago my great aunt (hi Jeanie!) sent me a box of some jewelry making supplies she wasn't going to use.  This box has sat, slightly sifted through, in many areas of the house since we moved.  I'd go to it every now & again digging through the beads and bobbles and findings searching for inspiration.  Nothing really smacked me in the head until Sunday when I decided that the silver aluminum wire would work great for a monogram!  I thought how sweet & how cheesey it would be to have a necklace with both a Z & an M on it.  How stinking cute!
Things you'll need: 16 gauge wire (mine was aluminum in a silver color so it was really flexible to work with but dented rather easy, so don't squeeze too hard with your pliers!), needle nose pliers, wire cutters, a template (your handwriting or an image - or if you're awesome like Zach you can just free hand it), lengths of chain, jump rings, closures.
I sat down & started playing with the wire thinking 'hey, I learned cursive in the 3rd grade & write in it everyday.  I can do this.' It's true, I do write in cursive everyday...I'm the weird one.  But man that was hard! So I googled a cursive chart to help me out.  You could even try to match a certain font you've seen by typing out a document in word.  The way I shaped my letters was by looking at the image, bending the wire, & laying it down to make sure things were lining up.  I used my iPad for this but you could use your own hand writing or print out your font on paper the size you want it.  So just bend it around to make it look right & make sure you put a little loop at the top so you can join it to your chain!
I decided to make this necklace a two tiered one with each initial on a separate chain.  Cut your chain any desired length but remember to make one slightly longer than the other.  Slip a jump ring onto the loop in the top of your initial & close it.  Thread the chain through the jump ring.  Repeat for your second initial.  Then add a jump ring & a closure.  The best thing about making your own jewelry is making it the right size for you.  I always feel bad when I take out links on something store bought & it really sucks to transfer a charm to a longer chain if the one it came with is just too short!
So, while I was struggling to make my two initials....Zach sat next to me playing around with 18 gauge wire in this antiqued copper color.  I'm struggling & starting over, struggling & starting over.  By the time I'm done with the M, Zach shows me he's written my entire name.  WHAT!? We laughed for a bit because, c'mon.....he's so talented to do that for the first time!  So I put it on a chain too.  18 gauge wire is much more flexible so you can wrap it around letters like he did & create something a little more dainty.  Be careful not to pull to hard or stretch it out while you're wearing it though!

Hope you enjoy!

xoxo, Moe

Connect on Twitter // Follow on Pinterest

5.16.2013

Boost Your Blog // 4 Collage iPhone Apps for Summer Blogging

I am dying over the warm weather here!  I can't wait to get outside & take a zillion pictures like I normally do when it gets warmer.  I took about 100 photos this past Winter & I think I've exceeded that number in these last few days!  So if you're like me your blog is now going to be flooded with all you're iPhone or smart phone pics.  The Summer sun just makes everything look warm & yes I do want to see the maragrita you're drinking and your feet dangling into the cool water of a pool!

Here are some of my favorite collage apps for iPhone that will help you create cool photo layouts for your summer picture sharing & blogging:
PicFrame - I downloaded this ages ago when I first got my iPhone & it's been my go-to collage app for ever!  Since I downloaded it like over a year ago there have been a bunch of upgrades - add shapes, add effects, more layouts, it's all awesome!  This is really an all in one app since you can make the collage & edit/apply filters with in the app.  You can also open in it other apps including instagram, you can send it to flickr or facebook, and of course save to your camera roll.  It's seriously the best!
DuoMatic - It's not really a collage more like a double exposure but it's still creates a pretty cool and unique effect to share!  I loved playing with this at the lake & combining sea, sky, and sand.  You can get really artsy with it too since you don't have to take two photos instantly & can pull from your camera roll.  So edit your photos in another app & bring them over to DuoMatic.  Or create your photo then edit away in other apps! (some of my faves are listed here)

Pocketbooth (also on Android!) - Create old style photo booth pictures instantly to use in blog posts with this app.  There are several different upgrade packs available for different effects, too.  For a better blog format, try taking pictures horizontally that way you can use the film strip as sort of a banner stretching from left to right (instead of up & down) across your post.  Take pictures the traditional way & create a cool wallpaper with this tutorial, too.
BeautifulMess - This app came out just a little while ago...this week actually I think!! And I've played around with it for a few photos.  It is pretty cool! If you love the look of doodles and text on photos but aren't that skilled a doodler or a mousepad user, this app may be a great alternative to make your blog photos have that look.  Save the images directly to your camera roll & use an app like PicFrame to stitch a few together or upload a collage made in PicFrame & see what you can make.

So there you have it, some pretty sweet & pretty cool apps to spice up your photo taking and blogging this Summer.

What are you excited to document this Summer?  Any fun trips?  Do share your fun collaged pictures!

xoxo, Moe

Connect on Twitter // Follow on Pinterest

5.14.2013

Trend Tuesday // My Next Beauty Purchases

Well, my make-up up swing is in full effect & I'm craving a lot (a lot, a lot, A LOT! lol) of new make-up and brushes.  This is sort of a secret confession: I've been watching a lot of make up videos on YouTube as well!!  I'm so weird!  Any who.....my last make up freak out (I mean obsession) was probably sophomore year of college...and my remaining collection of things is a little outdated/expired. Also, my previous up swing revolved around eye shadow and right now I'm craving different foundations, blushes, bronzers, brushes, etc.  I'm looking to really focus on a whole look, a whole proper look.  I also don't plan on spending a whole lot on this new little collection so to the drugstore, WalMart, & Meijer I go.  So here are some of the things I want to pick up to add to my little collection:
wishlist beauty bys
I'm on the look out for more brushes - currently I have a big fluffy blush & a foundation brush, so I'm looking for more, more, more!  I am also eyeing this sort of beauty blender thing I've seen at Walgreens.  I used to put my make up on with a sponge & have since moved away from it....but I think this may feel better than those little baby wedges in my hand.  The contours seem like they'd blend things together better.

Since I'm all about new foundations, I'm also all about new concealers.  I've got my Rimmel BB cream that is good for summer & Rimmel foundation, I recently picked up Revlon Color Stay because I heard it was more full coverage, I want to try a Neutrogena one I've heard is great, & I want to pick up the Almay that I used to wear in high school & college.  Side note - I'm pretty sure when I was younger & first started off with make-up I used revlon, as soon as I smelled it a wave of nostalgia overtook me!  Anyway....these concealers are ones I've had my eye on every time I pop in the drugstore.

Meijer carries e.l.f stuff & I've only ever seen it in Target & online so I'm stoked to see if I can pick up a new big neutrals palette.  I'm really a neutral eye girl and my old palette was gifted to me one Christmas aaagggeess ago....probably early high school so it's time to let that baby go.  I think that's the only bit of make up thats made a million moves with me.  I just love all the neutrals in it & it's my go to palette for special occasions.  This big palette in the image above is from e.l.f. I wonder if I can find it in the store or if I've got to order it from the website.

Mascara because my mascara is rather cheap & because why not.  Who doesn't need an assortment of lash blasting products?

My face has a lot of redness & scaring from troubled skin as a teen.  This green concealer/tone correcting thing I've used since high school but I haven't bought one in a while.  I remember when I found out that green corrected red, I think I read it in like Girls Life or Seventeen or something.  My mom picked it up for me, I put some on the redness on my face and applied my make up.  It was like magic.  I was so excited to have normal looking skin!  So, I guess that's a bit nostalgic for me too!  Now I'm not embarrassed or self-conscious about my red spots but an even skin tone is nice!  Currently I'm using a tone correcter from e.l.f.

I've been lusting after a pretty yellow nail polish after seeing it on Kaelah's nails in her instagram feed...which wasn't that long ago!  But I neeeed a yellow polish.  This one from Ruby Wings changes in the sun to an orangey color.  So cool!

And since I want to keep my lips nice & since carrying around a bonnie belle lip smacker like I'm eight might not be the best approach these cute lip gloss sort of things will look just as cute but make me feel my age.

What are your next beauty buys? Anything you swear by?

xoxo, Moe

Connect on Twitter // Follow on Pinterest

5.13.2013

Make it Monday // DIY 3 Simple Chain Bracelets for Summer

I've been drawn to delicate, simple chain bracelets lately.  Just a little something to add a hint of classy arm candy to an outfit.  But I haven't really been on the hunt for any lately.  So I decided to raid my jewelry making supplies to see what I could dig up.  Luckily I found a few strands of chain, some bits & bobs, clasps, & jump rings.  To add a bit of color I snatched up a bright pink nail polish - believe me, it's like neon pink the photos don't do it justice!
DIY Knotted Silver Chain Bracelet:
With your wire cutter, snip three equal lengths of chain longer than you think you'll need to fit around your wrist.  Open a jump ring & slip all three chains + one end of the clasp set then close the jump ring.  Gather all three lengths & tie an over hand knot in the center (or as close to it as possible.)  Now wrap it around your wrist & eyeball how much extra chain to take off - or you could gauge it on a bracelet you already own - and use your wire cutters to snip off the ends.  Next open a second jump ring slip all three chains + the second half of your clasp and close the jump ring.  You're done!

DIY Tri-Colored Beaded Chain Bracelet:
Like you did before cut three equal lengths of chain - to fit around your wrist, this time - in three different colors (gold, silver, & an antiqued copper), add a jump ring, & the first half of your clasp.  You'll need beads with holes large enough to thread one length of the chain through.  Add your beads.  Open up your next jump ring slide all three chains on + the second part of your clasp.  You're done!

DIY Circle Loop Chain Bracelet:
Same deal - three lengths of chain (doesn't matter if they are the same but they need to be long enough to fit around your wrist).  Add a jump ring & clasp.  I found some silver circles in my bead stash that I painted with nail polish for an enameled look but you can use any bit of chain or repeat my process if you like.  Now open up a jump ring, slide on your loop, & pick a place on the chain to place your circle, attach the jump ring & close it.  Now using your cutters snip off the excess.  You'll attach this excess right back on the other side of the circle with a jump ring.  Now repeat that with your second circle, staggering it on another chain.  You can lay this bracelet next to the others do get an idea of the excess you need to snip off.  Then open a jump ring, slip your three chains on & the second half of your clasp.  You're done!
Now you have three pretty cool bracelets for Summer!  I love them because they add a little bit on interest to an office look - even though my office is pretty laid back - or adds a bit of class to a pair of jeans.  Love it!

xoxo, Moe

Connect on Twitter // Follow on Pinterest

5.09.2013

Summer Bucket List 2013

Last year I did a little Summer Bucket List (here & here) consisting of things I wanted to do before I moved.  A lot got done, some didn't, but I enjoyed my summer to the fullest!  This Summer I want to do the same thing so I can make the most of the first Summer in our new place.  Some of these things are going to start in the spring - like planting - but for the most part this list is something to make the warmer months pretty fun:

- plant a garden outside & an herb garden inside
- take more instax pictures
- visit the beach more than a handfull of times
- go on at least 7 weekend trips (big & small)
- be a tourist in our own town
- cook on the grill
- go antiquing & yard sale-ing
- put together a relaxing space outside to sit (we've got quite a few patio spaces!)
- get back to sewing
- keep focused on the shop(s)
- get the ceramics studio up & running
- participate in a few craft fairs
- take a class at a local rec-center or gallery
- visit the aquarium in Chicago
- do a lot of learning

This summer I'm going to need a way to completely focus on getting these things done.  I'm sick of making lists, having good intentions, then sitting on the couch after work.  I'm just so exhausted & want me time but I've noticed this is letting my goals slip through the cracks.  I think I've said it before but if I weren't as determined as I am sleep & laziness would win out...so knowing how utterly lazy I can be I'm still surprised I get anything done!!

So while I'm still brainstorming this goal getting done I'll continue to dream of warmer weather!

How are you going to make the most of the warm weather?

xoxo, Moe

Connect on Twitter // Follow on Pinterest // Peep me at Hello Cotton

5.08.2013

Wednesday Decor // Flower Shopping & a Gardening Plan

This past weekend I went perusing the flower center at our Lowe's & our Meijer.  Realizing that I have no clue what I'm doing I took some of Van's advice on this post & have been planning out exactly what I want to do - tackling a job at a time.  At first I thought I'd have to get a lot of shade only plants since I thought our front yard stayed mostly in the shade but I carefully eyeballed the sun as it passed over our house this past weekend.  Seems like depending on the hours of sun in the front yard I maybe opened up to more possibilities!  I think we're in the range of sun to shade flowers - Meijer's flower tags were much more helpful to me. They said that full sun is 6 hours of sun a day, sun to shade is 2-4 hours, & shade is, well, shade.  Am I on the right track here?
This weekend Zach thankfully helped me pick up some of the leaves we could not stay on top of this past fall.  I am not a yard work person.  Really.  I was done as soon as we started.  But we did get all the leaves away from the back of the house & filled up more than a few bags.  Seriously, I wish I was a millionaire so someone could do this for me!!!  I am not a yard work person.  But now that is almost all done....maybe I can be a gardening person?  I don't know how people have such lovely houses! I have other things to do, you know like blog, crochet, & make things!! But I really want to give this a good try.
I don't want to do anything too fancy...but I just want to do something nice.  I plan on planting flowers in the front of the house in the little marked off area of the rocks in our raised little bed.  Right now there are a few bushes of unknown origin growing and we have a marked off little area that houses some mulch & two small deer statues.  So that area will have some sort of foliage :)  Then there is our walkway to the house and next to that is another mulch-y area which may have some plants ooooor I might just fill it with rocks too.  I want to find out what those bushes already in the front are so if I do put rocks I can plant one there too.  There also is a smaller little bed of rocks in front of the big bed...so that might have some plants in it too!

On the patio - behind these flower beds - I want to put some hanging pots between the suport beam things. (Can you tell I'm not a professional at all? no? good.)  I also want to get a small table & two chairs.  Maybe when I am a millionaire, I'll get a swing.

On the deck off the kitchen (which is getting cleaned off this week!  I promise to work on it a bit each night after work!) will go a bigger table for yummy meals outside.  I found a great one at Meijer that I hope is still there at the end of this week!  I also want to put a few planter boxes off the side of the deck.  I'm not sure how many though but it will be pretty...maybe also some hanging planters!  I may go overboard with the things I don't have to actually plant! Like the already potted ones...I can feel successful without having to do anything!
Then there is a little side garden part to by our garage door which I'm going to fill with something.  And finally, I'd like to have a little planter box on the ground under our window off the living room.  Can you tell I love the idea of flowers? I Just don't really know what I'm doing!!  Hopefully I'll get there.  I also have an idea for potted shade flowers at the end of our driveway.  Too much? Yeah, probably.  I'm just going to take it a step at a time & we'll see how it goes.

But my goal through May is to make a list each week/weekend of things to do & just mark it off!  I hope I can get some things done & get this house looking like some really rad flower loving people live here.  No one wants to sit outside with a bunch of nothing to look at!

How do you break up your yard work? Or are you a yard warrior & just attack it all in one weekend?  If you are, come to my house & help a girl out!

xoxo, Moe 

Connect on Twitter // Follow on Pinterest

5.07.2013

Fun Beauty Must Haves for Spring (and Maybe Summer!)

I may have mentioned before that I do this thing where I get really into make up - nail polish, hair, lip stick, etc - and then all of a sudden I just don't give a crap any more.  Well I'm in one of my upswings where I can't believe I ever lived with out some of these beauty products.  Seriously...I'm in love with all of these products & really can't wait for the warm weather to stay so I can go out & show them off!  Maybe it's the cold but I do feel like I've been hibernating for the past few months but I also think that I was in a little slump right there at the end of my unemployment (I was struggling emotionally & had been offered a job I would have been ashamed to work, honestly.  Thankfully I pulled it together to find a job I'm proud of) - I just didn't care how I looked and that made me not really care about myself.  But now that the world is brighter here so are the colors in my life.  Here are some of my warm weather beauty must haves:

A fresh face!  I've mentioned before that I really love products that work together.  I got the Olay Fresh Effects Va-Va-Vivid cleansing system in the Sweet Heart Vox Box from Influenster & fell in love! Shine Free all day!  I just picked up the Statin Finish moisturizer but I'm not quite sure how I feel about it.  I included it because I do like it, it makes my face feel nice, but I think it might just not be right for me.  I'll keep using it though, maybe I'm just being weird.

To keep my face fresh, I usually pair my cleansing routine with Rimmel Fix & Perfect Primer25 hour foundation, & Stay Matte Pressed Powder but just recently I picked up Rimmel's BB cream in light & medium.  I picked up both shades because they were a BOGO deal at the drugstore and so I could blend them as I get sun on my face throughout the spring & summer.  I've heard all the hype about a BB cream, I still don't exactly know what it's all about but I like this one by Rimmel.  It has good coverage & blends well.  Since I have really uneven skin I tend to opt for a more full coverage foundation & really thought this would be on the tinted moisturizer side but it isn't!  So far my face feels great all through the day, no oiliness.  I usually don't wear blush...just add a little natural color to my face with some bronzer, nothing special.  I also tend to keep it natural by just throwing on some mascara, nothing special there either!

You already know about my obsession with the Maybeline Vivids collection but I turn to two colors most often: Shocking Coral (pictured) & Fuchsia Flash.  Lovely spring colors with out being too ridiculous for work!  I shy away from some of the colors because I'm just too shy to wear them.  But the whole collection sure looks great in my make up drawer!
I'm in love with my new flexible rod curlers!  They give more of a wave than a curl & I really like it!  This look is best on day two hair for me.  The first day looks too precise but second day & on it looks much more tousled and beach wavy.  But I still can't decide between curls & waves.  This past week I fell back on my good old foam curlers & fell in love again.  I think I'll keep switching it up here & there.

Colorful Nails & Soft Hands (Elbows, Knees, & Toes) are important for warm weather!  My mom always used this Neutrogena hand cream & now that we're coming out of winter it's the greatest formula for any left over dry skin from winter.  I also like to use this with my manicure sometimes.  Speaking of manicures I just found these awesome nail polishes at Meijer the other day!  They change colors in the sun!  And they aren't lame UV polishes either.....mint to an apple green & coral to a deeper red.  They look good both ways! Currently I'm wearing the mint Gypsy color but also have Sand Dune & Lilac not pictured.  As always, my favorite base & top coat from Icing is key to my manicures.  This base & top coat really seals my manicure & it doesn't chip all week!  I recently tried out a new base coat after seeing a pin on Pinterest but it totally chipped the same day I did my nails.  The whole nail color just peeled off.  Not cool.

I'm loving the warm weather & can't wait to make the most of the sun shine!

What are your warm weather beauty must haves?

xoxo, Moe

ps.  some links in this post are affiliate links but I love each of these products, just so you know.

Connect on Twitter // Follow on Pinterest // Peep me at Hello Cotton

5.05.2013

Sum Up Sunday // Some Yucky Homeowner Stuff

It's not been very glamourous around here these past few days.  I've been covered in dirt & sweat each morning trying to reach my goal of having a nice yard.  But I don't know how to do that & stay on top of my inside chores.  For example our living room is a hot mess right now because I am too tired to pick anything up.  Also, nothing else has gotten put away that's left over from the move either.  I'm half tempted to just donate it all but then again I've also got boxes intended to donate that haven't gotten there either.  Slowly but surely I'm marking off my spring cleaning list (if you're a newsletter subscriber, you know what I'm talking about!)
Our little herbs!
On another, slightly gross note our shower wasn't draining properly so it's been holding water & just getting really dirty really fast.  I've tried to used Drain-o to get it clear multiple times but Zach mentioned we should just plunge it.  So I took a crack at it & got the grossest hair ball out but that wasn't the only beast below.  Zach tried his hand at it & I don't even want to know what he found but he successfully cleared the clog.  Our tub is so sparkly clean - we also had a problem with our water softener so the tub was also red.  Phew!  Simple things like a clean bathtub can really make someone happy.  Amirite?
Lastly, Zach & I picked up some of the leaves we couldn't stay on top of this past fall.  Like I said, I don't know how people keep a nice home - clean inside & pretty outside. No clue! (this is a hint for tips please! lol)  If it weren't for Zach I think I'd go mad some times.  I got so pissed picking up the leaves. I hate leaves.  It seems like for everyone you pick up there are 6 more.  I don't know how to stay on top of them at all!!

Anyway, it's been a nice productive weekend.  See, I'm staying on top of my flower goal!  Have a great week!

Connect on Twitter // Follow on Pinterest

5.01.2013

Wednesday Decor // Top of Dresser Floral Vignette

I've always been inspired by the Baroque & Rococo movement in both architecture and art.  In fact one of my favorite movies - mainly because it's pretty in that way- is Sofia Coppala's Marie Antoinette that released in 2006. I especially love this movie because of the mix of modern thrown in - converse sneakers in a scene & modern music at a masquerade ball.  I watched it the other day while I was working on blog stuff & feel back in love with the pastel, the florals, and the overall fantasy & over-the-top decor that is depicted in the movie.
source
Look at all that pretty decor.
Now that it's getting to be spring I'm beginning to dig on pastels & florals and was trying to come up with a way to incorporate the luxury of this 18th century movement in a way that wouldn't make Zach feel like he was living in an easter egg palace.  Our bedroom is where this sort of Rococo inspired idea comes into play.  We've got a black & white damask pattern comforter paired with royal purple sheets.  Not too pastel right?  I've been searching for a way to add more creative yet classic elements that both Zach & I like.  We've got more modern furniture - dresser all in black with clean lines - but also have a mix or more traditional designs in our night stands & my vanity.  The legs for our DIY bedframe (that hopefully we'll get to here shortly!) are more rounded & formal looking if you will.  The next part of the bedroom I believe is tackling the closet doors - they are a light brown & don't match anything at all!!

While perusing Meijer the other day, I think I was in there with no intention of visiting the craft section (but you know how that goes), I found some really awesome fake flowers on sale (the central purple one in the second photo).  I started off with no intention of creating a huge bouquet but once I got home I realized that a vase with only 7 flowers looked sort of lame.  So back out I went to Hobby Lobby to check out their selection of flowers.

I've always shied away from fake flowers because they look like, well, fake flowers.  But from being in Hobby Lobby over the time we've been here has led me to see that there are very good quality fake flowers out there - at a price.  The ones I like are made of a sort of foam & not made of fabric or plastic like yet don't look too plastic-y (that makes no sense right?)  These high quality flowers are also high in price.  I missed the half off flower sale but some of the stems I grabbed were on clearance so I think that made up for it (a bit).

I love the real look of this bouquet!  I sort of had a classic idea in my head - full & with some overhanging plumes.  Channelling this Rococo movement but bringing it a bit modern with colors & a sleek black vase.  I stuck to incorporating a deep purples, pastel purples, whites, & a bit of black.  I found some really pretty white flowers with a black-ish purple center to bring a little depth.  Moving away from bright colors but on a more of a pastel look really helped lighten up the space.

This little vignette is on our tall dresser.  The top also serves as blanket storage now that it's getting warmer.  I plan on making a few more blankets as a little bit of an accent here in the near future.  I'm trying to pull in bits we already have in our collections just to get the most out of the stuff we love.
I kept it a bit whimsical with my gnome lamp (love him!) and incorporated some of Zach's old bottles & one of our cameras.  Now that I'm looking at it, the camera might go but that's what's so great about collections - moving things around as you please!  Like an ever rotating exhibit.  I feel like I may add & take away quite a bit before I'm super satisfied.  I'm thinking I'd like to have a mirror there as well....our room only has one window...so mirrors might be a great touch to bring in the light!

I can't wait to give you a full tour of the house but I'm so happy to share with you little sneak peaks here & there.

xoxo, Moe

Connect on Twitter // Follow on Pinterest // Peep me at Hello Cotton