Showing posts with label Valentine's Day. Show all posts

2.12.2018

5 DIY Gifts to Support your Best Galentine

Valentine's Day is this week!! I absolutely love February because it is all about love & expressing our love to others.  This year, I'll be focusing on giving some care to my self with a long bath & probably a good movie with a bottle of wine.  We all need a little me time.  But this Make it Monday I want to share with you some easy DIY projects that are supportive for your best Galentines!  Make something for them that will build them up and make them feel like they are awesome!!

Oh, and if you check out the bottom of this post you can in on the last minute registration for the FREE LIVE Essential Oils & Self Care class tonight!  So check that out too!

Printable Positive Affirmation Cards

Build your best gal pals up with a set of printable affirmation cards.  They can draw a card each morning and repeat it while they prepare to move through their day inspired and empowered.  This deck of 36 empowering phrases can be printed at home and assembled rather quickly.


A Handmade Mala Tied with Love & Intention

Speaking of affirmations, hand bead and tie a mantra for your galentine so that they can repeat their affirmation 108 times during a meditation.  Choose beads that you find inspiring - they don't have to be wood or crystal, just something you think they will love.  Choose the embroidery floss based on a Chakra you know your bestie is working with - red for the root chakra of groundedness & security, orange for the sacral chakra of creativity & desire, yellow for the solar plexus chakra of joy & and empowerment, green for the heart chakra of self love & gratitude, blue for the throat chakra of expression & communication, indigo for the third eye chakra of intuition & openness, or purple for the crown chakra of enlightenment & divine guidance.

An Energy Clearing Kit to get rid of any Bad Vibes

Set your gal pal up for a Spring full of good vibes with an energy clearing kit.  Include an essential oil or Palo Santo + a crystal aligned with some good juju so that she can break through anything that has been holding her back!


Custom Scented Bath Bombs

A long, refreshing bath is one of the best self care activities.  We take time to release ourselves from all other burdens to focus on our own well being.  Essential oils can help align us with the emotions we'd like to feel so we can become rejuvenated and restored.  Create a bath bomb for your gal pals that will help them feel they can reach their highest potential!


A Beautiful Journal to Keep Wonderful Thoughts

One of the best ways we can keep track of how awesome we are is to journal our thoughts.  A handmade journal using your Cricut Explore is a great way to get crafty for your BFFs.  Share a creative space where they can feel inspired & supported!

There is still time to sign up for the Essential Oils & Self Care LIVE class this evening!  Head over to the Facebook event page or register here for a FREE self care planner.  I hope to see you tonight!

How do you build up your besties?  

xoxo, Moe

2.02.2016

Happy Valentine's Day from Minted

Who kind of wishes that they still were able to participate in elementary school style Valentine's Day card exchanges?  I totally do - though I'd really like it to be with all my friends and not with like my coworkers!!  Plus we're grown ups now, so we could drink wine and what not.  It would be great, it really would.

If you're wanting to host your own Valentine's Day card swap, or maybe you have some little ones that need class room cards, Minted has some stinking cute ones!! Of course if you need to send some photo cards to relatives, Minted has you covered as well.

this post contains affiliate links, please read my full disclosure here.
For all my crafty ladies, I'd totally give you this sewing machine card!! The vintage look of this is so cute!
The hand drawn look of this one is adorable. I want to attach this to a little friend gift!  The shades of pink and red with that yellow just speak to me!

If you're in the mood for some Valentine cards, Minted has some promos for you as well:
Enjoy 15% off Valentine's Day Photo Cards with code SENDLOVE (valid 1/31-2/5)
Enjoy FREE expedited/rush delivery on Valentine's Day cards with code FEBSHIP (valid 1/31-2/5)
Enjoy FREE 3-day shipping on classroom valentine card orders $60+ with code SHIP60 (valid 2/1-2/4)
Happy Valentine's Day everyone!

xoxo, Moe

1.30.2015

Free Journaling Cards February 2015

Remember last weekend when I'd realized I'd forgotten the free journal cards for January?  Yeah, it was a creative goal of mine to keep doing them...then I totally spaced!  Here's the second installment of 2015's free journal cards!
Of course they are for Valentines day and as always they are designed in PicMonkey (learn how to design your own here!)  I love the ombre look of the Ombre Amour option to add some fun pink touches to the cards.  This would look great on photos as well to create a cohesive look.  It is a part of PicMonkey's Royale feature - so sign up here ($4.99/mo or $33/year).
As always the PDF of 8 journal cards are free so go ahead and click here to download!  Please play nice though, as I work hard to make these free cards for everyone each month and really, truly enjoy it!  Remember to either pin, link, or share the post and not the link to the cards.  These are for personal use only - do not sell them or claim them as your own.

Check all the free cards here!

xoxo, Moe

2.18.2013

Make it Monday // Homemade Black Fettuccine Noodles

Zach & I have an annual tradition of making homemade pasta each Valentine's Day.  Last year we made three types of ravioli: cheese, sausage, & spinach and mushroom.  Each pasta was a different color: sausage = red, cheese = white, spinach = green. This year we wanted to do colored pasta again but try a fettuccine noodle this time, and try a twist to the coloring!  So today I am going to share with you how to color pasta black with cuttlefish ink. You read that right & it's really fun.
Start with a regular pasta recipe (we used a modified one from memory & looked to the book that came with our pasta machine for reference).  The general ingredients are flour, eggs, & water, you'll also need to pick up some cuttlefish ink.  You should be able to find this at any sort of international store or even if you have a amazing supermarket.  Zach found his online.
This was the first time we got to try using the mixer to make pasta & it was a bit of a challenge.  Last year we made piles of flour & egg on the table and I worked it together with my hands.  This year I really wanted to try the dough hook attachment on my mixer.  A place online suggested to start with the regular beater attachment to get the mixture going, then to switch to the dough hook.  That's what we did.
From last year we learned that sometimes you'll need more water & sometimes you'll need more flour.  As we started to mix the eggs, four, & water we also added two packets of the cuttlefish ink.  Now, I will worn you it smells a bit ...... fishy.  But don't worry! It won't be fishy when you get done, I promise!  Because we were a little bit inexperienced with the mixer we pulled the dough out a bit & worked it with our hands to get the ink distributed well.  The mixer takes a lot fo the kneading out but you'll still need to knead it a bit with your hands until it's the right consistency.
Here's where I took it out the first time to incorporate the ink. I threw it back in to knead some more
Our cart came in pretty handy when making the pasta! It was great extra counter space! At the end of it all you want the dough to not be sticky.  Your ball of dough should almost feel like play-dough on the dry side - it still sticks to itself, it's not flaky, but it's not sticking to your hands - it's just a nice little ball of dough.  This will take adding more water or more flour to the dough, but do it in increments so you don't end up adding too much.
Now you're ready to let your dough sit for 30 minutes.  Throw a towel over it & just let it be.  Now is the time to clean up your mixing bowl, but don't put your flour away.  You'll need it to help running the pasta through the pasta maker.
Start by cutting off chunks from your dough ball about an inch in width.  Begin running through your pasta maker on the largest setting.  You'll need to add flour if it starts sticking, fold it over, run it through again.  You want it to become a consistent sheet of dough before moving down to the next notch  Keep going, making a consistent sheet of dough before moving down in size.  We ran our pasta dough until it reached the 7 notch.  Then threw flour on both sides & ran it through the fettuccine attachement.  Let me tell you, it's much better to have a friend doing this with you!  Your sheet of dough will be long & you may need a friend to catch and organize the pasta strings.
Since our dryer is out (we just had the new one delivered, but it's not hooked up yet..can't wait!) we've been using drying racks for our clothes.  These drying racks did double duty as a place to hang the pasta!  I am not quite sure what we would have done if we didn't have these, so a place to hang your fresh pasta is important!
Now prepare your meal as normal.  Since your pasta is fresh, it won't take any time to boil up so watch it & make sure it doesn't overcook.  Zach made up some scallops & shrimp, added some asparagus and we put Alfredo sauce over the noodles.  It was an amazing dinner.  You may want to have a few friends over because you'll end up with a lot of pasta, we'll have leftovers for a bit.
So there you have it! Homemade pasta dyed with cuttlefish ink!  It turns out really pretty.  Homemade pasta is very fun to make.  You can make it yourself, but it's fun to do with a friend.  I think it's really a team work sort of thing because you have to work together when the sheet of pasta gets too long for you!   Cooking together is one of my favorite things.  I'm so glad I have a great cook to work with!

xoxo, Moe

Connect on Twitter // Follow on Pinterest // Peep me at Hello Cotton

2.11.2013

Make it Monday // Valentine's Day Safety Pin Sweater

This week is Valentine's Day!! What? Can you believe it!  I'm pretty sure if we're not spending this weekend putting down the baseboards, we'll be doing our annual Valentine's Day pasta making.  (You can find last year's yummy post here.)
I stumbled upon this wonderful Safety Pin Heart Sweater DIY over on Trinkets in Bloom & fell in love!  When we were in Virginia for Christmas I stopped by Forever21 to shop their plus section - which I love! - and found this awesome heart sweater.  I usually don't pick up sweaters because I feel that they don't flatter me well...but this one I couldn't resist.  I've been wearing it way too much.  Last week when we were in Wisconsin, I wore it all week! I decided to spruce it up even more for Valentine's Day with a safety pin heart!


I followed the tutorial but added a smaller heart inside of the bigger heart, in small gold safety pins since I was running out of bigger safety pins!!

I had to keep fiddling with the heart shape to make sure it was staying in a heart shape.  I also think I may try it again by outlining just a small heart in gold safety pins!  There are so many shapes & outlines you can add with safety pins.  I'm so glad I found this awesome DIY to share with you!

Happy Valentine's Day!

Connect on Twitter // Follow on Pinterest // Peep me at Hello Cotton

2.05.2013

Trend Tuesday // Valentine's Day Gifts

I've never done a little gift guide before...at least I don't think so....so this is going to be fun!!!  There may or may not be some things I want included in here.  Because the best way to my heart is a handbag, I've included a lot of them!


Starfleet Cadets Print from Mich Palmer on Society6 // Mr Beer Home Brewing Kit // Reusable Silicone Bottle Caps // Wake Up Call iPhone Dock (not just for boys! I have this one in brown) // I Love Bacon Book // Pixel Heart Mug

I love Valentine's Day!  I also believe the best way to a man's heart is bacon.

How will you celebrate Valentine's Day this year?

Connect on Twitter // Follow on Pinterest // Peep me at Hello Cotton

1.22.2013

Trend Tuesday // Heart on Your Sleeve

I love Valentine's Day mainly because of the hearts.  They are cute, I love seeing them everywhere, & they make me smile.  I especially love seeing them in untraditional ways like mixed with mint or in mustard yellow!  I know it's not Valentine's day yet, but I'm preparing!

While looking around on Etsy the other day I found some heart shaped things I love:

Heart on Your Sleeve

ONE - fun mint & red heart print washi tape from the Washi Shop// TWO - knit mint & coral heart motif headband from Three Bird Nest // THREE - crocheted heart motif leg warmers in white & red from EmofoFashion // FOUR - mustard yellow applique heart pillow cover from Pillow Factory

Connect on Twitter // Follow on Pinterest // Peep me at Hello Cotton

2.14.2012

Happy Valentine's Day // From my Hearts to Yours

My room mate posted this on facebook, so I decided to share it with you all.  Just so you know:

I am sorry, but I don't have a direct source! Help a girl out if you know!

I just want to say that I am so thankful for all of my bloggy & twitter friends (new & old) for being so awesome in this blogging community.  All the blogs I read daily & all the the conversations I have over email & twitter with lovely bloggers have been really inspiring.

There are going to be some great big changes here in the future (hopefully!) & I can't wait.

On another Dr. Who related note, Tiffany & Co. recently tweeted about giving your sweet heart that little blue box, you know, the Tiffany blue ones filled with expensive jewelry? Well, the only blue box I ever want better be filled with the Doctor!

So Happy Valentine's Day all!


2.13.2012

Make it Monday // Homemade Pasta from Scratch

If you love pasta, then you'll love homemade pasta! This past Saturday, Zach made the best ravioli I think I've ever had for our Valentine's Day Dinner.  There were three types of ravioli: Ricotta, Mozzarella, & Provolone, Spinach & Mushroom, & Sweet Italian Sausage.  I mean it when I say this, I had a blast making the pasta & watching Zach  put it all together.  (We've been watching 
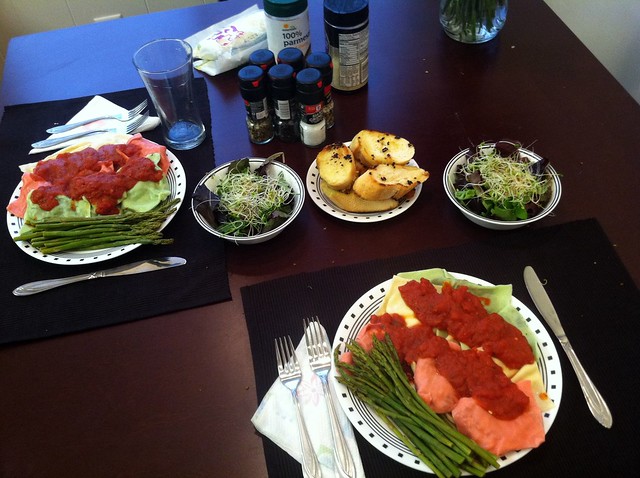
Chopped recently, so presentation was a big thing for this meal!)  The final product was a serving of ravioli, side of asparagus, spring mix salad with sprouts & Olive Oil & Vinegar, and garlic bread.  We topped it off with Milk for him & Champagne for me (of course!)

So, if you are interested, here's how you make your own homemade pasta (just the pasta, not the yummy insides...I'll save that for another post!)


First, clean your damn counter tops! We didn't have a space big enough to make the dough on so I scrubbed the heck out of the table to make a clean surface.

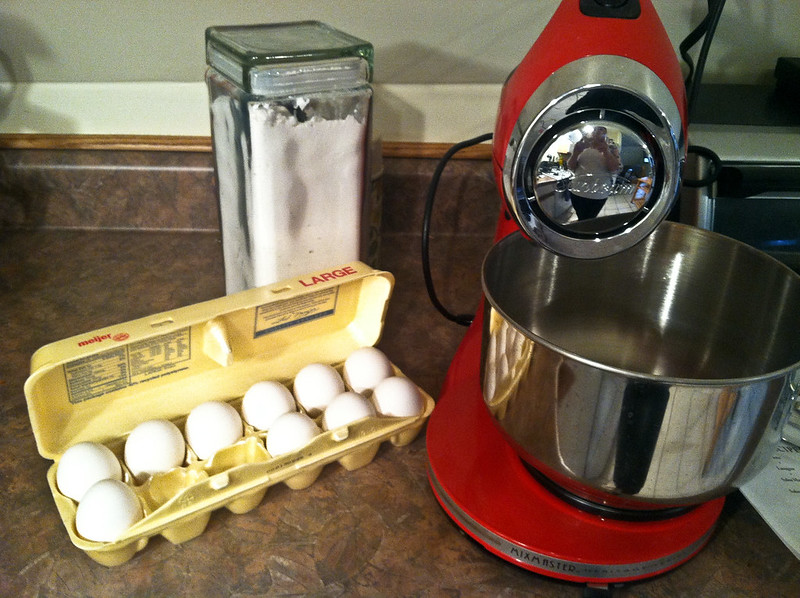
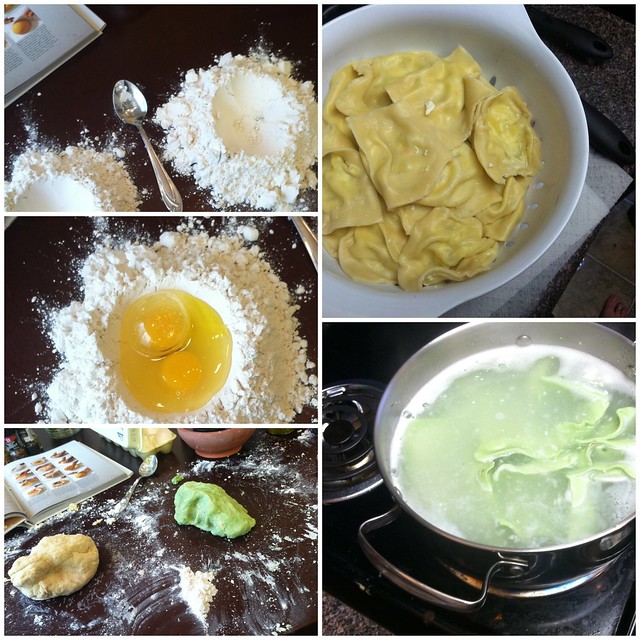
Second, lay out 3 separate piles (if you are making different pastas) of 2 cups flour.  Great a little bowl shape in the flour with a spoon to hold your other ingredients.

Third, add two eggs, 1tsp, 1.5 Tbsp water.  (you may need to add a bit more water as you make the dough.)  To the middle pile of flour, eggs, olive oil & water, add a few drops of green food coloring & to the third pile add a few drops of red.  <-- that last part is optional.  We wanted to do a fake out of pasta with tomato & pasta with spinach.  But the color does help with the would be Russian Roulette of 'what does my ravioli have in it?' We put the spinach in the green pasta & the sausage in the red pasta.

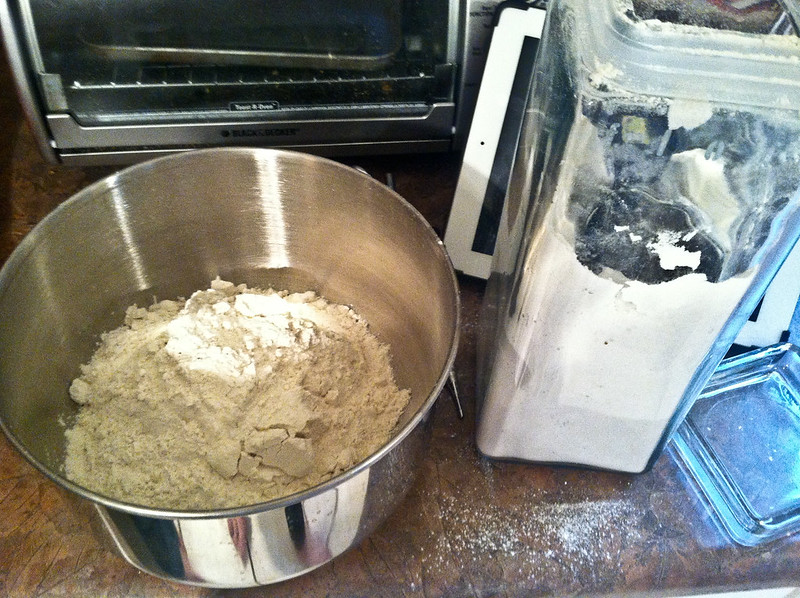
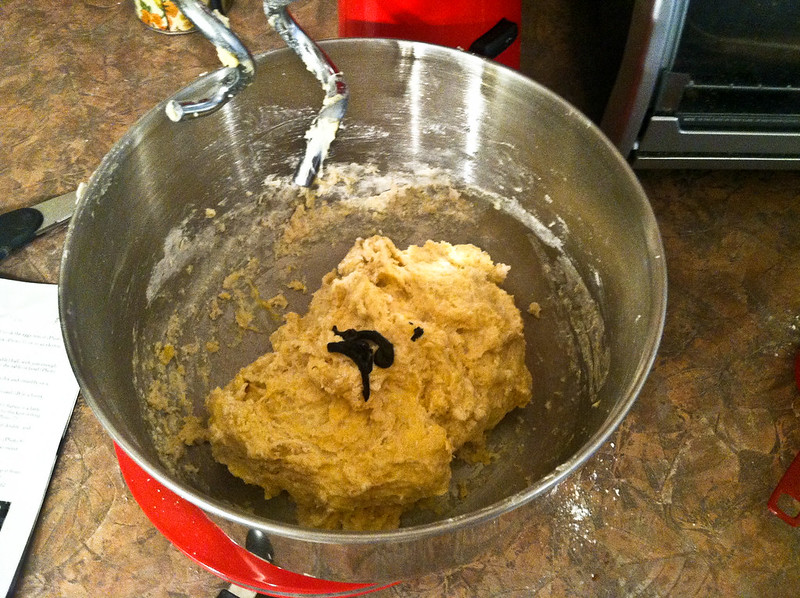
Next, take a fork & begin to whisk the egg mixture in the little bowl in the flour.  This helps combine a little of the flour so the egg doesn't go everywhere.  Slowly begin to whisk in more flour from the walls until you get a rather thick mixture.  
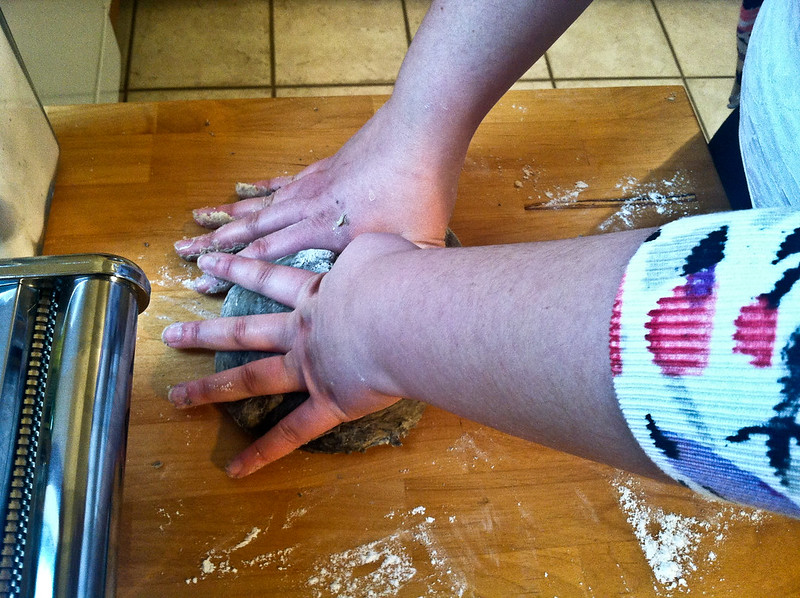
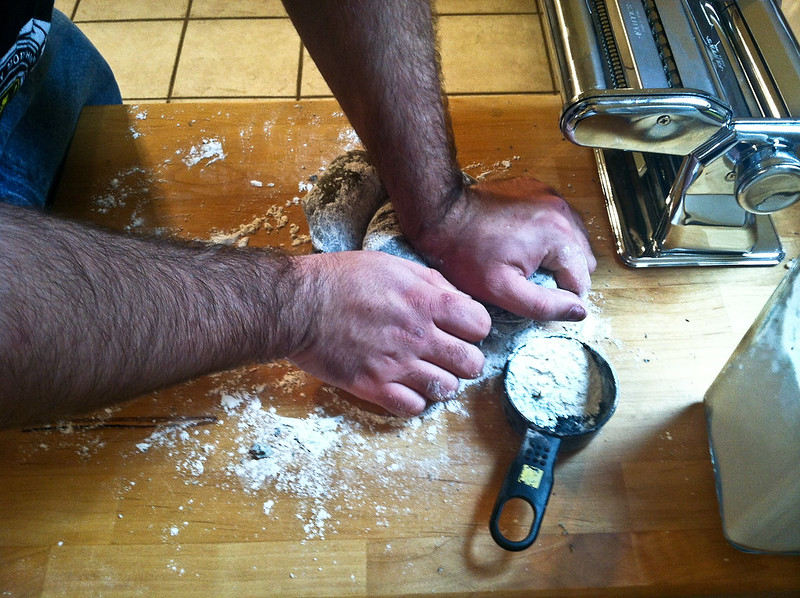
Begin to knead the dough by gathering up the sides of the flour walls & pushing down (toward the table) & then away from you.  Keep gathering & kneading.  This is the place you might want to have a cup of water handy to add a Tbsp here or there.  It takes a bit of water to get the dough to stick to itself.

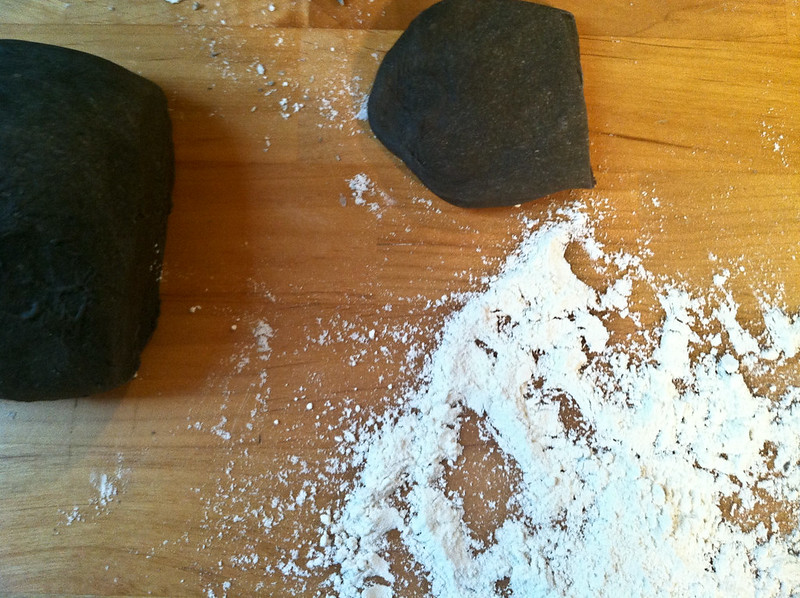
Then, keep kneading & kneading & kneading.  The dough should feel a bit like almost dried out play-doh, then you're done.

Then move on to the next pile.  The one good thing about having a few piles is that I got better at kneading & incorporating the ingredients by the end of it!

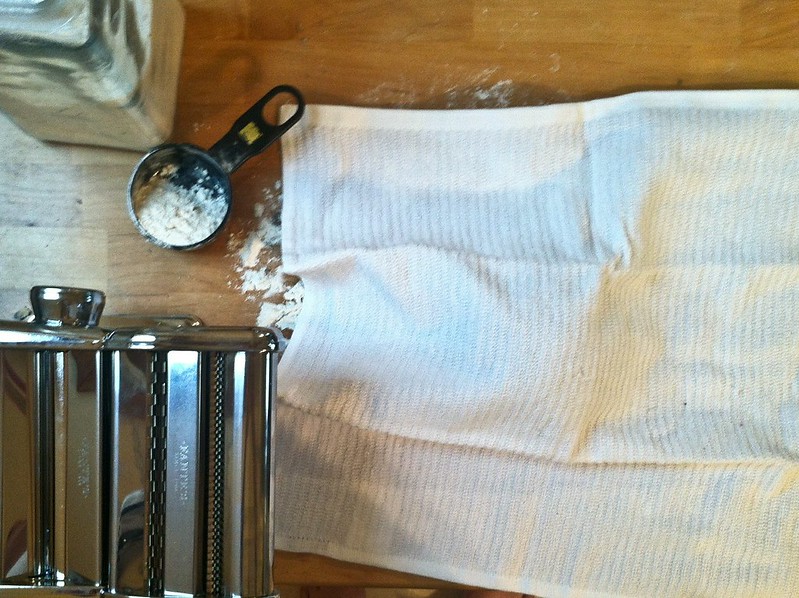
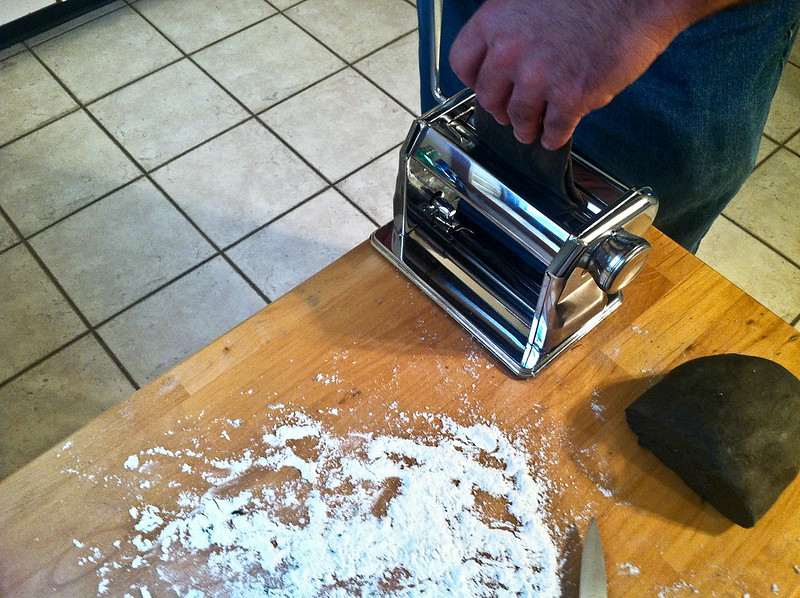
Next, (here's where I get wordy..) pull out the good ol pasta machine & begin to roll your dough through.  I am not going to go into too much detail because I followed the instructions in our pasta machine & it came out perfect, but here are some necessary tips:

  • Just go down in thickness slowly & make sure you run the dough through a few times to get the dough all the same consistency.
  • Don't worry if when you run it through the first time it falls a bit apart.  just pull it out & layer the other parts of the dough over each other.  Add a pinch of flour between the layers.  The only reason I could think why it would fall appart on the highest setting is because the middle of the ball of dough was moist & the outside was a bit dryer.  (This is why you need to put the pasta through a few times)
  • If the pasta gets too long, cut it in half & work with one half at a time.  This makes it easier to make the raviolis too!
  • If you are making raviolis, make sure the final run of the pasta makes it at least as wide as the pasta machine.  If it's not wide enough, fold the dough in half (from end to end & not side to side) and run it through again.  Do this until it is the width of the pasta machine.
  • DO NOT lay the made sheets of pasta on top of each other, they'll stick! You could try to add flour between the layers, but you'll have a harder time sealing the pasta to itself for ravioli.  If you're going to make another type of pasta, it might be ok to do that....
Finally, get out your ravioli ingredients & start to stuffing! Lay out the sheet of pasta & put little dollops of filling down the long side, spaced about the size of your thumb apart.  Fold the pasta sheet (long side to long side) over & press around the mound of filling.  (press a bit hard to seal 'em up!)

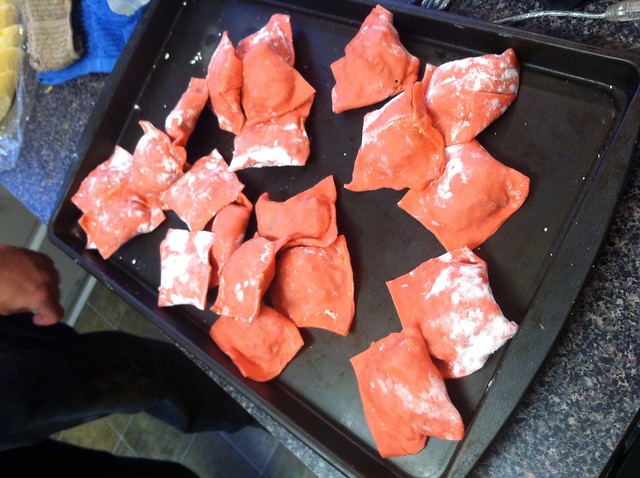
Then take a knife & cut them apart, being sure to seal any edges that may come open (use some water if you need too).  This is what they look like:


There is a bit too much flour on these, but they are ready to be boiled! Cook them like you would any other pasta.  Our filling was already cooked so you don't have to worry too much.  We did add egg to the filling (you'll have to ask Zach why, though) but you'll cook 'em long enough to cook the egg.  

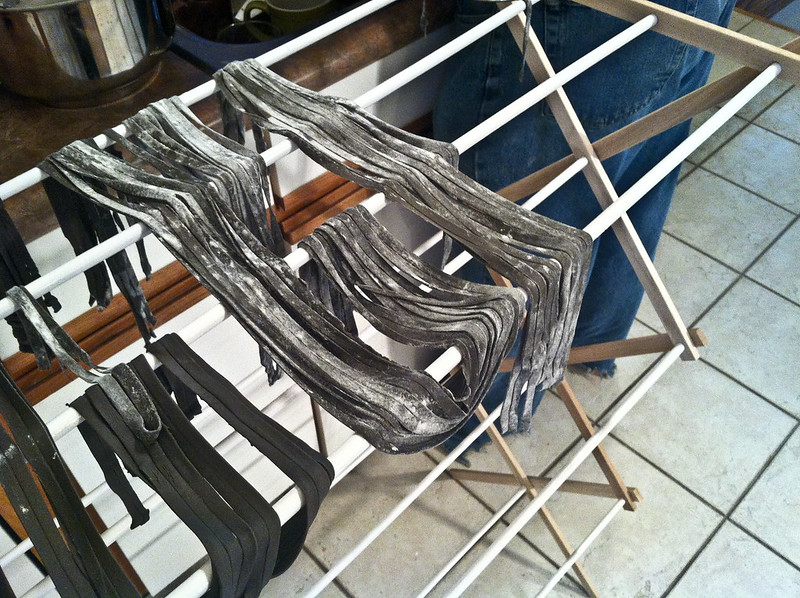
There should be another attachement to your pasta machine that will make spaghetti or fettucini, if you're interested.  Just run it through there & you'll be set!

All your hard work, it will take a few hours (!!) will turn into this yummy, yummy meal

Bon Appetit! 

(ps. all these photos were taken with my iPhone! Pretty good quality this time!)


2.14.2011

Valentine's Day

Spend it watching this:


PS. Don't forget to check out the link parties in the Side Bar or click here!

2.04.2011

Fan Fridays: Spread the Love

I thought I'd give every one an early Valentine & share these free printable Valentine Love Notes with you!  Click here to go to google docs where you can download & print!


The PDF is black & white so you can color them how you wish!
Spread the love! 
Don't forget about the Valentine's Day shop...better get your orders in soon!


PS. Don't forget to check out the link parties in the Side Bar or click here!

1.06.2011

Doily Valentine's Day Decor: Home, Office, Classroom

Doilies are, to me, the most essential part of Valentine's day.  I remember using the paper ones to create cards & decorations when I was little.  Crocheted doilies are the grown up versions of the paper ones we used to give to classmates & friends.

Check out the Valentine's Day Shop over at With Love to pick up some doilies in sets of 2, 3 & 4.  Perfect for classroom, office & home decor.  Use them as coasters during your romantic candle lit dinners or dress up your gift giving to friends & family.


Happy Valentine's Day!  What would you do with doilies?

PS. Don't forget to check out the link parties in the Side Bar or click here!