It is so chilly up here that I just know snow is going to fall before I'm completely ready. Everyone else I know is down south still wearing shorts and flip flops. I've fully busted out the boots, hoodies, and fall candles! So it is only fitting that I dress up my planner for Fall!!
this post contains affiliate links, please read my full disclosure here.
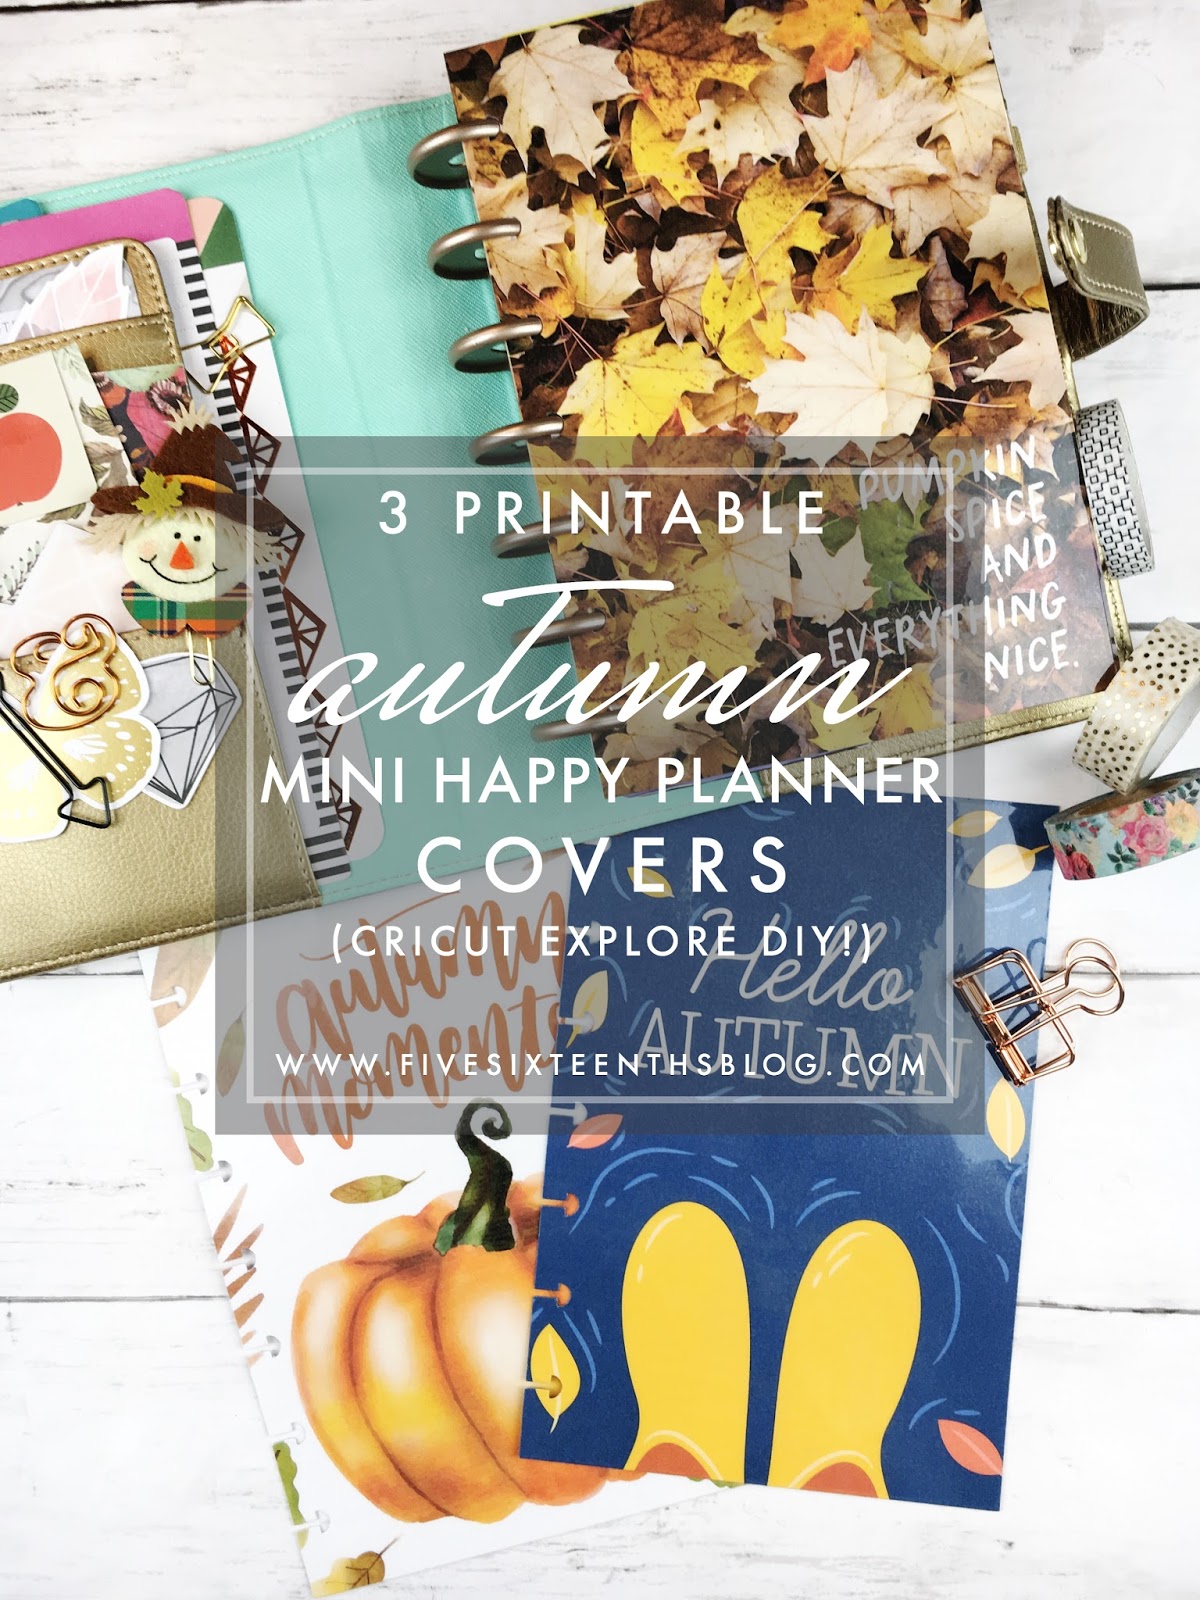
One of the things I wish MAMBI would do is release a ridiculous amount of deluxe covers for the Mini Happy Planner. I've debated on painting a few of mine just to have the diversity I want. I have yet to take the plunge into taking the rings out of a six ring binder. I almost tried this weekend but I chickened out! So now I'm just using the gold deluxe cover for fall and a brand new snap in cover!! Below are three covers for you to cut with your Cricut Explore, so enjoy!
supplies // printable covers, printer, regular printer paper, Cricut Explore, 5mil laminating pouches, Cricut mat
Circut has recently updated their print then cut area to be 6.75 inches by 9.25 inches. This update also changed the registration marks so my previous way of laminating then cutting no longer works. After a ton of trial and error trimming my laminating pouches I found that my Cricut was able to read the registration marks even if they work laminated! Queue the celebration!

So, open the desired back image and print that on your regular printer paper. What I tend to use is 28lb paper. It is slightly thicker but not as thick as card stock and that really makes the cover stand up to wear and tear more. Upload the desired cover image to a new canvas in Cricut Design space. There is no clean up needed so just follow the steps and save as a print then cut image. Add this new image to your canvas, size the height to be 7.5 inches. If the proportions are locked then the width will auto adjust. Select Make It in the upper right hand corner, then send your project to your printer.


Place the printed page into a 5mil laminating sleeve and feed through your laminator. I find that 5 mil over regular printer paper holds up enough through wear at tear and a regular laminator gets hot enough to create a good bond to the paper. If you try to laminate card stock with a regular old laminator it won't get hot enough to form a strong bond and the lamination will start to peel back from the paper. That's not good!

DOWNLOAD THE COVER IMAGES HERE!
If you find your machine won't read the marks, try to cut in complete darkness or as close to it as you can. I cut these guys multiple times in this experiment and it worked all 5+ times. So hopefully it works for you!


Want even more Cricut Explore DIYs? Click here!
xoxo, Moe
Do you have a template that will cut the pages out with the correct punch for Happy Planner?
ReplyDeleteThese are so cute!! Well done!
ReplyDeleteAdorable, Thank you
ReplyDelete