Inspiration boards are a great way of giving readers a cohesive look into an outfit, a room of your home, a trip you're taking, etc. Making inspiration boards sometimes becomes a bit of a daunting task if you don't have great software or great photoshop skills. My favorite place, that I think you've probably heard of, for making outfit inspiration boards is Polyvore. But did you know that you can also use it for other sorts of inspiration boards? If you remember this post on Summer Party Essentials I used Polyvore for that board too! I used Polyvore to make this inspiration board for my craft room:

Polyvore has a browser extension that lets you clip from most any website meaning that while you can clip clothes you can also clip housewares, cars, office supplies, etc. So today I wanted to share with you how I use the options provided by Polyvore to create inspiration boards. I say 'using the options provided' because in Polyvore's Terms (at least how I understand them) you aren't allowed to change the html or images Polyvore provides for you to post on your website. But there are many text options, many pointer options, etc. Here's how I used Polyvore to design my craft room:
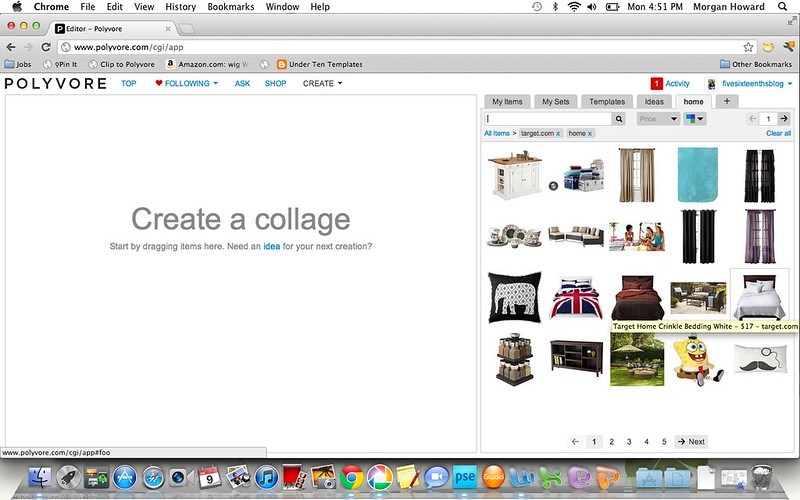
Start by going to Polyvore & creating a new set. Use the search bar to find items you're interested in or click on My Items to find the items that you've clipped & start to add the items you like to your set.

You can choose a specific color, specific price range, only items from target, etc. I started off by searching for storage, then organization, then baskets. I found a lot of things I wanted to use so I added them to my set.

Once I was satisfied with the storage solutions I'd found I decided to add text by clicking on the A under Embellishments. I added text for the title, a subtitle, & a description of each solution.
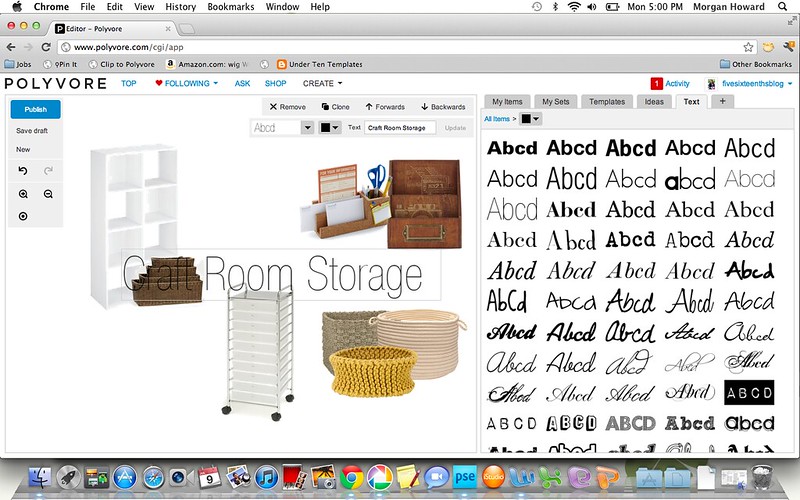

I cloned & repositioned the text boxes in order to keep the size consistant. Then added text at the bottom for visual balance.

Then I went back to the home page & selected the arrow under Embellishments category. I added an arrow I liked then resized it, rotated it, & flipped it to face the way I wanted. Positioning them around the layout added a level of interest & direction to the set.
Lastly make sure that the collage is taking up a lot of the white space so that it will be a large image for your blog. You can select the entire collage by clicking & dragging the cursor over the entire collage. From there you can resize the collage. Once finished, hit the publish button & name your collage. You'll be taken to the collages page where you can right click & get the code.
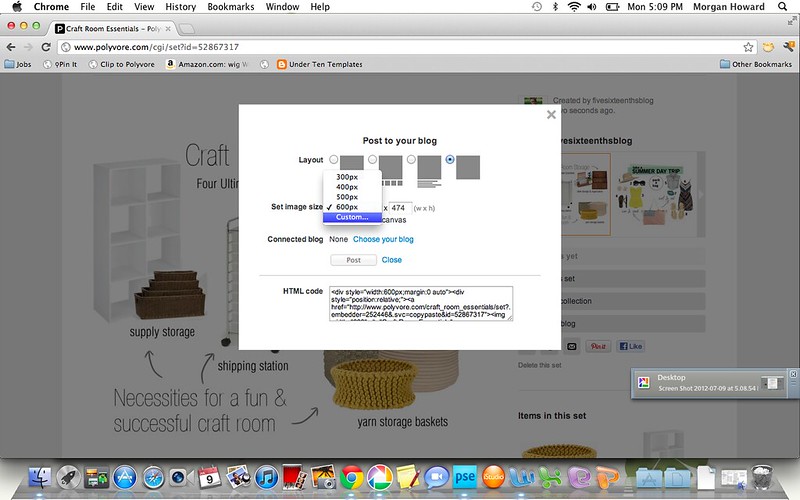
I tend to choose the last square under layout so that the individual names of the items used aren't shown because I like the design better. If you have a certain width in mind, I like images on my blog to be 650px wide, you can put that custom width in the box.
Now go over to your blog platform & post the HTML in the HTML option of your post body. Write up your post & you're set.
Polyvore is a cool site to play around with & it's easier to use than a photo program. You can make sets & save them for later, you can join groups & be social, you can get loads of inspiration too. It's a super cool way of making an inspiration board easily.
How do you use Polyvore?

This is a great post! I think I'm going to use Polyvore a lot more from now on. I'm just not as creative as you - your collections put my efforts to shame! x
ReplyDeleteIsland Girl Insights ♥
This was such a great post, i went straight to work on my post this morning! I came across your site via hernewleaf.com and you are now on my permanent blogroll list. thanks again and can't wait to explore more of your site.
ReplyDeleteJust found this post by searching on Google for how to make blog collages and I really just want to thank you because it has helped me so much! I was previously saving the Polyvore collage as an image to my computer and finding that it pixellated horribly! Your blog is great by the way :)
ReplyDeleteThanks again, Rebecca, of A Little Bit of Glitter (www.alittlebitofglitter24.blogspot.co.uk)
xx
Thank you soooo much, I cannot tel you how happy you have made me (I feel like a REAL blogger now with all my fancy montages!)
ReplyDeletex
http://heidis-box-of-various.blogspot.fr/
Thanks this is so handy! :)
ReplyDeleteThank you so much for this post!! I am terrible at Photoshop and this is so easy to use!! :D
ReplyDeleteSo glad this is helpful!!
DeleteThanks for posting this. I found this through Google, as I used Polyvore before, but I didn't get it 100%. I am now trying to make more wishlists for my blog and using it again.
ReplyDelete