One of my favorite things about the Happy Planner is that you can pull the pages out and add pages in. Because you can add things in, this planner is great for customizing! I already have a few DIY posts on customizing your Happy Planner - make a few bookmarks & make a planner cover - so I'm adding another to the bunch.

If you're signed up for Blitsy (a flash sale type of site for craft supplies) you'll know that the MAMBI Happy Planners plus the accessories are on their a lot (check out the whole lot of planners here). You can get what you need at a discounted price. But sometimes I'm all about making things with what I have! So this DIY will be helpful if you clip in a lot of things and maybe don't want to buy the Snap In Tabs or if you don't want to buy them to start with but have a few things on hand. Here's how to do it...
supplies :: Cricut Explore cutting machine, SVG cut file, double sided removable tape, 3 mill laminating pouches, laminating machine, scrapbook paper, bone folder
Prepare the materials for cutting by laminating the scrapbook paper. Double sided papers may be best for this but single sided will work as well.
 Upload the SVG to Cricut Design Space, if needed size the SVG to 1.25 inches wide (keeping the proportions locked) and select Go. Under project copies enter 15. 15 clips can fit on a 8.5 x 11 inch canvas, the size of a transparency sheet or laminating pouch. Select Go. Set the dial on the Cricut Explore to Poster Board +, load your material, push the flashing Cricut button on the machine.
 If the Poster Board + setting doesn't cut deep enough, you may need to create a custom setting. Learn more about creating a custom setting in this post. I've realized that as my blade gets dull, I need to increase the pressure. My custom settings for this type of project is: Pressure at 340, Multicut at 3x, and Blade at regular. This setting tends to work for any project where I am cutting through laminated scrapbook paper.
 Using the double sided tape, place the sticky side down on one smooth edge of the clip. Use your bone folder to encourage the adhesive to stick. Leave the backing on the tape so you can use these as you need them.
 The repositionable tape is helpful in case you want to remove the photo, document, or journaling card in the future. I won't do too much damage to the item attached to the clip. I love finding new ways to use materials I already have on had! This is perfect for adding in anything you'd like to use in your memory planner, adding in important documents you need to remember, adding in journal cards or adding in class schedules. Any way you slice it, these guys are 100% helpful!
Remember, all freebies on the blog are for personal use only. Do not use this in any commercial capacity - do not make and sell them, do not disseminate in mass quantities. As always, thank you for planing nice!
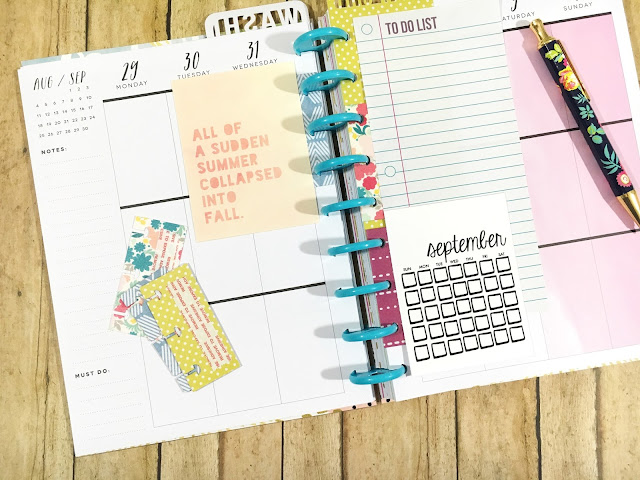
Find the Summer into Fall journal card here & the September month journal card here.
What do you use your Happy Planner for? Anything unique?
xoxo, Moe

Prepare the materials for cutting by laminating the scrapbook paper. Double sided papers may be best for this but single sided will work as well.


DOWNLOAD THE SVG CUT FILE HERE
Remember, all freebies on the blog are for personal use only. Do not use this in any commercial capacity - do not make and sell them, do not disseminate in mass quantities. As always, thank you for planing nice!
Find the Summer into Fall journal card here & the September month journal card here.
What do you use your Happy Planner for? Anything unique?
xoxo, Moe
If you like the content you see here on the blog, please consider becoming a patron! Joining the Patreon Family as a financial contributor means you get access to exclusive content only for you!
Not able to download the svg file. Comes up as a blank page. Am I doing something wrong?
ReplyDeleteYou should be able to download & then upload to design space and the image show up. I believe that the preview shows a bit of the canvas of the file...so if the actual image isn't on that part of the canvas...it won't show. Just download & upload to DS as usual, you should see it then :)
Delete