I can't believe it is almost time for back to school...some places have even started school already I think! And if you're in college....you might already be back to it as well. It has officially been 10 years since I graduated high school, and 5 years since I graduated college. I haven't gone back to school in a long, long time. But...that doesn't mean I don't get excited for it every year. The school supplies, the fresh notebooks, the new clothes, the new back packs....man, I'd really like to buy a slew of new school supplies like right now.

this post contains affiliate links, please read my full disclosure here.
This year MAMBI introduced an academic planner into their line of Happy Planners and I think that is the bomb-dot-com. They also introduced a new Teacher Planner which is all that and a bag of chips, if I do say so myself. Last July I shared this DIY cover for your Happy Planner using a cool pocket folder from the back to school section and today I want to share another Happy Planner DIY - DIY bookmarks! I've been on a roll lately offering up some great SVG files for use with your Cricut Explore, and today's DIY is no different. Here's how you do it:
supplies :: laminating machine, 3 mil laminating pouches, scrapbook paper, SVG cut files, Cricut Explore (Circut Explore one or Cricut Explore Air), paper trimmer (optional)


If the scrapbook paper isn't trimmed to fit inside the laminating pouches, trim them down now. The best type of scrapbook paper to use for this project is double sided scrapbook paper so the design is visible on both sides of the bookmark, but it isn't necessary. For this project I used 3 different, single sided, scrapbook papers trimmed to 8.5 x 11 inches. Laminate the scrapbook paper by following the directions on your laminating machine.


Place the laminated paper right side up on to the mat, and feed it into the machine when prompted. To cut through 3mil laminated scrapbook paper I've found the Poster Board or Poster Board + setting on the knob on the machine to be sufficient. You may need to play around with your machine to find the best cut setting for you. Push the flashing Cricut button to cut the project.
Repeat for all of the bookmarks.

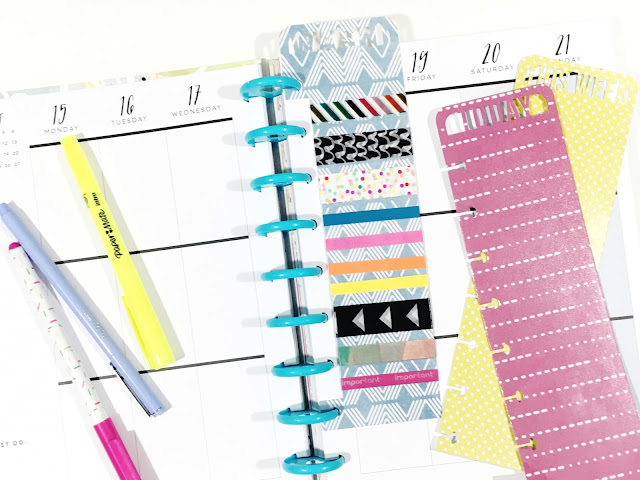
The washi bookmark will allow you to wrap some of your favorite washi samples to carry with you on the go! Snap the bookmarks in where you will need them and you're set! These are perfect as mini dashboards to stick any important information - class schedules, grocery lists, project supplies, group meetings, etc.
These SVG files are for personal use only, do not sell the files or anything created with them. Do not distribute the files or the end product in mass quantities. If you would like to share this DIY, please link or pin this post and not the files. As always, thank you for playing nice.
I hope you enjoyed this little DIY! Have fun planning and find more Planner DIY posts here.
xoxo, Moe
 If you like the content you see here on the blog, please consider becoming a patron! Joining the Patreon Family as a financial contributor means you get access to exclusive content only for you!

DOWNLOAD THE SVG FILES HERE
(disclaimer - you may see one or more of the files show up 'blank' when you click the link. Simply download the file and it will show up on your computer. You shouldn't have any trouble uploading it to design space either.)
I hope you enjoyed this little DIY! Have fun planning and find more Planner DIY posts here.
xoxo, Moe
where can i find the downloads for this diy
ReplyDeleteI've now added them in! Sorry about that!
DeleteI love this idea! Is the size of the download for the BIG, classic or mini?
ReplyDeleteThis is for the Classic Size planner :)
Delete