Everyone is posting images of their new planner set ups for 2015 and I'm over here moping because I'm still in Virginia (it is Saturday January 3 when I'm writing this) so I can't break out my new laminator or new planner goodies until I get home to Indiana!! So, in order to feel like I'm keeping up with everyone I wanted to share with you 3 ways to create lined inserts for your Filofax, disc bound, or any other ring bound planner you might be using this year.
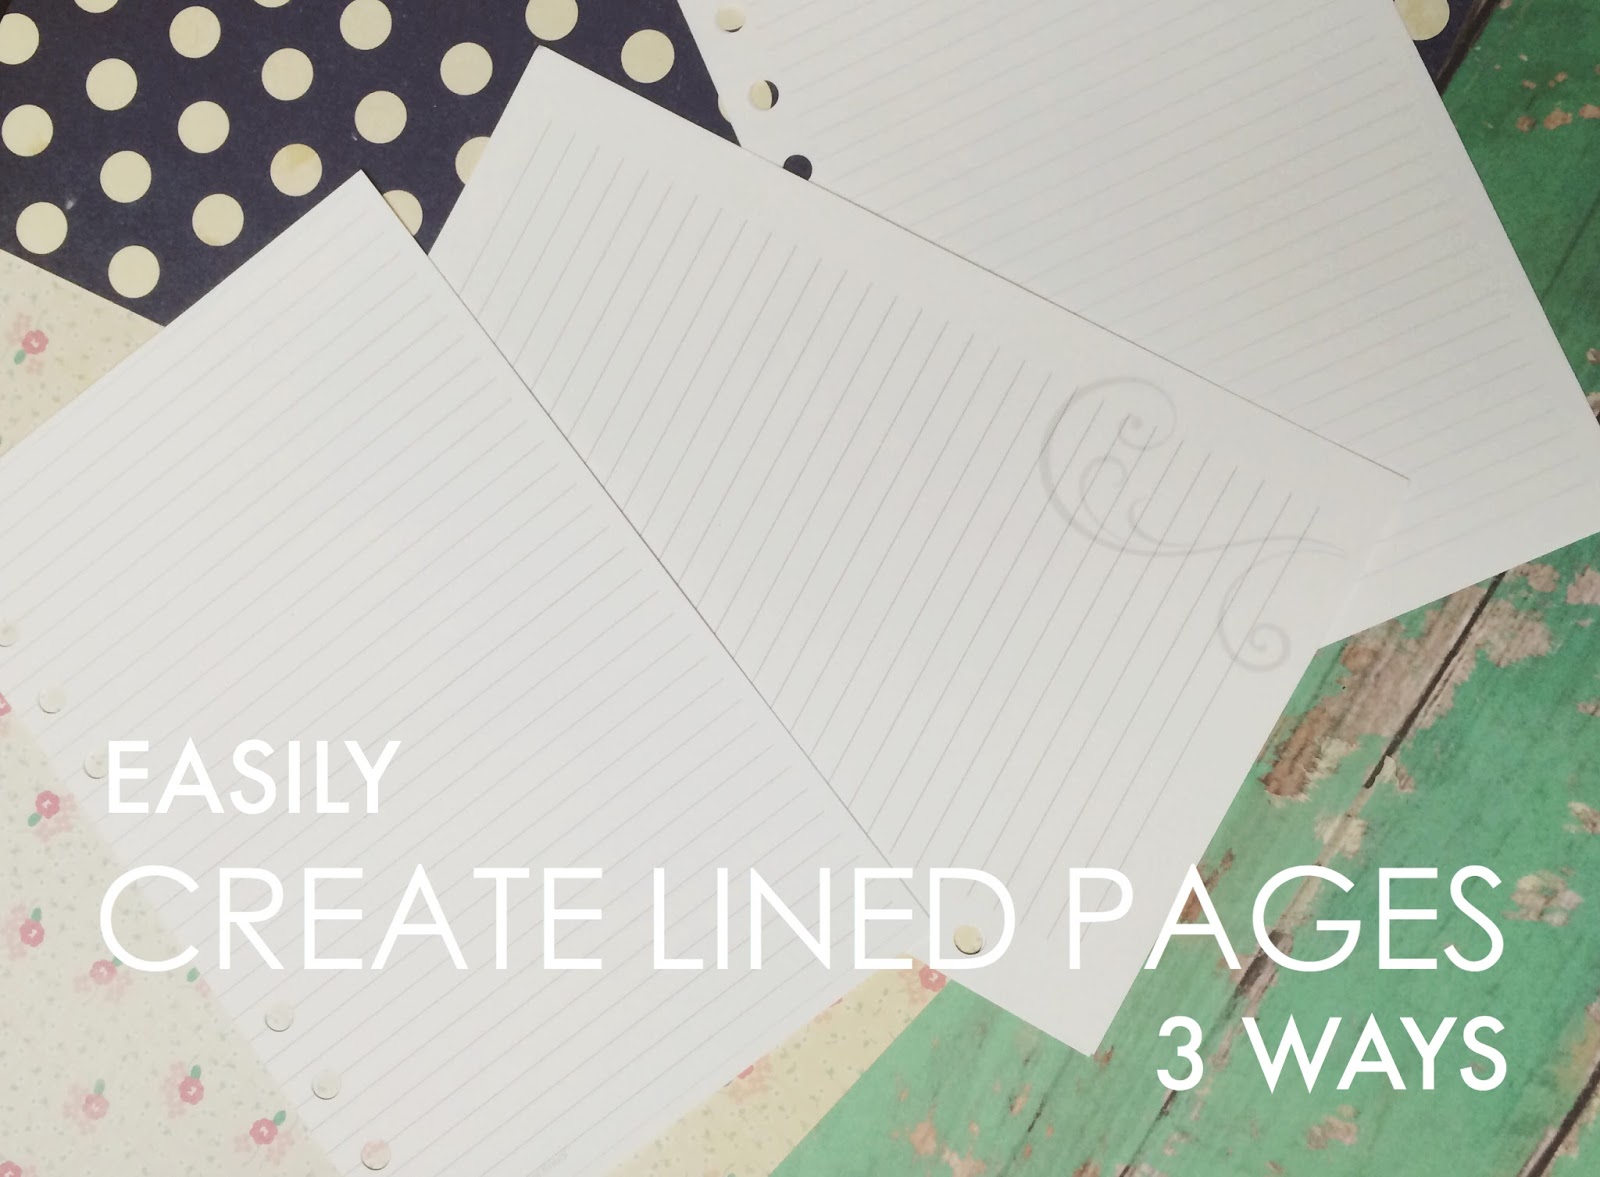
I know I love making my own inserts because I can tailor them to my own needs, but of course you can do a quick internet search and find free printable inserts to use. In fact I have a few inserts (and plan on adding a bunch more in 2015) if you click this link here. Here's three ways to make personalized lined inserts for your planners:
Using a Word Processing Software
Obviously this is the most common resource when it comes to making an insert. If you have a processor like Microsoft Word or Open Office you can simply set your page size, margins and type in a few lines of underscores and print it out. I usually set my pages to be 8.5 x 5.5 inches because I trim my 8.5 x 11 inch pages down before I print & punch them. However, today I wanted to quickly show you how to make a full 8.5 x 11 inch page of lines because I plan on doing another DIY later where this will come in handy! I'll be using Microsoft Office for this part so you might have to adapt it for your own word processor.
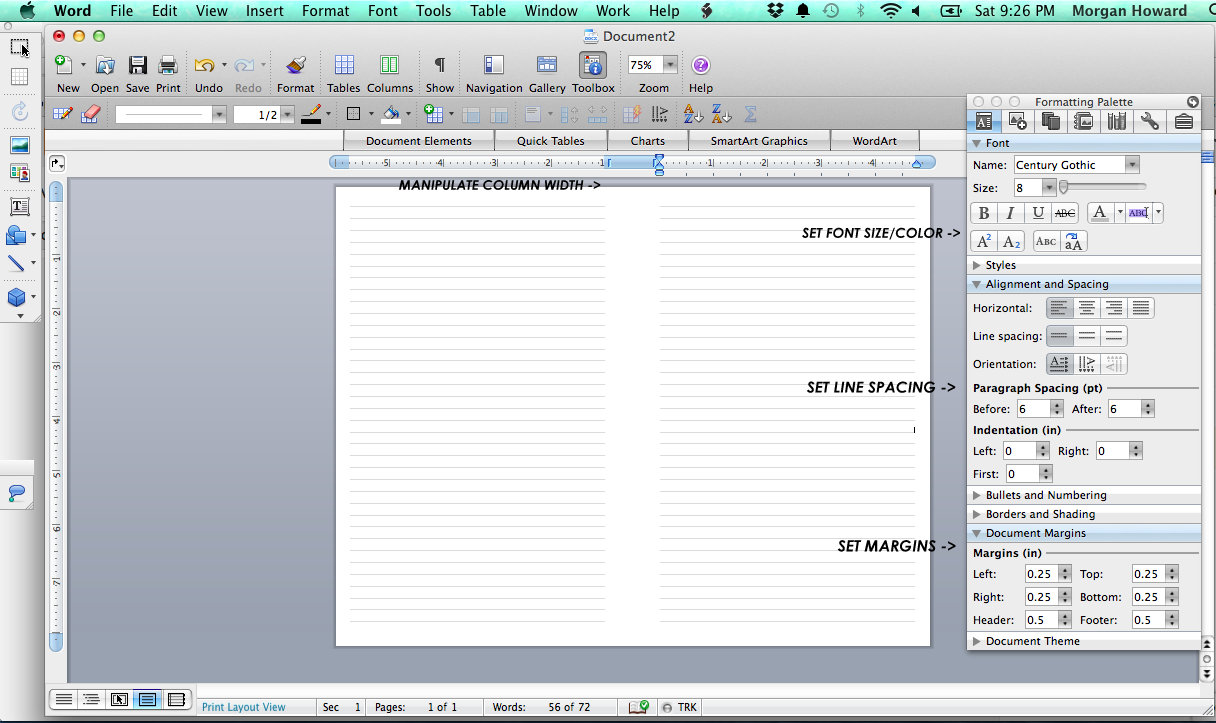
Open a blank 8.5 x 11 inch document in Word, set the page view to horizontal, and set the right, left, top, and bottom margins to 0.25 inches. Insert two columns and then type out your underscores. You can manipulate the spacing easily by changing font sizes or you can find line spacing and add spaces before and after your lines until they line up. This increases the spacing between the lines giving your more room to write. You can also add titles like notes, blog ideas, things to remember, shopping list, etc if you need lined pages for multiple sections of your planner.

An advantage to this method is that you can save your work to view later. It also puts a nice border around your pages. If you plan on slicing the pages in half, manipulate the column width by hovering over the blue line on the ruler at the top of the page and dragging the edge to the right to make the middle bigger to allow space for your hole punches. I like to set the color of my lines to a light grey shade. Then print the pages back to back following your printer's instructions.
Online Generator
Incompetech is a online graph/ledger/lined paper generator that offers a whole bunch of options for lined paper. With this option all you have to do is navigate from the home page to Writing and Note Taking and you'll find a variety of note papers to down load in as a PDF.
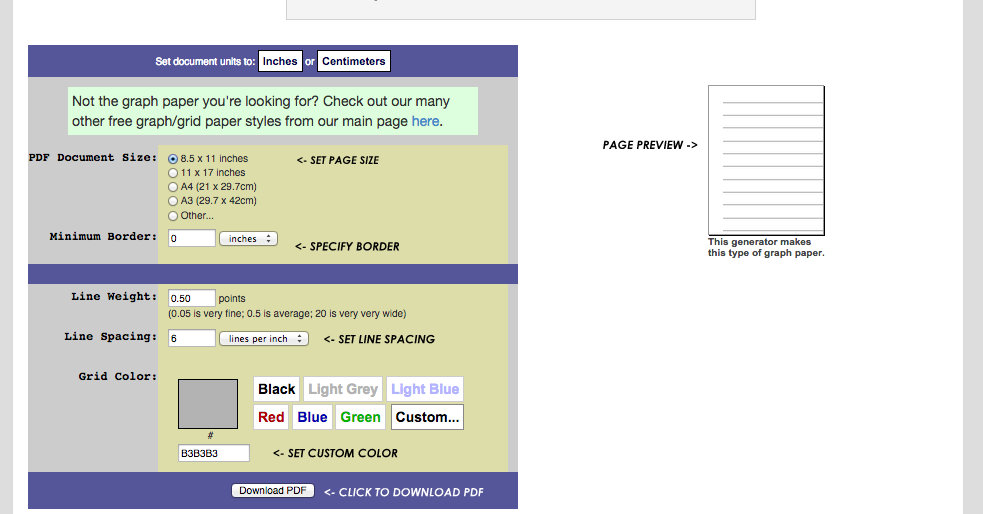
For this image I chose Line Paper and set the desired measurements - 8.5 x 11 inch document (choose other then input 11x8.5 to get a horizontal page), 0 inch border so the lines go all the way across the page, 6 lines per inch, a .5 inch line weight, and line color to light gray. Then click the small Download button to download the PDF.
An advantage to this website is that it's no fuss but still pretty customizable and the lines go to each end of the page. You can set custom page measurements, line spacing, colors, etc with out having to worry about all that jazz in a word processor. This is by far the easiest click and print method! There is a watermark at the bottom of your downloaded PDF, FYI (so many acronyms...)
Using PicMonkey
You know I had to throw in my favorite online photo editor/mini design machine! This is where you can get creative with out having to really worry about setting up margins etc. You can add fun check mark boxes, doodles and all that jazz really easily.
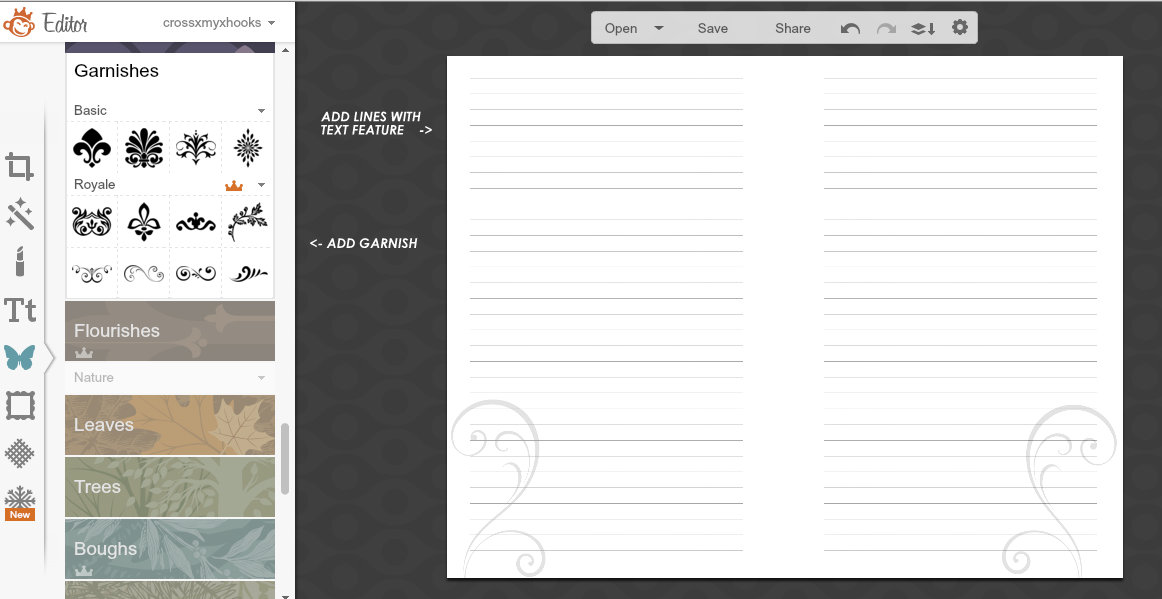
Because PicMonkey offers no design guides I usually hold a piece of paper up to my screen, mark both edges of the canvas with a pencil then fold the paper to make the edges meet. This gives me an idea on where to lay a guide line to judge the middle of the canvas to account for any punching I may do later. I then hold the page back up to the screen a insert a line down the middle of the canvas to design around.
Open up a new, blank design canvas the size you wish to design on. I used this page on the PicMonkey help to find out that an 8.5x11 inch image needs to be 2550 x 3300 pixels. I entered this conversion under the custom design option (entering 3300 x 2550 will give you a horizontal canvas to work from). Using the text feature I added a box of lines, the right clicked and duplicated the text box and moved it to the other side of the canvas to create a two page spread. I added a flourish from the Royale feature through PicMonkey to add some spice. Then print your image - I opened mine in preview on my Mac and then printed it full page.
An advantage to this is using some fun images behind your lines to add a personal touch. While there are many free options through the site PicMonkey, signing up for the Royale feature gets you access to a butt load more options! You can sign up here - $4.99/mo or $33/year.
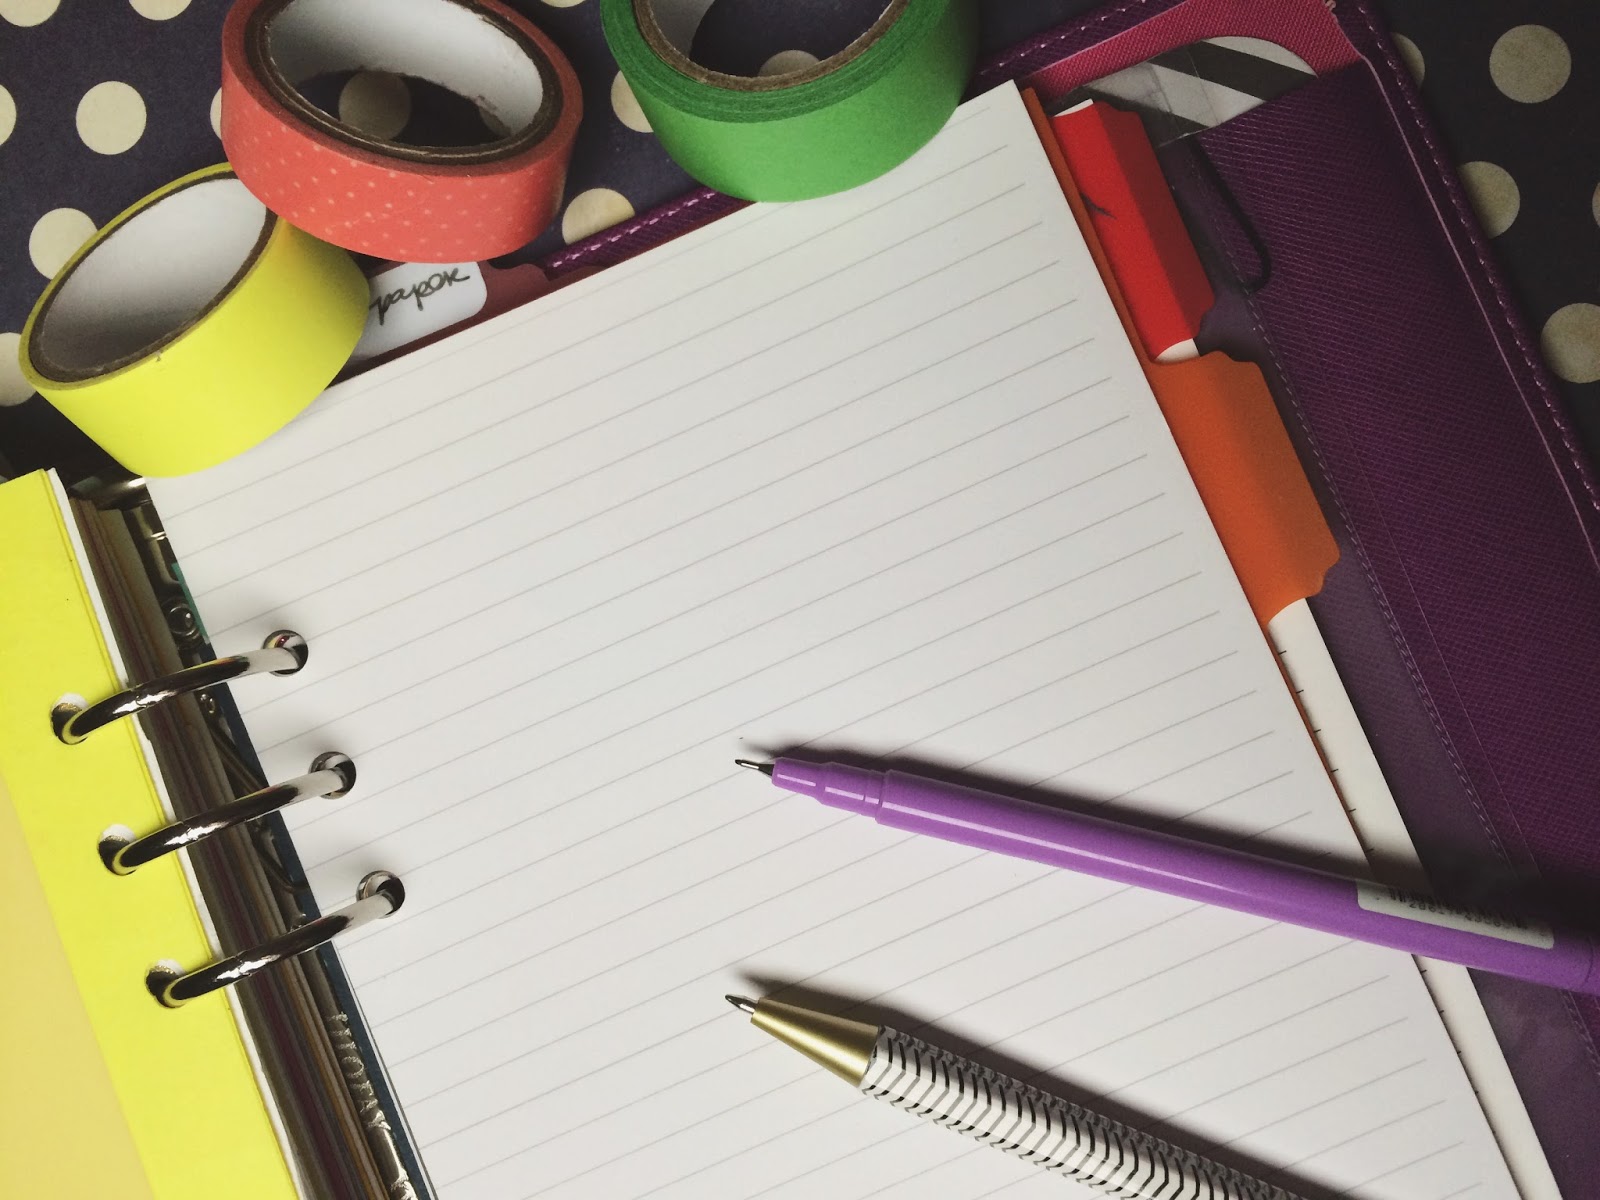
Of course, if you want these printables already made up to print on 8.5 x 11 inch pages you can download the blank lines I made in word here and the lines with the flourish in PicMonkey here. Then follow your printer's instructions to print back to back images.
I hope this little DIY info has been helpful in your planner personalizing for 2015. I can't wait to get my 2015 set up put together so I can share it with you all! Be sure to subscribe to my YouTube channel for a walk through coming up shortly.
How do you make inserts for your planner? Do you customize your planner at all?
xoxo, Moe
I just Google "printable lined pages" and print them, then cut along the lines so that it is even.
ReplyDeleteBut yours are prettier. :)
http://giftieetcetera.blogspot.com
I really like the ones with the added swirls!
ReplyDeleteI managed to pick up some packs of Filofax paper in the sale, so still have lots left over. I've never had a go at creating my own pages or printing much, but I may consider having a go when I use my current stock up. I don't do a huge amount of customisation, but recently purchased some washi tape so will be having a little play with that :)
I really liked your idea. Making few for my self. Thank you!
ReplyDeletehttp://completelyhandmade.blogspot.com/
This comment has been removed by the author.
ReplyDeleteDo you have an actual tutorial that explains the different methods? I have Microsoft Word but I am very visual and need to see how you make your pages to understand what you are talking about. TIA for sharing, Cynthia
ReplyDeleteCynthia - under each section there is a little blurb on how I created the pages. Microsoft Word is easy enough to create two columns and then fill your page with underscores. Hope this helps!
DeleteHi Moe, Thank you for the reply. I read your posts regarding the methods but don't understand how to apply some of what you said in Microsoft Word. Also, PicMonkey? So, I was hoping there was a tutorial on the methods. I can give it a try either way. Thank you in advance
Delete