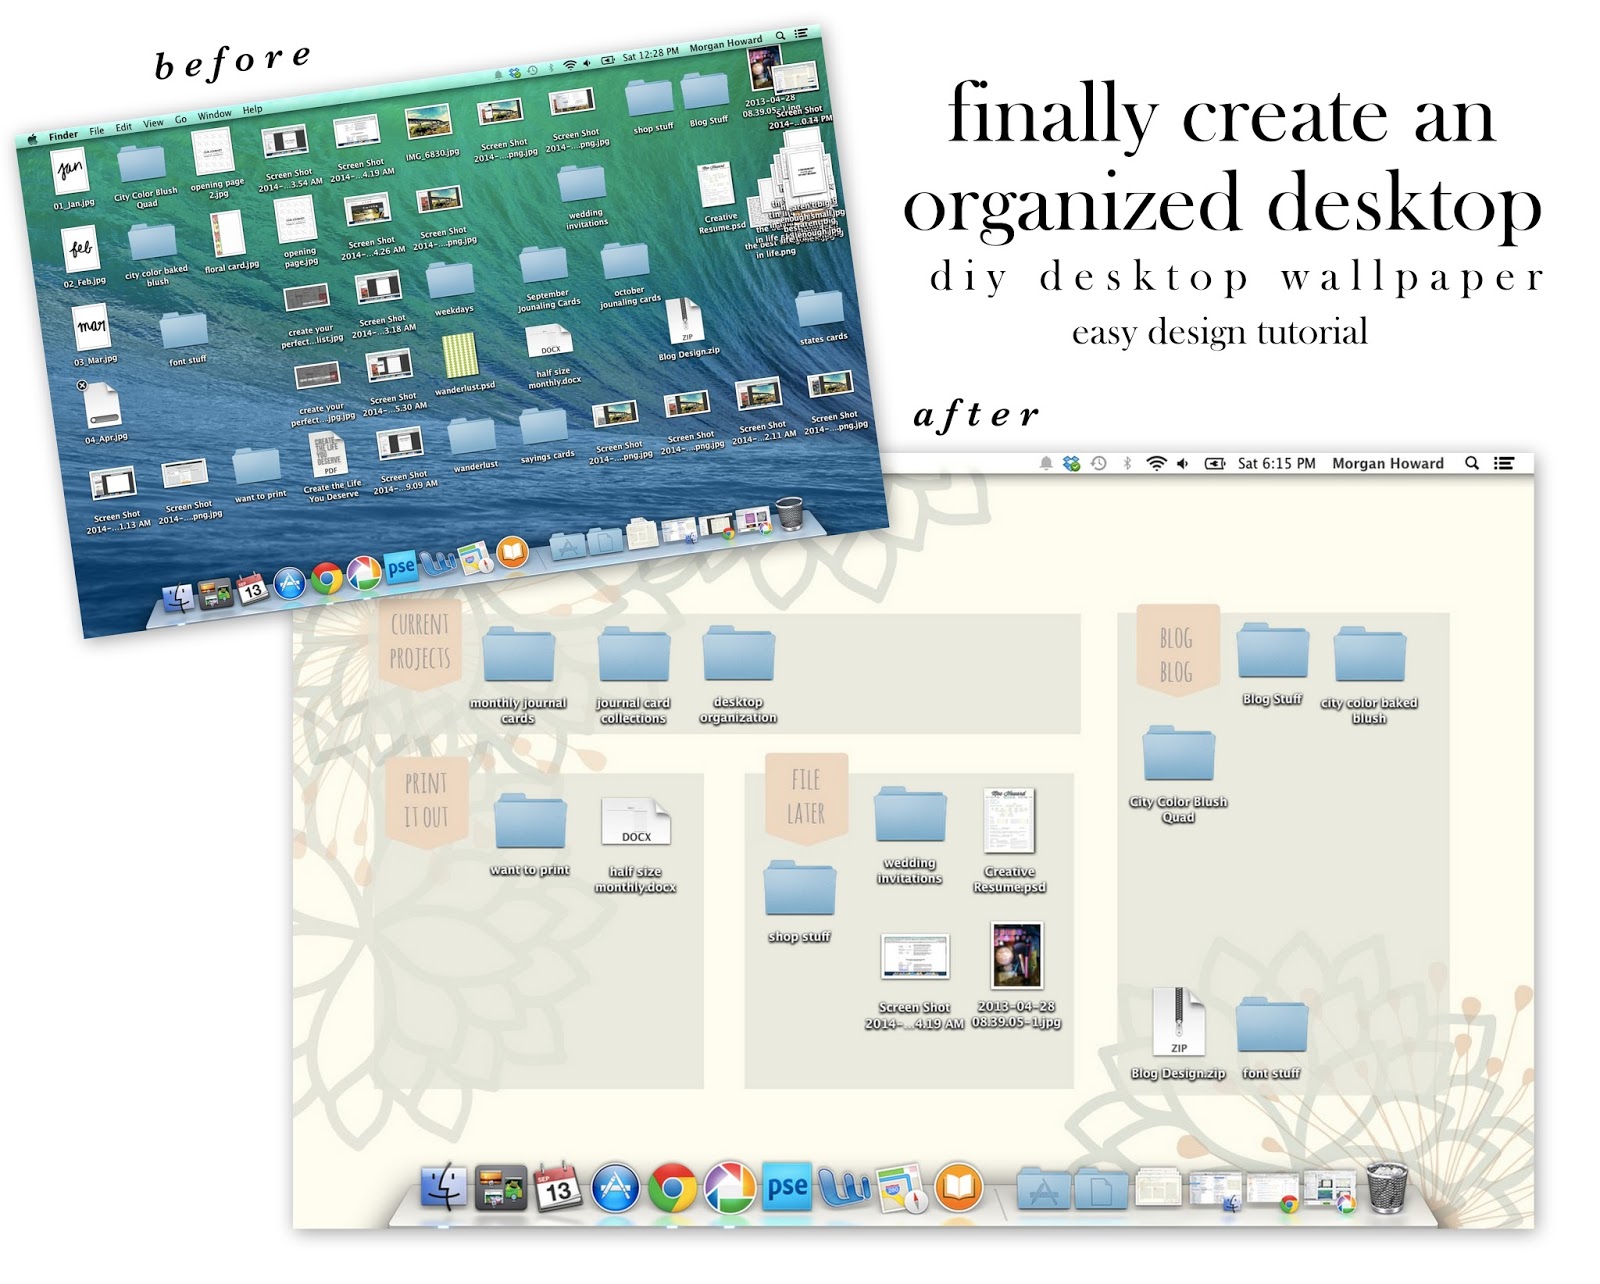
I'm still sorta in back to school mode and am still craving some more organizational DIY stuff so I thought I'd go for another one of my favorite types of tutorials on the blog and that is tutorials using PicMonkey! If you don't already know - PicMonkey is my favorite online photo editing and simple design platform. You can use it for free, online at PicMonkey.com and if you want to test out the Royale feature click this link for a free 1-day trial to decide if you want to upgrade. In the tutorial we'll use PicMonkey to create desktop wallpaper to organize your files. This desktop background isn't relegated to just back to school season - you can use an organized desktop in general even if you're not in school. It's great if you've got a lot of blog content to organize, documents for clients, family documents, etc. Ok, onto the tutorial!
First you'll need to determine the display resolution on your computer - PicMonkey is very helpful with that. Head on over to the PicMonkey webpage & hover over Design. Select Custom, then using the provided proportions, click Make It.


From the first screen you are directed to, click where it says No fixed proportions under the Crop heading. Scroll down until you find the selection that says (your screen) beside it. This gives you the exact measurements to fit your screen. How helpful! (I didn't do this at first and made an entire background at the wrong resolution....good for you though because both the ones I made are free at the end of this post!)

I chose a color palette from ColourLovers that I liked and went from there but you could also choose colors of your blog or branding as well. Set your canvas color, add some design elements to make a nice background, then begin to add your boxes.


I made a list of the types of boxes I wanted to categorize my files in so I'd know how many boxes to make. I chose Current Projects, Blog, To Print, and File Later. But you could choose whatever you need. If you're a student you could put class names if you type a lot of papers or work on a lot of projects. Your desktop is supposed to house things you need quick access to....mine totally didn't do that...so make your titles things you access most often.
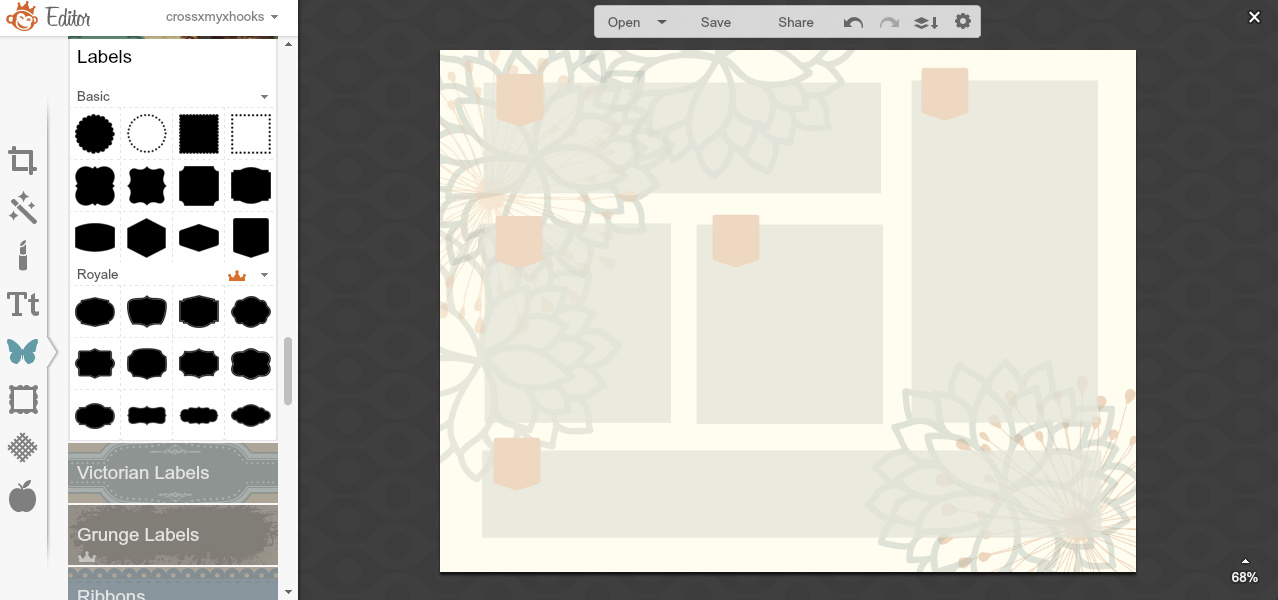
Add the boxes and arrange them in an order you like. They could be all vertical, all horizontal, or staggered like mine. Then add another little shape to act as your label and fill in with text.
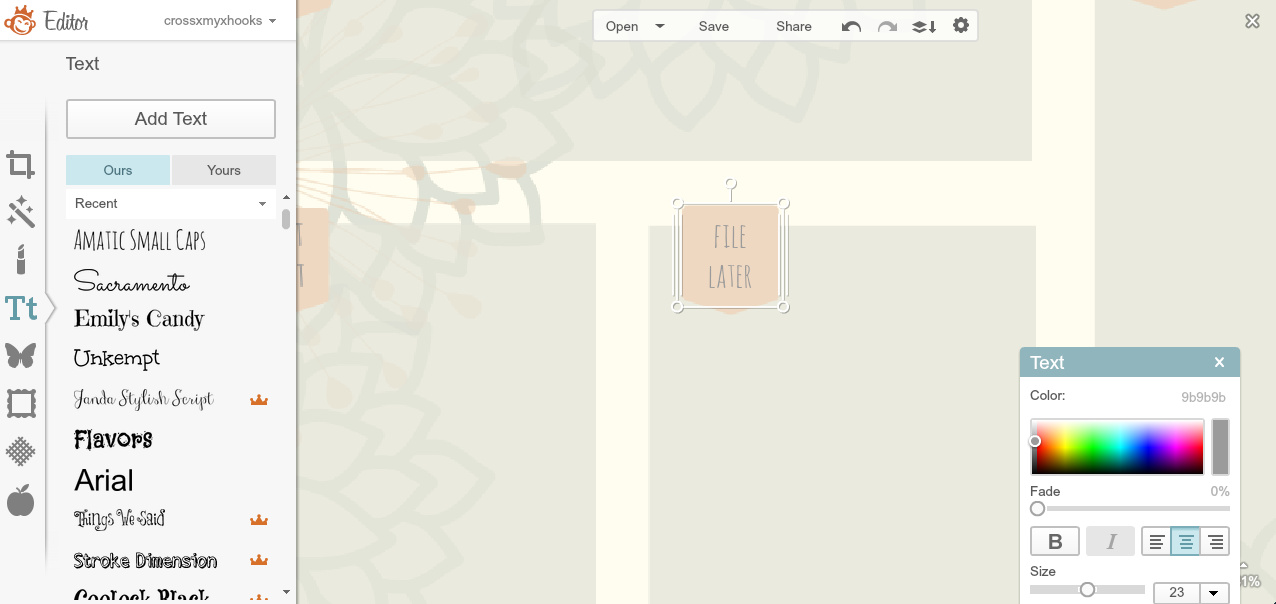
At some point during your design process you might need to zoom in to make sure you are clicking on the correct element you're trying to move. If you have a mouse, simple use the center scroll wheel to zoom in & out. Or mouse over the bottom right of the screen to manually zoom in & out. You can then use the box that appears to move your canvas over to the area you need to edit.

Once you believe you are satisfied, save your work. But do not close out of PicMonkey! If for some reason you set this image as your desktop then hate the widths, the layout, or the design all together you can simply go back to your PicMonkey screen and edit. If you close PicMonkey your work is gone forever...so just don't close it just yet. You may even want to organize your desktop before closing the PicMonkey browser just to make sure you do in fact like it. I would also recommend saving a copy of the image with out the labels in case you want to change them later. You can just open the blank image in PicMonkey and add new labels.
once image loads right click & save to your computer
Now organize your life!
How do you keep your desktop organized?
xoxo, Moe
xoxo, Moe
Thank you for this beautiful, easy to follow tutorial. I have been wanting to do this and you made it so easy for me. I love my new desktop organizer! Now I want to make more for fun! :)
ReplyDelete