I think when the beginning of the year hits something in our DNA screams
'it's time to get organized!' and I've been listening. A few weeks ago I shared with you
what I keep in my purse and I'd love to say that it's stayed that way - simple & organized - but the truth is it didn't. Right now my purse is a receipt burial ground full of lost lip balm & pens. My phone gets lost in there every two minutes and who knows what lurks at the bottom. I love my purse from
Target - it's big enough for everything, has two side handles, & another handle for a cross body if you want it. The other day I was watching organizing videos on YouTube and I found something amazing: a little contraption to keep your purse organized called a
purse organizer. The person doing the video purchased hers on etsy (which is a great option!) but I decided that I could make something similar. I knew that mine didn't have to be super duper fancy - just something to organize my crap. So I picked up two cheap placemats & got to sewing.
this post contains affiliate links, please read my full disclosure here.
Supplies: Sewing machine (or needle & thread, or fabric adhesive for a new sew option), two cheap placemats (or one, depending on the size of your purse), straight pens, ruler/tape measure
The best type of placemat to work with are the Mainstays brand from Wal-Mart. They are $1.97 (so cheap!) and have little ridges that make it easier to sew in straight lines. They are also pretty sturdy with out being too thick so your sewing machine needle will be able to pierce the fabric.
First, lay the placemat flat horizontally & decide where to fold your placemat to make the pockets. I decided to fold up the bottom of the placemat 3/4 of the way to the top. The placemats ended up being a bit too tall for my bag so I flipped the placemat over & pinned the top flap down a little as well.
If you have an idea of things you want to store in the pockets, use the tape measure to measure out & pin the individual pockets. Repeat the pining & measuring if you need to on the second placemat. Leave each side of each placemat unpinned, we are going to join the placemats together at one end to create a longer organizer.
Now sew, sew, sew. I used the thread I had on hand (but I'd suggest matching thread since you do see a bit of the thread in your bag once you're done. Unless you don't care about that, which is fine). You can see in the pictures above that following the ridges on these placemats is really easy. Make thick & thin pockets as well. Randomizing as you go is best especially if you didn't map out your pockets in advance.
Once you've sewn up all your pockets join the two placemats by sliding the hem of one placemat over the hem of the other placemat. Pin & sew the placemats together in between each hem. This is the easiest because you're not pushing your needed thorough 4 thick hems. Hopefully the picture will help you see the placement. Trim your ends & you're done!
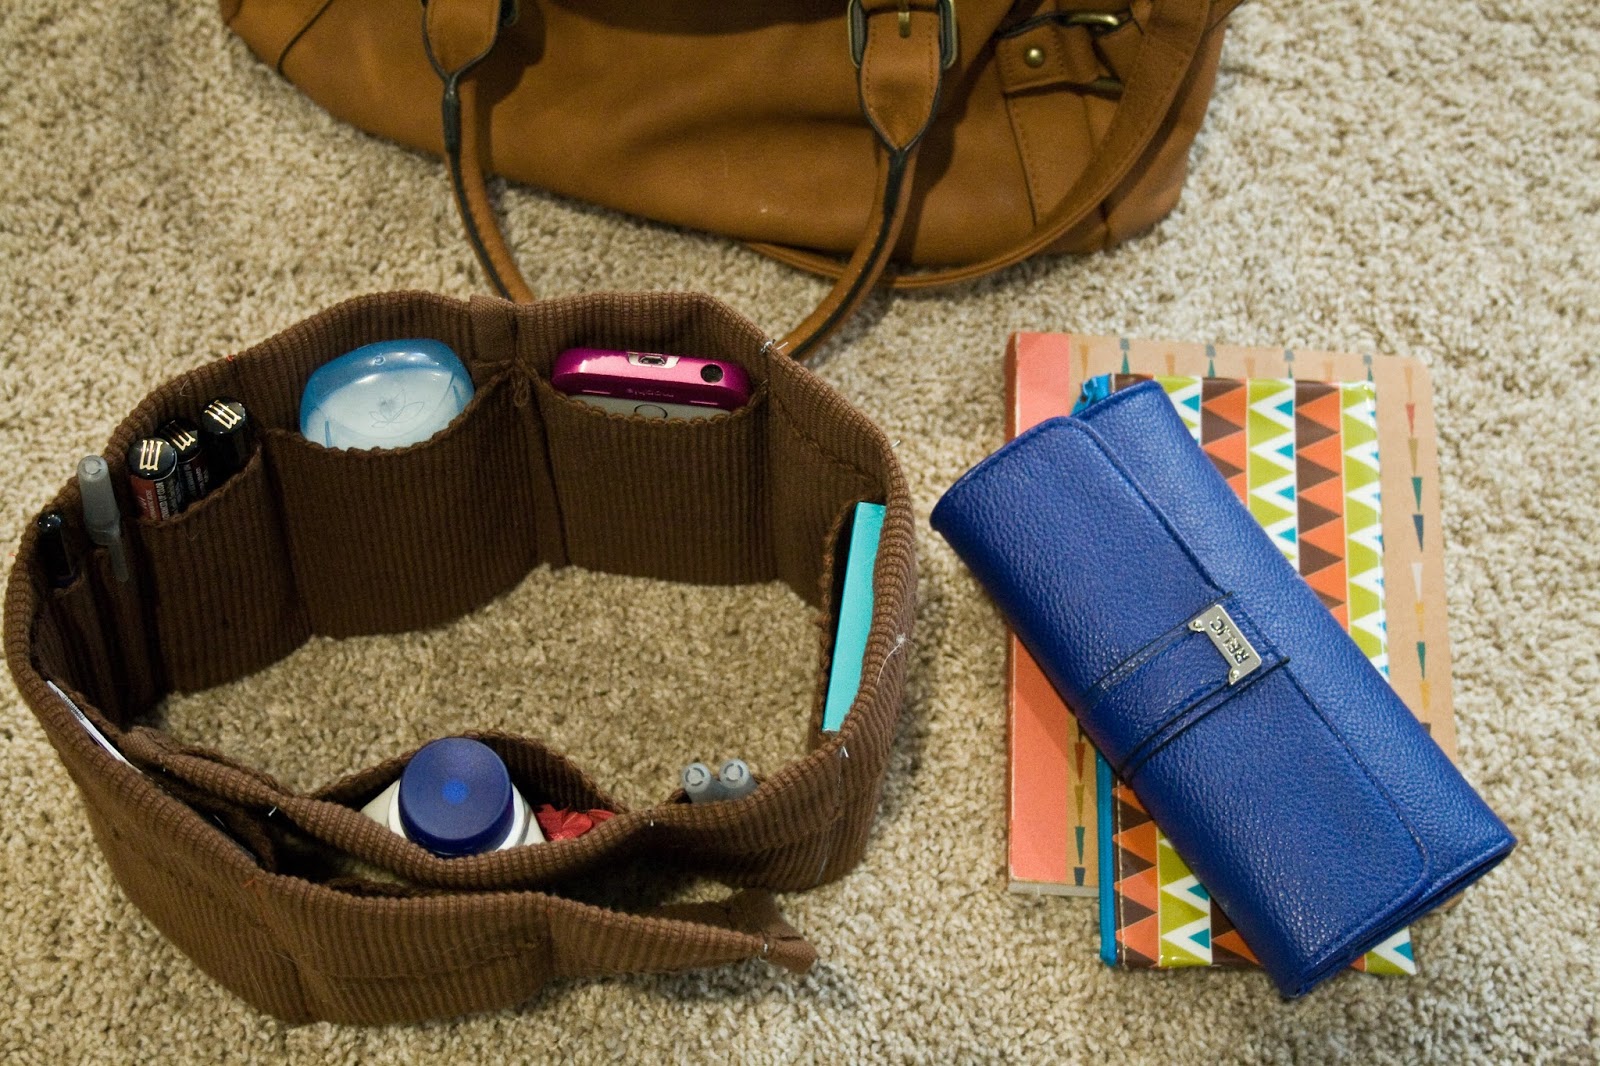
Your organizer might be a bit too long - mine was even though my purse is huge. So you can double over the sides like the picture below. Also don't be discouraged if your organizer is like a lump of weird fabric in your bag. It doesn't quite look right until you get all your stuff in there. I slipped the organizer in my bag then filled it up with my things. I actually had a bunch of pockets left over
after I put all my things in there! I was totally not optimizing the amount my purse can hold! I got rid of some of the little baggies that were in my previous
what's in my purse post because I now have other pockets to hold the stuff - but I may add them back depending on the things I'll add to my purse now that everything has a spot.
You can either place your purse organizer with the pockets facing in or facing out. I prefer the pockets facing in towards each other - I can get to things better. Now your purse has like 4x the pockets it had before & you can easily move between purses and find everything you need! (In the photo above you can see that I used blue bobbin thread since I just had it on hand. It doesn't bother me too much but if you don't like those kind of things use matching thread!)
I also made one from a single placemat for a clutch style organizer. This one was supposed to be fancier, just in case you were going to a nice place or out for the evening, etc but then I realized I have no nice clutches! So you can see that you can make one of these organizers from however many placemats you need. I think this might even be great for a travel make up bag as well!
Want more easy sewing projects?
Click here!
Are you getting organized this year? Are you including your purse in your organization plans?
xoxo, Moe


 Once you've sewn up all your pockets join the two placemats by sliding the hem of one placemat over the hem of the other placemat. Pin & sew the placemats together in between each hem. This is the easiest because you're not pushing your needed thorough 4 thick hems. Hopefully the picture will help you see the placement. Trim your ends & you're done!
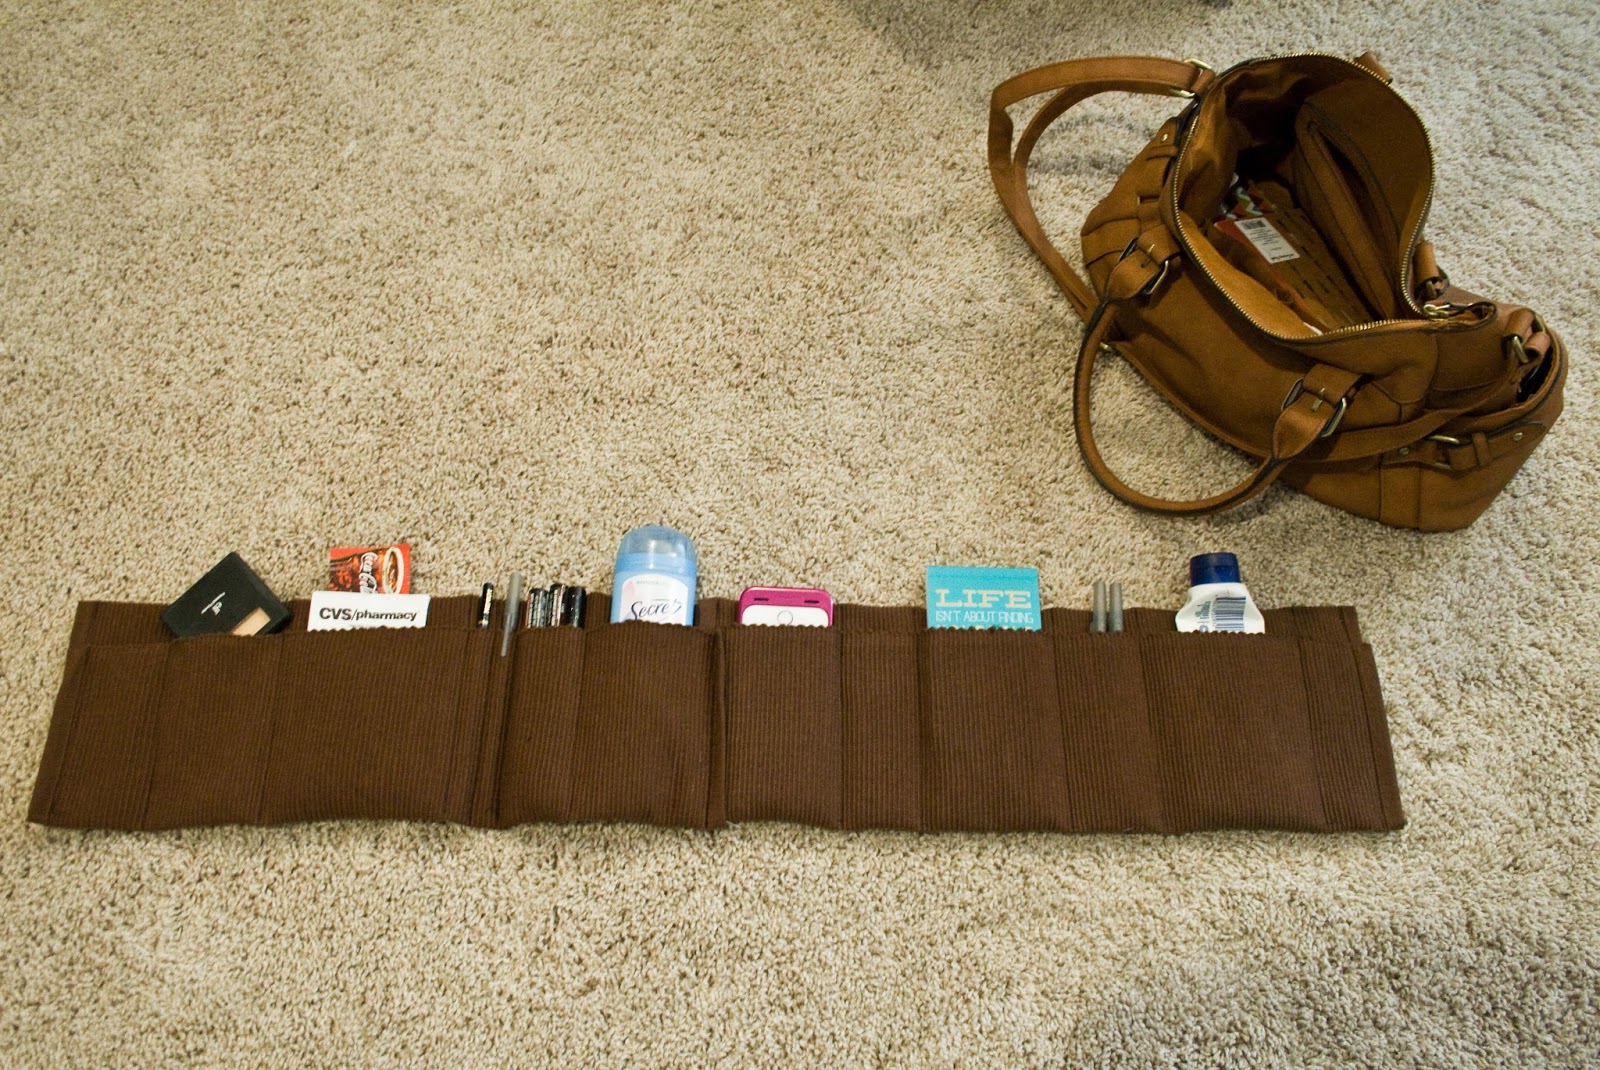


This is genius! Love it and desperately need such organizers! Will try this! Thanks so much, Moe. xxx
ReplyDeleteBrilliant!! I've linked to your tutorial on Craft Gossip: http://sewing.craftgossip.com/tutorial-diy-purse-organizer-from-placemats/2014/03/07/
ReplyDelete--Anne
Fabulous idea! As we're waiting for our new girl to come I'm looking for a huge purse instead of a diaper bag. Your idea will definitily help me reaching my goal :-)
ReplyDeleteThanks!
I found that using a lighter colored placemat made it easier to see the things down inside my purse. Thanks for the idea. Easy and quick.
ReplyDeleteWhat a great idea! Many thanks :)
ReplyDeleteThank you for this idea. I tried it with a red double layered placemat and it worked beautifully. The folding over makes it very stiff so it stays upright, and it fits pretty much in any purse. Made it for my sister and she really loves it
ReplyDeleteGreat information. Thanks for providing us such a useful information. Keep up the good work and continue providing us more quality information from time to time. Time to buy Handbags
ReplyDeleteI suggest that before you pin and sew, you lay out all the items you want to put into the organizer. Some cell phones are thicker than others. Some of us need larger compartments for certain bulky items. If you just measure, you will not allow for the bulk of the items. I personally hate to rip out seams to start over.
ReplyDelete