A really long while ago my great aunt (hi Jeanie!) sent me a box of some jewelry making supplies she wasn't going to use. This box has sat, slightly sifted through, in many areas of the house since we moved. I'd go to it every now & again digging through the beads and bobbles and findings searching for inspiration. Nothing really smacked me in the head until Sunday when I decided that the silver aluminum wire would work great for a monogram! I thought how sweet & how cheesey it would be to have a necklace with both a Z & an M on it. How stinking cute!

Things you'll need: 16 gauge wire (mine was aluminum in a silver color so it was really flexible to work with but dented rather easy, so don't squeeze too hard with your pliers!), needle nose pliers, wire cutters, a template (your handwriting or an image - or if you're awesome like Zach you can just free hand it), lengths of chain, jump rings, closures.

I sat down & started playing with the wire thinking 'hey, I learned cursive in the 3rd grade & write in it everyday. I can do this.' It's true, I do write in cursive everyday...I'm the weird one. But man that was hard! So I googled a cursive chart to help me out. You could even try to match a certain font you've seen by typing out a document in word. The way I shaped my letters was by looking at the image, bending the wire, & laying it down to make sure things were lining up. I used my iPad for this but you could use your own hand writing or print out your font on paper the size you want it. So just bend it around to make it look right & make sure you put a little loop at the top so you can join it to your chain!

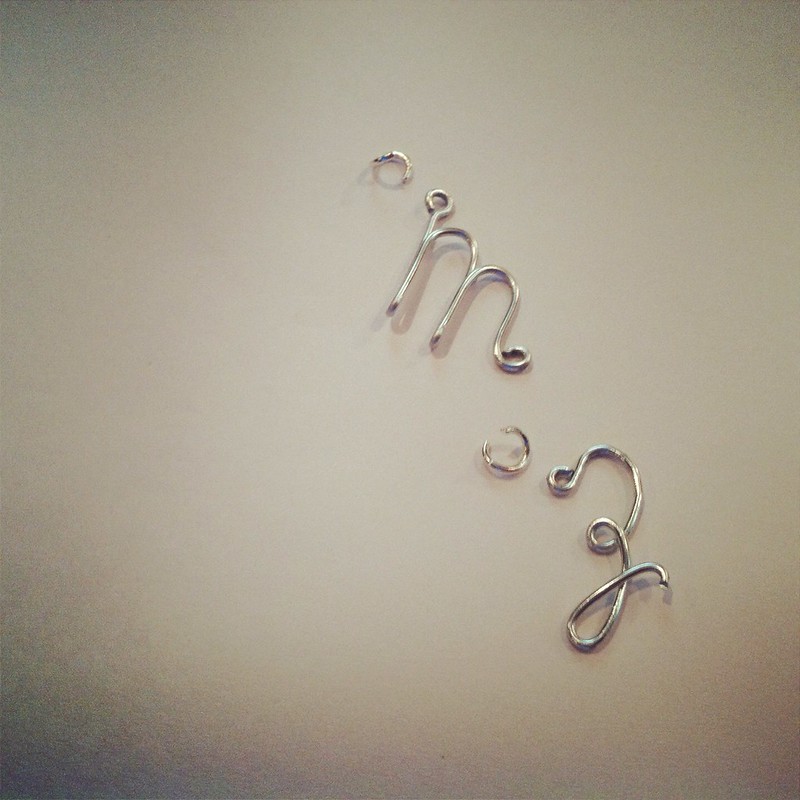
I decided to make this necklace a two tiered one with each initial on a separate chain. Cut your chain any desired length but remember to make one slightly longer than the other. Slip a jump ring onto the loop in the top of your initial & close it. Thread the chain through the jump ring. Repeat for your second initial. Then add a jump ring & a closure. The best thing about making your own jewelry is making it the right size for you. I always feel bad when I take out links on something store bought & it really sucks to transfer a charm to a longer chain if the one it came with is just too short!

So, while I was struggling to make my two initials....Zach sat next to me playing around with 18 gauge wire in this antiqued copper color. I'm struggling & starting over, struggling & starting over. By the time I'm done with the M, Zach shows me he's written my entire name. WHAT!? We laughed for a bit because, c'mon.....he's so talented to do that for the first time! So I put it on a chain too. 18 gauge wire is much more flexible so you can wrap it around letters like he did & create something a little more dainty. Be careful not to pull to hard or stretch it out while you're wearing it though!
Hope you enjoy!
xoxo, Moe
Glad you are getting use of that stuff. I love you girl.
ReplyDeleteSo cute and feminine! I absolutely love this!
ReplyDeleteMargeaux
margeauxknight.blogspot.com
Nice idea! Very beautifully fabricated I must say. I really like the suggestion of making the wire necklace. I love what you did with the metal wire. Although I always prefer to buy necklaces from Kilkenny, but this is something unique and easy that you can actually make your own. I will absolutely try to create for my little angel.
ReplyDelete