The best thing about fall is how cozy everything gets. All the warm colors, the flavored coffee, the cozy candles.....Fall is the start of the best time of the year. The next four months are awesome: first we start with the cozy month winding down from Summer, then there is Halloween, then Thanksgiving, and then Christmas!
this post contains affiliate links, please read my full disclosure here.
I've adjusted my planner line up for the fall too - I've moved into a personal size Webster's Pages Color Crush planner in Walnut, a new Simple Stories A5 Carpe Diem in Marigold, and a Studio Calico Hello Forever Planner in Melon. Each of these I've decked out for fall and I wanted to share with you not only the decor they have but the plan I have for them:
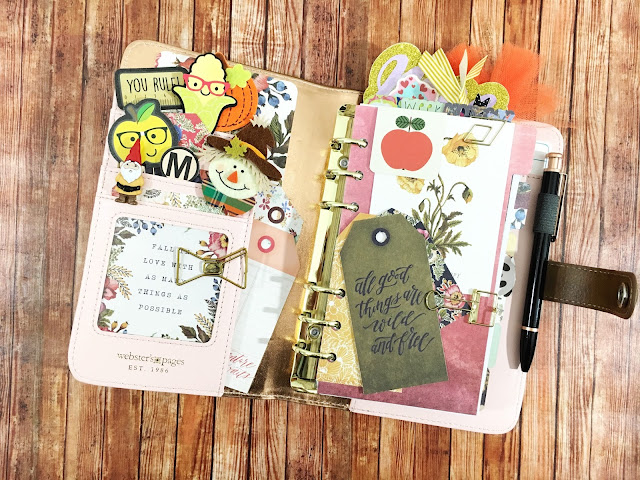
Personal Size Webster"s Pages Color Crush Planner in Walnut
The Webster's Pages Color Crush planners have quickly become my favorite, affordable personal size planner brand. If you've seen any of my reviews - here, here, & here - you'll know that the Color Crush has grown on me. From the first one I got that I wasn't so pleased with to the current Spring/Summer 2016 release that I was thrilled with, I've purchased quite a few of these bad boys. I don't currently use the inserts that Webster's Pages makes, I use a combination of the inserts from my shop.
This planner is my go with me everywhere daily focus planner. I am hoping to get back into a daily focused routine with this guy. I will have monthly, weekly, & daily pages in my calendar section. Not only will this help with daily tasks but will also help me notate things on the go. I was thinking of making this solely a work planner (for my blog, etsy, and YouTube) but I also like to have a mini set of everything on the go. So I'm keeping my original 6 tabs - including a work tab with my blog, etsy, and YouTube ideas and schedules, as well as the routines, mail, notes, and miscellaneous. You can see previous set ups here & here, honestly it hasn't changed much. My main goal for this planner is to just get back on my daily routines - scheduling time, making lists, and getting things done.
One of my favorite things about the new Webster's Pages planners is that little clear photo pocket in the front. I use it for a journaling card with an inspiring quote, and as soon I as I saw this quote in the We R Memory Keepers Wildflower paper pad I got at Tuesday Morning, I knew this was the paper pack for fall. I used a lot of the cut-a-part elements as decor and made planner clips using the following tutorials - the apple with glasses and the You Rule clips are made with stickers like in this DIY and the Scarecrow and Pumpkin are made using this DIY. The corn clip was made using my Cricut Explore and some of the images as part of the Cricut Access Subscription. The planner gnome is made using a button from the sewing department!
You can find this planner here on Amazon or here on Blitsy. Don't forget to sign up for Blitsy - a super cool discount craft site - here.
Simple Stories A5 Carpe Diem in Marigold
The Carpe Diem planners have quickly become my favorite A5 size planner (over the Webster's Pages and even the Filofax Original I have) because of how well they fit the Erin Condren Life Planner. I uncoiled and punched my ECLP into a OG Carpe Diem - with the fabric interior and the polka dots - and fell in love. These planners are wide enough not to smush the tabs with both a pen in the pen loop and the button tab closed. The new planners are a bit thicker, however, due to the fact that they are now made entirely of the faux-leather outer covering. Additionally, the new planners come with out inserts, apparently they are sold separately this year. Keep a look out for a comparison video to go up on the YouTube channel!
This planner is my main or my big planner. It houses the main schedule and the main monthly calendar. I love the layout of the Erin Condren Planner and how the vertical style works for me. I break my day down into To Do, Today, and Little Things - much like the rest of the planning world - and use location & symbols to code rather than color. You can read more about the anatomy of a no white space spread here. I plan on continuing to use this planner as the main over view planner & to play with sticker kits...just because I like stickers!
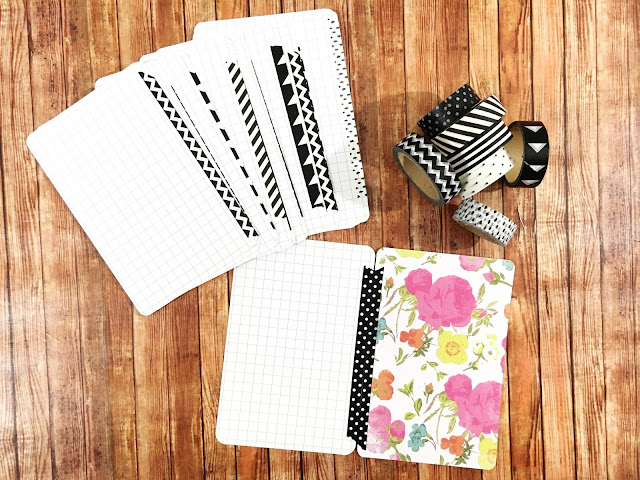
To decorate the main pocket in the front of this planner, I used some stickers (coffee cups here and the Fall Countdown is available at the end of this post!). In each smaller pocket are some other fun elements - page flags, washi cards made with this tutorial, ribbon paper clips, bow & ampersand paperclips from 5Below and Hobby Lobby, & the apples with glasses were made using this tutorial. The pom pom was from a lovely planner friend at a meet up in August. To make the dashboard I used the Rhonna Deisgns app, the tutorial is here. The typewriter bookmark file will be available soon but until then you can make your own sushi magnetic bookmarks with this tutorial.
Find this planner here on Scrapbook.com, or here on Blitsy. If you use this link and create a new Erin Condren account, you'll get a discount on your first purchase!
Studio Calico Hello Forever Planner
I originally purchased this planner in Graystone one time when Studio Calico was having a 20% off sale (watch my first impression video here). Since then, I've purchased the other two colors - Melon and Clear Sky - from another sale on the website. I love these planners because they are the best size to fit an Erin Condren or Happy Planner uncoiled, untrimmed, and punched. (Watch a comparison video on the best A5 planners for ECLP or Happy Planner here.) I dislike these planners because the quality reminds me of an old photo album. Honestly the quality seems to differ between all three colors - the Graystone color has a flimsy feeling elastic yet the Melon color has an elastic that feels very thick. I also now have 3 sets of inserts I'm 100% not going to use! They are pretty hokey looking and I think and 8th grader in a graphics class could design them - they aren't clean enough to be sleek and modern & they aren't curated enough to be inspiring.
When I first got the Graystone color, I figured 'since I had it. I might as well use it' and turned it into my memory planner. Turns out I love these planners for that purpose and have just switched over to another color. For this planner the only goal is to have fun. I plan to document my weeks with a theme, pictures, and more decorative stickers. This planner is purely fun for me, it doesn't have to be functional. I love this because I can be creative - I can mix patterns, I can pull different designs, I can just play with out the fear of not checking anything off! This is more of a what happened this week type of thing than a what will happen in the future thing.
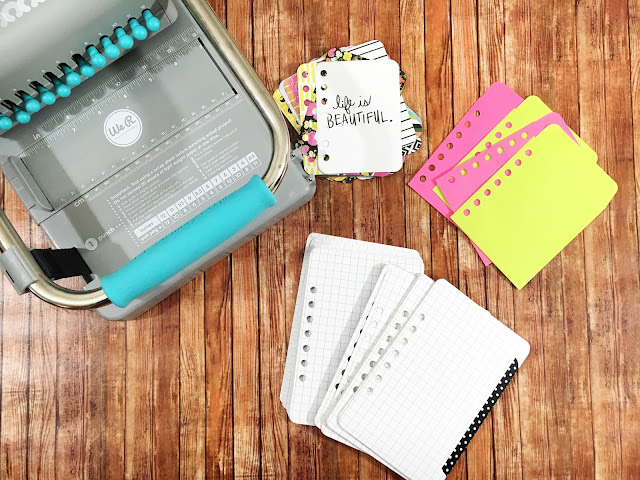
To decorate this planner for fall, I filled the main secretarial pocket with stickers I would use in the planner so that they are handy. The smaller pockets are rather odd sizes so I put some colorful page flags in the smaller pocket along with a bow clip from 5Below and a glitter die cut leaf. I used a DIY shaped paperclip to hold some fall inspired journal cards together and used two yellow ribbon clips to add some fun. There are a few To Do list sheets from a Target notepad held together with a typewriter magnetic paperclip as well as an exclamation point clip. I also use pocket pages in this planner - the 6x8 size fits perfectly and you only need to punch 4 more holes as the two existing holes line up with the middle ring of each set of 3 rings. I also put washi tape over the disc punches of this Happy Planner sticky not insert to create a dashboard for my planner.
Find this planner here on the Studio Calico website.
Now that I've shared with you my Fall planner line up, I wanted to sneak in a free sticker printable for fall - the Fall Countdown Stickers as seen in the pocket of the A5 Carpe Diem! There are multiple file types included for you - a PDF for you to trim by hand, a Silhouette file if you've got a Silhouette die cutting machine, and a PNG file if you've got a Cricut Explore cutting machine. I do hope to start adding all three of these files into the blog (and into the Free Sticker Friday posts) but I need to work through some of my stash of designs before making more
DOWNLOAD THE FALL COUNTDOWN HERE
Remember, as with all printables on my blog these files are for personal use only. Do not sell this file or claim it as your own. Do not sell anything created from this file. Do not disseminate this file or end product in mass. If you would like to share these stickers online please link or Pin to this blog post and not the files themselves. As always, thank you for playing nice!
If you'd like some more planner printables, please click here. Looking for more planner posts, click here. Want to know more about the Silhouette vs the Cricut? Watch my vlog here.


