Showing posts with label Erin Condren Life Planner. Show all posts

5.15.2020

Free Sticker Friday // Planner Girl Memory Planning Sticker Kit

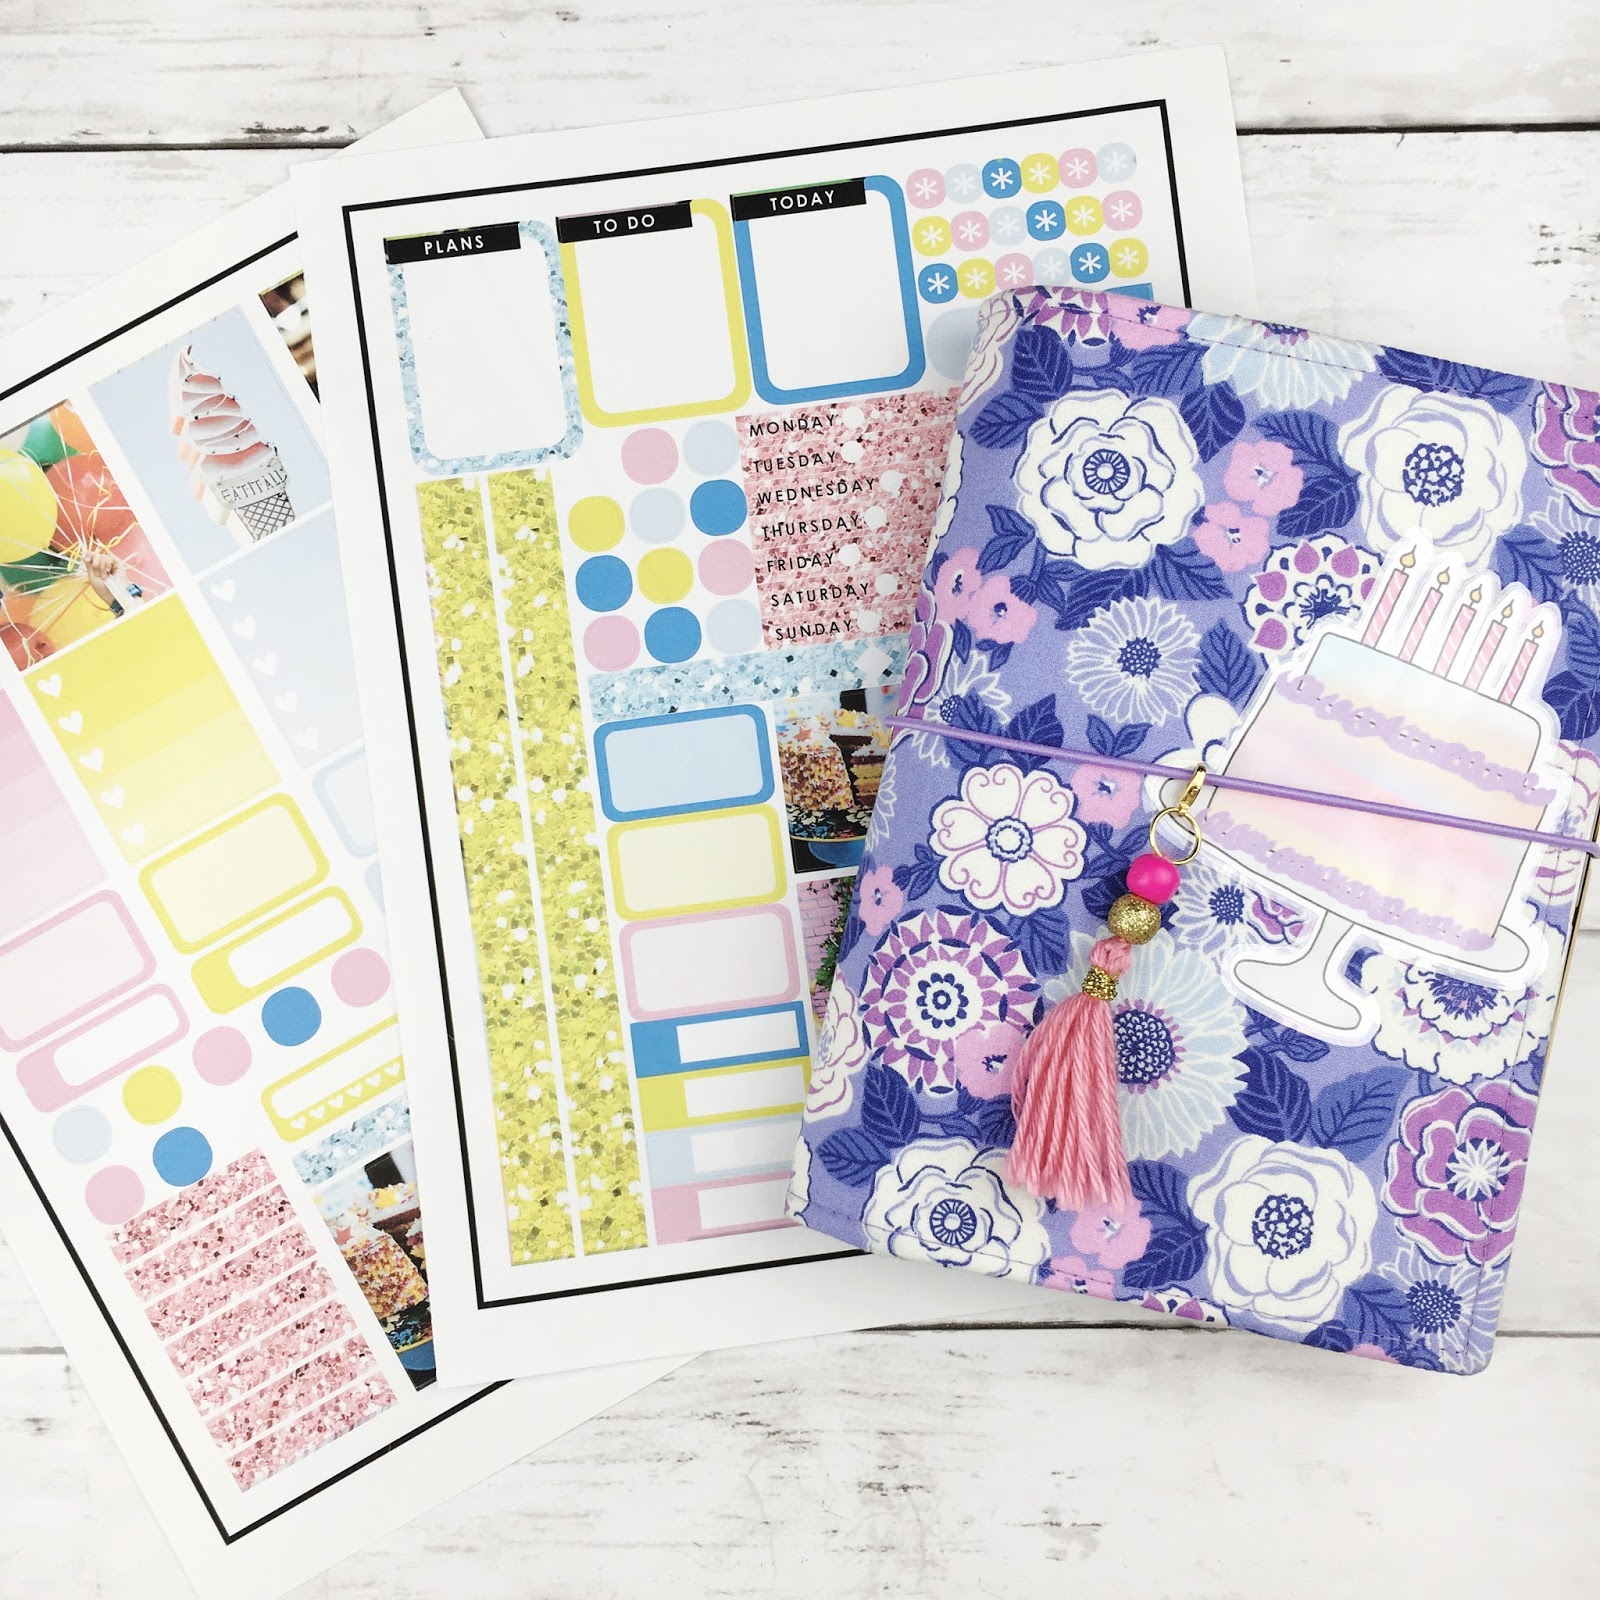
It has been a long, long while since I have offered a free printable sticker kit on the blog.  I mean...a loooonnnggg while!  I used to post a sticker sheet nearly every Friday because I loved making them so much.  The last Free Sticker Friday post is from by birthday in 2017!  I've been making stickers for myself and for Patreon for a while but I thought I'd share this guy over here just for you all.
this post contains affiliate links, please read my full disclosure here.

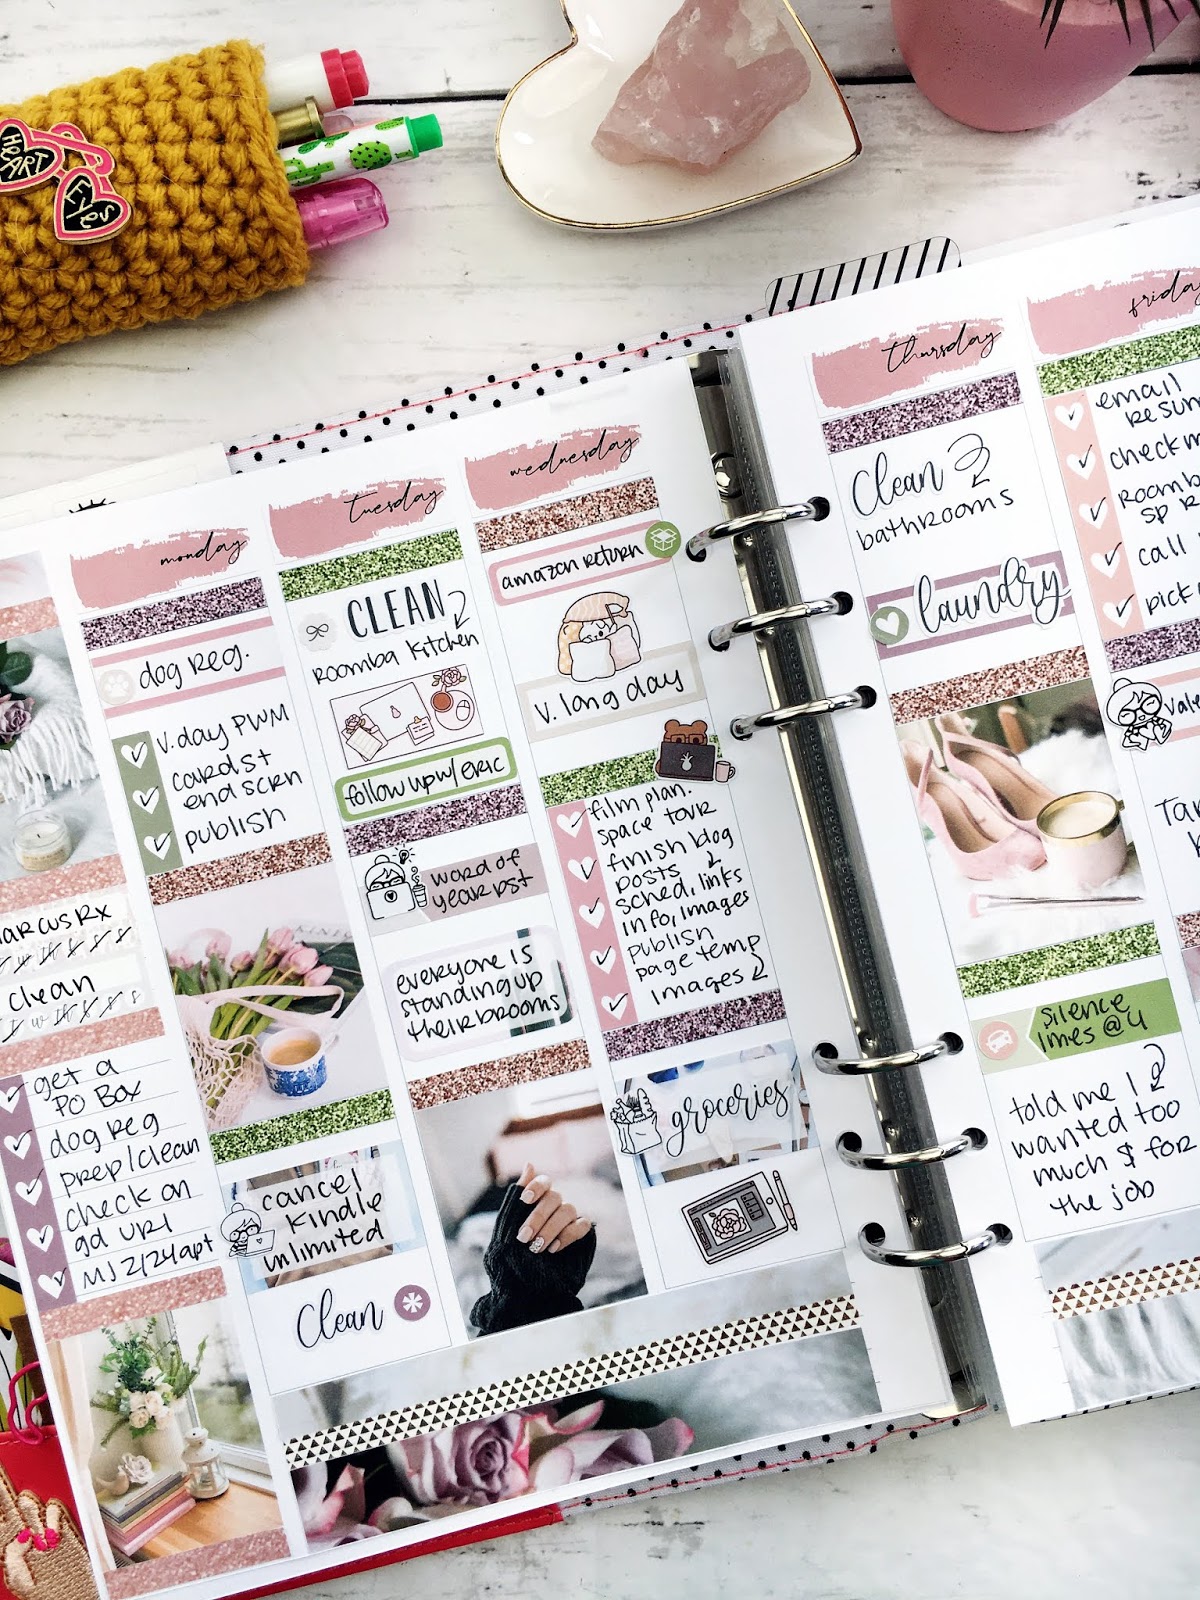
Way back in the way back, you may remember, I did the no-white-space EC style planning.  I had an Erin Condren planner & I had inserts that mimicked the EC layout.  I did both my regular, everyday planning and my memory planning in this EC style.  My everyday planning really took on the no-white-space look while my memory planning had a little more white space showing.  Check out how I set up a Memory Planning spread here (that was way back in 2016!).

Then I went into memory planning in my horizontal Happy PlannerThat was fun because I did like to journal and found the layout inspiring for memory keeping.  I fell off the memory keeping wagon for real in about 2018 right before our wedding.  This post goes over how to print your photos at hom for memory keeping.
After getting pregnant with Marcus I wasn't feeling planning of any sort so I totally stopped all of it!  Now that he's here I wish, wish, WISH I was feeling it because it would have been very nice to have a document of all the things that happened & that I was feeling before and after his birth.  But we can't really go back in time, so we just gotta start now.

Since being in Quarantine, I've gotten inspired by the ECLP planning style again. I've been watching a lot of my OG YouTube planner channels - think like Scribble Prints Co - and getting back into that style of planning.  Since I've kept my Happy Planner starting in January and I've been documenting Marcus with a ton of pictures on my google photo account, I've been able to do some memory planning or rewind spreads in my new memory planner.
This kit is very pink & very feminine so I used it to memory plan Valentine's Day week of 2020.  (Check out my Happy Planner Plan With Me video for this week here.)  I think it has the perfect mix of checklists and functional boxes plus some little icons that you can just supplement a little bit with stickers you may have leftover from other kits or character stickers.

The stickers in this spread have come from the Papershire Facebook group & Print Petticoat Bandit.  I've made some script stickers myself (video tutorial coming soon!) and my own DIY glitter headers (check out the tutorial here!).  This kit comes with 7 glitter headers already but if you need more you can TOTALLY make some yourself, for free, to cut with your Cricut Explore or Cricut Maker!

DOWNLOAD THE PLANNER KIT HERE


Go ahead and download the kit above and let me know what you think! As always, these printables are for personal use only - do not sell or reproduce these guys.  You'll get a PDF to cut by hand, a PNG ready to cut with your Cricut Explore or Cricut Maker (size it to 6.75 in x 9.25 in in Design Space), and a Silhouette file to cut with your Portrait or Cameo.  
I'll also link above my favorite sticker papers to use.  I have two new favorites!  The weatherproof matte sticker paper from Online Labels is AMAZING.  I bought this a few years ago to make one sticker for Zach and then never used it.  I finally decided to bust it out again and it is perfect for super crisp, professional looking prints.  I also just found this Packzon sticker paper on Amazon too.  While not as durable as the weatherproof paper from Online Labels, it does give crisp prints and is much more affordable.  It is a bright, bright white just like the weatherproof paper too.  My OG favorite that is super affordable, kinda removable, and super thin is the Yens Full Sheet Labels on Amazon.  These aren't as crisp white as the other two but it doesn't look bad.  I've used this sticker paper for YEARS and it has only been recently that I've switched.  I like this paper because it is very thin and wont bulk up your planner.  The paper isn't marketed as removable but it comes up easily unlike the other two mentioned above.  The prints still come out acceptable...I was satisfied with the quality for years!  It takes inkject really well and delivers a fine print!  I recommend all three, and based on your needs, think there is a sticker paper in here for you!

I hope that you've been having a fun planner journey and if you're just starting out be sure to check all the previous planning blog posts here on the blog!

What have you circled back to in your planner journey?  What have you done from the very beginning?

xoxo, Moe

12.15.2017

Free Sticker Friday // Birthday Week Planner Stickers

So this week (today actually) I turn the big 3 - 0.  That's right...I am 30.  Over the past few years I've had to change my bios on various websites like Twitter, Pinterest, and even this blog.  What started out as 'a post grad southern girl' changed to 'twenty-something Indiana transplant'.  But as I've moved through my late twenties, I changed most of my bios to say something like : 'I'm Moe, a 9-5er, Southern at Heart, Indiana transplant & sweet tea enthusiast'.  So no longer am I post grad or twenty something...I'm 30!! 
this post contains affiliate links, please read my full disclosure here.

One of the the biggest things I've learned in my 30 years is to make sure I'm doing what makes me happy.  Over Thanksgiving when I was at my parent's house, I was sitting on the couch putting stickers in my memory planner & my everyday planner.  I thought to myself 'You know, some may think this is pretty childish.....playing with stickers.  But it makes me feel creative and expressive, and it relaxes me.  So I'm going to keep doing it even though I'm 30.'  Life is too short not to do the things that make you happy.  Life is also too short to keep doing things that make you annoyed, sad, frustrated, etc.  So I need everyone to resolve with me to continue to do the things we love...no matter what it is.
So, in honor of my birthday - and for the fact that I figured out the sizing for the Mini Happy Planner - here is a free printable you can use during your birthday week.  This week I left the icon circles blank because I really loved using my planner stamps for the icons.  Leaving these blank means that you can customize them with planner stamps or digital icons of your own!  How many times have you purchased a weekly kit only to find that you  don't use all of the icons or don't even need some of them?  This way you can create the ones you need.  And hey, bust out those planner stamps if you haven't been using them.  Learn more about how I use planner stamps here.


Remember, all printables on the blog are for personal use only.  Do not sell the printed or digital design, do not claim any of these as your own, do not print an disseminate in mass quantities.  As always, thank you for playing nice.  The glitter textures are from EyeInspire and all photos are from Unsplash.
Included in the download are the files for both the Erin Condren sized & Mini Happy Planner sized stickers in the following formats - PDF for printing & cutting by hand, PNG for uploading to Cricut Design Space, and Silhouette Studio file to cut with your Silhouette.  Be sure to size the PNG to 6.75 x 9.25 inches when you upload it to Design Space.


If you're interested in the birthday cake die cut, you can join the Printable of the Month Club over on my Patreon page!  For $3 a month you'll get access to an every growing library of printables totally unique to that subscription.  That means the printables you find over there will not be replicated in the shop or on the blog....they are exclusive for my Patreon family.  Check it out & subscribe here.

What is something that makes you happy?  What is something you want to start doing?

xoxo, Moe

ps. my planner cover is from Sew What Else is New on Etsy.  I love it, I have 2, and I need more.  Check out the shop for amazing planner covers & traveler's notebooks!  Don't forget to use Ebates when shopping on Etsy for the holidays (and any time really) to get cash back on your purchases!  Sign up here.

8.31.2016

Fall Planner Line Up // Free Fall Countdown Stickers

The best thing about fall is how cozy everything gets.  All the warm colors, the flavored coffee, the cozy candles.....Fall is the start of the best time of the year.  The next four months are awesome: first we start with the cozy month winding down from Summer, then there is Halloween, then Thanksgiving, and then Christmas!  
this post contains affiliate links, please read my full disclosure here.

I've adjusted my planner line up for the fall too - I've moved into a personal size Webster's Pages Color Crush planner in Walnut, a new Simple Stories A5 Carpe Diem in Marigold, and a Studio Calico Hello Forever Planner in Melon.  Each of these I've decked out for fall and I wanted to share with you not only the decor they have but the plan I have for them:

Personal Size Webster"s Pages Color Crush Planner in Walnut
The Webster's Pages Color Crush planners have quickly become my favorite, affordable personal size planner brand.  If you've seen any of my reviews - here, here, & here - you'll know that the Color Crush has grown on me.  From the first one I got that I wasn't so pleased with to the current Spring/Summer 2016 release that I was thrilled with, I've purchased quite a few of these bad boys.  I don't currently use the inserts that Webster's Pages makes, I use a combination of the inserts from my shop.
This planner is my go with me everywhere daily focus planner.  I am hoping to get back into a daily focused routine with this guy.  I will have monthly, weekly, & daily pages in my calendar section.  Not only will this help with daily tasks but will also help me notate things on the go.  I was thinking of making this solely a work planner (for my blog, etsy, and YouTube) but I also like to have a mini set of everything on the go.  So I'm keeping my original 6 tabs - including a work tab with my blog, etsy, and YouTube ideas and schedules, as well as the routines, mail, notes, and miscellaneous.  You can see previous set ups here & here, honestly it hasn't changed much.  My main goal for this planner is to just get back on my daily routines - scheduling time, making lists, and getting things done.
One of my favorite things about the new Webster's Pages planners is that little clear photo pocket in the front.  I use it for a journaling card with an inspiring quote, and as soon I as I saw this quote in the We R Memory Keepers Wildflower paper pad I got at Tuesday Morning, I knew this was the paper pack for fall.  I used a lot of the cut-a-part elements as decor and made planner clips using the following tutorials - the apple with glasses and the You Rule clips are made with stickers like in this DIY and the Scarecrow and Pumpkin are made using this DIY.  The corn clip was made using my Cricut Explore and some of the images as part of the Cricut Access Subscription.  The planner gnome is made using a button from the sewing department!

You can find this planner here on Amazon or here on Blitsy.  Don't forget to sign up for Blitsy - a super cool discount craft site - here.

Simple Stories A5 Carpe Diem in Marigold
The Carpe Diem planners have quickly become my favorite A5 size planner (over the Webster's Pages and even the Filofax Original I have) because of how well they fit the Erin Condren Life Planner.  I uncoiled and punched my ECLP into a OG Carpe Diem - with the fabric interior and the polka dots - and fell in love.  These planners are wide enough not to smush the tabs with both a pen in the pen loop and the button tab closed.  The new planners are a bit thicker, however, due to the fact that they are now made entirely of the faux-leather outer covering.  Additionally, the new planners come with out inserts, apparently they are sold separately this year.  Keep a look out for a comparison video to go up on the YouTube channel! 
This planner is my main or my big planner.  It houses the main schedule and the main monthly calendar.  I love the layout of the Erin Condren Planner and how the vertical style works for me.  I break my day down into To Do, Today, and Little Things - much like the rest of the planning world - and use location & symbols to code rather than color.  You can read more about the anatomy of a no white space spread here.  I plan on continuing to use this planner as the main over view planner & to play with sticker kits...just because I like stickers!
To decorate the main pocket in the front of this planner, I used some stickers (coffee cups here and the Fall Countdown is available at the end of this post!).  In each smaller pocket are some other fun elements - page flags, washi cards made with this tutorial, ribbon paper clips, bow & ampersand paperclips from 5Below and Hobby Lobby, & the apples with glasses were made using this tutorial.  The pom pom was from a lovely planner friend at a meet up in August.  To make the dashboard I used the Rhonna Deisgns app, the tutorial is here.  The typewriter bookmark file will be available soon but until then you can make your own sushi magnetic bookmarks with this tutorial.

Find this planner here on Scrapbook.com, or here on Blitsy.  If you use this link and create a new Erin Condren account, you'll get a discount on your first purchase!

Studio Calico Hello Forever Planner
I originally purchased this planner in Graystone one time when Studio Calico was having a 20% off sale (watch my first impression video here).  Since then, I've purchased the other two colors - Melon and Clear Sky - from another sale on the website.  I love these planners because they are the best size to fit an Erin Condren or Happy Planner uncoiled, untrimmed, and punched.  (Watch a comparison video on the best A5 planners for ECLP or Happy Planner here.)  I dislike these planners because the quality reminds me of an old photo album.  Honestly the quality seems to differ between all three colors - the Graystone color has a flimsy feeling elastic yet the Melon color has an elastic that feels very thick.  I also now have 3 sets of inserts I'm 100% not going to use!  They are pretty hokey looking and I think and 8th grader in a graphics class could design them - they aren't clean enough to be sleek and modern & they aren't curated enough to be inspiring.
When I first got the Graystone color, I figured 'since I had it. I might as well use it' and turned it into my memory planner.  Turns out I love these planners for that purpose and have just switched over to another color.  For this planner the only goal is to have fun.  I plan to document my weeks with a theme, pictures, and more decorative stickers.  This planner is purely fun for me, it doesn't have to be functional.  I love this because I can be creative - I can mix patterns, I can pull different designs, I can just play with out the fear of not checking anything off!  This is more of a what happened this week type of thing than a what will happen in the future thing.
To decorate this planner for fall, I filled the main secretarial pocket with stickers I would use in the planner so that they are handy.  The smaller pockets are rather odd sizes so I put some colorful page flags in the smaller pocket along with a bow clip from 5Below and a glitter die cut leaf.  I used a DIY shaped paperclip to hold some fall inspired journal cards together and used two yellow ribbon clips to add some fun.  There are a few To Do list sheets from a Target notepad held together with a typewriter magnetic paperclip as well as an exclamation point clip.  I also use pocket pages in this planner - the 6x8 size fits perfectly and you only need to punch 4 more holes as the two existing holes line up with the middle ring of each set of 3 rings.  I also put washi tape over the disc punches of this Happy Planner sticky not insert to create a dashboard for my planner.

Find this planner here on the Studio Calico website.

Now that I've shared with you my Fall planner line up, I wanted to sneak in a free sticker printable for fall - the Fall Countdown Stickers as seen in the pocket of the A5 Carpe Diem!  There are multiple file types included for you - a PDF for you to trim by hand, a Silhouette file if you've got a Silhouette die cutting machine, and a PNG file if you've got a Cricut Explore cutting machine.  I do hope to start adding all three of these files into the blog (and into the Free Sticker Friday posts) but I need to work through some of my stash of designs before making more

DOWNLOAD THE FALL COUNTDOWN HERE


Remember, as with all printables on my blog these files are for personal use only.  Do not sell this file or claim it as your own.  Do not sell anything created from this file. Do not disseminate this file or end product in mass.  If you would like to share these stickers online please link or Pin to this blog post and not the files themselves.  As always, thank you for playing nice!

If you'd like some more planner printables, please click here.  Looking for more planner posts, click here.  Want to know more about the Silhouette vs the Cricut?  Watch my vlog here.

6.08.2015

Make it Monday // Cheap and Easy ECLP Protective Cover

Did you know that the new Erin Condren Life Planners launch tomorrow??? Did you know??  (Did you also know that if you click here and sign up with a new email you can get $10 off your first purchase??)  In honor of my freaking excitement I thought I'd share with you a super cool way to protect your ECLP if you travel with it a lot or if you're just going to do some rigorous activity for a short while with it.  I don't know what you do with your planner...I won't judge.
This post contains affiliate links, please read my full disclosure here.
I'm a two planner girl now and I love the look of both my Filofax and my ECLP.  To give a little more protection to my ECLP in my purse I used an accordion folder from the Target Dollar Spot to create a fold over cover!  I couldn't find any of the cute colored $1 folders so I ran back to the office supply section and picked up a $6 accordion folder too.  So this DIY isn't too expensive to give you a lot of protection.
Supplies : scissors, ruler, marker, acetone to remove marker from folder (nail polish remover with acetone will work), large accordion folder with elastic, paper cutter (optional), craft knife & cutting mat (optional). 1/8 hole punch, ECLP or equivalent planner, small binder clips.
First, cut out the insides of your accordion folder.  You want to orient yourself with your folder too - the opening flap should be towards the right side, or the open side of your planner, like the image above. Keep this in mind as you're working on your cover so you don't get confused.
To make your front cover take one of the existing covers from your ECLP (I chose the front cover because it was easier to use the information section to line up the center between the two holes for the elastic) and trace out your front cover using your marker.  You want to align the cover in the middle of the folder at the bottom edge of where the plastic dividers used to be.  This is the front cover so you want none of the accordion folds on this cover. Avoid going towards the middle fold of the accordion.  Cut this out using your scissors, craft knife and cutting mat, or paper trimmer.  Any way you feel comfortable getting a straight line.
 To make your back cover (the cover that will have the accordion fold-over) align your existing ECLP cover to trace on the other edge of the middle of the accordion folder.  Keep the edge of your ECLP cover off of the middle part of the accordion folder with the two holes.  Trace just the left and right edges.
Using your ruler and marker use these two lines to make two longer lines stretching across the length of the left over folder.  This way we won't cut too much off when we try to create the part of the cover to fold over.  Using your paper cutter, scissors, or craft knife and cutting matt, trim off the excess to the left and the right.
Using your full planner, decide the thickness that the cover needs to fold over.  Since every ECLP is about the same I would say fold the first score from the rounded edge (the edge with the button) and then count down three score lines and fold there.  That should accommodate the thickness of your ECLP.  Next, using your existing ECLP cover, place it at the edge of the third score line and trace the bottom edge where the coil would be.  Trim off the excess.
Using the hole punch, align your existing cover to each new cover you've made and punch.  Make a slit in each hole to allow the cover to slip in and out.  The binder clips help keep the existing cover aligned so that all your holes will match up.
Using the extra piece you cut off when making the back cover (the piece with the middle of the accordion folder with the two holes for the elastics) line up the left and right edges then make a mark at each hole about an inch or less up from the holes you punched for the coils.  Do this on the back cover so that the elastic comes from the back, around the coil, to attach to the button on the front.  If it's too high up and your hole punch won't reach - just align and mark again a bit closer to the coil punches.  Use the hole punch to create the two holes.  Before threading the elastic back through these holes, use the acetone to remove the marker from the plastic.
And there you go!!  A nice, easy, and cheap protective cover for your ECLP!  I haven't decided if I'm going to purchase the new ECLP since I already have my old one...and it was such a good deal.  But if you do want to purchase one click here for $10 off your purchase when you sign up with a new email!!

Are you excited for the launch?  Do you have the old style ECLP or are you looking to switch?

xoxo, Moe