Showing posts with label journal. Show all posts

1.01.2019

2019 January Journaling Jump Start

Well, here we are again.  Another year over & a new on just begun.  Last year I did my own little journal prompt exercise to discover my word of the yearIt's not that other prompts & challenges out there were bad...it was just that I was bad at them.  Sometimes I need something that fits me instead of me trying to fit in.
this post contains affiliate links, please read my full disclosure here.

I will say, over the years there's been quite a few things I don't fit into and I've learned to blaze my own trail rather than try to follow along.  And so the January Journaling Jump Start was born!

Last year was my first year coming up with the prompts and this year I changed just a few of them to align more with what I'm looking to discover.  So here we go.


What is the January Journaling Jump Start?

This is a four week journaling prompt exercise to help you reflect on 2018, plan for 2019, research who you want to be, and outline your next action steps.  Each week has a theme - reflect, plan, research, outline - and 7 prompts to help you connect with each theme.  You can take just a few moments to jot down the answer or get creative in your journal to do a little bit of self care.
This month long activity will help you discover the perfect word to live by in 2019.  Your word should be personal & it should be something you can incorporate into your everyday life over the next year.  It's all about focusing on how you want to feel in the new year not necessarily a physical thing you want to gain.  It's about making space for a new you so that you can become the person you'd like to be.


How Can I Get Started?

First download the prompts in the link below.  You'll find a set of journaling cards featuring the prompts as well as a link for a planner template download.  There are a TON of ways to do this though - use your current journal, create a mini album, make a dedicated travelers notebook, start a listing journal, add it into your vision planner - just get to it!  
The best part is that you can be creative in the way that really connects with you!  And hey, if these prompts don't connect with you create your own challenge and share it with us in the Five Sixteenths | Live Creative group over on Facebook!


If you want to check out last year's journal prompts (they are very similar so you can totally use those journal cards too), click hereThe journal cards for this year's prompts work perfectly with the December Patreon Printable of the Month, too.  If you're down to join in on an ever growing library of printables, join the Printable of the Month Club for only $3 a month!  Click here to join.


Happy 2019 my friends!

What is your word for 2019?  Have you chosen a word for your year before?

xoxo, Moe

8.29.2016

Make it Monday // DIY Mini Journal using the Cinch

Guys - I'm participating in 30 Lists.  You may remember that I've tried this like two times in the past and failed horribly at it.  I've been working on my own listing journal and that has taught me a lot about this process - intention and priority are two of the words that journal has taught me - and I plan on finishing my 516 listing journal this coming weekend since it will be a 3 day weekend!
Mini Journal DIY with the Cinch
this post contains affiliate links, please read my full disclosure here.

But today's DIY is about creating a small journal using the Cinch tool.  This tool is one of my favorite high end craft tools and it gets very little use in all honestly.  So I thought I'd break it out for this little listing journal since I needed to whip one up in a hurry.  Let's get into it.

supplies :: Cinch tool, pliers, cinch 1" binding, at least 30 4x6 grid journal cards, 2 4x6 journal cards for cover, laminating sheets, laminator, scissors, assorted 3x4 decorative journal cards, assorted 6x6 paper pads, corner rounder, assorted washi tape, paper trimmer, library pockets (optional)
First, choose the 6x6 papers to use for this project.  I chose about 20 patterns to use from quite a few paper packs.  My inspiration for this journal came from two bright neon library pocket envelopes I had in my stash.  I'm pretty sure they came from the Dollar Tree in the teacher section at one time, but I'm not 100% sure.  The bright neon pink and electric green inspired the colors I chose from various paper packs.  The paper packs I used for this project are Amy Tangerine Sketchbook, Heidi Swapp Favorite Things, an American Crafts paper pad, and Pink Paislee Citrus Bliss.  Next, choose the coordinating 3x4 cards you'd like to use - the kits I used that went well with my color scheme were the Heidi Swapp Favorite Things and the Project Life Sunshine Edition packs.  
DIY Journal
Using the paper timmer, trim the 6x6 papers down to 4x6 size. Round the corners with the corner rounder.  This is one of my favorite punches because it has multiple options depending on the corner radius you need for a project.  The sharpest radius is the one that matches the Project Life radius the closest.
Project Life DIY
Because these paper pads aren't double sided, the washi tape will create a 'double sided' look to the journal pages.  Place the tape along the side of the 4x6 grid card (it is easier to make a straight line this way), align the two journal cards wrong sides together, fold the washi tape over on to the patterned paper.  Repeat for as many 4x6 patterned papers you have.  You don't have to have 30 of them, it is better if you have just slightly fewer.  20 - 25 patterned papers should be good.
Using your Cinch tool punch the pages in the alignment you'd like.  I use the info printed on the Cinch as guidelines (kinda like how pirates use rules....just as guidelines) for punching holes.  But I also just make it up as I go.  To repeat the spacing I did - pull out the first two knobs as well as 10 - 12.  Leave the guide pushed all the way in & punch all the 4x6 cards excluding the front covers.  Once the front covers are laminated, pull out the guide just a tad (one click) and punch the two covers.  To punch the 3x4 cards push in all knobs 1 - 7, and pull out all knobs 8-12.  Bring the guide back to its original position and punch all 3x4 cards.
Assemble the cards on the coil, back and front covers right sides together (back cover on the coil first) then add your inserts the way you'd like.  Use the back end of the Cinch to close the coil.  You can see detailed instructions in this post.
And now you're done!  I love this little guy - a great way to use up scraps and create a cohesive look.  I've found the way to create something I really like is to form it around an inspiration piece and come at the project with intention.  Some projects can be created all willy nilly but some projects need to be planned.  I really wanted this project to be super simple so the only other elements I'll add into this listing book are the scraps from this project, a black pen, and highlighters.  I do plan on stamping the list numbers - I'm not going by date because I know I won't finish it like that! - using some ink and stamps I have already.  If all the work is done, all I have to do is write.  And I wanted all elements to fit in a small pencil bag!

Do you do any journaling?  Have you tried any list challenges?

xoxo, Moe

7.31.2016

Starting a Listing Journal

One thing I've really, really wanted to start and complete is a creative journal.  I've tried to create art journals in the past and I've also participated in the 30 Days of Lists challenges...but I've never committed and completed a project like this.  I never felt I was able to and recently I think I've figured out why - I didn't start out with intention.  Prior to now, I've sort of just said 'I want to do this' and I've done it.  But for some projects....this isn't the best approach.
this post contains affiliate links, please read my full disclosure here. 

A creative journal filled with ephemera, decor, and just a place to paste things I like would seem like a project where when the inspiration takes you..you go with it.  But for me it never worked out.  Finally I had the idea that I need to plan out what I was going to do.  To give myself resources to pull from, and to have an intention when it came to working on this project.
So I put together some ephemera, some journaling cards, and some paper scraps into on of my vintage train cases so that I would have everything I would need in one spot.  This has helped so much with my planning - having one thing with all the things so I  know where the things are - so I thought it would translate well into this project.  I love that I can just crack open my case and play, then pack it all away.
Eventually I will do a video about the supplies in my train case but for now the images above sort of sum it it.  A little bit of this and a little bit of that.  It has been fun to work on this project and I can't wait to share with you some of my lists and pages on Instagram!  I am journaling in a mini notebook I made using the MAMBI Happy Planner Punch and I've slipped the back cover into a Traveler's Notebook from Webster's Pages.  I love this set up because I don't have to commit to a bound notebook but I can have the feel of a Traveler's Notebook. 


If you would like to follow along as well (or you're just looking for fun listing prompts) I've put together a PDF and a Silhouette file so that you can list along with me.  Download them both at the link above.  Remember, all printables on the blog are for personal use only.  Please do not sell the design or the printed images, or distribute them in mass quantities.  If you would like to share this with your friends or pin to a Pinterest board, please pin this blog post and not the digital file.  Thanks for playing nice!


Hope you'll follow along!

xoxo, Moe

10.05.2015

Make it Monday // DIY Mini Travelers Notebook

A few weeks ago I posted a really affordable planner DIY.  I mean nearly everything was from the Dollar Tree!! Today I'm back again with a little how-to on making a mini traveler's notebook.  If you're not the tiny planner type, this can be easily translated into bigger moleskine style inserts - I just found these little lined notebooks at the Dollar Tree and knew I could do an amazing DIY with them
Supplies : polyfolders, mini notebooks, elastic, paper cutter, ruler, scissors, pencil, craft knife, Crop-a-dile Big Bite (or an awl or something pokey), measuring tape
this post contains affiliate links, please read my full disclosure here

First off, nearly all of this can be found at the Dollar Tree - I found the folders & the notebooks in the office section, I found some elastic back in their little craft section, and if you don't have a Crop-a-dile (which you totally need to get if you read this post) you can totally just find something pokey to use to make you're holes.  If you don't have a paper trimmer a ruler and scissors or a craft knife to trim.
Start by cutting the poly folder in half and then carefully slicing away the inside pocket.  I place the knife on the inside of the fold and gently pull up slicing along the fold.  Be careful but ensure that you are slicing as straight as possible.
To measure your width it is easiest to do with a fabric measuring tape.   Wrap the measuring tape around the stack of notebooks you'll be using to measure the width of your cover.  The height of the cover should be just slightly bigger than the measured height.  It is always good to assume you need to go larger so that you can trim excess later.  Mine ended up being about 8.75 inches wide by 6 inches tall
Once the cover is trimmed, gently fold it in half and mark the half way point.  You don't want to create a permanent crease so just gently fold and run the pencil along the valley you've created to mark the middle point.  
Begin to measure out where the holes for the elastic by measuring halfway down the line to mark the mid point (this will be for the strap that holds your notebook together) then make a mark up 1/2 inch and then up one inche from either end.  Once you're done measuring, you should end up with 5 dots.
Using your pointy object or the Crop-a-dile, punch each of the 5 holes.  Create the loop to hold the notebook together by wrapping a piece of the elastic tightly around the stack of books plus the cover.  Trim the elastic, slip it through the middle hole and tie a knot on the inside of the cover. 

To thread the rest of the holes, follow the images below:
starting from the second hole from the right, thread the elastic from the inside of the cover to the outside
Next, thread the end of the elastic that is now on the outside of the cover back through the right most hole.  The end of the elastic should now be on the inside of the cover.
Thread the end of the elastic through the left most hole from the inside of the cover.
Finally thread the end of the elastic back through from the outside of the cover into the inside of the cover through the second hole from the left.
Once the elastic is threaded through the holes. Slip a small notebook (the one that will be the middle of your traveler's notebook) through the longest of the elastic loops on the inside of the cover.  Tie a knot tightly and securely to hold the book in place with tension.  Trim the elastic.

Using the leftover elastic, create a second loop that will hold your other two books.
Slip the elastic around the middle of each book so that the two books are joined like the image below.
Next, slip the set of joined books under the middle book so that there is a book on either side.  You now have your own traveler's notebook style journal or planner!!
the completed journal should hold the three notebooks perfectly!
I decided to show you how to use this little notebook as a planner by dividing the pages with washi tape, using return address labels for the dates, and other assorted stickers to decorate.  I even used some printables from my shop and some other stickers designed to fit the Erin Condren planner.  You don't have to have a name brand planner to have a fun planner!!
Hope you enjoyed this tutorial! Remember, this notebook can be made in any size - so if you've found some other notebooks you're keene on, making a cover for them is super simple!

If you'd like to know how to add charms to your Midori or Fauxdori, watch this video on my channel.  You can also see a Fauxdori set up video here.  Or learn to bind your own notebooks for Fauxdori here.

xoxo, Moe

8.11.2014

Make it Monday // Create Journalling Cards with PicMonkey

Last Friday I mentioned my love of using Project Life cards for practical yet pretty uses in my planner.  Today I want to share with you how to make your own journalling cards for use in your scrapbooks, mini albums, or planners using the free photo editing site, PicMonkey.  I'm not going to be using some Royale features here in this post so if you can totally do this for free....but if you want a free day to access more of the awesome features through Royale, click this link <- that's the only link to the free Royale feature in this post.....so click there if you want the free day!
Let's get started:

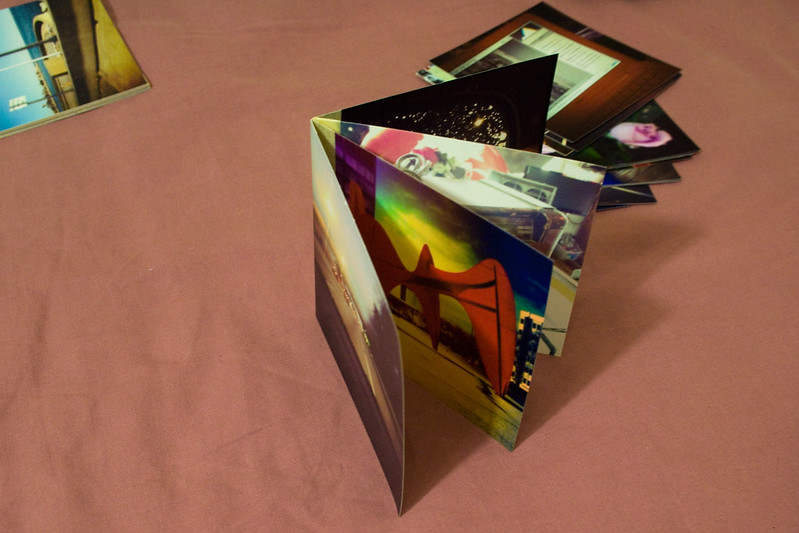
First, head to PicMonkey & select your canvas.  I started with the 4x6 option since thats the size of the largest Project Life style cards.  These cards I'm going to show you are very, very simple...mainly because I'm loving black & white right now.  But please, make your cards fit your layout with colors, overlays, text, etc.
Now let's add some text.  I used some quotes from my Quotes board on Pinterest.  The best thing about PicMonkey is a new feature where you can use fonts already on your computer!  You can download a whole slew of free fonts all over the interwebs so this feature is awesome - especially because PicMonkey gives you amazing freedom to design!
Simply add the text, arrange & save.  I loved using the thin, bold font Bebas Neue for the quotes.  A fun font to pair with Bebas is Halo Handletter.  The bold lines and curvy swirls are really nice!

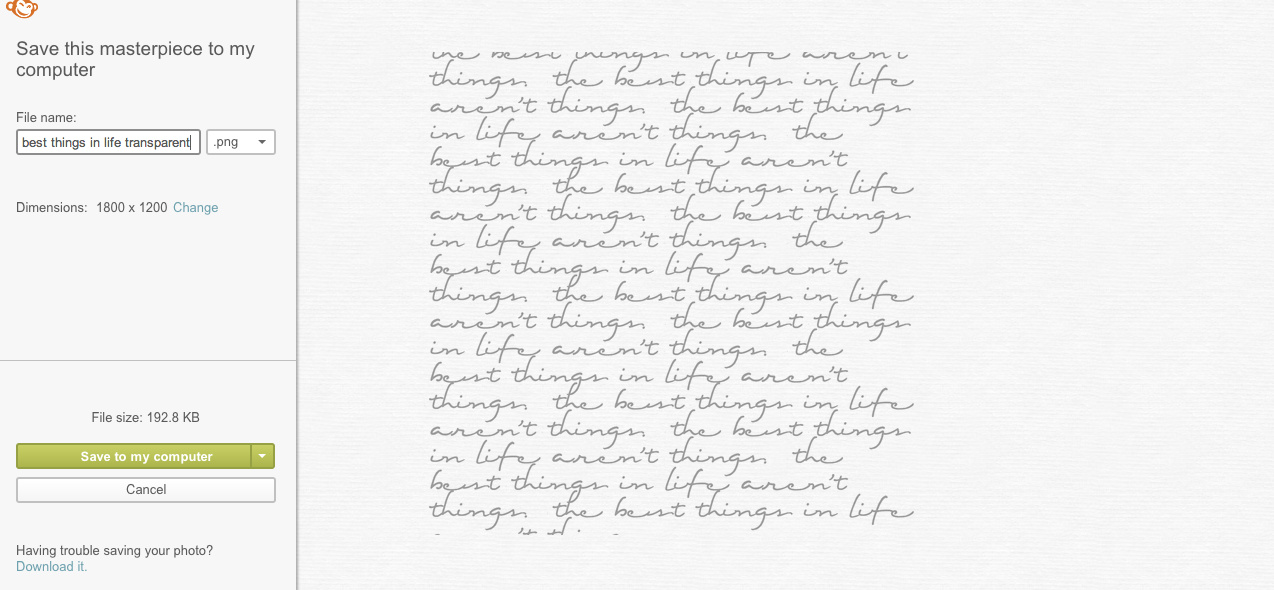
You can also create a texture with your text if you use a really scripty font, like in the example below.
In this design, I used the font Eight Fifteen to create a fun texture.  I stretched it out and copied my text of the best things in life aren't things to create a beautiful texture.  For this one, play around a bit....you might be here for a while finding the best layout.
If you start out with 4x6 cards you can crop the design down to the 3x4 (or 6x4 to 4x3).  To get the design to be horizontal rather than vertical, select the rotate option.  
Creating fun things for holidays is super easy as well!  I chose to create some halloween options because I'm wishing Summer away & can't wait for Fall right now!  But you can make Spring, Christmas, Back to School, etc themed cards.  When I was looking at Project Life style cards, I found that the themed cards - for certain holidays, seasons, etc - came in packs that had a lot of cards.  What if you only want to do one layout with them?  Or you're not using them for scrapbooking but for a mini album or your planner?  That's a lot of leftover cards.  If you're like me, you think well I'll use them next year but you know you'll be wanting to do something else or not into it at all.  So this is a way not to have a zillion cards in your stash!

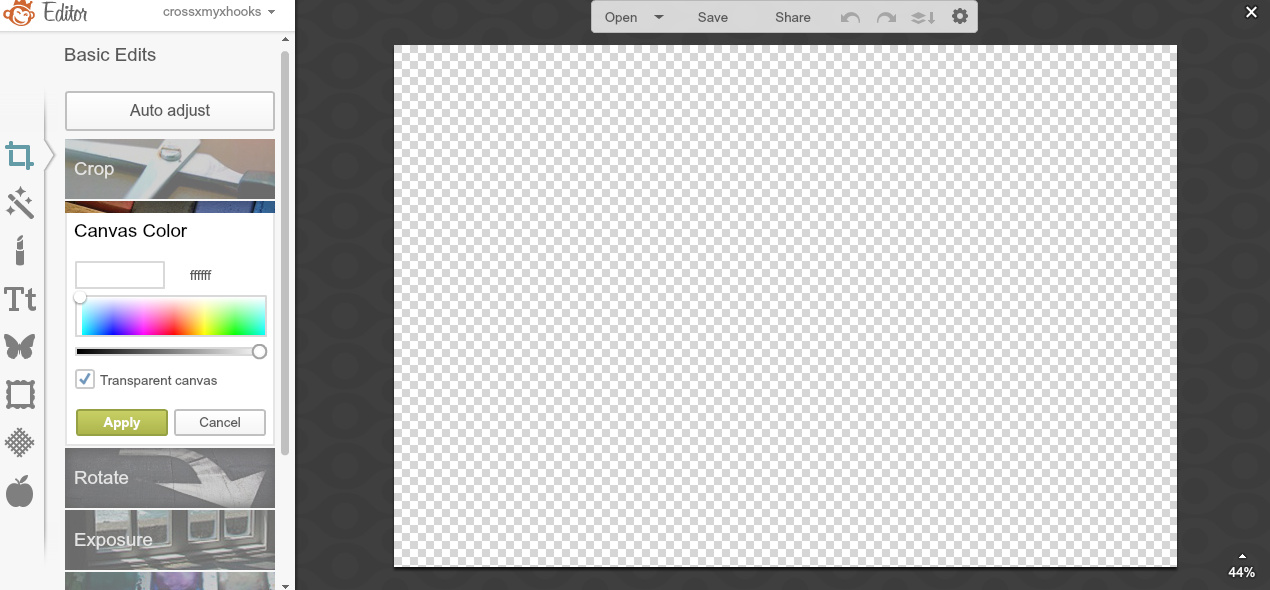
Just as a little side note - if you make any cards you just looooove why don't you go ahead and make the canvas color transparent and save it as a .png file.  Select transparent canvas under the canvas color tab.  You can add your design before or after you make the canvas transparent.
Make sure you save it as a .png file because there will be another DIY using these little cards or images on your photos when editing them on your phone very shortly......

Now onto printing.
Now you can print your cards various ways - the easiest for the sake of this video was using Picasa .  Simple select your images using the control button (command on a mac) to only select the images you want to print with your mouse.  Hold down the control (or command) key while selecting each of your images.  If you use Shift+select option you will select every photo....including things you might not want to print.  Then from the bottom of the screen select the print icon.  On the next screen select 4x6 and two will print to a page.
To add guidelines for cutting, click the Border & Text Options button.  Ever. So. Slightly. Move the little guide under Border Width to the right.  Select a light gray color for the border, and uncheck even with border.  Now you have a light border around your card to make it easier to cut out.

Printing the 3x4 cards are bit tricky but still pretty easy.
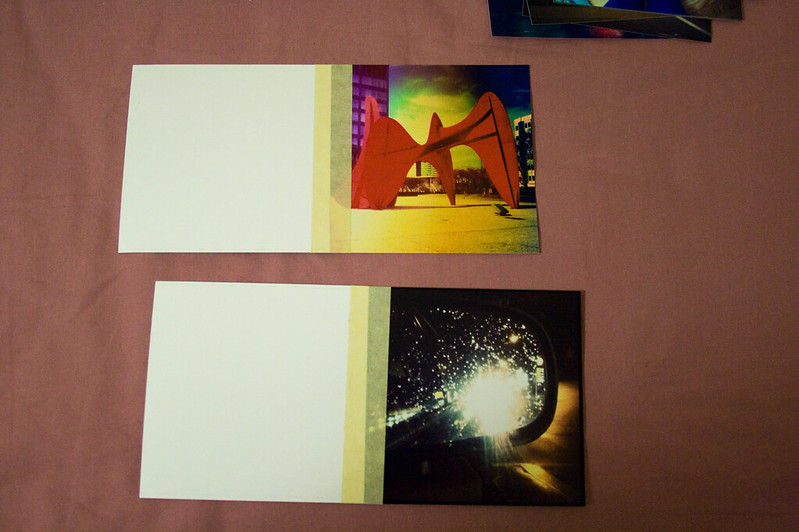
The easiest I found to make two 3x4 cards fit on a page is to select the two 3x4 cards, create a collage, and then print two 4x6 to a page with the border.  Then you can just slice down the middle - either eye ball it (if you're that good) or make that your first cut by measuring to the middle & slicing.

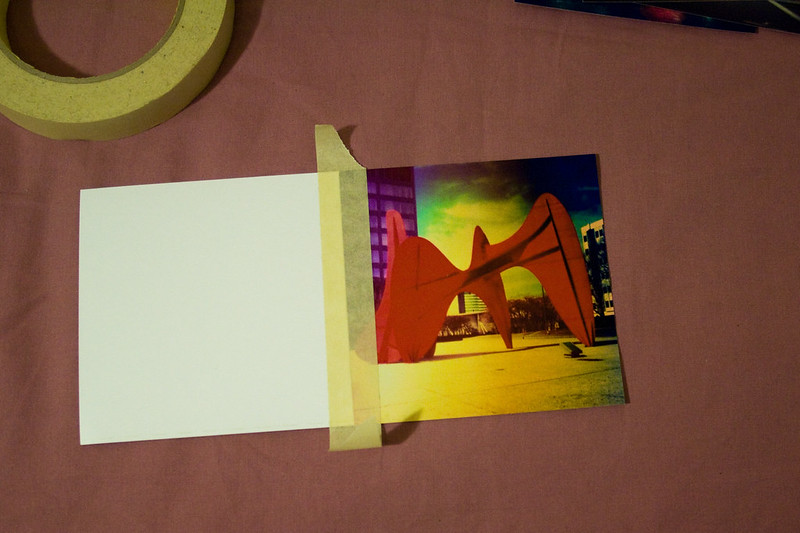
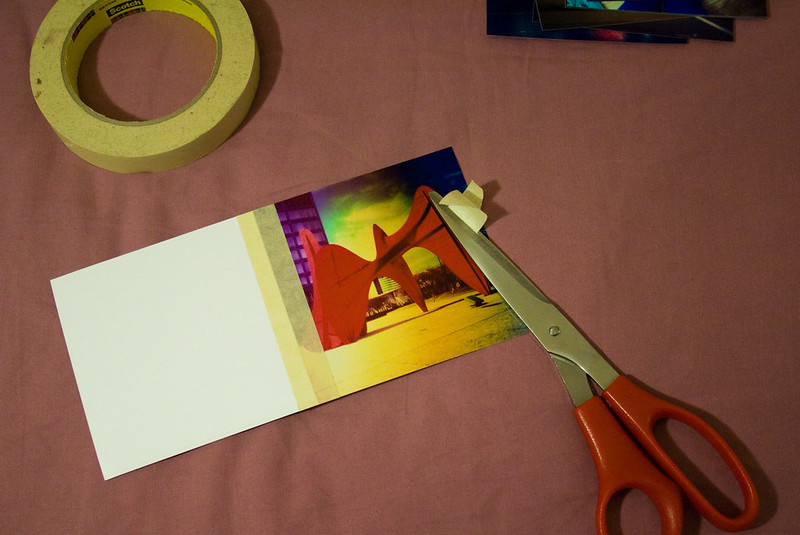
The best way to cut these guys out is with a paper slicer & a fresh (or pretty fresh) blade.  The guides make it very easy.
I used a corner rounder on some of the cards but found out afterwards that the roundness of my corner rounder didn't match the roundness of my collection of cards.  If you're using these in Project Life layouts....you might need to find a smaller rounder to match the other cards.  But for my planner, the round corners were fine.

Other ideas.....
Use this post to create color palette for your cards/planner/mini album/scrap book.  Create a few and then decide which palette you're feeling.  You can also use the palette to go shopping for cards/paper to match your idea.

Use this post to create fun backgrounds to use on the background of your cards by uploading the image to PicMonkey, cropping it, and adding your text or overlays.

Use this post as inspiration to create a cover page for your planner or mini album with descriptive words all about yourself.

Hope this post was helpful and that you got some ideas for journalling cards!  If you are loving black & white or really want ones I've made you can click the links below & download the cards:

Happy With a Calm Life
4x6 | 3x4

If Your Dreams Don't Scare You
4x6 | 3x4

The Best Things in Life
4x6 | 3x4

Halloween Faces Light
4x6 

Halloween Faces Dark

xoxo, Moe

5.07.2012

Make it Monday // Instagram Picture Inspirational Journal

A long, long while ago (when we were in Michigan actually) I ordered some pictures from Postal Pix.  When we got home I got them in the mail & they sat on top of the microwave for a long, long time.  I had no idea what to do with them.  One day I decided that it would be cool to have them in a sort of journal because they backs of the photos are blank.  Perfect for writing!


So I took a cue from this tutorial & made them into a book.  Here's what you'll need:


Line up two photographs with one face down & one face up.  Tear a piece of tape & place it where the two pictures join.  This becomes your binding.  Trim up the edges of the tape so that they are even with the pictures.  Repeat for a second set of pictures to make another signature, or bound set of pictures.  Then join these two signatures together in the same fashion. Place the first signature with the pictures face down & the second signature with the pictures face up.  Tear off a piece of tape & place it where the two signatures join.  Continuing making signatures in pairs & joining them.  Then join each pair of signatures together by lining them up & taping down the center & until you have a full book.

To make the outside binding, use pieces of masking tape or decorative washi tape or woodgrain contact paper.  I still have a load of woodgrain contact paper left over from other DIY's.

I knew I wanted to use my book for some of my favorite quotes so I decorated the cover with another strip of woodgrain contact paper & wrote QUOTES with a sharpie.  I then cut out circles of the contact paper & stuck them to the blank side of the photos.  Then had at it with quotes from my Hello Monday pin board.

You could use your's as a travel journal, a journal for a wedding or event, or even just as an everyday journal.  Also, you can add onto it if you get more pictures by just adding more signatures.

I also have an idea to make sort of an album that you could use for either a smaller option from postal pics or for your instax pictures involving the same sort of binding.

Coming up with cool ways to get my photos off my phone & into real life and coming up with ways to use them has been a cool challenge.  I don't want to do too much with decor since I know I'm moving around August.  But I am definitely keeping a photo wall in the back of my mind for our next apartment!

How do you get your pictures off your phone & into real life?


                   Connect on Twitter // Follow on Pinterest // Peep me at Hello Cotton