Showing posts with label printmaking. Show all posts

9.19.2016

Make it Monday // DIY Cactus Art Print

Sometimes I hoard supplies.  If you watched my office tour, you'll probably have seen that.  Sometimes I hoard supplies for like ages - pretty sure this project I'm sharing today is made with supplies I've had since college.  So that means I've had the supplies for this for 5 years.  Not all the supplies, but the main ones.  
Today I want to share with you a really fun DIY using erasers to make stamps.  I've always wanted to carve up these little erasers that I've had for 5 years but I never found inspiration to do so.  Then I saw a cactus on Pinterest and suddenly the light bulb went off.  Here's how to do it:
(this post contains affliliate links, please read my full disclosure here.)

supplies // white rubber eraser, linoleum cutter, box cutter/knive, pencil, pen, stamp ink, cardstock, thin tipped marker

The type of eraser used for this product is important.  You'll need a really good rubbery eraser - not the pink ones, not the brown ones that crumble easy, but an eraser that will stand up to being carves.  I used this brand but as it is super crazy expensive on Amazon, I suggest looking in the art/drawing supply section of your craft store to find this sort of eraser.  This is key because not all erasers are made the same.
Start with a sketch of how you'd like the cactus to look.  I realized that pretty much this cactus is just a repeating shape in varying sizes.  Practice drawing the shape you'd like a few times until you get the hang of it.  The shape is pretty much a U shape fattened at the curve and narrowed at the tips connected by another, smaller arc.
Using the box cutter, carefully chop the erasers into two parts.  Don't cut them directly in half - make sure you have four different sized eraser parts when it is all said and done.  
On each bit of eraser, draw the fattened U shapes in varying sizes using the pencil.  Don't be afraid to change the shape up, after all you are drawing with pencil on an eraser so you can rub the marks off!
Once the shapes have been drawn, use the linoleum cutting tool to trace and carve out the images.  You want to carve away the negative space.  So carve around the outside of the shape you've made.  Use the size 1 blade for detail and the size 3 blade to remove bigger chunks of eraser.  Use the size 1 blade to make little divots to represent the cactus needles.  Be careful, this tool is very sharp so be careful not to stab or cut yourself.

After carving out the designs, use the box cutter again to carefully narrow down the shape.  Don't cut too much off...cut just enough off so you will be able to better guess where you are stamping the image. Again, be careful here!
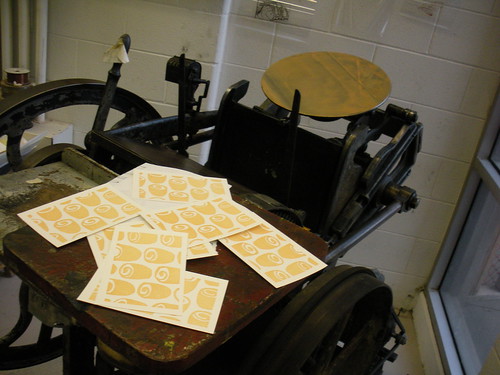
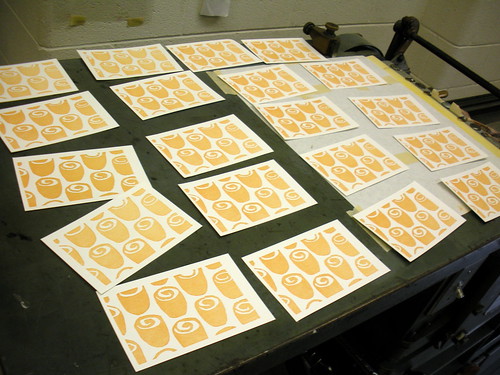
When you are satisfied with your stamps, choose your ink and do a test stamp.  I found that my Memento Dye Ink did not work as well as the Chalk Ink I had.  But play around with your inks to see what works best for you.  Do a few test stamps to see how you'd like your cacti to look and figure out the best pressure to use with each stamp.  Then move on to stamping on the paper of your choice. 

I chose to stamp on some off white card stock after drawing little pots with a black fine tipped marker.
These are great for framing, for sharing, for use as a pocket scrapbooking element, etc.  If you have a bigger eraser you can carve a bigger stamp but these are perfect for 3 x 4 and 4 x 6 inch size prints.  I love these guys and really want to use these in a spread in my Memory Planner!

Hope you enjoyed this little DIY!

xoxo, Moe

4.13.2012

Fan Fridays // Back to Normal

Happy Friday all.  I went to pick up my lovely boyfriend from the airport last night & am glad to say he is in good shape.  He flew off for an interview in Michigan over the past week & I was very sad.  But I am glad to have him home safely & off to more interviews in VA.

This week has been mad at the office.  Trying to get things straight from the move, turn on the phones & internet, find all the folders for students, etc, etc.  On the blog front, I've also been organizing sponsor stuff for this month & the month of May.  I've updated my sponsor page here to include a new feature spot.  The feature spot will include a solo intro post with interview, option to guest post, & inclusion in the new Five Sixteenths Newsletter.  If you are interested in any sponsor spot, please shoot me an email!

Fan Friday today doesn't really have a theme as I've been inspired by a bazillion things this week.

This awesome monoprint fabric pillow with DIY from Design Mom.  I love the look of monoprints.  Sometimes I feel like it's an extra step, why not just paint (!?!?!), but the look is so much more unique.  When you paint (at least when I paint) I focus on the perfection of it all...if it's a monoprint it looks more worn & unique! I have to try this!

This totally super awesome ring display DIY from Tea Rose Home.  I've been dying to make something like this & keep finding awesome inspiration.  It's so lovely I have to make one.

Elycia's stinking cute hair cut right now.  I want to take this pic to my hair dresser & hope it looks good on me.  I am also in love with the collaborative vlogs with Elycia & Chantilly (of My Girl Thursday)

This super rad girl with super rad style in a super rad cardigan.  She blogs about absolutely amazing fashion & affordable finds on ebay.  I love those posts.  Makes my day every time.

This weeks manicure featuring a mint green by Sally Hansen & a lemon neon yellow from Icing.  I've been trying to be more experimental with my nail polish but sometimes it just comes out like crap.  For example, that half moon manicure worked once for me :( now all I get is a smooshed mess! What the heck!


Edit to add some awesome links:
Check out these blurry photos as featured by Flutter Happy
The Seven Deadly Sins of Instagram by What Emily Did Next

What has been inspiring you this week? Anything special?


9.19.2010

Sum Up Sundays: Finished Bookplate & Framed Quote

My apologies for this picture heavy post but I wanted to share with you the process.  So be prepared for a lot of images!

You may remember from this post an assignment to design a bookplate.  Well my design changed a bit & here is the process & the final product:

Inking up the press


Locked up block:


Preparing ink for second print:


And the final print:


I got SUPER frustrated doing this.  But my friend who is a print major helped me out a load! It made so much sense after! I realize though that in my frustration that my image doesn't support my type. I still like the colors together though.  One of the main parts of the assignment was the plate had to reflect the creator, it had to be personal.  During crit of our sketches my original one got thrown out because everyone thought this design reflected me better.  I see what they are saying now!!

And remember the quotes I made? Here they are as a decorative piece on my head board:


I love inspirational quotes.  And I really believe in this one! I also gave one away to my room mate since I made an edition of 21.  I put it in a thrifted & painted frame on top of a piece of scrapbook paper my sister gave me! Next to it is a great mason jar.  My roommate is so creative, she decided to buy some old mason jars for us to use as cups! So great!

PS. Don't forget to check out the link parties in the Side Bar or click here!

9.15.2010

Quotes

This in its raw form probably has nothing to do with decorating but when I get finished with them I think it will:

In my print making class, one assignment we had to do (blogged here) was set some type & print it.  The type was to be our favorite quote & the goal was to print an edition of 21 (20 for us & 1 for our instructor).  My quote is a Samuel Becket quote.


I plan on framing a few & giving them as gifts.  They will be put on patterned scrapbook paper (probably) then framed.  I'll keep one for my self of course, but the others may get used in a collage or something, I am not sure yet.

I knew I loved this quote & what it meant but I never thought about how it exactly applied to me.  I always thought about it in theory.  Well if you check out this post on Cross My Hooks, you'll see one of the many art projects I am working on.  Well, long story short, while completing this project we were one part of the process short & thus it wasn't working correctly.  Once we remedied the problem it worked perfect.  It wasn't until that moment that I realized that the quote is true & not just in theory! We tried, we failed. We tried again. The second try wasn't perfect but it was a better failure than the first time & we progressed! Now we can pour these sheets out no problem.  Hooray!

Do you have a favorite quote??  One that you really feel is most definitely true?

PS. Check out the link parties in the side bar or click here!

8.30.2010

Make It Mondays: Light as a Feather, Heavy as Lead?

This week's Make It Monday is soooooo late today.  Don't worry, its here!  As I mentioned earlier, I am going to incorporate some of my art projects into Make It Mondays. If something interests you, for example this week I am featuring printmaking, I encourage you to see if there is a community center or shop offering lessons.  They may be free or for a fee, but you will learn a whole lot & maybe find a new passion.  So here we go:

  1. First is a decor idea I have.  I'd like to make a load of origami butterflies to cover a wall but........I don't have the time or the paper.  I am settling for a little burst of butterfly on my desk.  I am going to hang a few from the underside of my hutch just to add some fun.  I love butterflies, they are very special to me.  My great grandmother used to say she'd come visit as a butterfly so now every time I see one I think of her.  This origami butterfly is from origami-fun.com with full instructions! How sweet is that!
  2. Secondly, I have to set type for my print class.  Yikes! Nah, I am not worried.  I've seen it done (some of my friends are printmaking/book arts majors, so I think I have it in!).  This image is from Letter Press Daughter.  This blog seems so cool! I love to look at people in their element & this blog follows a fun life.  
Well, it is late & I still have to read. Until Wednesday....much love :)