Showing posts with label make up. Show all posts

3.01.2018

Three Ways to Save Money While Building your Make Up Collection

I'd consider make up to be one of my many, many hobbies.  For me personally it's the thrill of the hunt (finding limited edition products or being the first to find something new on the shelves), the thrill of saving at the check out counter, and the thrill of the comparison.  Make up is really something I collect - of course I use it too - but it's fun to have a lot of things at your disposal when you want to play around.  It's also great to be able to find some amazing things for a great price, here are my 3 tips for saving money while building a collection:
this post contains affiliate links, please read my full disclosure here.

Clip your coupons and hunt for deals

The place I like to shop for drugstore make up is CVS mainly because of their coupon program.  I've written a post on it here but mainly you can join their beauty club and for every $50 spent you get $5 Extra Bucks to spend in the store.  Additionally, they have in store coupons that print when you scan your rewards card.  And you can stack a CVS coupon with a Manufacturer's Coupon with your Extra Bucks to get the most bang for your buck.  I shop at CVS for everyday things - cereal, tooth paste, anything really - to build up my extra bucks to buy beauty products.  This is a great way to try things you're interested in but don't really want to shell out cash for.  They also have really great sales every week.  The only thing I can complain about is the selection of some brands is very poor.  For example my CVS doesn't have a great selection of Wet n Wild.

Follow your favorite brands on social media & keep an eye out on places like HauteLook.  You can find amazing (& sometimes secret) sales but keeping up with the brands you love.  HauteLook also runs sales on some of my favorite brands - like the Balm - quite often.

Know the Best Drugstore Brands

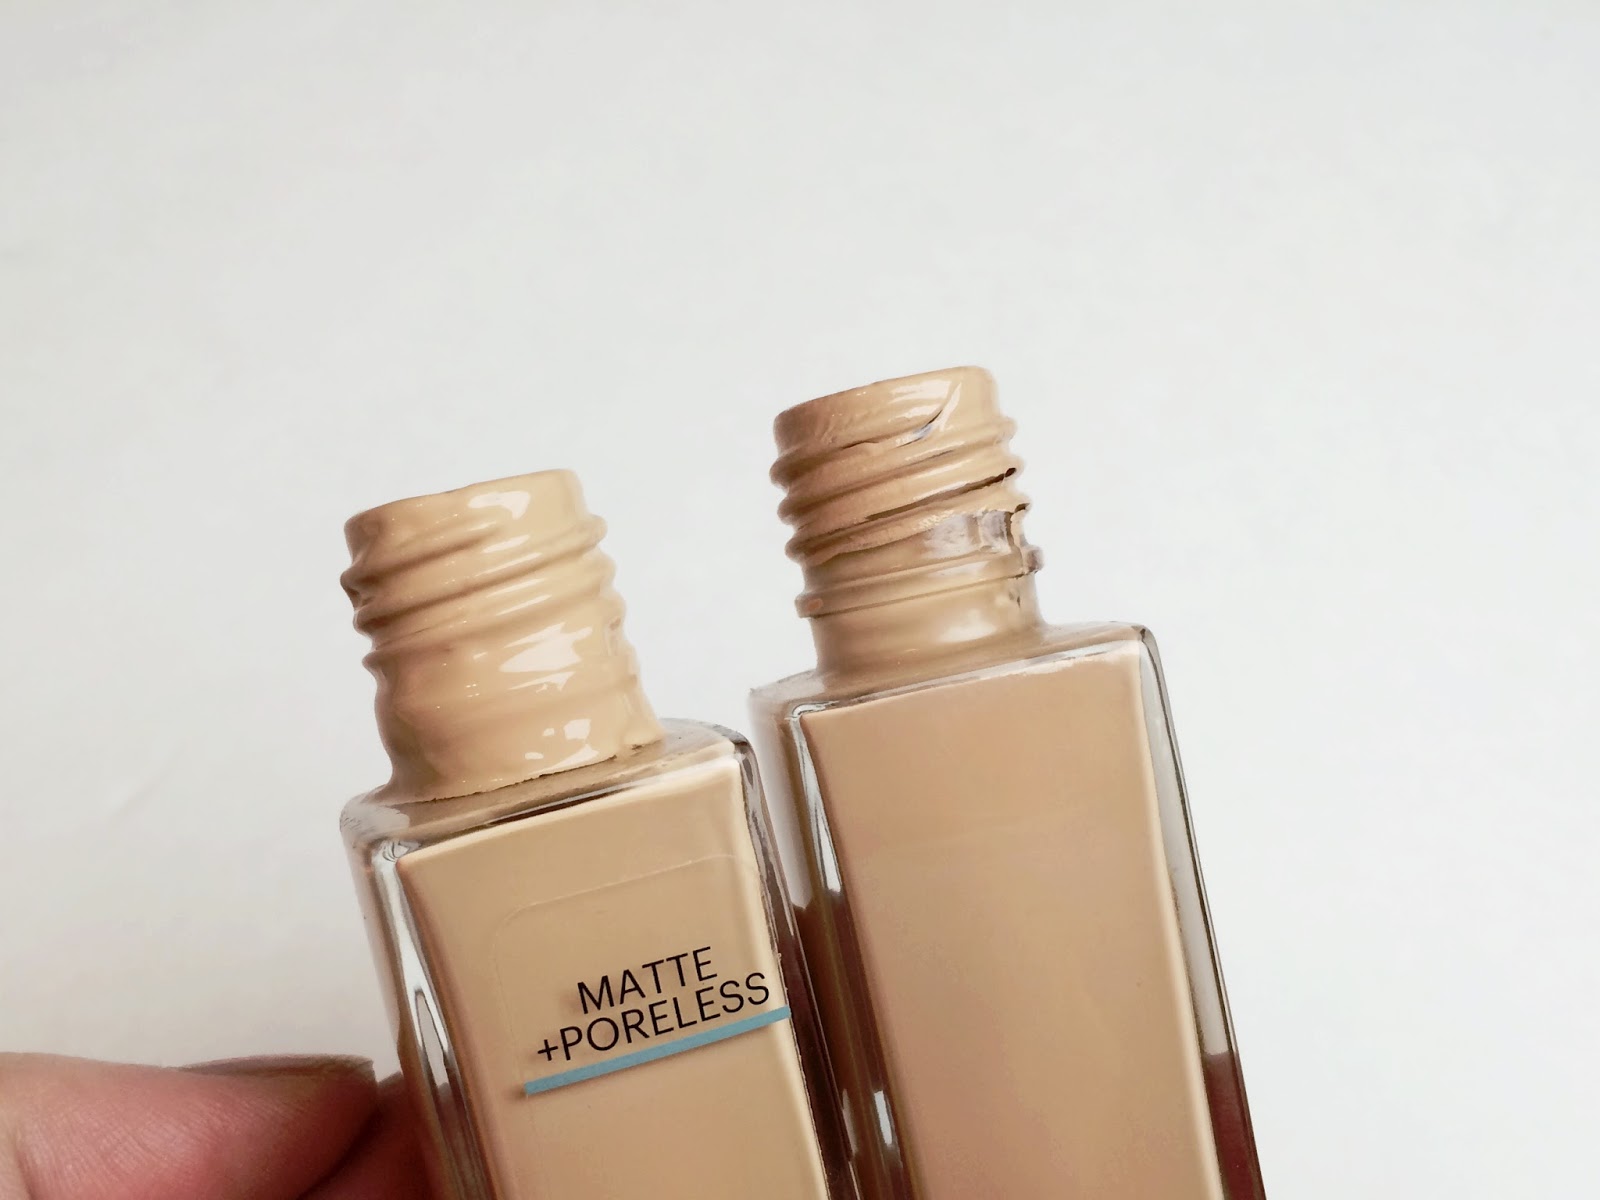
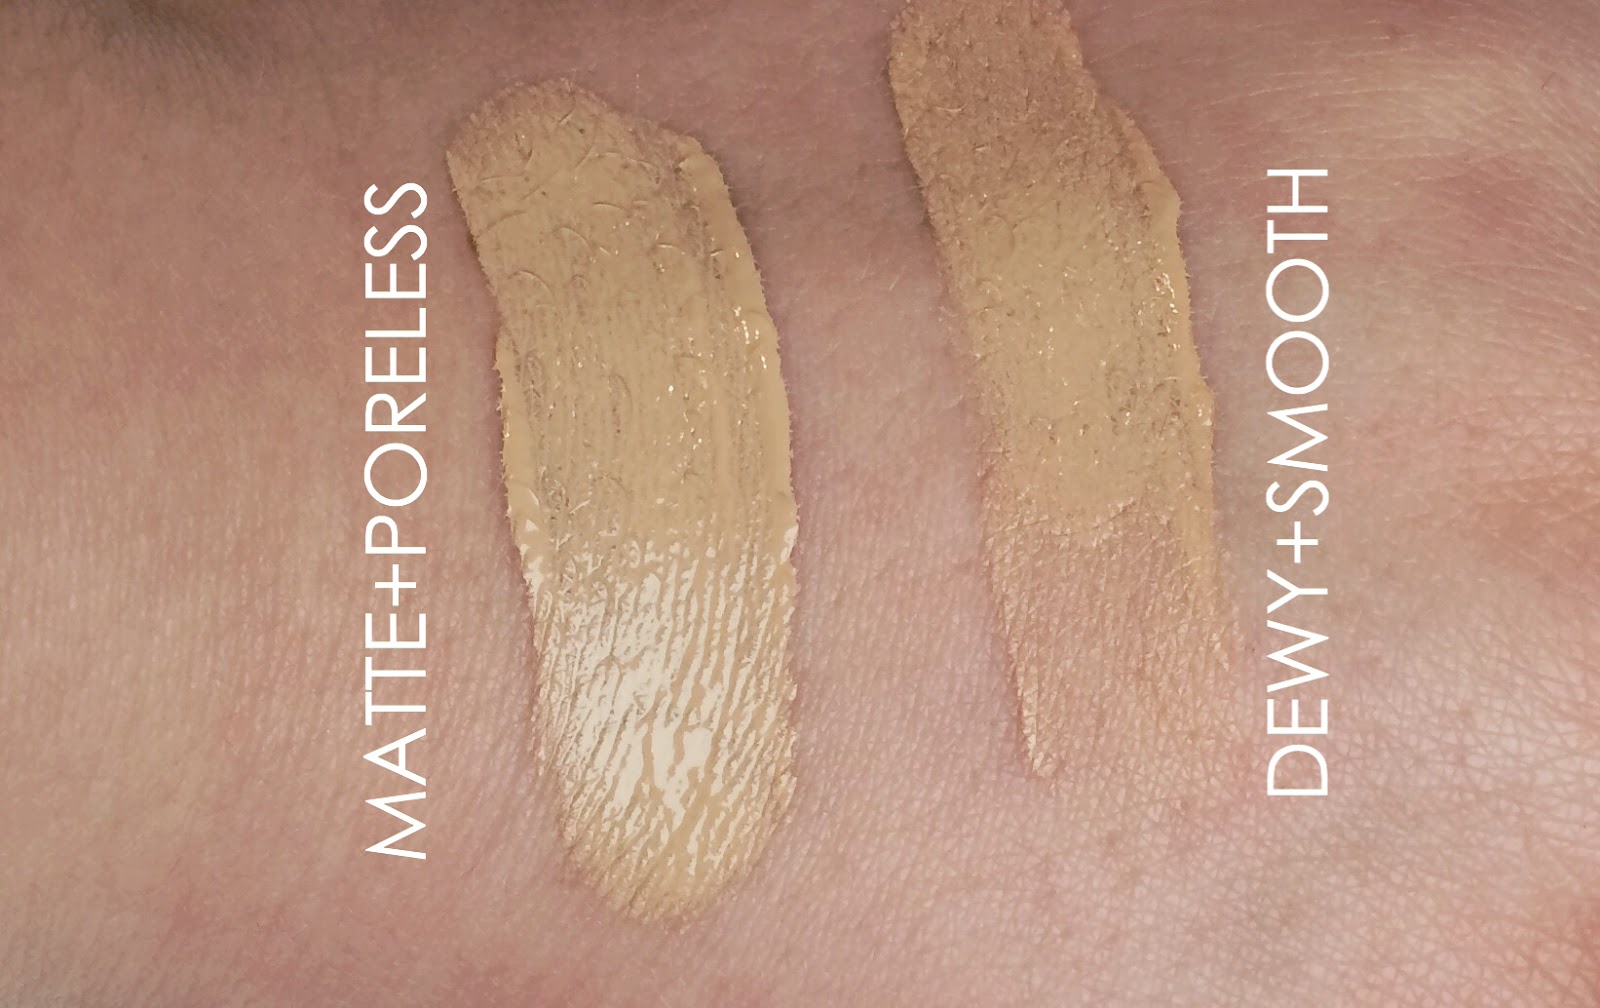
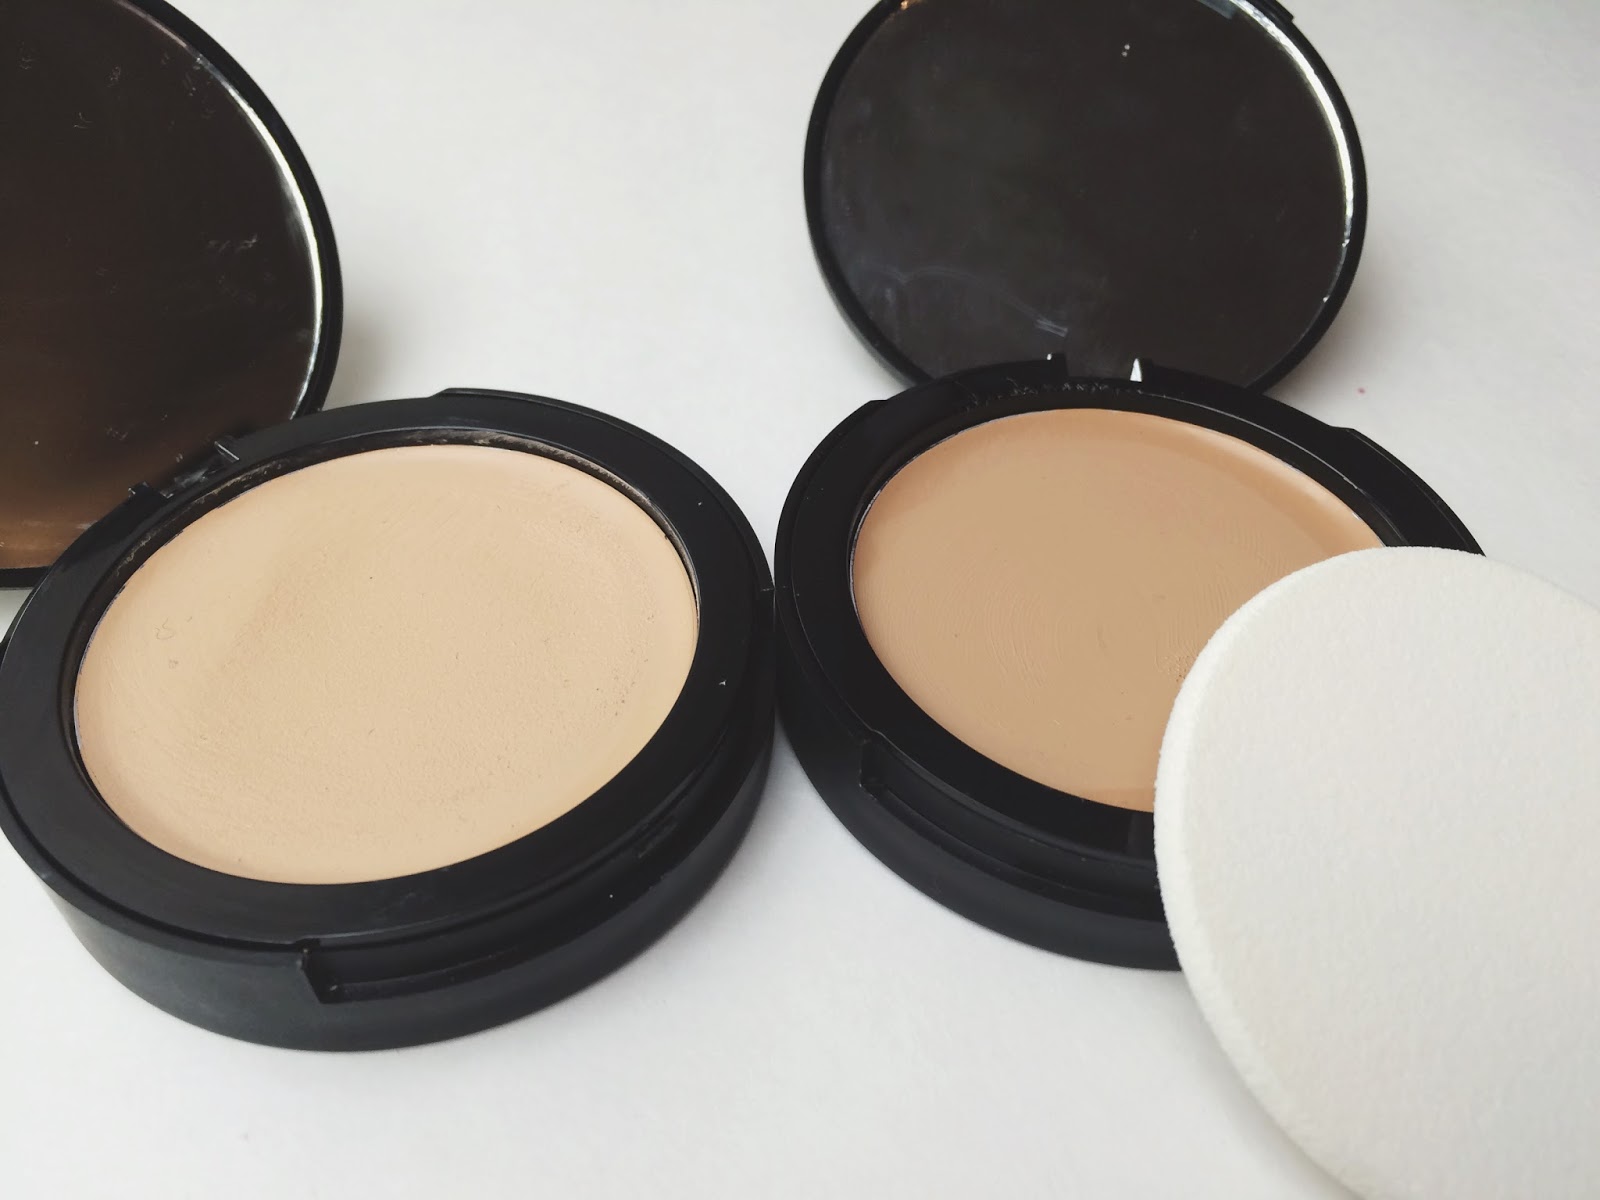
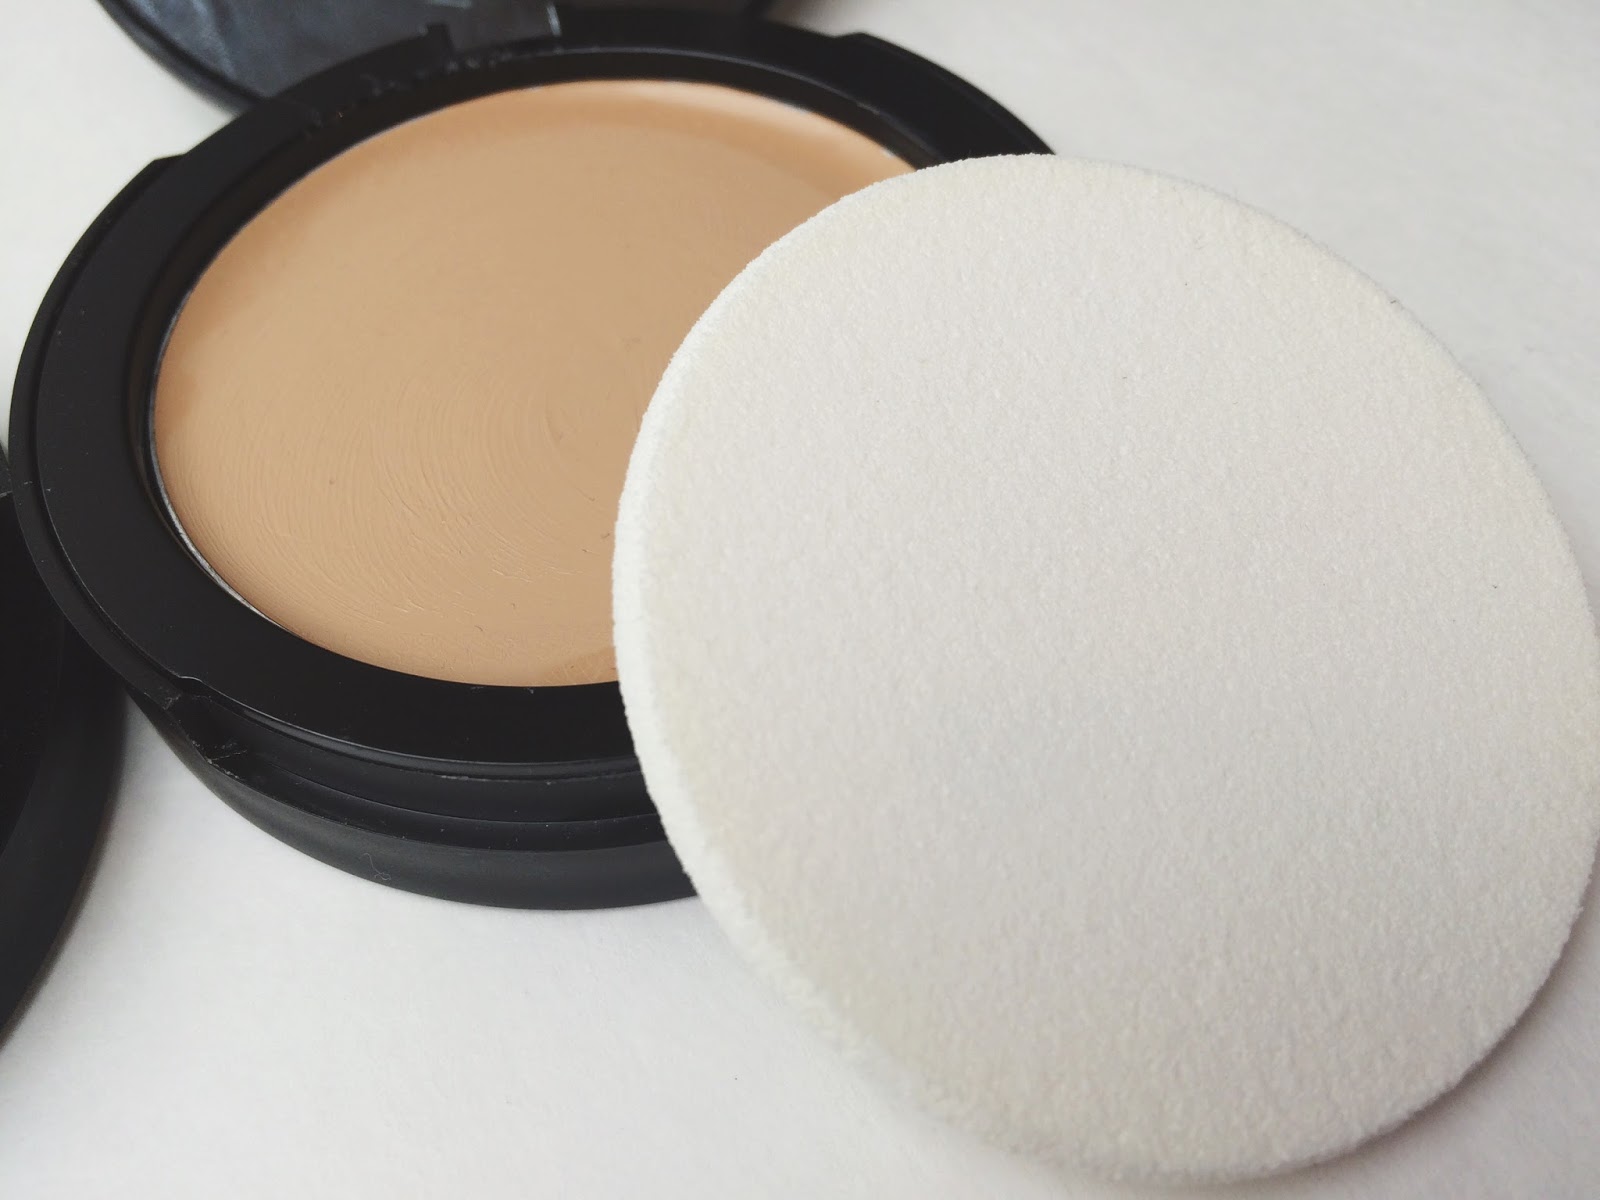
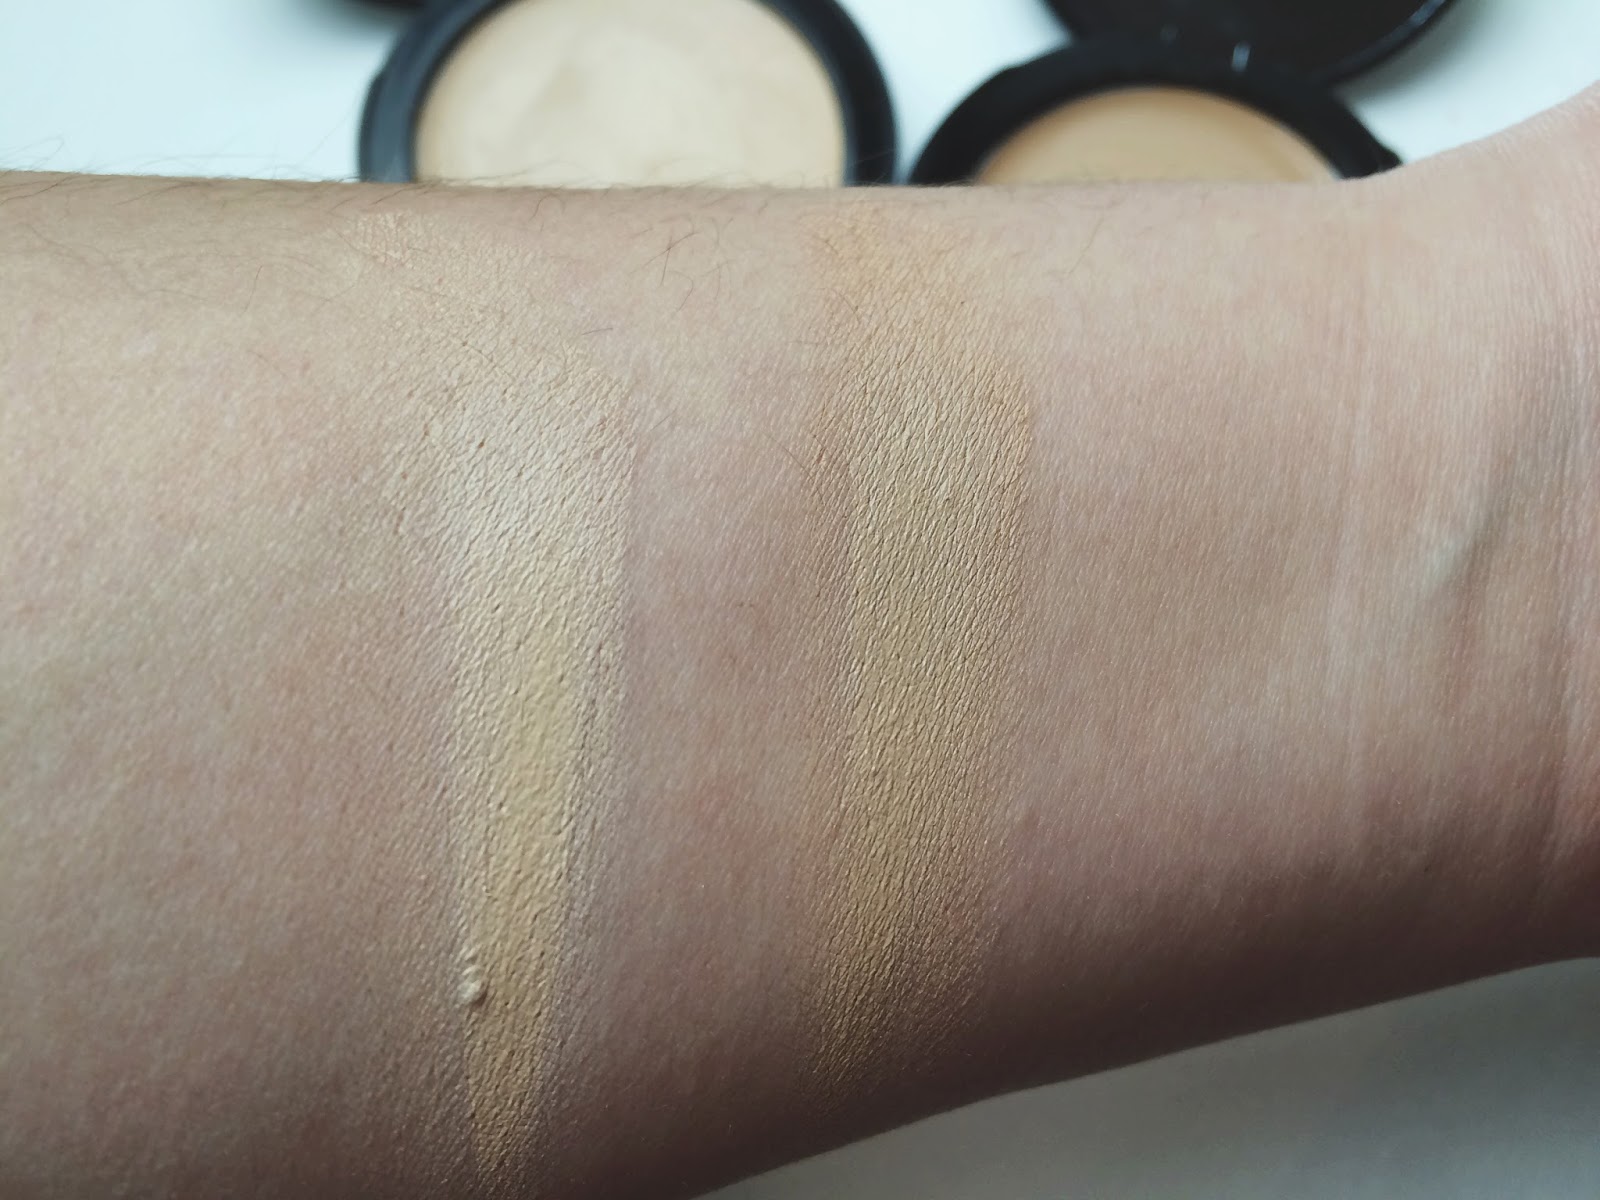
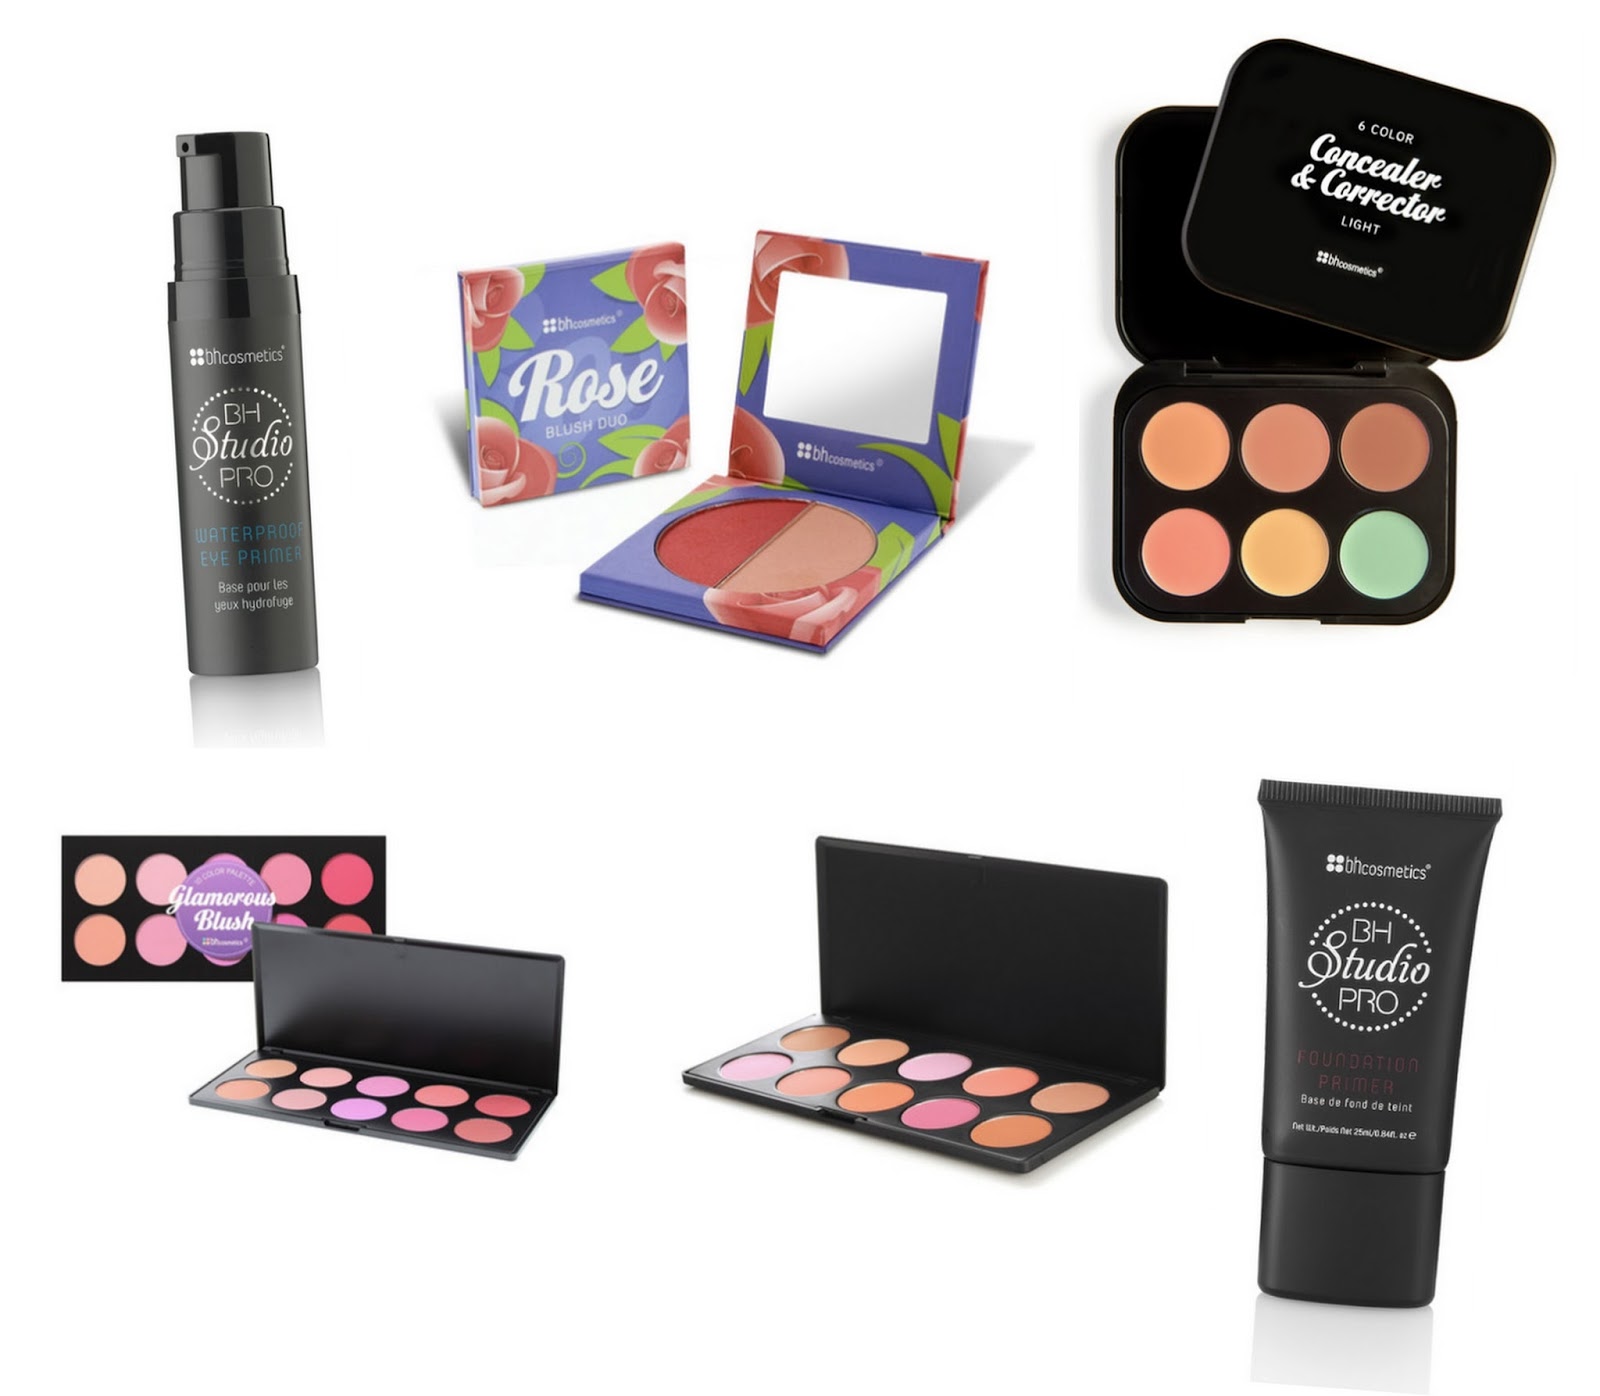
When it comes to affordability there are a few brands that are on the top.  Wet n Wild & Eyes Lips Face (ELF) are the tops for me.  They are easily accessible, start off at a really low price point, and the quality pretty much rocks.  CVS often has buy one get one free on Wet n Wild and even if it's just BOGO 50% off, you're still getting a steal.  The Eyes Lips Face website is constantly running sales (really get on their 50% off everything sales) but they are also available at local retailers.  Here's the breakdown:  If you want an affordable foundation that lasts all day the Wet n Wild Photo Focus foundation rocks.  Wet n Wild has the best eyeshadows & lipsticks.  Plus, they are constantly releasing amazing limited edition items which can fulfill you're need to hunt.  Eyes Lips Face is probably found in your local Target or Walmart and sometimes at Walgreens.  In recent years the brand has expanded to be more readily available and their product lines have only increased in quality.  In this line the blushes are a good range for what is available in store.  There are also a few blush & highlighting palettes that really impress me.  You don't have to place an order online to get a good grasp of the brand, however there are far more things online than in stores.  Their brushes are amazing and if you're just starting out your brush collection picking a few of their Studio Line Brushes will really build your collection fast.  (Here is a video on the essential Elf brushes that you have to have!)

Shop the Holiday Sets

If you want to get the most bang for your buck when it comes to high end, or prestige brand, make up be sure to shop the limited edition holiday sets.  You may be spending $45 but you might be getting a $100+ value.  First, save you're money...then weight the odds.  Whenever I want to try a brand or try something new from a brand, I look at these sets.  You'll often be getting a steal and getting a good sampling of that brand.  Additionally you're often getting smaller sizes of products in these sets so you're not tied to something you might not like.  You'll either work through it quickly or not feel as bad passing it to a friend because you didn't pay full price for a certain item.

If you're worried about bulky packaging you can also depot the things you like into Z Palettes to maximize you're storage space.  Brands like Elf and Physicians Formula also do holiday sets at the Drug Store and often you'll get more bang for your buck that way.  My personal philosophy when it comes to holiday sets is to shop for what you want.  Because these things are so, so popular I like to snatch up the things that I would be really sad if I couldn't find after the holidays.  Then, after the holidays, I'll go shopping to find any leftover sets that might be on discount.


You can really save a ton of money building your collection if you're patient and you build your collection one or two pieces at a time.  It's easy to do this if you coupon, coupon, coupon.  I stop into CVS quite often to see what deals I can get with my Extra Bucks and MFG coupons and that way I'm only spending a few bucks at a time but building a collection of things to try!

What are some of your money saving tips when it comes to make up?

xoxo, Moe

6.20.2017

Beauty Review // Wet n Wild Photo Focus Foundation + Concealer

If you didn't know, Wet n Wild is one of my all time favorite brands from the drugstore.  Nearly every time there is a limited edition product from this brand I scoop it up.  I've curbed my makeup spending significantly over the last year or so - but honestly that is because I've found other interests!  None the less, Wet n Wild's new Photo Focus line has caught my eye.
Wet n Wild Photo Focus Foundation Review
I've had these products for quite a while and have to say I really do love this product.  You can't beat a great foundation under $10!

From the Website
Your skin, only better. Our new high-performing, skin-perfecting foundation underwent major road testing under seven different photo lighting conditions to deliver flawless camera-ready makeup every time. Specially made with a matte, light-diffusing complex to give your skin #nofilter perfection.

High-performing, breakthrough formula
Featuring light-adjusting complex to help prevent white cast in photos
Tested under 7 light conditions with and without the use of flash

taken from the Wet n Wild website here.

First Impressions & Application
When I first opened the bottle I was a little surprised by the little spatula type deal that is attached to the cap.  At first it reminded me of the way the Maybelline Dream Wonder Fluid Touch foundation bottle is made.  The product is a little thicker than the Dream Wonder foundation, from what I remember.  Using the spatula was not the first instinct I had, for sanitary reasons, so I poured the  product onto a make up palette.  The consistency of this foundation isn't too thick, though thicker than the Dream Wonder foundation and the Fit Me foundation by Maybeline.

I applied this with my Real Techniques Beauty Sponge and love this application.  The sponge does soak up quite a bit more of this foundation that I expected.  I'd say it soaks it up a little bit more than something like a Revlon Color Stay or even the Wet n Wild Coverall foundation.  The Photo Focus foundation seems to apply similarly to the Dream Wonder - it applies thinly, feels like there may be a little bit of oil (not in a bad way!) in the product.  The foundation applies easily and blends seamlessly.  I was impressed with the coverage which is medium, yet buildable.  It also doesn't apply too cakey.
Wet n Wild Photo Focus Foundation Review
The concealer is nothing to write home about, pretty average at best.  It applies evenly, has a light to medium coverage (good for brightening), and is really creamy so it blends well.  My first impression is that it is average but I prefer the Coverall Concealer from Wet n Wild.  

I also want to mention a lot of people said that the foundation smelled like paint.  It was the very first thing they noticed when working with the product.  When I first started wearing the foundation I did not notice the strong scent.  However, it did become noticeable over time!  

Wear Time
I work a typical 8 hour work day.  I would say that this foundation, with powder (my favorite powder here), lasts up to 9-10 hours.  It actually beats the heat too.  I wore this foundation for this photo shoot and it stood up to the heat and a few outfit changes!  It even looked great for dinner afterwards.

This foundation has become my go to for long wearing, easy application.  Not to mention the price is amazing!  With oily skin, it seems only the higher priced drug store products have a good chance of staying on me.  I don't notice that this breaks down or separates.
Wet n Wild Photo Focus Concealer Review
As for the concealer - again, pretty average.  Lasted a good while, even through the heat.  All concealers crease on me at some point.  This one was just as good as any other.  The thickness of the product didn't feel heavy or move around on me.

Overall Impressions and Recommendations
If you have oil skin, I 100% recommend this product.  It does have a little bit of a weird, paint like smell so if you're sensitive to smells application may be hard for you.  Since it wears pretty well and the price is super affordable, I plan to go back to the foundation in the future!
Wet n Wild Photo Focus Foundation Swatches
As for color range, the website says the shades go pretty deep but not too light.  There are 20 shades in all from porcelain to mahogany.   I'm actually surprised by the depth of the color range as I did not find shades too deep out in the stores.  I did check various Walgreen's - there is one by my work that carries very deep shades of all foundations - and still didn't see the darkest shades.  But if you can find these guys out in the wild, $6 for a foundation is affordable enough to grab two and mix your perfect shade.  This is exactly what I do.  It also mixes well with the Maybelline Fit Me Matte foundation.

All in all, I give this foundation a thumbs up.  Good coverage, long lasting, affordable, + a wide range of shades is all impressive.  As for the concealer - you probably have another one that is your favorite but this one is not too bad.  Nothing to get super excited about.

Have you found any drugstore favorites recently?  Anything super exciting?

xoxo, Moe

6.28.2016

Beauty Review // Elizabeth Mott Thank Me Later Eye Primer

I'm not 100% sure how to review an eyeshadow primer - it has no color so there are no swatches of it - but I just knew I had to review this one.  First off I will spoil the review (I don't really like doing that) because I love this primer.  It seriously brings out the colors of even the cheapest shadows and makes them last super long!  I was very impressed using this primer thte other day with a drugstore Wet n Wild palette.  That palette is not the best quality that Wet n Wild can put out, but applying the shades over the primer made the colors more vibrant and increased the lasting power.
So let's just get into my thoughts on this product :

From the Website
A lightweight and waterproof formula that locks in your eye makeup and prevents shadow creasing. This silky blend dries transparent and preps your lids for a smooth and even application. Watch your favorite eye shadows intensely come to life. More importantly, it protects your eye makeup all day, so you can get back to the important things in life (cat videos, selfies, and hoarding makeup samples).
taken from the website here.
First Impression & Application
When I first applied this primer I was a little confused - it is very thick and I didn't realize that you only need a very, very tiny bit.  The first time I used this I think I used too much - it felt like a cheap cream shadow on my eyelids.  The key is to use the very least you can.
The way I apply this primer now is to take a bit about the size of the head of a pin - this is for both eyes!  I rub it between my two fore fingers to warm up the product, then gently swipe it onto my lids.  I then dab a clean finger (often my ring finger or middle finger) on my lids to pick up any excess product.  This is important because the shadows will blend easier.  This is the first primer I've used that has acted like a glue.  It doesn't really absorb into your skin but rather sits on top to create a sticky layer that holds onto the shadows.

Wear Time
This primer is great for cheapo shadows.  I used an old (yikes!) Wet n Wild eye shadow palette that didn't really have that great of a color pay off or lasting time with any other primers.  And I went into the bathroom before I left work to grab some lunch and my eye shadow was still there! It wasn't the greatest but it was still there!
In the picture above I tried to capture the color payoff of that not so great Wet n Wild palette and the lasting power of the primer.  This was a hard review to photograph!  You can see the light colors became a little more vibrant - like the pastel purple and even a little tiny bit of that pink and the cream color.  And the darker colors were the last to stick around.  That purple though is still showing up in the far right image!

I put on my make up at 6:30am and leave work around 4pm - so that is around 10 hours.  If I use a good shadow - like a Lorac palette - I find that I'm taking off my eye shadow with the rest of my make up when I get home.  That is impressive to me!
Overall Impressions & Recommendations 
I love this primer.  However, the full price is $20 for .35oz.  I got this sample in one of my last Ipsy bags and the sample size is .17oz.  I don't think I will ever go through this whole tube, honestly, so I can't tell you if I'd purchase this again or not.  I can tell you that I'm glad I tried it!  If long lasting primers are important to you I would suggest dropping the $20 on this.  The tube will last you literally forever so it is worth the money.  This is my current holy grail primer - I've had it in my last few make up baskets too!

I hope this little review was helpful - I am so very glad I have this product.  It really is a standout!

Do you have a current favorite eye shadow primer?  Any products to recommend?

xoxo, Moe

1.26.2016

Trend Tuesday // CoverGirl TruNaked Palettes Swatches

I can't get over the amount of nude inspired drugstore eye shadow palettes that are hitting the shelves right now.  First we had the Maybelline palettes (reviews/first impressions here & here), the it was one from L'Oreal (see it featured here), then Revlon (GRWM video here), now.....we've got CoverGirl.  
CoverGirl release at the beginning of 2016 the TruNaked Eyeshadow Palettes and I have to say they are the bomb!  I only have two to swatch for you today because for the life of me I can't get my hands on the Nudes shade - every where is sold out!  Each time I come upon an empty display my heart get's broken a little more.  
These palettes are so much more compact than their earlier counter parts - much smaller than the L'Oreal La Palette Nude, the Revlon ColorStay Not Just Nudes palettes, and the Maybeline The Nudes palettes.  And they have much better quality - in order of preference I'd say CoverGirl, L'Oreal, Revlon, Maybelline.  On the lid of the product it even says 'shades like a leading $50 palette'!  While I don't have any of the Naked palettes, I do believe you can achieve the same look.
If you're down for the rosey pinks of the Naked 3, totally pick up the TruNaked Roses palette.  There are three matte pinky-mauve shades.  The lightest one is Almond and a mid-tone one is Baby, and the deeper one is Copper Rose . Oh yeah, these palettes also have shade names!!!  There is no matte highlight shade in this palette only an extremely glittery/shimmery pale, pale pink.  All other shades are very shimmery/glittery yet I haven't notices too much fall out.  The colors are all very unique to each other - nothing seems overly similar - even the deepest shades have something unique about them to differentiate them from each other.
If you have more bronze skin, I think the Goldens palette would be great.  This one features two matte shades again - one for the crease/transition is a soft, midtone brown and one as a matte highlight/browbone shade.  The rest, again, are all shimmery/glittery.  I love the bronzes, golds, and olive greens in this palette and think this one can actually create a more dynamic look that the Roses palette.  You can get a golden, a bronze, and an olive eye look distinctly from this palette.  From the Roses palette I see only variations on the rosey eye look, nothing too standout-ish from each other (if that makes sense.
The texture on these is wonderful.  It's what you'd like a drugstore palette to perform like!  I want to say they aren't as soft as the Lorac shadows, but I don't have the Naked palettes so I can't compare texture there!  Each shade applies and blends well.  And I've noticed that they stay on well into the day.  A super plus!

I have to get my hands on the Nudes version of this palette!  I think it will be the perfect go to look for me because I've been super lazy recently.  Man, these swatches really get me!

Have you tried the TruNaked palettes?  Any tips?

xoxo, Moe

12.01.2015

Trend Tuesday // All That Glitters is Gold

We only have 4 more weeks until Christmas! I couldn't be more stoked!  Last friday - Black Friday! - I donned my ugly Christmas sweater and headed out for some sales.  I don't think I scored too big except at Micheal's, but I did buy a pretty gold passport cover from Forever21.  Surprisingly the lines in F21 weren't that long and I was booping around when the shiny gold caught my eye.  I scooped it up and now will be traveling the world with some bling......not really.  But it did get me thinking about all the gold things I've been digging recently.  It is the holidays so gold is all over!

this post contains affiliate links, please read my full disclosure here
find this set on Polyvore here
1. A Nice Gold Watch
While you don't have drop a lot for a nice gold watch, it doesn't hurt to!  I don't wear a watch too often so a watch from Charming Charlie or from Forever21 doesn't get beat up too much.  If you're a casual watch wearer, a $25 or less one will do just fine!

Scrapbook.com has a ton of gold paper clips.  I found these feather ones to be unique and would add a fun touch to your stationery supply.  They even have these little gold trees!  How sweet for the holidays!

I love the foiled look every little thing has now.  Hobby Lobby has a ton of foiled gold washi added to their washi section and Michael's has some foiled washi for Christmas.  This skinny washi is great for divisions in your planner and can be used in the vertical Erin Condren Planner to divide up the weekends (ps use this link to create a new account and save $10!)

4. A Gold Planner
I was going to try to get my hands on a gold Webster's Pages Color Crush planner for this December but I was unable to find one for sale until a Blitsy sale on Black Friday (Blitsy is a great flash sale style site for crafting and planner supplies!).  So that one is on its way to me but if you're looking for something in stock right now, try for the Gold Filofax Saffiano.  My first Filofax was a Saffiano and that got me hooked on ring planners!  I currently am loving the Original Filofax - it's the button that really gets me!  But I'm currently using a the Gold Dot Lilac Kikki K I unboxed earlier this year.

For a very affordable price you can deck out your passport and your luggage in gilded gold.  The inside of this passport holder is a bright silver and has a few little things you can use as pockets for other travel documents.  I think this luggage tag will look super cute on my purple luggage.  When we went to Korea there was a purple bag that looked nearly exactly like mine.  So I need something else now to make it stand out!

6. Glitter Scrapbook Paper
This paper pack from the Heidi Swapp Marquee Love collection is the bomb.  I love it!  I used the gold glitter paper to decorate a pen for my December planner and these would be great dividers or even backgrounds for the popular shaker dashboards right now!

This set are my favorite affordable brushes from Amazon.  I love the variety of brushes you get and the all are great quality for the price.  This is a repurchase for me - even though they last a long time, they are so affordable if I feel I may need another foundation brush I just pick up a set.  (Plus Amazon Prime is amazing!)

So there you have it - all that glitters is gold!  I'm loving the gilded look 365 days a year - not just around the holidays!

Are you digging the gold trend?  What would you love to have shining bright gold in your collections?

xoxo, Moe

ps.  Don't forget to use Ebates on your holiday shopping this year to get cash back!  Sign up here.

7.07.2015

Beauty Review // My Essential Travel Brushes

When I pack my make up bag for travel it is often hard to choose which brushes to bring.  If I'm going on a long trip - like maybe a week home in Virginia where I might be doing some different stuff - I tend to bring an assortment of my favorite brushes.  I'll even pack up my whole brush roll.  But if I'm only going out for a weekend I tend to be more picky.  Often I'll consider what I'll be doing - if I'm camping, nah, I'm probably bringing zero make up, if I'm going to a family function I might bring some more full coverage stuff, if it is a casual trip weekend maybe I'll bring some BB Cream and a few little things but nothing crazy.  But when it comes to brushes for smaller trips, I've paired it down to just the essentials.
this post contains affiliate links, please see my full disclosure here
I like to only bring brushes that will fit in my make up case.  Like I mentioned before, if I'm staying longer I'll bring more which means more room.  If it's a weekend trip I'll use a little bag like the picture above.  (Just FYI I took these pictures while I was traveling, and yes my brushes are dirty.  So sue me.) Here are the brushes I can't live with out:
from right to left: Real Techniques Blush Brush, Contour/Bronzer Brush/Real Techniques Powder Brush.
Real Techniques Blush Brush - This is my favorite brush for blush and I us it everytime I use blush.  Every.  Single.  Time.

Contour/Bronzer Brush - This brush is from a set on Amazon that I highly recommend.  I love this brush for bronzing and contouring because it is fluffy enough to blend but small enough to be precise.  I don't lay down a heavy contour so I like to have a brush that can blend out in the hollows of my cheek bones.


Real Techniques Powder Brush - If I've got a liquid foundation in my make up bag I need a powder brush to set my foundation.  I never go with out setting my foundation because I have oily skin and I need it to last as long as possible.
from top to bottom: Real Techniques Setting Brush, Eyes Lips Face Blush Brush
Real Techniques Setting Brush - If I plan on doing some under eye concealing and maybe a bit of highlighting with concealer, this brush is a must.  It is small enough to fit under my eye and the bristles are really soft so my endereye doesn't feel tortured!

Elf Blush Brush - If I don't pack this one I pack the Elf Tapered brush because both of these are great for highlight!  They place the highlight in the precise place and blend it out nicely.  (side note: did you know you can get cash back when you shop the ELF website through Ebates?  Ebates is my favorite way to save money on beauty products.  You can check it out and sign up here.  If you want to know my favorite ways to save money on make up, please read this post)
from top to bottom: Flat Shader Brush, Blending Brush
Flat Shader Brush - This brush is good for packing on the color to your lid and being precise in the inner corner or outer corner.  Because it is so dense, I find it to be a really functional brush.

Blending Brush - Because when I travel I am usually not going to do an intense eye look, I make sure to bring just one little blending brush.  This one happens to be from Mirabella and is just a simple fluffy brush.  I use this in the crease and to blend everything together.  Nothing fancy, just simple.

These also happen to be the brushes I grab for in a hurry.  If I'm just doing a simple look or just an everyday look I know these can be my go to brushes.  I also have a video on my channel about my favorite ELF brushes but I am thinking about doing an update video because there are so many more brushes added to the collection now!

What are your travel make up essentials?  

xoxo, Moe

6.16.2015

Current Summer Make Up Favorites

If you haven't noticed, I've been pairing down my make up routine lately.  I'll start with a full face on Monday and by Friday I'm lucky if I even have on concealer. (My favorite concealers are in this post!)  See the thing is....I like to sleep a bit longer!  I've been just doing a bit of concealing, some lipstick, my brows, and mascara lately but on a recent trip where I knew I needed a foundation with a bit of SPF, I rediscovered a BB cream I got from Big Lot's of all places.  I'm not sure if you can get this anywhere anymore...the only listing I found was of one left on Amazon.
this post contains affiliate links, please read my full disclosure here
The Epielle BB Cream has become my go to foundation because it is easy to apply, light weight, but has a the coverage I'm looking for.  My face has gotten better recently - with redness and overall acne/breakouts - so I've been going for lighter coverage.  For some reason my usual full face, full coverage look hasn't been appealing to me.  I've been loving a lighter, fresh faced look....which is surprising!!  This BB Cream has SPF 20, claims to moisturize, prime, smooth, brighten, even tone, and protect.  It also says it has sheer coverage but I'm surprised at how well it evens my skin.  It is a great base for natural summer make up.
In addition to the BB Cream I've been setting my face with the Balm Sexy Mama translucent powder.  This is also something I rediscovered!  I love that it is light weight and I really do think it keeps me nice and shine free for a good long while.  The compact does have a mirror but no little sponge so it's not that great on the go - I am thinking about sticking it my puse though because I have a retractable kabuki brush with me.  
For blush I've been loving the subtle look of the Elf Mineral Blush in Jet Setter.  I have all four of the shades and a review + swatches of them all in this post.  Jet Setter has to be my favorite of all of the blushes in the collection.  It is matte and just the perfect shade of a natural flush.  I find this blush is perfect all year long.
As for lips, I've been going more natural if you can consdier it that.  Sort of the my lips but better shades.  I've been loving the Too Faced Melted lipstick in the shade Melted Fig for a while now and pulled it out again for the summer.  Some other natural colors I've been loving are the Elf Moisturizing Lipstick in the shade Wink Pink and the Wet N Wild Megalast Lipstick in Rose-Bud.  Side note: I can't wait to see if & when the Wet n Wild Fergie line comes out with anything crazy for the Summer.   Last year I snatched up all their fun lipstick shades!

As always I suggest if you're going to do any online shopping for beauty products to see what kind of deals you can score through HauteLook and Ebates.  The Balm is on HauteLook quite often so keep a look out.  Amazon also has pretty great deals on The Balm as well.  If you're shopping on the Elf website I just found that they are a part of Ebates now!  Ebates gives you cash back for shopping through their link - just go to the Ebates website, search the retailer you're looking for (like Eyes Lips Face) and you'll be securely redirected to the retailers site and if you purchase, you'll earn whatever the cash back deal is at the time.  I use Ebates any time I purchase high end make up online - I used it to purchase a Mac MSF through Nordstrom since Mac isn't a part of Ebates (plus I believe Nordstrom does free shipping! score!)

What are your go to Summer make up staples?  Anything new you're trying out?

xoxo, Moe

3.24.2015

Beauty Review // Favorite Spring Make Up from the Drug Store

The snow has melted, finally, and I am so ready to bust out the make up for Spring.  I did a bit of a transition into the bright, springtime colors in my March Make Up Basket but can't wait to put together a fun spring look for my channel as well.  I'm was going through my make up to decide on what I should include in my April basket and decided to put together a really pretty collection of spring time make up in case you're in the mood to do some drug store shopping now that the weather is warmer:
For me, spring is all about the bright lip and cheek colors so I like to keep the eyes neutral.  I feel like all fall and winter long we were doing the deeper eye colors - smokey eyes, cranberries, deep reds, etc - and right now I want to lighten it up a bit with some neutral shades.  I am all over the matte look for springtime eyes so I love the Physicians Formula Matte Eye Shadow Quads (review here) because of the range of matte shades.  However, if you're looking to add some shimmer the Sonia Kashuk Eye on Neutral Shimmer palette has a great variety.  This palette has the deeper shades....if you need them.  The shade are pigmented and smooth but do kick up a bit of powder.  I love the lighter shades for a pop of shimmer in the center of the lid.
Now we're getting into the fun stuff - the cheek products.  Milani released these Rose Powder Blushes in a Limited Edition set last summer and I think the summer before that too - but these babies are permanent now.  These are two great colors Tea Rose (open on the top) is a really nice neutral-ish pink.  If you're scared of pink I would suggest this one because it's not going to be too bright pink even thought it looks scary.  I also love it because it has that slight tint of periwinkle which has to be one of my favorite colors to see in cosmetics!  The next blush is Coral Cove and this would look amazing on deeper skin tones.  It is definitely that pop of orange!  Each of these blushes is matte and really silky.  The rose relief won't go away too fast either....I have one from the original collection two years ago and it still has the rose design.

At the top of the image there are my two favorite powder highlights from the drug store, both from the Wet n Wild line.  On the left is the Wet n Wild Color Icon Bronzer in Reserve your Cabana.  It is s super light, champagne shimmery powder that reminds me a bit of the Hourglass Ambient Lighting Powders.  It is smooth and soft and just applies a light pearly highlight - nothing too shimmery.  It does kick up a bit of powder though but looks gorgeous on your cheek bones.  The second is the Wet n Wild Fergie Center Stage Collection To Reflect Shimmer Palette in Rose Champagne Glow (review of all the Shimmer Palettes ever here.)  These remind me of the MAC Mineralized Skinfinishes (I have the one in Lightscapade and boy is it dreamy) and kick up a lot less powder than the Color Icon Bronzer.  The Shimmer Palettes are much more glitter - they give that wet look with a little bit of fine shimmer - while Reserve your Cabana is more of a sheen - it is more reflective than it is shimmery, there are no little glitter particles.  I definitely think that the Shimmer Palettes are more comparable to a Mac Mineralized Skin Finish and the Color Icon Bronzer in Reserve Your Cabana is more like the Hourglass Ambient Lighting Powders.
My absolute favorite part of spring and summer is the bright lip colors.  I will keep a neutral eye and a neutral blush but go for a POW on the lips.  On the far left is a new line from Maybelline, the Rebel Blooms collection.  This is the shade Orchid Ecstasy and it is a really pretty pinky-fushcia-purple (the image makes it look really dark, but it really more of a true purple color in the tube.  These lipsticks are rather glossy and more sheer than my favorite line from Maybelline, the Vivids line.  The Rebel Blooms collection have a lot of fun colors but I chose this one because its a great, easy way to wear a purple lip with out feeling like you can't pull it off.  I love that this collection has a translucent purple cap...purple is my favorite color!  If you're down for a full, opaque bright lip I'd suggest the Maybelline the Vivids line.  Pictured above is the shade Pink Pop.  This line has a bright orange, clear top and is really fun to look at in the store.  The shades in this line are very opaque - one swipe is full color.  They are still glossy, just more full color and really comfortable to wear.  Personally I blot off the glossiness to have a bright matte lip.  Pink Pop is a true bubblegum, Barbie pink perfect for the springtime!

The next in the image (second from the right) is the new Wet n Wild Balm Stain in Redioactive...how clever.  This is my new favorite lip color.  It is the perfect bright pink, corally, red color.  I think it is really unique to the drug store.  These Balm Stains are super long wearing.  When you first apply them they have a nice gloss to them while giving your full color.  However, they leave behind and intense stain that lasts a good chunk of the day.  The stain left behind is also full color...so don't worry!

Finally, I love to play with the LA Girl Glazed Lip Paints (other colors were in my Favorite Summer Lip Colors here.)  This one is in the shade Peony and it is the perfect light, peachy-pink color. (This one was hard to photograph too, the packaging is more of a true bright coral peach color) These are really glossy and rather runny and are best applied with a lip brush.  They are a little bit sticky but I find that these lip colors last for a few hours.  Some colors even leave behind a little bit of a stain - but this one is so light you might not be able to tell depending on your lip color.

Hooray for spring time!  I can't wait to put together my April make up basket and really get back into the swing of things on my channel.  My goal is to continue with videos every Monday, Wednesday, and Thursday like I was doing at the beginning of the year.  Here's to making that happen!

What is your favorite drug store look for spring?  Anything new and excited you've added recently?

xoxo, Moe.

ps.  Read more beauty related posts here.

2.10.2015

Beauty Review // Maybelline Fit Me Comparison (Dewy vs Matte)

Today I wanted to do a quick comparison between two of the offerings in the Maybelline Fit Me line - the Matte & Poreless line and the Dewy & Smooth line, today we'll be talking just about the foundations.  I plan on doing a comparison between the powders as well.  You can see here on the Maybelline website that the Dewy & Smooth is a repackaging of the original fit me line.  I have the old/original packaging so that is what you will see in this review/comparison.  So let's just get into it.

From the website
Fit Me® foundation has a new look for its same great hydrating formula!  Hydrates, smoothes skin texture and matches natural tone for a luminous, seamless finish.
For Normal to Dry Skin. SPF 18.  Fit Me!® Dewy + Smooth foundation for dry skin from Maybelline New York goes beyond skin tone matching to fit the unique texture issues of normal to dry skin for the ultimate natural skin fit.  While some foundations can exaggerate dry, rough patches, only Fit Me Dewy + Smooth hydrating and moisturizing foundation contains our genius hydra-smoothing concentrate so dry areas become incredibly smooth with a perfect dewy finish.
taken from the Maybelline Website here
Tone + texture-fitting foundation for the ultimate natural fit.  Mattifies, erases pores and matches natural tone.  For Normal to Oily Skin.  Fit Me!® Matte + Poreless from Maybelline New York goes beyond skin tone matching to fit the unique texture issues of normal to oily skin for the ultimate natural skin fit.
While some foundations can exaggerate pores and oily skin, only our pore-minimizing foundation contains our genius blurring micro-powders that erase pores and absorb oil for a naturally matte and poreless-looking finish.
taken from the Maybelline website here 


First Impression & Application
Each of these foundations come in a pumpless, square glass bottle with a black cap.  The repackaging of the original fit me foundation (found here) doesn't deviate too much from the original look - there is an addition of the words Fit Me to the black cap and the front design is a bit different.  The Matte & Poreless version has a teal accents.
The consistency of each foundation is different.  The Matte & Poreless is very, very runny.  It is a cross between the consistency of the Maybelline Dream Wonder Foundation (review here) and the Maybelline Super Stay Make Up - I feel that it is really, really runny but no too runny to blend away to nothing.  The neck of the bottle gets covered with the product no matter what I try to do.

The consistency of the original formula, repackaged as Dewy & Smooth is thicker, but not as thick as the Super Stay Make up.  It seems to give a decent amount of coverage with the sponge, but as I'll get to later, by the 4 hour mark the foundation is gone.

I apply each of these foundations with my a beauty blender style sponge.  For me, I feel that the sponge gives more coverage and less streaks.  Even though these aren't the same consistency they are still runny - just one more than the other - and streaks are a problem with a brush.

Wear time
The original formula lasts only about 4 hours on my skin.  I remember when I first got this foundation I was super impressed with it but it soon fell to the fails pile (as seen in this post).  My skin just seems to eat this foundation, quite literally.  It does slip around or get super greasy...it just disappears.  I couldn't even do a check in on it because my first check on it at work, around the 4 hour mark, left me stunned in the bathroom.  Everything was gone.
Super weird! The Dewy & Smooth is recognizably thicker than the Matte & Poreless, I hope this image picks up on that.

The Matte & Poreless, however, is the gem for me from this line.  It stays a good 7-8 hours on me.  Enough to get through my work day and then a little touch up after work and I'm sitting down to film for my channel.  I have oily skin and big pores, so the claims of the foundation really got me.  I'm not so sure about the matte claim because it doesn't stay matte all day but it does last all day, and that is the biggest thing for me.  The powder does help with the matte look though.  I would say I am matte at about the four hour mark and then after I do notice some oil but nothing too bad that I wouldn't expect.  

Overall Impressions & Recommendations
For me, the Dewy & Smooth/original formula is a no go.  I feel like if you had extra super dry skin this might be ok.  If you don't have an oil problem at all, this might work for you.  I've never had a foundation just be gone off my skin before so I was super disappointed in this foundation.

However, I am so very glad I picked up the Matte & Porless version - though I think I'll have to get another shade because 120 is too off from my skin tone - because it was impressive, especially after the original formula was a complete fail.  I like it in the way I like the Dream Wonder Foundation, too.  It has sort of an oily feel too it that makes it super runny but with really good coverage.  I don't know if the oil vs oil thing has to do with the staying power either....  Additionally, I do feel that the application of the foundation is indeed matte.  It doesn't mattify down to be unworkable but it does set matte in a way that doesn't look cakey.  I feel that I do have to be light with the powder lest I do get a bit of cake face going on.  However, a good douse of your setting spray can take care of that.

Overall, for my skin type, the Matte & Poreless foundation is the bomb.  It has grown to be one of my favorite foundations and I would recommend it if you have normal to oily skin.  If you just prefer that matte look, I'd totally go with this one.

I hope this review & comparison was helpful.  I do plan on doing a powder comparison too because I want to show the differences between them.  You can see all my foundation reviews here.

What foundations have you tried that surprised you - both in a good or a bad way?

xoxo, Moe

12.02.2014

Beauty Review // ELF HD Mattifying Cream Foundation Review

In case you haven't heard there is a pretty cool brand out there called Eyes Lips Face.  In case you haven't heard they are pretty affordable, too.  In case you haven't heard I've reviewed a few Elf products already:  Personal Blend Mineral Foundation, Acne Fighting Foundation, Baked Eyeshadows.  I also have an Elf Get Ready With Me video on my channel here.  Today I have another foundation review from their line - the HD Mattifying Cream Foundation
From the Website
High-definition, oil-free, lightweight. For normal to oily skin types.  Cream to powder formula minimized lines and leaves a natural, long lasting, matte finish.
claims taken from the website here.
Porcelain on the left, Sand on the right

First Impression & Application
This foundation comes in 6 shades and even though there are few shades the range does go very deep.  Usually (I'm thinking Rimmel 25 Hour Foundation here) there are a bunch of midrange shades - none too light, none too dark.  However, I think that this shade range is a nice representative of the differences in skin tone.  The packaging is black with white writing and I think it's very sleek.  The product does come with a nice size mirror and sponge.  
I applied this foundation different ways.  I first tried out this foundation probably a year ago when I first got it...but I didn't quite like it.  I threw it in my November Makeup Basket to try again to get a better feel for it.  So I tried a few different ways to apply it - a brush, my fingers, and a sponge.  I found the best coverage I got was from using my Real Techniques Miracle Complexion sponge.  I loved the way this foundation applied.  It truly has a matte finish, the coverage is amazing and it blends so beautifully with the sponge.  Because of the texture and blendability, I felt I put my foundation on in an instant.  It was just so easy to apply.  My skin tone was even and my flaws were covered.  I would consider this a medium to full coverage foundation.
Wear Time
Here's were we start to get a little bit sad.  I thought that because the foundation blended on so smooth and had wonderful coverage, that it would be long lasting like the claims on the website.  However I only got a solid 4-5ish hours wear out of this.  I have oily skin (like I try to mention in these reviews!) and I felt it separating and pooling in my pores.  I like my foundation to last at least through my work day of 8hrs but really I need it to last 10+ hrs.  This just did not make the cut which really, really saddened me.
Porcelain on the left, Sand on the right

Overall Impression & Recommendations
This foundation has amazing coverage, an a matte finish.  I would say that if you were just going to get some pictures taken for a few hours or even if you needed a cheap foundation to look good for maybe filming a YouTube video - that way you don't have to use your nice foundation - I would recommend this.  If you can pick it up during one of their 50% off sales that will bring the price down to $3.  Overall I do like this foundation and feel it definitely has a use.  I wouldn't wear this foundation in any long lasting capacity but if you're going out for a few hours, need pictures taken, or the like, this is a great foundation.  I sort of feel like you have to be Cinderella here and get home before the clock chimes 4 hours from application....otherwise you risk looking crazy.  I will probably continue to use this foundation for filming since it's so fast to apply.

Have you tried this foundation?  How did you like it?
xoxo, Moe

11.16.2014

BH Cosmetics on HauteLook

Hey there!  Popping in for a quick little Sunday blog post to share with you an affordable brand that just got even more affordable by being featured on HauteLook.  If you've been reading the blog for a bit you may remember my BH Cosmetics haul & review here from back in the summer.  I was super annoyed and not satisfied with a lot of the products...so I only recommend a few products & when they are on sale.  Well here it is...BH Cosmetics is on HauteLook!  Head on over here - sign up if you need to, you won't regret it! - and get you some discounted BH Cosmetics!  Guess what, you can even use Ebates to get money back for shopping online too.  If I wasn't on my no-buy (which I already violated because of the stupid CVS beauty clearance) I would totally be all over this.  Since there are only a few things I would actually recommend from this brand, I'll just share them with you now:
I love the 10 Professional Blush Palette and would venture to guess the 10 Glamorous Blush Palette would be of the same quality and for only $7 you can't beat it.  I recommended the Concealer & Corrector palette in my concealer video - the perfect time to pick it up on sale for $5, a good price for what you get.  This palette is really only good for highlighting with the three skin tone shades and the single yellow corrector shade.  Word of caution though, the shade pictured in the collage above is the shade light and the image on the website is not true to color.  Light is way light not the medium sort of look they have going on here.  I also think the Blush Duos are at a great price of $4 to pick up.  Some of them have a blush and highlight duo thing going on.  I hear good things about the eyeshadow primer and the foundation primer though their original prices are around $15 & $20, snagging them for around $9-$12 is stupid great especially since you hardly know if you'll be satisfied.

Just thought I'd share if you've been wanting to try somethings or want to pick up somethings you may love, head on over to HauteLook and check it out.

11.11.2014

Beauty Review // City Color Intense Blush Quads

City Color Cosmetics has been making the rounds lately for their awesome, affordable cosmetics - and I have to say I agree.  I found a few City Color items at 5 Below the other day and thought I'd give them a whirl.  I'd seen older City Color products in stores before but never the newer items that have been making the rounds recently.  So here are my thoughts on these pretty affordable blush quads:
From the Website
Our Intense Blush Quad is a girls ultimate must-have blush for bold and bright cheeks. Its enhanced formula is richly pigmented and blends beautifully for a flawless silky finish. Comes in 4 vibrant collections for your perfect glam look.
Information taken from the City Color website here.

First Impression & Application
First off richly pigmented is not an understatement.  These blushes are pack a powerful, colorful punch!  The sleek black packaging is nice and sturdy.  It might be a little too bulky for me, but I know these blushes aren't going to shatter easily because of the hefty packaging.  Fun Fact: In the store I dropped a palette from the display and it was fine.  Each quad comes with two very thin brushes.  Usually you get a fatter, flat brush with a blush from the drug store and this reminds me of one nearly half the size of the usual brush. 
These blushes have a grid texture imprinted on the surface.  This is only a turn off for me when swatching by hand because I have a weird thing with certain textures.  The over all feeling of the actual product is very smooth and they don't kick up a lot of powder.

Additionally, the price listed on the City Color website is $5.99 but at 5 Below I only paid $4.00!  Steal!

Wear Time
The wear time of these blushes is impressive as well.  You only need the slightest amount on your brush to get a big color pay off.  I've found that the darker blushes in the orange palette sort of leave a stain on my cheeks.  Sometimes that can look a bit crazy especially if you're not wearing a long-wear foundation.  However, since I like to get a good 8 hours out of my blushes and other face make up, these are perfect.

Overall Impressions & Recommendations
As you can see by the swatches the two different quads would suit your skin tone differently.  If you have a darker skin tone the orange quad would show up beautifully with out any building. However with the pink quad you might have to do some building if you have a deeper skin tone.  I definitely think that blush color all depends on your comfort level but each of these offers some benefits for a variety of skin tones.  If you choose one quad you do have a variety of colors to change with the seasons.  Currently, for the early fall time I love a neutral shade and in the Orange palette the first shade on the left and the 3rd shade from the left really speak to me.  Additionally, in the pink palette the 3rd from the left shade is another perfect neutral shade.  As we move into the winter, the first shade on the left in the Pink palette will give a nice rosey cheek.  These palettes are versatile!

Overall, for $4.00 I think these quads are amazing if you're on a tight beauty budget.  Even for the $5.99 price tag on the City Color website that's not bad, but as always I suggest saving money, so if you can get it for $1 a pan...you should do it!  These are so pigmented and the price is really a steal!

Have you tried anything from City Color Cosmetics?  What products would you recommend?  Where have you found them out in the wild?

xox, Moe