Showing posts with label scrapbooking. Show all posts

9.14.2017

How I Print Photos at Home for Memory Keeping

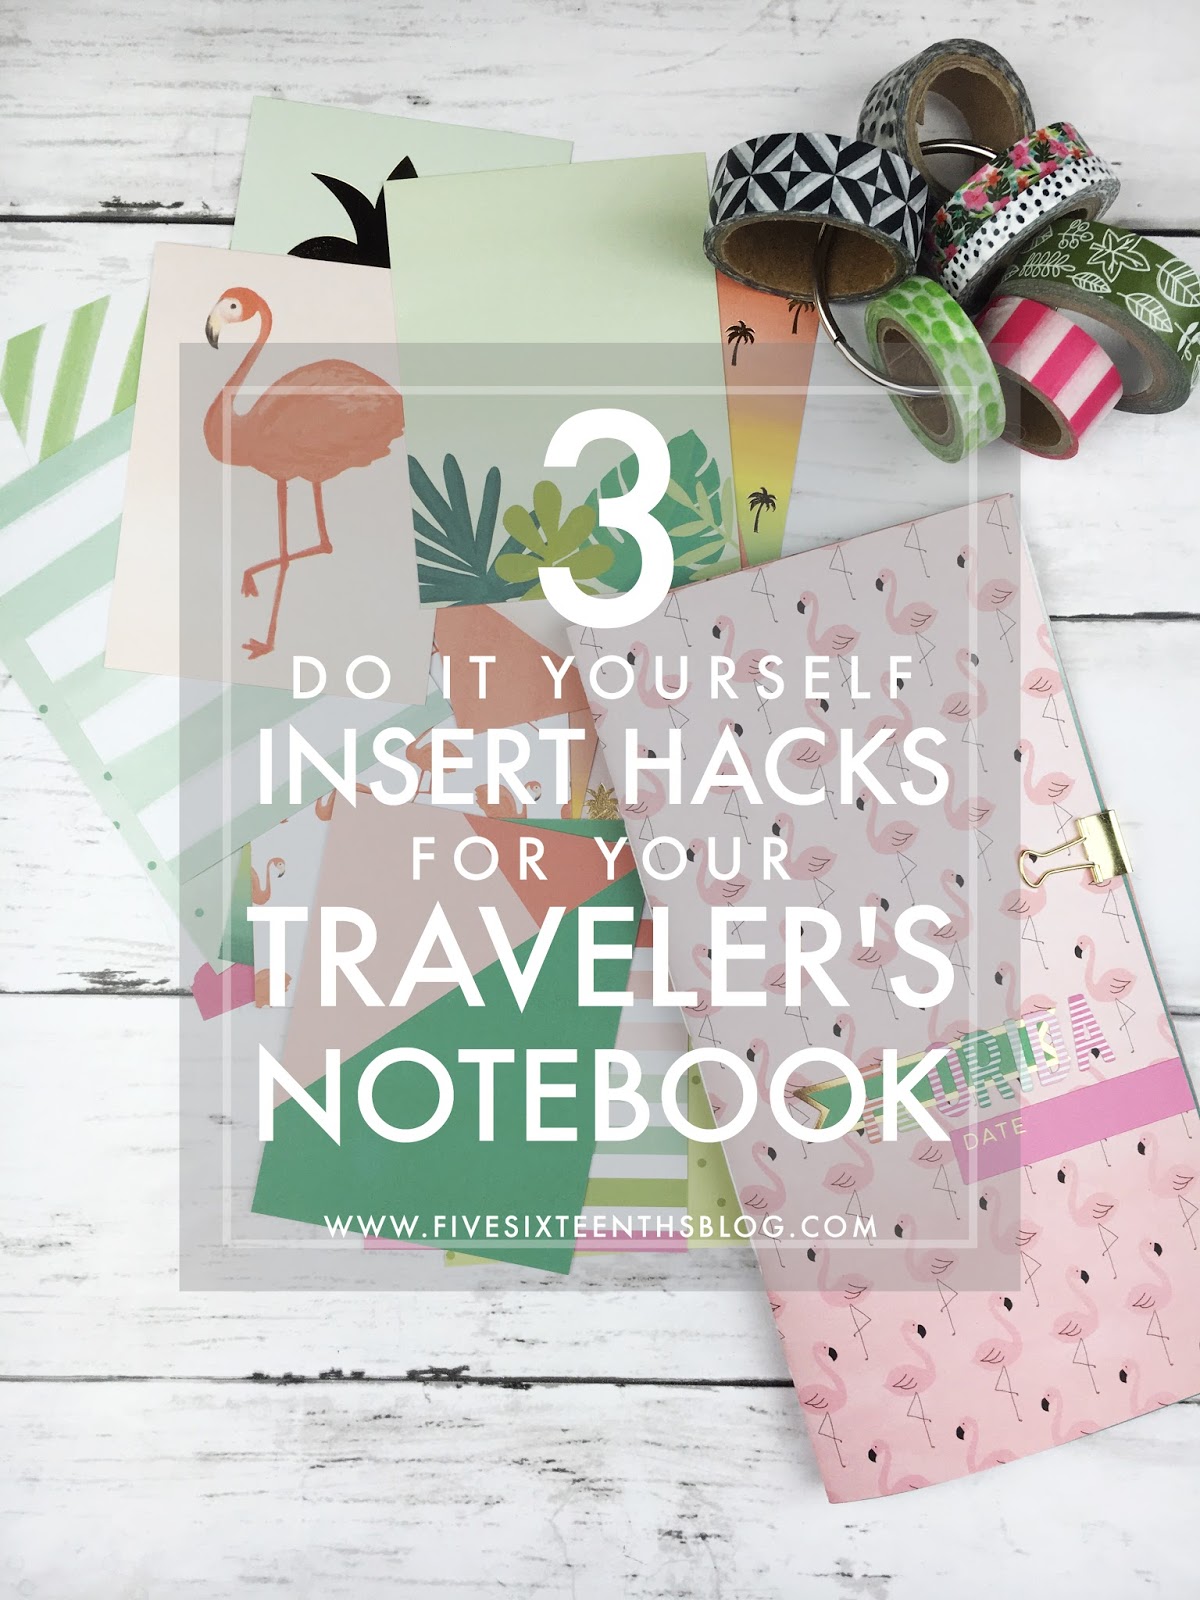
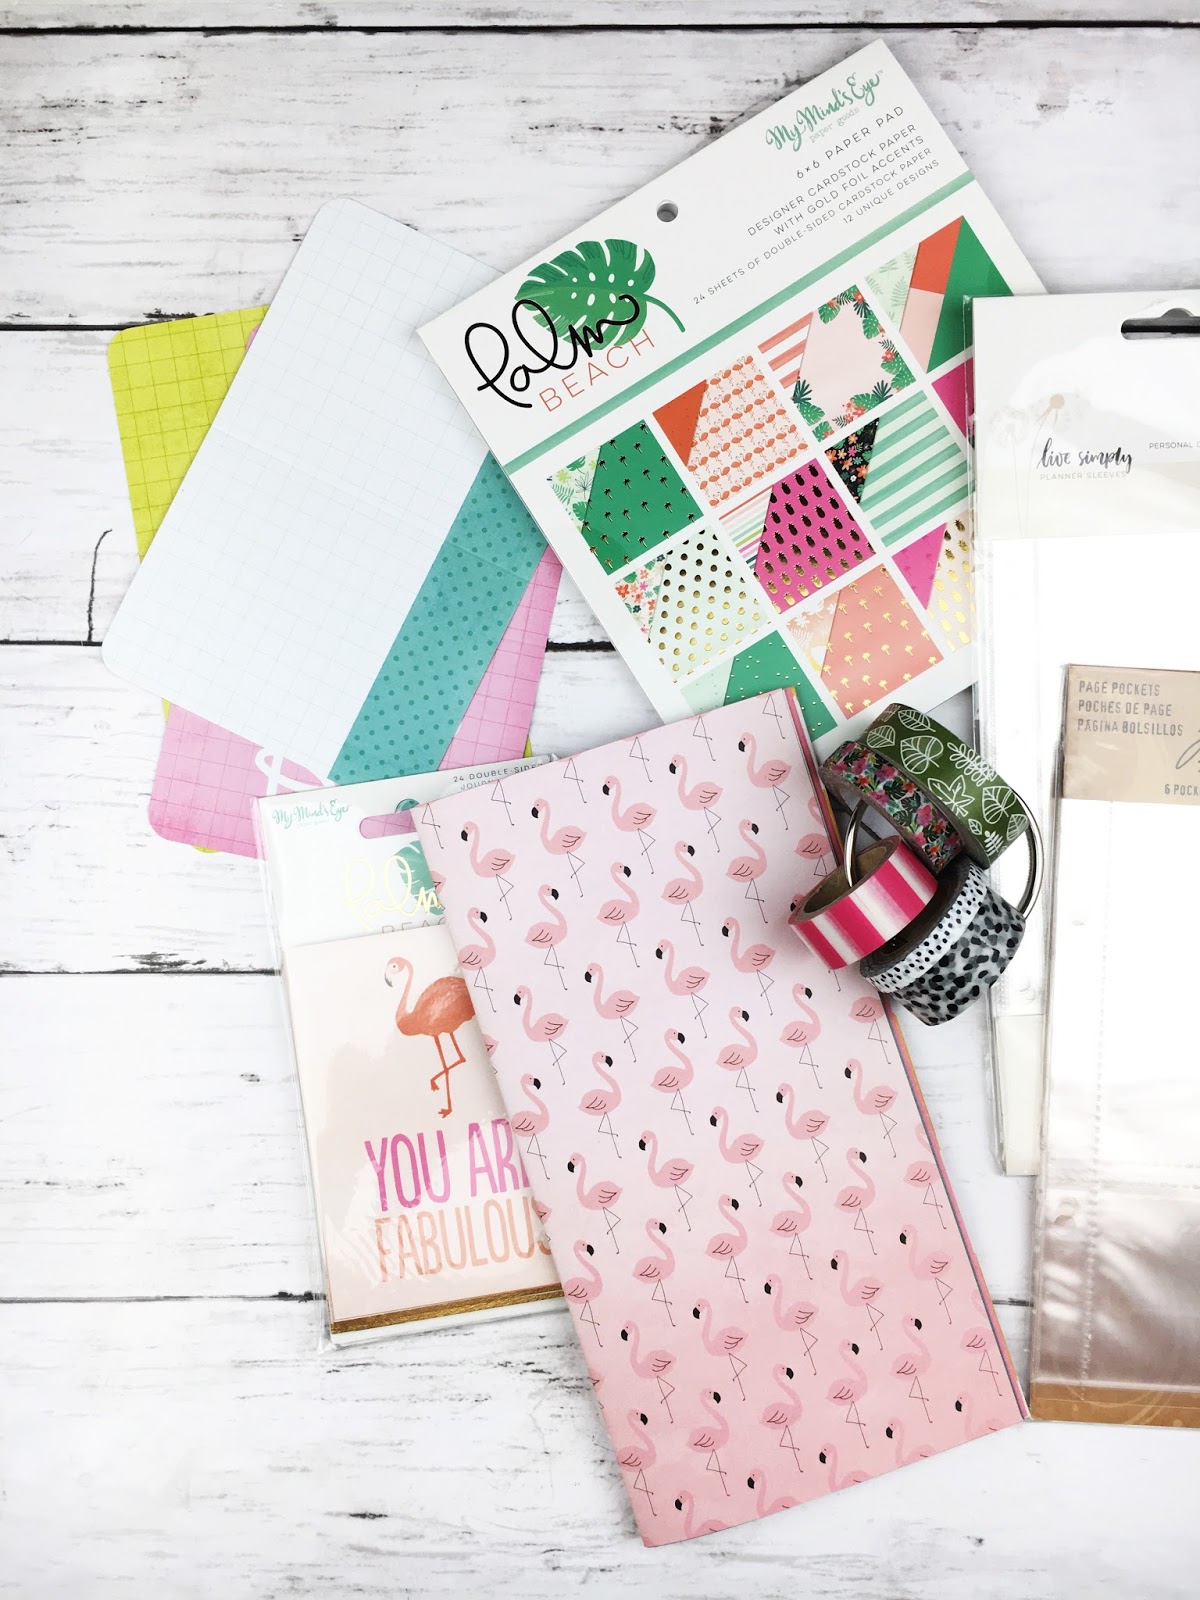
I haven't been doing too great a job at memory keeping this past year.  Honestly it all went down hill after the election, and I'm not even afraid to say that.  I just could not get back into my memory planner at the end of last year & I even have a whole new Erin Condren planner that went unused this year!  But memory keeping is important to me, no matter how long I put it off, so I've started to document our 2 trips this year in traveler's notebook inserts and have even started another mini memory keeping notebook/gratitude journal in my traveler's notebook.
this post contains affiliate links, please read my full disclosure here.
Printing pictures for these guys is the hard part for me.  I'm 100% a picture hoarder.  The fact that I can take 300 pictures of one thing on my smart phone means I'm left with 300 images with unnoticeable differences....but I'm afraid I'll choose the wrong one to use.  Size also really stresses me out.  When I was doing standard 6x6 Project Life albums I'd have to plan out all my photos for the month I was working on so that they would fit properly.  It became way too much for me! I also want to give another go at documenting on the road...that was a big failure for our Japan trip so I'm hoping I can salvage the notebook I was using and actually finish the project!

Anyway, printing pictures is the biggest point of memory keeping right?  And dealing with what pictures to print & the sizes...it's just much easier to print at home.  So here are my 3 ways I easily print my photos at home for my scrapbooking projects :
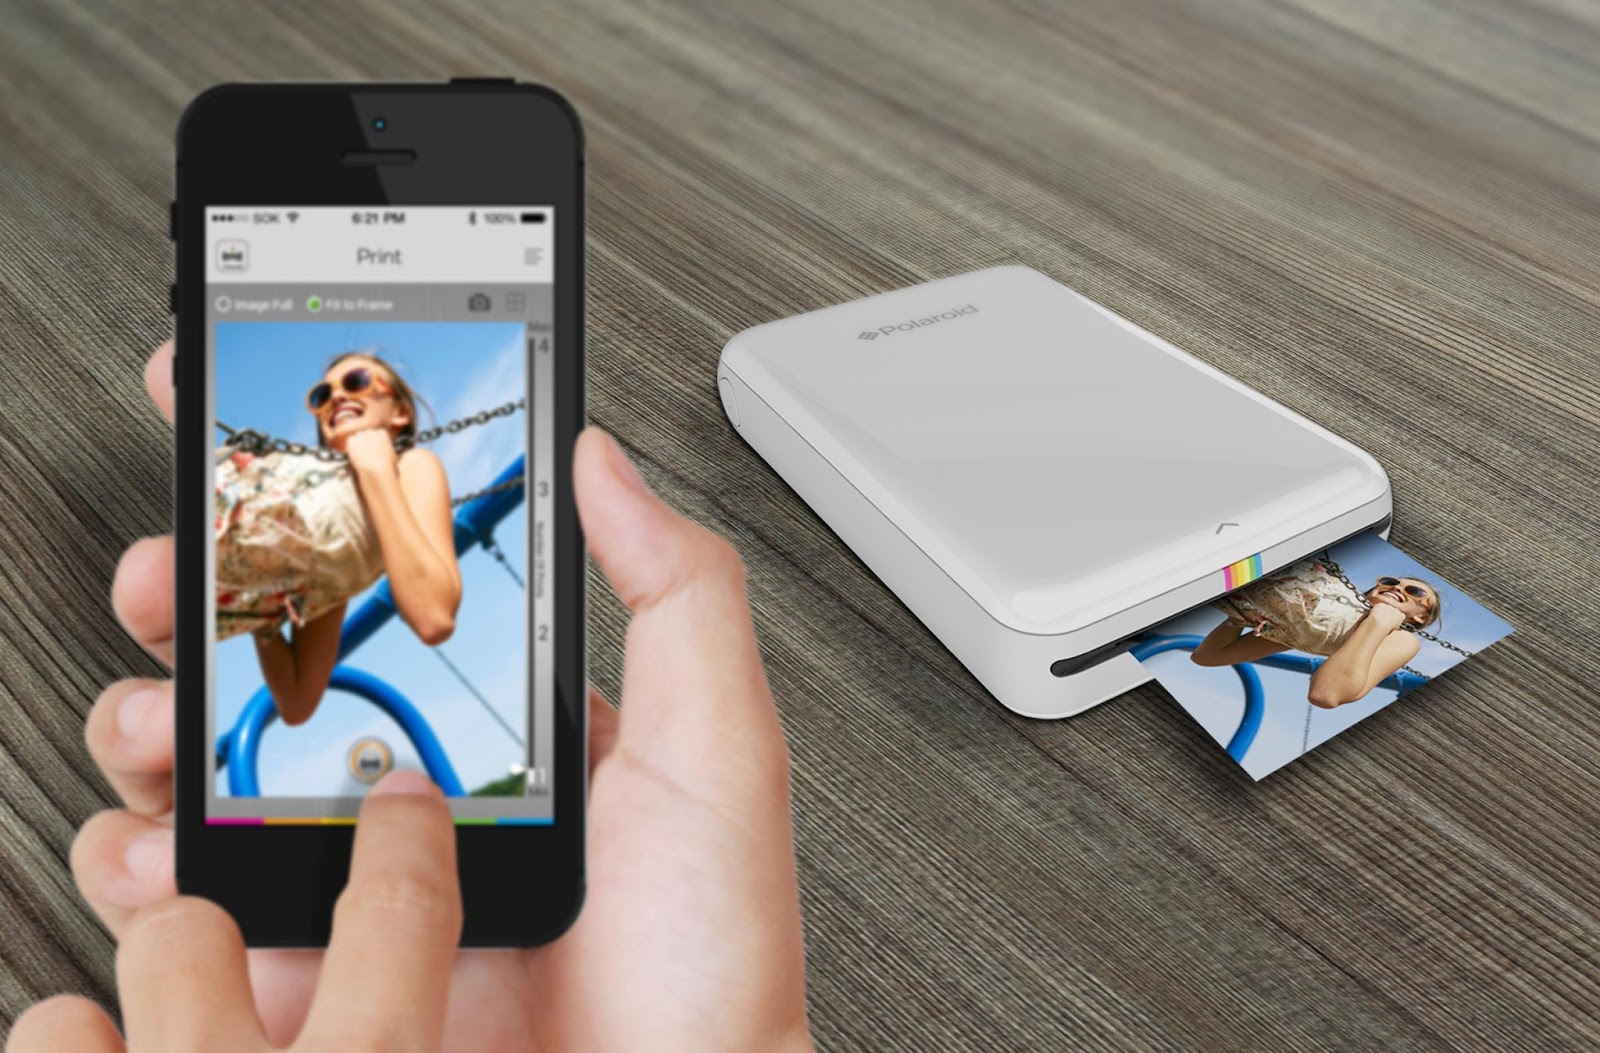
Polaroid Zip

This guy was an unexpected gift from Zach way back a year or so ago.  He was looking for something in the mail when he was out of town one week and I found a package, assumed that's what he was looking for, then bam Polaroid Zip!  Unfortunately I ruined the surprise but I was able to jump into the Polaroid Zip train.
This guy prints out about business card size pictures on glossy, sticky back paper.  It uses no ink so you don't have to worry about refills and it is super portable.  The paper packs are sold in individual packs of abut 10 sheets though you can purchase multiple packs of this paper in a bundle.  It connects to bluetooth and comes with a charging cable so that you can use it wirelessly once it is charged.  I keep my printer, the cord and a few extra packs of paper in a pencil pouch.  This printer is so small and portable you can carry it with you everyday if you want!  A lot of shops also sell custom decals for the front of these guys to make them extra spiffy!
The downside is that the print quality is not that great.  In order to get a decent print, you'll need to lighten or brighten your photo as the printer often prints darker.  For me, that results in printing multiple copies of the same image to make sure it looks alright.  Images that are already light work great but even white backgrounds turn a bit yellow when printed through this app.

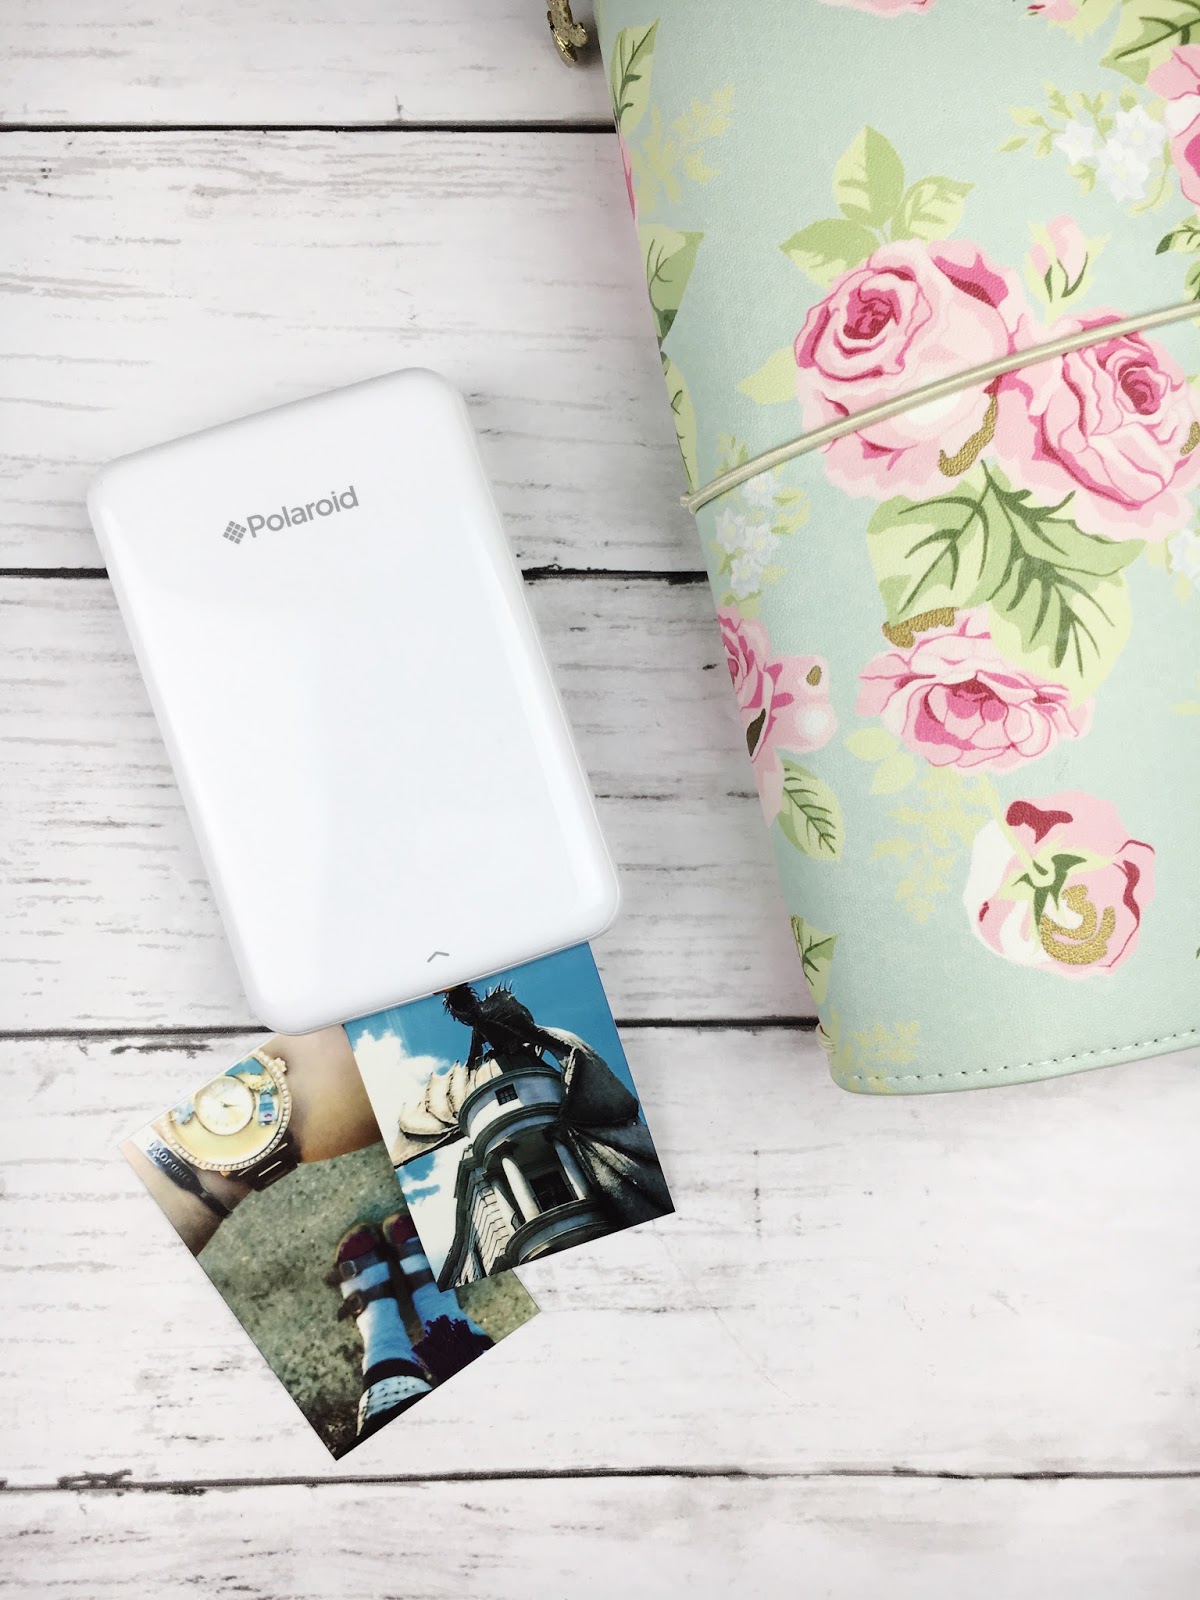
All in all this guy is great for on the go memory keeping - I brought him to Japan and it was amazing to be able to print and stick my pictures down in the hotel room (and that hotel room was small!)  If I needed to charge it I could plug it into my laptop with the USB cable charger so no wall mounted charger was needed.
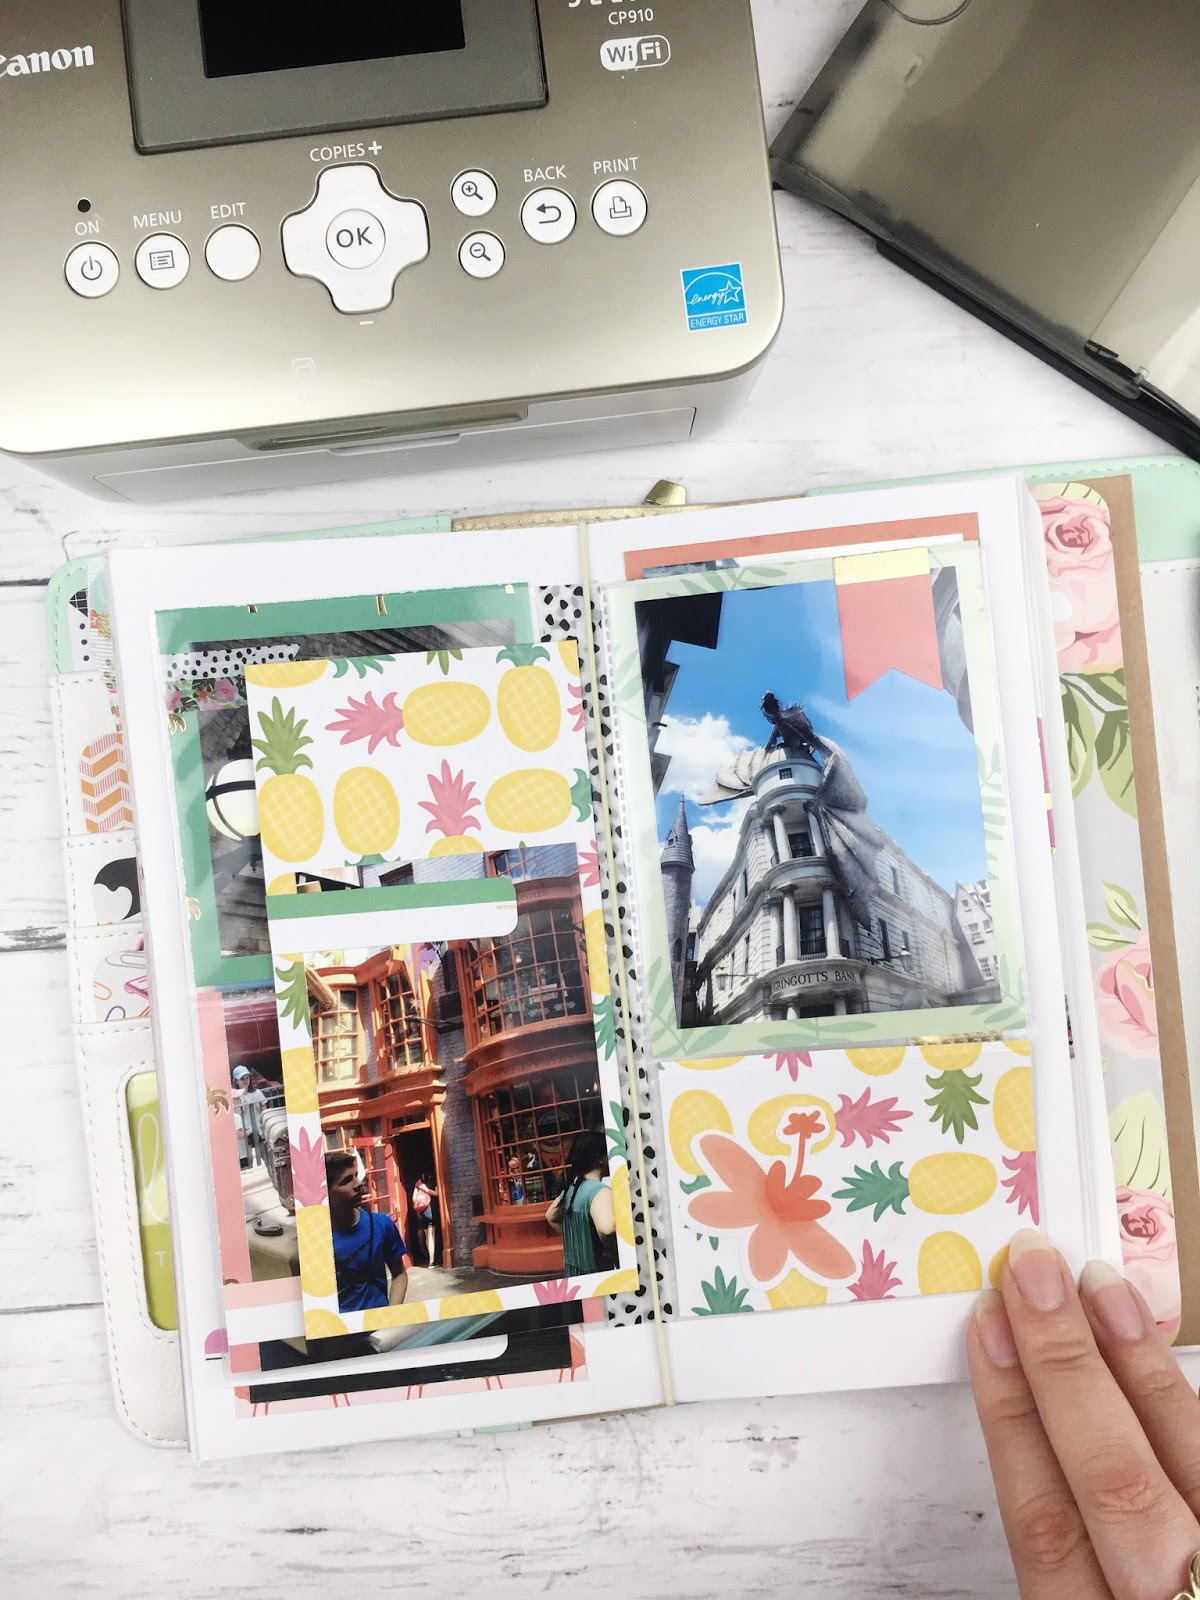
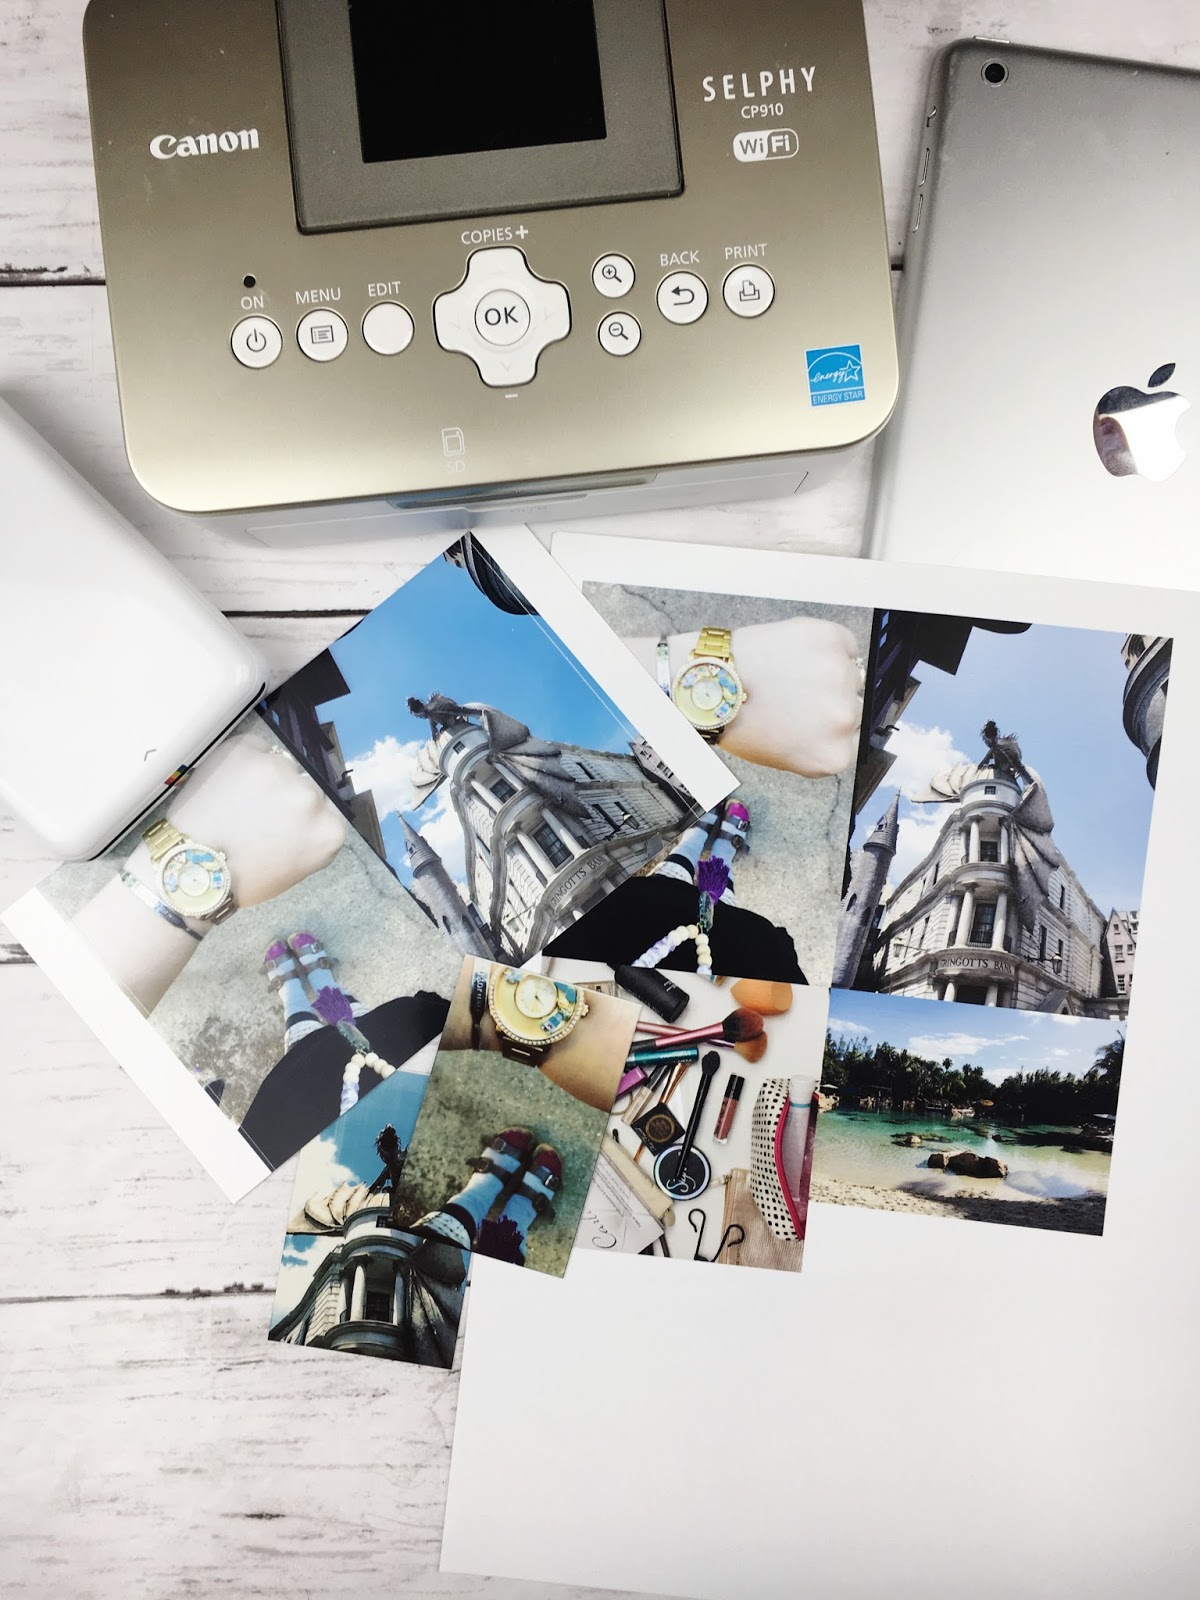

Canon Selphy

The Cannon Selphy is another rather small, portable printer made to make printing photos at home a breeze.  I purchased mine from Joanne's because they had the gold Teresa Collins edition (#aesthetic) but you can totally get this much, much cheaper from a place like Amazon. 
This guy is much, much larger than the Polaroid Zip.  It's a little brick!  It prints out 6x4 photos onto glossy paper.  It does have an ink pack that you install after so many odd prints.  Honestly, I just keep using mine until I notice the print quality diminishing!  The paper packs are sold with the ink cartridges and you can grab up quite a few packs at a time.  This printer connects to wifi instead of Bluetooth so you can't be on your device doing other things while you're printing pictures.  The image quality of this guy blows the Polaroid Zip out of the water, but it's still not true to color.  Instead of printing like an inkjet printer would, this guy lays down each color in layers.  Yellow, then blue, the pink, the green, then a top coat/sealant.  So you don't get as true to color photos as say with your home printer or from a professional printing place.
There are a few other downsides to this printer, in addition to having to connect to wifi.  One being the printer is not wireless.  You can purchase a battery pack for it, but it seems that it will make the printer a bit bigger and therefore less portable.  As it already is the size of a brick (kinda) & that means you'll have less space if you're going on a short trip or would like to take something like this to a planner meet up or crop.  I mean to each his own, I've seen others with this printer at planner meetups...it's not a big deal.  But traveling to some place on vacation (like Japan) makes this guy not the best option.  You have to bring the cable cord too, which has a large power converter type deal.  It just isn't as portable as it could be.
With those points being made, this printer is my favorite printer for memory keeping.  It is portable enough to take places I need to take it (like from my desk to the coffee table lol), the print quality is the best of the portable printers I have seen, and in the long run the paper is more affordable!  If I were traveling far, I would not bring this guy.  But documenting at home or at a crop/planner meet up, this is by far the best.

Print to Size + My Printer

Now if you don't have either of those guys I want to share with you how I printed photos before I had them - using my home printer.  The best part about your home printer is that you get to choose the paper finish.  I can't find any matte finish paper refills for either printer mentioned above.  I also can't find any generic refills which would make printing so much more affordable.  You can also buy in kand paper locally (though I save a butt ton on ink by purchasing through Amazon!) so you're not limited to specialty shops or online orders.
Previously I would print my photos by making collages and printing through Picasa.  Google has since phased out this editing program (so sad!) so now I use the app Print To Size on my iPhone along with other collage apps like PicFrame.  Print to Size allows you to size photos exactly as you'd like them to be printed by displaying the ratio, inches & DPI right on the screen.  Be sure not to enlarge your photos too much, 300 DPI is the print quality you're looking for in order for the images not to appear grainy.  You can also fit multiple images on your 8.5 x 11 inch canvas.  You can also choose the size of your canvas in order to print on a different sized paper.
When you're ready to print, the app should connect to your printer as long as you are on the same wireless network.  Simply select the printer & print!  You can also export as a JPG or PDF or even save the canvas to work on later.  If you're traveling to a friend's or family member's house and are able to use their printer you have a good shot of being able to memory keep easily on the go.  They may have a problem with you using up their ink, but other than that you should be good to go.
In this final photo, you can see the quality differences between the three different printers.  With the Zip, you have to crop the photo super narrow, the images are dark & grainy, and the colors are slighly off.  With the Selphy, you'll need to make a collage to print smaller photos, the color can be washed out but it tends to perform well with landscapes, & the image is not too dark.  With the Print to Size app + your home printer, you'll need to collage in order not to waste paper, the color depends on the quality of your printer, and it's not as portable.

I find that the only way you're really going to do something is if you have the tools available to you to actually do it.  When I try to print pictures through print apps or even at Walgreens I feel I have less control over what pictures I'm printing.  I need them to fit in the proper spot and the best way to ensure that is to print at home!


I hope this post was helpful for you and that you're either inspire to grab up one of these portable printers or to just actually print your photos from your phone if you're a photo hoarder like me!

How do you print your photos?  How do you memory keep?

xoxo, Moe

8.28.2017

Make it Monday // Travelers Notebook Memory Keeping Hack

Something I am getting back into this month is journaling.  I've put together quite a few travelers notebooks recently for quite a few different things - a tarot, essential oil, & gratitude journal, a listing journal, and a memory keeping journal.  I've got two trips I really, really need to memory keep this year, since I kinda gave up on my memory planner.  I just could not get back into that guy at the beginning of this year.
this post contains affiliate links, please read my full disclosure here.

The two trips I need to memory keep are when we went to Japan in January & when we went to Florida in April.  When we went to Japan, I tried my hardest to do a physical journal while we were there.  I brought my zip printer, ink, paper, journalling cards.......and then it just became too much!  So I thought I'd just make another little memory keeping journal at home.
supplies // scrapbook paper, personal size planner photo sleeves or tim holtz photo sleeves, stapler or needle & thread to bind, paper trimmer, journal cards, 6x6 paper pad, washi tape
(I used this collection by My Mind's Eye of journaling cards, ephemera, & 6x6 paper)

I have a ton of pictures from each trip that I want to use.  I hoard pictures on my camera roll - every picture might be a picture I want to use!  That makes it super hard to choose pictures to save when I upload them to my Google Drive and super hard to choose pictures when I want to print them.  Enter the planner photo sleeves from Webster's Pages!  I actually purchased the wrong ones from Biltsy a while ago but they were perfect for this tutorial.  You can also use the Tim Holtz photo sleeves, those would work great too.  And hey, if you have a fuse tool you can make your own photo sleeves!

Gather up the papers you plan to use and trim them down.  A standard travelers notebook is about 8 & 1/2 inches wide x 8 & 3/8 inches tall.  Double sided scrapbook paper works great for this, but single sided is find too.  Here are the 3 ways to add interest to you inserts:

Photo Sleeves

Trim a little bit off of the side where the hole punches are & use a strip of washi tape to tape two photo sleeves together on the sides where the hole punches are.  Be sure you have the photo pockets facing the correct way!

6x6 Paper Pad + 4x6 Journal Cards

Simply folding over the 6x6 or 4x6 cards in half you get added interest.  Putting a 4x6 card over a 6x6 piece of paper over another insert adds layers.  If you've got a lot of photos or ephemera or other what-nots, this is a great way to get a chunky notebook!

3x4 Journal Cards

Another trick with washi to to tape two 3x4 cards together.  These fit nicely in between the pages to give more space to decorate & journal.  If anything they are just really pretty!

I've shared before how to bind your own traveler's notebook inserts back when I was using a fauxdori at the beginning of 2015, so I'm going to use the same way to bind this one.  Using a needle & thread you can follow this written tutorial here or this video tutorial.  This is the way I bind all of my traveler's notebook inserts.  Here's a look at how the book looks all put together.
Now you're ready to get to memory keeping!  I plan on working on these guys over the next month or so to get my creative juices going.  I will probably put together another tool box like this one so I have all of the ephemera I need in one place.  Can't wait to use these two guys and make more for any other memory keeping needs!


How do you memory keep?  How do you use your travelers notebooks?

xoxo, Moe

1.16.2017

Make it Monday // Digitize your Handwriting with your iPhone

Hand lettering has become all the rage recently.  I've seen it all over instagram, in my facebook groups, and it is huge in the planner community.  There are even fonts designed to mimic this gorgeous calligraphy.  If you've been practicing your handwriting I've got a great tutorial for you today.  How great would it be to have your own handwriting as beautiful digital image to work with? 
Today I'll show you how to digitize your handwriting to create a beautiful PNG overlay to work with when you're creating Instagram photos, photos for your memory keeping, or general inspiration for you.
supplies // iPhone, Superimpose app, iScanner app, Negative Me app, PicsArt app, brush marker, white paper, decent lighting.
First practice writing out the word or phrase you want to digitize.  I used my One Little Word for the year which is Mindful.  I did not have a black brush tip marker so I used dark purple.  It is best to use black or a color as dark as possible for this tutorial.  If not, you risk not creating a black and white image.  You can make a black and white copy of your phrase if needed, the follow the steps below.

Next, open the iScanner app.  Find a room in your home with bright light that will cast few shadows.  You may have to step outside for this, you may have to focus a lamp on your space, but be sure not to cast a shadow over the phrase to be digitized.
Use the iScanner app to photograph the word or phrase. Once the image is processed, align the blue rectangle around the phrase to digitize.  When prompted, choose chose the filter that creates the most solid fill to the letters.  I find the right most filter on the bottom row gives the most solid fill.  If needed, choose a shade from the menu at the top to achieve the darkest fill.  Click the check mark and you'll be prompted to save the image to the app.  From the next page select the arrow in the bottom left and save the image to the camera roll.
I find the best way to use this overlay is as a white overlay over a photo.  To create the text in white, open the Negative Me app (you may be prompted that the app will slow down your phone, it is a pretty old app that has not been updated!).  Choose the photo saved from the iScanner app.  This app will invert the colors - black to white, etc.  Tap the save button in the upper right hand corner - an ad will pop up but simply tap No to save the image to the camera roll.
To use the overlay, open a photo in the PicsArt app.  This app requires a sign in and to create a profile but you can set your photos to private.  From the bottom menu choose Add Photo.  Chose the image of the phrase where the text is white from the camera roll.  Position the phrase over the photo, scaling and rotating to your preference.  From the menu at the bottom choose Blend.  Chose the Lighten blend mode to create the overlay.  Tap Apply, move the slider next to only me so that it is pink, tap Save and Share.  This will set your photo to private, share to your profile, and save to the camera roll.
I plan on making quite a few of these not only to use on Instagram but to use in my Vision Planner to focus on my word for the year.  You could also use the overlay created here along with this PicMonkey tutorial to add glitter to your handwriting!

Be sure to check out my YouTube channel to be notified when I upload the video about my Vision Planner!

How do you use your handwriting in your craft projects?  

xoxo, Moe

11.09.2016

My Favorite Apps for Memory Keeping

The holiday season always gives me the warm and fuzzies.  It is a time for family, a time for coming together, and a time for forgetting our troubles.  It is a time to be kind, to help others, to see the good in others.  Something we shouldn't forget when January 1st rolls around.  Today I want to share with you some apps that I love for memory keeping all year round, not just for the warm and fuzzy times.
(this post contains affiliate links, please read my full disclosure here.)

Ever since I started my memory planner I've loved the instant access to memory keeping that my phone provides.  You no longer have to worry about the 24 exposures on your camera roll, you can fill up your phone with as many memories as you'd like.  But the key is to participate in the memories too.  Don't just stand behind the camera get out there and make the memories too!

Collecting Photos and Memories
There are a few apps to help you collect the memories you're making if you're going to transfer them to paper later.  If you're into scrapbooking, memory planning, or journaling, the apps Collect and Penzu will really help you keep track of your daily happenings to reflect on at a later time.  Collect will help you create a daily snapshot of your life by adding photos by date into albums then allowing you to tag those photos and add a little note.  This is perfect for memory planning and scrapbooking.  Penzu is a journaling app that allows you to keep a secure diary on your phone.  If you like to spend more time reflecting on your day to day life, you can keep detailed notes of thought and happenings to reflect on later.  This app allows you to add photos from your camera roll into your logs and is more of a traditional diary format.  Best of all?  Both of these apps are free!  They do require and upgrade for some features but the free versions of the apps are still very, very useful.
Collecting all these memories may clog up your phone.  I love having Google Drive, Dropbox, and my SanDisk iXpand app on my phone.  With your Gmail address, you get 15GB free storage through Google Drive.  The app is great for organizing photos and sharing with friends. Create albums to access on your desktop or to share with those you choose.  Dropbox works about the same way.  If you're traveling where you may not have access to wifi to back up your photos to Google Drive or Dropbox, the SanDisk IXpand Flash Drive is a great back up device.  I use this when I travel with Zach (mentioned in this post here).  

Editing Photos and Adding Text
Sometimes the photos you take need a little bit of editing.  Use the tips in this post to take the best pictures possible and check out my past photo app recommendations here.  My current favorite photo editing app is A Color Story. This app is great for giving your photos that unedited look.  Add subtle effects to enhance your photos without going over board.  Plus the free filters are perfect for creating a natural look.  No need to purchase any of the other packs for everyday editing.  I find the filters Light Bright and Everyday are the best for adding the right about of brightness and the right amount of sharpness and contrast to the photos.  Two other apps I love for subtle edits are Afterlight (review here) and Snapseed.
If you like to get creative with your photos, there are quite a few apps to add text and overlays - here is a list of 8 overlay apps for iPhone users.  My favorite app for adding basic text is Phonto.  Choose from a crazy array of fonts and it is so simple to add text, change color, etc.  Even save some of your most use text/phrases as presets so you don't have to type it every time.  Check out the review here.  You can also use this app to create journaling cards!
A great app for overlays & text is Rhonna Designs.  While the app is free (check out the suite on iTunes here) there are some stickers, overlays, and fonts that do require purchase. However you can create a lot with the free edition.  This is my favorite app for making graphics and journaling cards.  See this tutorial on making a planner dashboard for some creative inspiration.  Plus, if you follow the Rhonna Instagram account she often posts links to free backgrounds for the app!
Another app for simple overlays and creativity is the PicMonkey app.  Finally, PicMonkey has an app!!  The best part of the app is if you're a Royale member you can save your creations to Hub - PicMonkey's cloud based platform to use your photos and edits between multiple devices.  Great if you want to edit something later.

Creating Collages
My favorite collage app that has been my ride or die for ages is PicFrame.  PicFrame is not free but it's been the best investment since the dawn of my iPhone usage!  It is so simple and so easy to use. There is a very in depth review here.
Another fun collage app is the A Beautiful Mess app.  This allows you to create fun and unique collages perfect for larger pocket pages.  Add stickers, emojis, and text through this app too.  See more about that app here.

Printing your Memories
Finally, in order to preserve your memories you probably want to print them. Two specific mobile printers are the Cannon Selphy and the Polaroid Zip printer.  I use the Polaroid Zip printer to print 2x3 inch photos.  This is great for on the go memory keeping - if your traveling or if you're journaling as you go.  The Cannon Selphy prints photos on 4x6 inch paper and is much bigger than the Zip printer.  Each have apps that can help you create collages and edit photos for printing.
image source
Before I had my Zip printer, I  used the app Print to Size to print to my wireless printer.  I love this app because I can choose the exact size I want the photo to print.  Change the size to fit in a pocket page or even print the journaling cards you've made using the apps above.  Print to Size creates an 8.5x11 inch page that you send to your wireless printer.  You can also save the page as a PDF to your phone to print later.  Email it to yourself and print it at a place like Staples or Office Max.

Phew! That was a crazy comprehensive list of memory keeping apps!  Everyday my smart phone blows my mind with the stuff it can do.  Did you ever think you'd be carrying around such a powerful machine in your pocket?

I hope you have a fun time memory keeping around this time of year. But remember to keep that warm and fuzzy feeling going all year round, too!

xoxo, Moe

4.18.2016

Make it Monday // 3 Ways to Use Clip Art in PicMonkey

I was at a total loss for what to do for this week's Make it Monday post - I wanted to make a physical thing, but I wasn't sure what to make. I wanted to move away from planner stuff because I've got other ideas brewing.  But I just didn't know what to do.  So I thought I'd just turn to my old trusty PicMonkey for a little how-to inspiration for today.
this post contains affiliate links, please read my full disclosure here.

There are a bunch of PicMonkey tutorials on the blog (find them here) and I want to share with you today three ways to use clip art in PicMonkey to create something unique.  I also want show you some more inspiration and new takes on some old DIY's.

First - where do you find clip art to use?
The PicMonkey blog shared this post on 4 places to find free for personal and commercial use clip art - and it is super helpful in understanding licensing and file types that PicMonkey can open.  While we're on that topic, PicMonkey can only open JPG and PNG files so you'll need to search for file types that end in .jpg or .png.  A lot of creative bloggers offer free clip art on their blogs for various projects.  I like to search Pinterest for free clip art to find some really creative and pretty images to use.

Now on to the important part:

Use Clip Art Over a Photo
In this DIY post, I showed you how to create your own watermark in PicMonkey to then use in PicMonkey over your photos.  Adding clip art to an existing photo is as simple as this previous tutorial - just skip the step of creating the over lay.  Here's how.

Open the photo you'd like to add the clip art to in PicMonkey.  You can click one of the links on the top (choose edit in this case) or drag and drop the image on to the PicMonkey screen.  Three squares should show up, drop your image into the edit square.
Under the Overlays tab (the butterfly in the left hand column) select the arrow next to Your Own and select my computer.  Locate the clip art image on your hard drive and select open.
You can the repeat the process adding the clip art around your image.  Be sure to create a visual balance across your image.  Add text and save.
This is a great way to add interest to a scrapbook photo or photo to use in your pocket scrapbooking albums.  It is also a creative way to create images for your blog or even your Instagram profile.

The feathers for this example were created by Angie Makes, and you can find them here.

Create a Layered Design
In this tutorial I showed you how to fake a repeating pattern in PicMonkey.  In another tutorial, I went over how to use PicMonkey's own graphics to create a patterned notes page for your personal sized planner.  You can also use clip art to create a patterned background for various projects.
From the main PicMonkey page, hover over the Design tab and choose a canvas to design from. The 4x6 canvas works great for pocket scrapbooking cards.  Once you have the canvas open, set the background, and rotate if need be.  Navigate to the Overlays tab and begin to open the clip art in the same manner as the previous tip - selecting Your Own and then My Computer.  Once the clip art is on the screen, size it to your liking and begin to duplicate it by right clicking on a PC or two finger click on a Mac and selecting Duplicate Overlay.  Continue to place your duplicated clip art around the canvas.  Like in this tutorial, you'll want to try to fake a repeating pattern.
Open a second clip art image you have saved that compliments the first.  Duplicate it across the canvas as well to create a layered look.  This adds depth to the pattern you're creating and creates a more interesting design.  I suggest only working with 3 clip art images at max to avoid a cluttered design.
Once the second image has filled the canvas the way you like, you can right click and send it to the back if that image seems well suited to the bottom layer of the design.  Save the design you've created.
This is a great way to create digital papers for personal use (if the clip art you chose is for personal use only) to use in any digital scrapbooking or other paper crafts you are looking to make.  This is also a great way to make backgrounds for your various devices.

The floral clip art is from We Lived Happily Ever After, and you can find them here.

Change the Color of an Existing Design
If you've found a clip art image that you love but it happens to be a color your don't quite care for, there is an easy way to change the color within PicMonkey.
Begin by either opening the image you will overlay the clip art on to or open a blank canvas.   If opening a blank canvas, and plan to use the clip art as an overlay in the future - set the canvas color to transparent.  Navigate to the Overlays tab, select Your Own and then My Computer.  Open the clip art image you'd like to change the color of.
You should see a little dialog box pop up any time the clip art image is selected.  Use the color scale on the dialog box to change the color by dragging the little circle around the color scale.
Duplicate the clip art and create the design on the canvas you've selected, or use the altered image as an overlay on another photo.  Save your design.

This is great if you want a few of one image but they were only created on one color scheme.  This can add some fun to a design project - like a pocket scrapbook card or print.  How cute would the design above be as an art print?

The mushroom is from Lisa Glanz and you can find the set here.

PicMonkey is a simple yet amazing tool if you're into being digitally creative but not down for spending a ton on higher end software.  PicMonkey can do a lot for you even though it is such a simple, online resource.  All of these tips can be done in the free version of PicMonkey but the Royale version offers a lot more - like the drop shadow on the text in the first tip!  You can sign up here for either the $33/year plan or $4.99/month plan.  Either one is totally worth it if you're down for some creativity and awesome fonts!

*as a side note, please be sure to read the terms of use for any and all clip art you download from any artist.  Please play nice, karma is a thing ya know.  I am also in no way affiliated with any of these artists - I found their work beautiful and wanted to share them with you.  I am in now way an expert on licensing terms, please read and understand any and all TOU that come with any downloads you find.

How do you get creative in PicMonkey?  Any tips to share?

xoxo, Moe