Showing posts with label food. Show all posts

4.28.2020

Let's Talk Baby Weaning // Easy Ways to Prep Solids for Babies

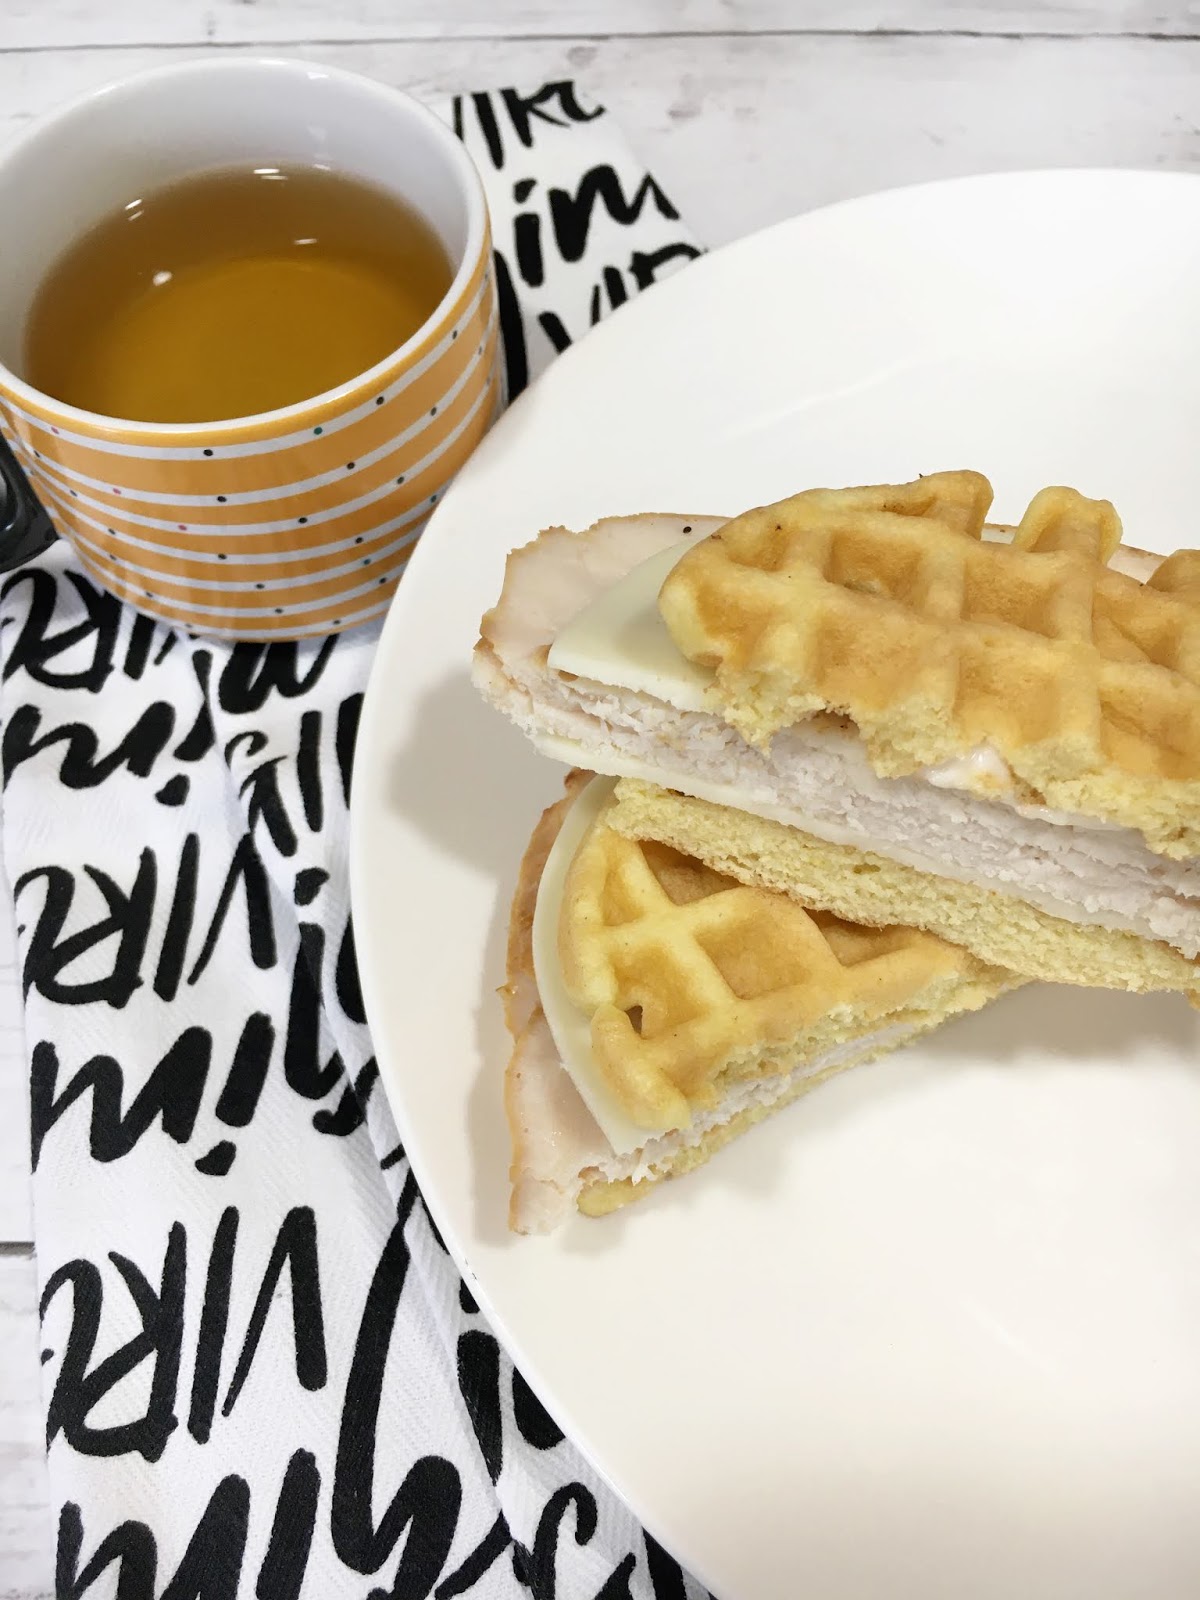
On the day I'm writing this post Marcus has turned 8 months old.  He eats 3 meals a day and eats a lot during those meals.  We moved quickly (I think) from purees to solids and he's been having fun with all of it.  At about 5 months we started rice cereal, then we moved onto jarred purees at about 6 months.  At about 7 months we'd progressed to eating soft things like puffs and mashed fruit.  And now at 8 months we're fully on board with Chex, eggs, pancakes, chicken, fish, cut meat balls, cut strawberries, green beans, pasta...I mean he eats a lot of stuff.  Most of the time we just modify what we're eating for meals for him and he's loving it.
this post contains affiliate links, please read my full disclosure here

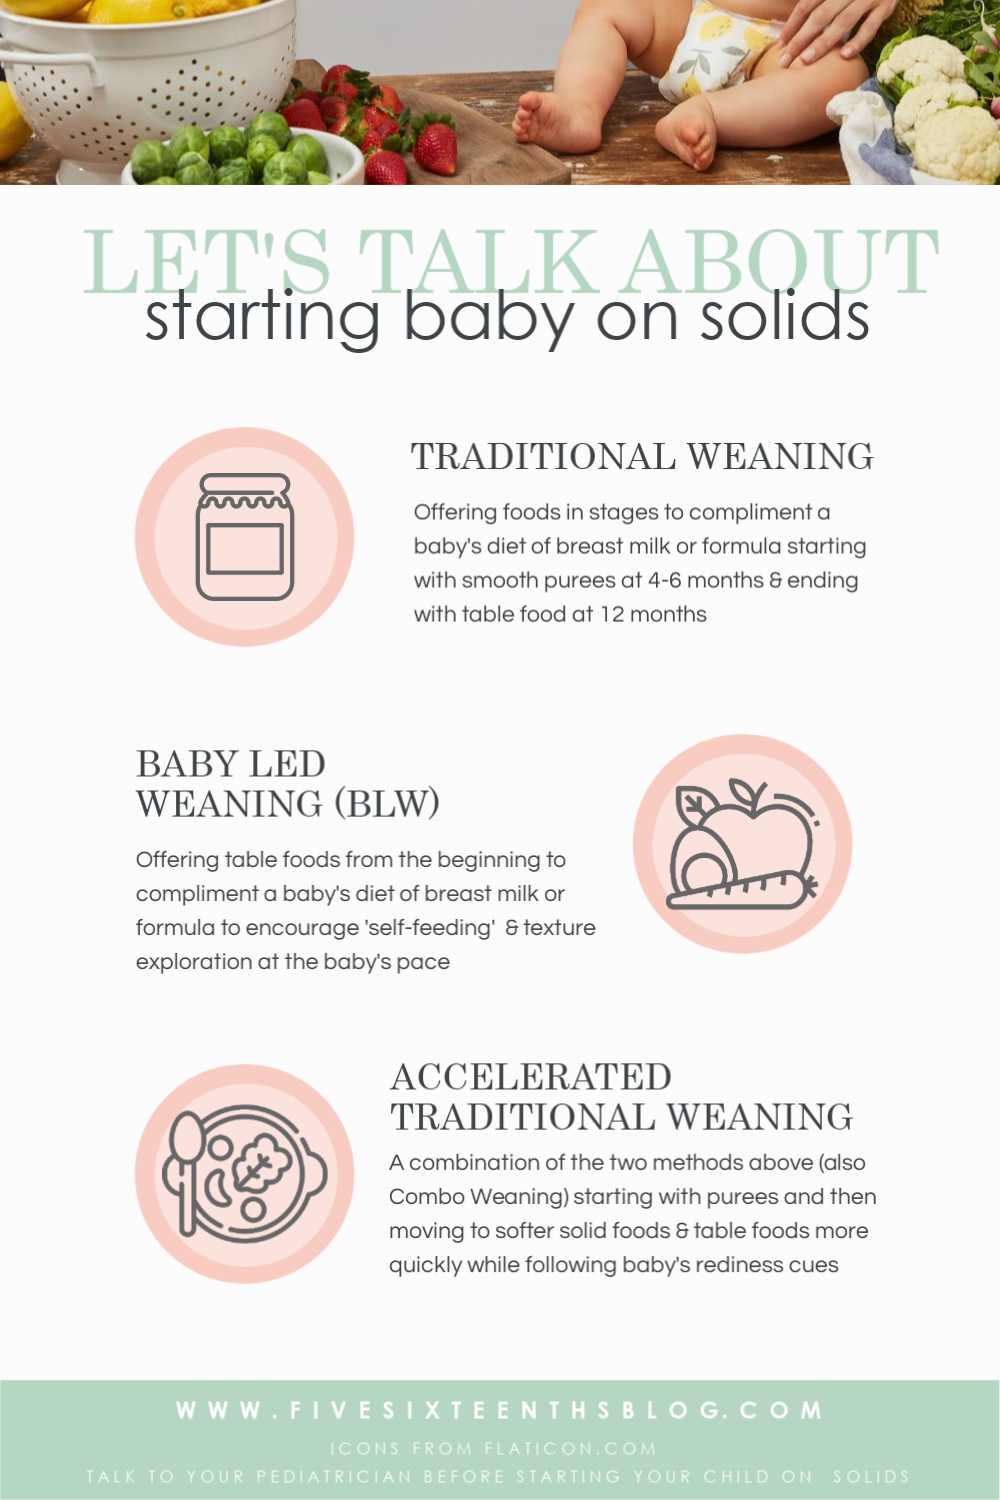
I was super afraid to start solid foods because choking was awfully terrifying for me.  But I really did let Marcus lead the way and if he seemed interested we went for it.  If I could squish it between my tongue and the roof of my mouth I felt confident to give it to him.  Obviously you'll want to talk to your pediatrician about starting and continuing foods and food sizes, etc.  But there are a lot of resources online about traditional weaning, baby led weaning, and accelerated traditional weaning, books galore on the topic & other mommas out there that you trust can be a huge support system!  I think ultimately with Marcus's readiness, we went with accelerated traditional weaning.  Here are some definition breakdowns:

What are the Different Types of Weaning?

Traditional Weaning - this is when you start to offer purreed solids along side the baby's diet of breast milk or formula.  Most baby food manufacturers follow a system that involves different stages of foods based on age.  You'll start with stage 1 foods which are single ingredient, smooth pureed fruits or veggies for babies ages 4-6 months.  Then you'll move up to a stage 2 for babies 7-8 months which combine foods at a slightly thicker texture to introduce new tastes and textures.  Then to stage 3 for 9-12 month babies which are chunkier in texture and must be chewed.  Then you final out with table foods after 12 months old.
Baby Led Weaning - this is a method of introducing foods so that a baby starts to 'self-feed' as soon as they are introduced to solids.  You are also offering food to compliment their diet of breast milk or formula but instead of spooning food into the baby's mouth they are exploring food at their own pace.  While each method focuses on the idea of baby's readiness, BLW focuses on providing table foods in appropriate shapes so that a baby may reach, grab, pick up, and self feed.  This method also allows for spoon feeding of foods like oatmeal and yogurt so that a child can learn to self-feed with a spoon.

Accelerated Traditional Weaning - this method combines the two above when starting to complement a baby's diet of breast milk or formula.  Accelerated weaning takes into account babies readiness for foods and moves from purees to softer and then to solid foods more quickly.  This method offers purees and then softer solid foods to encourage the oral skills needed to eat more advanced foods.  The recommendations here are that a food should be squishable or dissolve so that the child can learn to move food around in their mouths and chew.  Offering purees and solids at the same meal, one at a time, can be helpful to develop these oral skills.

Like I mentioned above we totally followed Marcus's lead and when it seemed he was interested in food and interested in what mommy and daddy ate, we offered it to him.  Again, be sure to check with your pediatrician when it comes to offering solids.  I'm not offering any medical advice here, just sharing my experiences!


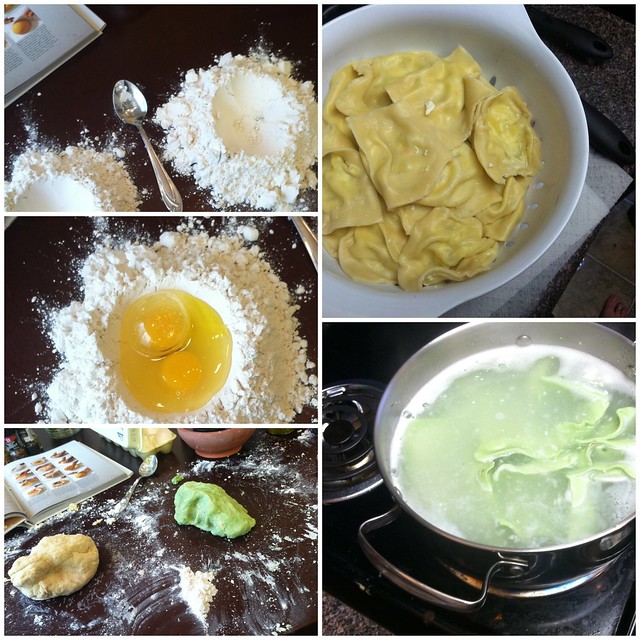
Three Ways to Prepare Solids Easier

I can hardly decide what I want to eat and now I've got to feed a baby an actual breakfast/lunch/dinner as well!?! This was overwhelming to me at first but as I slowly built the repertoire of foods Marcus would eat I found simple ways to offer them.  Here are 3 tips I have to prepare food for your little one.
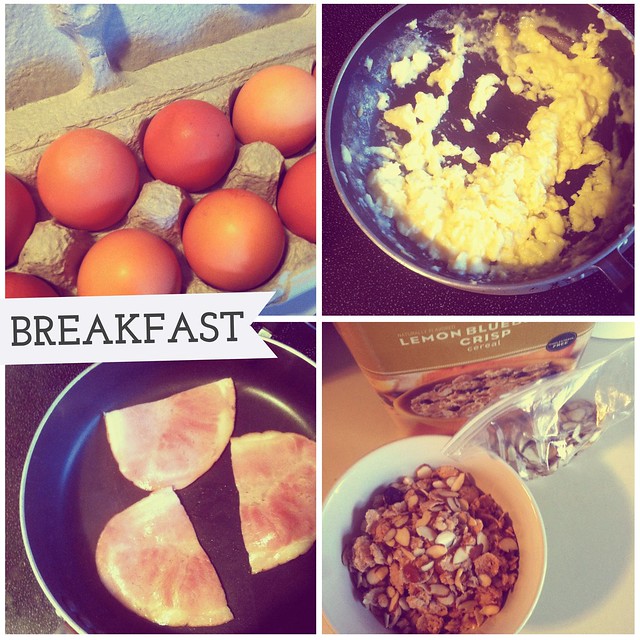
Microwave Eggs

Something super simple to make for a baby is scrambled eggs.  But you may have to dirty a pan and a few utensils if you make them traditionally.  And sometimes in the morning I'm not eating a full on breakfast like I'm going to feed him!  Shallow salad bowls work best for this method of cooking eggs - simply crack and egg into the bowl, scramble, and microwave at 30 second intervals until cooked through.  You can an easier prepared egg and it's easier for them to grab with the second tip below.

Cut foods with a Pizza Cutter

Slicing up foods like the scrambled eggs above or pancakes or toast can be made much, much easier with a pizza cutter!  I spread some leftover puree on toast or a pancake and cut it into bite sized pieces with the pizza cutter.  No more knifing up the food and squishing it while dragging the knife through.  Less crumbs when it comes to cutting toast too!

Personal Blender for Meat

We've offered Marcus both chicken and shrimp after its been blended in our Nutribullet. Of course you can use a regular blender but a small blender like the Nutribullet (or any other personal blender) means you're not dirtying up extra parts and pieces.  You can store the leftover blended meat in the cup with a cap for a day or two and not have to empty it into another container and then clean your whole blender.  Plus I throw my blender blade thing into the dishwasher (not sure if you're supposed to) so it's way easier to clean.  (Honestly, if it can't survive the dishwasher, I don't want it in my house!)
Starting Marcus on solid foods has been and adventure.  I started off super scared he'd choke but gagging and what not is learning.  It is super important to listen to your baby as they start eating food.  I didn't think we'd go the accelerated route and BLW kinda freaked me out but as he developed skills I felt confident following him and also challenging him with textures.  We run into things that he has trouble with or doesn't like and we work through it.  Just the other day we tried something I can only liken to a thicker veggie soup and it was hard for him to navigate the smooth and chunky and chewy texture.  Which is fine, he'll develop skills like that as we progress.

I hope this post helped you navigate feeding your baby a little bit and inspired your to not dirty too many dishes when making up some food for them!  Hope you're feeding journey is fun & exciting!

Resources I consulted: Very Well Family, Wikipedia, Feeding Bytes

What was your feeding journey like?  What food are you most looking forward to sharing with your child?

xoxo, Moe
listen to this blog post below:

11.12.2019

Three Keto Dough Recipes I Always Have on Hand

While I was pregnant with Marcus I was advised to start eating low-carb toward the end of my pregnancy.  Turns out I was growing a large baby and we needed to limit the carbs so that he didn't bust from my nether regions like bigfoot.  Too much? Well, that's the truth!
this post contains affiliate links, please read my full disclosure here.

Eating low carb was not what I wanted to do with my life, especially nearing the end of my pregnancy when I wanted ice cream and Oreos!  (spoilers: this is my favorite low carb ice cream.)  Honestly, when deciding to go low-carb one of my goals was to still be able to eat bread and sweets.  Finding some Keto friendly recipes on Pinterest was an obsession of mine...second to actually testing them out!

Over the last few months of my pregnancy and even into postpartum I've enjoyed finding and making new Keto recipes but there are 3 'dough' recipes that I always fall back on

Fat Head Dough

This was the first Keto 'dough' I discovered and it quickly became my go to for everything.  Fat Head Dough is basically mozzarella, cream cheese, eggs, and almond flour (or coconut flour).  This is the recipe I use each time. Making this dough can get really sticky.  Most recipes advise you to wet your hands often when working with the dough but I find using food prep gloves works the best.
I first experimented with these Fat Head Dough bagels but quickly moved to using this dough to make pigs in a blanket (with everything bagel seasoning!) & little pizza pockets.  Let's also talk about how I paired these pigs in a blanket with red wine.  I've reached ultimate mom mode!  I experimented with making little pizza rolls too...this is something I need to work on more.  I just found this recipe to make chicken empanada pockets and can't wait to have these for easy meals!

For the pigs in a blanket just make the dough as normal & cut the hot dogs into thirds.  With your food prep gloves on, grab a small ball of dough and wrap it around the dog.  Place on your pan and then sprinkle with everything bagel seasoning!  You can even brush a little bit of butter on them for that crescent roll taste but these taste great as is.  I bake them at the same temperature and time as the bagel recipe.

It is also important to cook these bad boys on a silpat mat I find this dough sticks to anything BUT this.  Even greasing tin foil got me no where.


The Chaffle

The Chaffle is something I'm just getting into but I can totally see it being my go to for buns, bread, personal pizza crusts...anything that you need to be hand held & quick!  The basic recipe is a cheese & egg mixture cooked in a waffle maker.  The waffle maker I've found that works the best for these hand held size portions is the Dash Mini Waffle Maker. You may be able to find it on Amazon - it sells out rather quickly - but Target is where I got mine.  Plus you can either order online and pick up in store or get it delivered same day with your Shipt subscription!
I love to whip the simple egg & cheese mix up for a quick breakfast sandwich or a quick pizza lunch.  One of my favorite quick lunches has been a pizza made on a flour tortilla.  Prior to having to cut my carbs I'd use whatever tortillas we had...eventually I'd found some low-carb ones BUT this chaffle cuts the carbs even more!  Just mix 1 egg with 1/2 cup cheese (I usually use mozzarella).  This will make two chaffles which makes it perfect for handhelds!

My favorite chaffle recipe that tastes EXACTLY like bread (so its perfect for sandwiches and toast!) is from Butter Together Kitchen.  I added a few things here in my own experimentation - instead of 3 tbsp almond flour I went with 2.5 tbsp, then added a half tbsp vital wheat gluten (this makes it more bread like) and 1/4 tsp of Lakanto Classic Monkfruit Sweetener.  The vital wheat gluten has been a real fun thing to play with and it is in another one of my fave low carb doughnut recipes.  If you make this recipe my way & with the mini waffle maker you'll get three chaffles.  So it might by worth it to double the recipe and make six so you can have 2 more sandwiches later/the next day.  Its the perfect meal prep!


Psyllium Husk Roll

This was the first 'roll' recipe I came across and I'd used it to make buns and whatnot for things like pulled chicken sandwiches.  (I love to make pulled chicken in my Instant Pot!)  This recipe also uses and ingredient I was interested in - psyllium husk.  This is basically pure fiber so drinking water is a must but apparently this ingredient helps recipes stay together.  Psyllium husk and vital wheat gluten are pretty fun things to play with in low carb cooking!
I didn't have a need to make these rolls recently so this image is from the original recipe maker, here.

This is the only recipe I'd ever used the psyllium husk in and it turns out a pretty nice roll.  The are a little odd though.  When you first cook them they will come out hard on the outside and then a little gooey on the inside.  I put them in a ziplock bag to store them and the next day they were soft on the outside and not gooey but still bread like on the inside.  It was odd but this is the results other people got to!  I'm excited to continue to experiment with different spices to make these rolls super versatile.


Another post I need to do is all the sweet things that I eat on Keto!  I have a huge sweet tooth and a love of bread so eating those things was important to me when I went to switch my diet up!

I'm still doing a Keto focused diet though I'm not super strict on myself.  I sub a few things here and there - like all these dough recipes, no sugar in my coffee, heavy whipping cream instead of creamer, monkfruit sweetener or stevia for sweetener - in order to just cut a few things out.  Overall decreasing my sugar and carb intake rather than obsessing over macros is my long term goal!

What are your favorite low carb recipes?  Anything I should try out?

xoxo, Moe

7.31.2017

Make it Monday // Yummy Banana & Butterscotch Smoothie

If there is one thing I love during the summer (and every other season of the year) is ice cream.  Now I'm not saying this is in anyway the healthy version of ice cream...but there's like 2 to 3 bananas in here....so that's got to count for something.  Isn't it about subbing things out?  So like eat all of the bananas and none of the ice cream, right?  That's a thing right?

And before you say 'Ewwww this sounds like the worst thing ever!', hear me out.  Bananas are a good substitute for ice cream, that is a thing!  There are tons of banana ice cream recipes out there.  Butterscotch milkshakes are a thing too...at least for me.  So if you don't like bananas, or bananas as an ice cream substitute, or butterscotch....might want to skip this post. 
this post contains affiliate links, please read my full disclosure here.
Anywhoooo...I do try to make banana smoothies when I'm craving something sweet because then I won't eat the ice cream.  In addition to an ice cream weakness, my favorite ice cream topping in butterscotch.  I love butterscotch flavor everything! So I thought I'd try tossing in some butterscotch topping into my banana smoothie.  So that makes it less healthy...but still a good treat.  Better than a big bowl of ice cream, right? right?
Supplies // 2 to 3 bananas, half cup milk, ice cubes, 2 tbsp butterscotch topping (or add to taste), Nutribullet

First off, can we talk about the only thing I've used my Nutribullet for is milkshakes and these smoothies....nothing truly healthy. Whoops!  I really do love this little guy though.  It's perfect for when you want to make a single serving of something as you don't waste ingredients.  When I use my big blender I always over estimate - because really my whole life is just throw it in the blender - so I have too much.  If it's just me, that means I drink more than the serving I need.  If I'm splitting something with Zach, we may still have too much...or not enough to satisfy us!  The Nutribullet makes guessing the perfect way to make a single serving!
Chop up the bananas into the cup, add the half cup of milk (you can use almond milk, cow's milk, whatever milk you like), add the ice, & then blend.  I mean it's really that easy to make a smoothie.
Once it's all blended up, add the 2 tbsp of butterscotch topping & blend.  Taste the concoction & if you need a bit more topping, add it in.  You can get the low sugar topping, or even try adding in butterscotch flavoring.  I love the smoothness of the ice cream topping.
What I love about the Nutribullet is that the cups you use to blend also turn into the cups you can drink from.  You don't have to....but you totally can!  Some of the screw on tops even have handles.  How convenient.  
Now if you need me I'll be out on my porch drinking these guys all day, everyday.  Again...defeats the purpose of being healthy but it's so delicious.
On a serious note....I have been trying to make good substitutions for things in my life.  For example, drinking cold brew coffee has cut out a giant part of the sugar during my day.  I've also been drinking club soda + essential oil concoctions instead of soda (not everyday....but a few times a week.  Ingesting essential oils is a personal preference and personally because of their concentration, I don't suggest ingesting EO's everyday).


So I hope this little recipe inspires you to sub out the ice cream treat for an equally satisfying treat!  I know this meets my sweet tooth when I need it.

How do you substitute snacks to make healthier choices?

xoxo, Moe

7.03.2017

Make it Monday // How to Make Cold Brew Coffee in a French Press

About a 2 weeks ago I picked up some coffee concentrate from the grocery store.  I'd heard about this crazy concoction from my BFF when we were in Florida (she doesn't even like coffee!!) and finally decided to pick some up.  Apparently you can dilute this magical juice with water, milk, etc and have a delicious cup of coffee.
Cold Brew Coffee At Home
this post contains affiliate links, please read my full disclosure here.

Let me tell you - I love this stuff!  Since picking that bottle up I've had a cup of cold brew coffee each morning with just milk.  I've cut my intake of sugar and that processed non-dairy creamer stuff by doing this.  Though I can't say the impact of that yet, the cup of coffee isn't too bitter and I can stand to drink it with out the pump of sweetness.  Never thought I'd be able to do that.

So, because I've found a new love & because I have a French press that is collecting dust next to my coffee bar I thought I'd try my hand at making my own cold brew coffee concentrate.
How to Make Cold Brew Coffee in a French Press
supplies :: french press, coarse ground coffee, room temp water, 14-16 hours, mason jar (optional), fine sieve (optional)

Personally I used the coffee grounds I'd had on hand but a lot of the blogs I read suggested coarse ground coffee for a sweeter flavor.  It seems that the grinding process heats up the coffee beans and the finer you grind, the more heat is generated.  Science, it makes sense.  And that heat is what creates the more bitter taste.  So take that as a suggestion.  I do plan on getting a coffee grinder for myself.
Cold Brew Coffee At Home
Add 1 cup of the coffee grounds to the French press and top with water.  Leave about an inch at the top so that you can add the lid and plunger with out causing overflow.  Cover the press and set aside for 14-16 hours.
Cold Brew Coffee Concentrate
Once the concoction has steeped for 14-16 hours, add the lid and press the plunger down to push the grounds to the bottom of the container.  My french press has a fine mesh over the spout as well but you may need a sieve here to remove the rest of the grounds.  Either pour the magical goodness into a separate container like a mason jar to store it for later or pour into a temporary container, clean the french press, and transfer the unicorn blood back into it.

Store in the fridge for about a week because you'll drink it all in that time frame.  No need to worry about it going bad, you're gonna down it in no time!
DIY Cold Brew Coffee
Cold Brew Coffee At HOme
I dilute the coffee concentrate with milk and drink it cold.  I have tried to dilute it with water - both drinking it cold and hot - and personally I don't like it.  I'd need a little bit of sweetness to drink it that way.  Milk - we drink Skim milk but this would be great with almond or soy milk - is the way I choose to take my coffee.  I don't measure out the ratios but about a shot of coffee in a mug topped with milk seems to work just fine.

Shop Related Products on Amazon!

I can't wait to try different coffee recipes with this coffee concentrate.  I see a gourmet coffee shop right on my kitchen counter in the future!

How do you take your coffee?  Are you down for some cold brew?  Let me know below or in the Five Sixteenths Blog | Live Creatively Facebook group here.

xoxo, Moe

9.05.2016

Make it Monday // Crazy Easy (Chicken) Fried Rice

There are an assorted few recipes here on the blog.  I am 100% not a cook at all....but since being with Zach, his add a bit of this and see what happens kind of cooking has rubbed off on me.  This is one of those types of recipes.  Fried rice is one of the easiest things to make and I totally think it should be in your recipe Rolodex.  I'm sure you have some of these things in your stock right now, and if not you can omit a few things or run out and grab a few things.  I'm going to share with you my base recipe with a dash of fun added in (like the chicken).  Honestly I made this with instant rice before we had a rice cooker and it still tasted great.  This is easy and affordable, so here we go.
this post contains affiliate links, please read my full disclosure here.

ingredients // 2 cups uncooked rice (instant is fine, I used Jasmine rice), 2 cups frozen mixed veggies, 2 eggs, 2 tsp oil (I used sesame but olive oil will work too), soy sauce to taste

optional // 1 lb chicken cubed, 1 tsp ginger paste (or fresh ginger), 2 chilies chopped, fresh green onions chopped, 1/2 yellow onion diced, sesame seeds

The base recipe excludes all the optional parts of this recipe (obviously) so you can skip over those parts in the.  

Prepare the rice according to the directions.  I made this with instant rice for years, it has only been recently that I'be been using the rice cooker.  If you don't have a rice cooker, you need one.  I put this step first because if you have the rice cooker you can let the rice cook while you prepare the chicken.

Cube the chicken and saute in oil with onions, ginger, and chilies.  Cook thoroughly and move to a separate dish.

Once rice is cooked, add to hot pan (add more oil before if needed).  Add in soy sauce - this is a personal preference thing, but don't worry you can add more in at the end too.  Stir in frozen veggies.  Allow to cook for a few minutes, stirring occasionally.

Move rice from center of the pan to create area to cook the eggs.  Break two eggs into the pan.  Allow to cook lightly then break yolks.  Stir the eggs in the center of the pan until they start to cook (think scrambled egg consistency).  Once cooked, fold into remaining rice.
Add in chicken.  At this point taste the rice, add in more soy sauce if needed.  Continue to cook until thoroughly heated.  Add in green onions right before serving, stir.

Add a dash of sesame seeds as a garnish.

Depending on how gluttonous you are, this recipe probably serves 4.
Soooooo, like I said if you just cook the rice, saute it in oil, add in soy sauce, add veggies, add egg (even that is optional) and cook it all up, you'll have some delicious & super easy fried rice.  If you have an egg that is about to expire or you have some leftover rice - even white rice from the take out place - you can have some yummy fried rice.  Better yet if you have leftover white rice from the take out place, make rice pancakes.

Like I said, I'm no professional but this rice is the bomb.com.  Perfect for a girl on her own, a college gal, family of two, or potluck (just maybe double it!) - just make this recipe, ok?

Do you have a favorite, easy recipe?  Any ones you'd like to share?

xoxo, Moe

2.22.2016

Make it Monday // Southwest Chicken & Rice Bake

One of my favorite easy recipes is a variation of rice, cream of whatever soup, and chicken baked in the oven for 45 minutes.  This is a super easy base recipe to add your own spin on to get a yummy dinner and it is the recipe I have in my recipe book. I can't tell you how many times I've varied the ingredients to create something different.
Southwest Chicken and Rice
Today I want to share with you how I made this delicious Southwest Chicken and Rice bake!  It is definitely a main dish - you can eat it with chips as a dip or use it as the fillings for burritos or tacos.  It is quick to make (it bakes for a bit, but you're not standing over the stove) and it's filling!
Quick Chicken Dinner Recipe
Here's how I made it

Ingredients:
1 can whole kernel corn
1 can diced/chili ready tomatoes
1 lb chicken breast (or more depending on your liking)
3/4 cup rice
Rotisserie chicken seasoning
1 packet Quesadilla Seasoning
1/2 Cup cheddar cheese (or queso cheese)
other veggies (peppers, onion, etc) optional
1 tbs olive oil

Start by defrosting your chicken if need be (one of these guys is great for this.  They defrost meat quick enough, with out a microwave!).  Next, slice it in to very thin strips.  Season the chicken with the Rotisserie chicken seasoning then saute the chicken in a pan with the olive oil for about 5 - 7 minutes.  I found that in the original recipe if I didn't cook the chicken just a bit before throwing all the ingredients together, the chicken would remain under cooked.  You can also saute the chicken with the peppers and onions if you'd like to soften them up a bit.  
Southwest Chicken Dip Recipe
Next, in a square metal pan or baking dish add the rice, can of corn, and can to tomatoes.  Do not strain these cans.  The liquid is needed to cook the rice.  Mix in the Quesadilla mix into the rice, corn, tomato mixture evenly.

Add the chicken to the top.  Sprinkle the cheese on the top. Cover with foil.

Bake at 375 degrees for 45 minutes.  After it is done baking, let it sit for a few minutes and then stir & serve.
Chicken and Rice Dip
Easy Family Meal
Like I mentioned above you can serve this as burrito or taco filling or as a dip for chips.  Or even in a taco salad shell with some greens.  I love the base recipe because you can get soooooo much versatility our of the same style.  This is my go to recipe for when Zach is gone.  Perfect simple bake it and leave it type of meal because I really do hate standing over the stove and cooking!

Do you have an easy go to recipe you use a lot?  How do you vary your recipes?

1.25.2016

Make It Monday // Fricken' Easy Marbled Mint Fudge

During the holidays one of my favorite sweet treats is fudge.  I'd picked up dark chocolate & mint chips from the store sometime in December because I just couldn't resist them, but never got around to actually making the fudge until right now.  Here's my excuse - 1 bag was not enough to make the recipe I'd found and I just never picked any more up.  The other day I did find some more chips at the store so I thought I'd try my hand at making what I'd meant to make.
And since I just can't do things easy right off the bat I decided to divide my chips - they were dark chocolate & mint after all - and create a marbled look.  Let me tell you, this recipe is super, super easy.  If you have a sweet tooth like me you'll totally be making all the fudge all the time.  I used this 3 ingredient recipe and halved it to create my marbled fudge.

Ingredients :: 3 cups (two 10oz bags) chips, 1/4 cup butter, on 14oz can sweetened condensed milk.

I started by dividing the dark chocolate chips from the mint chips into two separate  bowls.  Two 10 oz bags gives you just a little bit more than you need - 1.5 cups of the dark mint and 1.5 cups of the mint chips.  Halve the butter and the condensed milk and add each to each bowl.  

Microwave each bowl until the chips melt, giving them a stir once or twice.  I found a fork works the best to evenly distribute the ingredients.
Once each set of chips is melted, begin to pour the mixture (one at a time) into a well greased 8x8 pan.  I lined my pan with foil to make the removal process easier.  The dark chocolate chips maintained a thicker consistency while the mint chips got more runny when heated, so I used the dark chocolate as the base - meaning I poured that one into the pan first.

Using a spoon, spread the chocolate around the bottom of the pan.  Once it is as evenly distributed as possible, top with the melted mint chips.  Since these were more runny it was easier to take my spoon and create an S design running back and forth with in the chocolate.  To get the best marbled effect, don't be afraid to really get in there with the spoon and stir things up.  Don't go too far though or you'll get a weird color if you mix it too well.  I do suggest using a spoon - at first I tried a toothpick but it wasn't sturdy enough to get a good mix going.  You may need the toothpick to pop any air bubbles that form while creating the marbled effect.  The tiny pinpricks did leave little holes when I popped the bubbles - but that obviously doesn't affect the taste!!

If you can't find the premade bags of chips, two 10oz bags of complimentary chips works too.  It will probably be easier since you don't have to divide them by hand!!

I can't wait to enjoy these little treats all year round - it will be fun to try my own little fudge combinations!

What is your favorite sweet treat?

xoxo, Moe

4.30.2012

Make it Monday // Yummy Strawberry Cake

A favorite fruit shared between Zach & I is the strawberry.  Anytime we find an excuse to buy them we do & often eat the whole berry basket in a day.  Between stops at the fridge & turning them into yummy desserts, strawberries go as often as they come.  Food Lion lately has been having 2 two for $3 sale & when the strawberries look good I go ahead and buy two.

While out looking for something for dinner the other night I decided to pick up two baskets & cook up the strawberry cake mix Zach had left over.  We cut up a basket & threw it in with the cake the cut up the second basket & threw it on top.


This cake was so yummy! It's a perfect super easy idea for a get together, last minute dessert, or summer cook out staple.  I can't wait to make it again.

Happy Baking!


2.26.2012

Sum up Sunday // A Typical Weekend

Weekends are the best time of the week.  The week is over, no work for two days (three in my case), I get to sleep in, wear PJs all day, eat a yummy breakfast, & work on what I love.  One of my ultimate favorite parts of the weekend is breakfast.  Breakfast is probably the best meal of all of the meals.

Zach & I alternate between what we eat for breakfast: sometimes it's just cereal, sometimes it's pancakes, sometimes we fend for ourselves, but most of the time breakfast involves some sort of eggs & bacon.  This morning was no exception.

Since Zach cooks most of the dinners in the relationship, I try to cook most of the breakfasts (since, really, how can you screw up eggs!?!).  I haven't bought bacon in a while but found this sort of pre-cooked, sliced ham that I usually fry up in it's place.  It tastes great & you can throw it on an english muffin with your eggs & have a little ham-egg-muffin sandwich thing.  I love it because it gets the greatest tasting little  glaze on it.

Zach likes his eggs scrambled & super burnt so I usually make his first to get the pan nice and hot for my 'hockey puck' eggs.  I like my eggs hard in the center or scrambled (but not burnt) with some strawberry jam. Yum!

This morning I opted for some yummy Lemon Blueberry Crisp Cereal that was on clearance at Target.  I've also started a love affair with almonds so threw some of that in too.  The photo above is pre-milk because I didn't want it to get all soggy!!  I am really enjoying discovering adult cereal as I like to call it.  Cereal that isn't sugar frosted & satisfies my sophisticated tastes. (yeah right)

I consider weekend breakfasts with Zach to be another mini date.  We get to sit together & I really enjoy that time to just sit & relax.  Neither of us have work or anything serious to worry about during that time so we just sit & eat....maybe watch a Stargate episode (or two).

So here are some great Mini-Date Easy Breakfast Ideas I like to throw together:
- The Classic - eggs & bacon (or ham slices)
- The Handfull - english muffin, toasted with scrambled (or hockey puck) eggs, bacon/ham. Side of strawberries (our fave fruit!)
- Take the Cake - a big ol stack of thin pancakes (think nearly crepe thinness)
- Cereal Offender - choose either the kind you enjoyed when you were a child or a yummy adult cereal like the Archer Farms brand from Target.

So what is your favorite part of the weekend?  Does it involve food?


2.13.2012

Make it Monday // Homemade Pasta from Scratch

If you love pasta, then you'll love homemade pasta! This past Saturday, Zach made the best ravioli I think I've ever had for our Valentine's Day Dinner.  There were three types of ravioli: Ricotta, Mozzarella, & Provolone, Spinach & Mushroom, & Sweet Italian Sausage.  I mean it when I say this, I had a blast making the pasta & watching Zach  put it all together.  (We've been watching Chopped recently, so presentation was a big thing for this meal!)  The final product was a serving of ravioli, side of asparagus, spring mix salad with sprouts & Olive Oil & Vinegar, and garlic bread.  We topped it off with Milk for him & Champagne for me (of course!)

So, if you are interested, here's how you make your own homemade pasta (just the pasta, not the yummy insides...I'll save that for another post!)


First, clean your damn counter tops! We didn't have a space big enough to make the dough on so I scrubbed the heck out of the table to make a clean surface.

Second, lay out 3 separate piles (if you are making different pastas) of 2 cups flour.  Great a little bowl shape in the flour with a spoon to hold your other ingredients.

Third, add two eggs, 1tsp, 1.5 Tbsp water.  (you may need to add a bit more water as you make the dough.)  To the middle pile of flour, eggs, olive oil & water, add a few drops of green food coloring & to the third pile add a few drops of red.  <-- that last part is optional.  We wanted to do a fake out of pasta with tomato & pasta with spinach.  But the color does help with the would be Russian Roulette of 'what does my ravioli have in it?' We put the spinach in the green pasta & the sausage in the red pasta.

Next, take a fork & begin to whisk the egg mixture in the little bowl in the flour.  This helps combine a little of the flour so the egg doesn't go everywhere.  Slowly begin to whisk in more flour from the walls until you get a rather thick mixture.  Begin to knead the dough by gathering up the sides of the flour walls & pushing down (toward the table) & then away from you.  Keep gathering & kneading.  This is the place you might want to have a cup of water handy to add a Tbsp here or there.  It takes a bit of water to get the dough to stick to itself.

Then, keep kneading & kneading & kneading.  The dough should feel a bit like almost dried out play-doh, then you're done.

Then move on to the next pile.  The one good thing about having a few piles is that I got better at kneading & incorporating the ingredients by the end of it!

Next, (here's where I get wordy..) pull out the good ol pasta machine & begin to roll your dough through.  I am not going to go into too much detail because I followed the instructions in our pasta machine & it came out perfect, but here are some necessary tips:

  • Just go down in thickness slowly & make sure you run the dough through a few times to get the dough all the same consistency.
  • Don't worry if when you run it through the first time it falls a bit apart.  just pull it out & layer the other parts of the dough over each other.  Add a pinch of flour between the layers.  The only reason I could think why it would fall appart on the highest setting is because the middle of the ball of dough was moist & the outside was a bit dryer.  (This is why you need to put the pasta through a few times)
  • If the pasta gets too long, cut it in half & work with one half at a time.  This makes it easier to make the raviolis too!
  • If you are making raviolis, make sure the final run of the pasta makes it at least as wide as the pasta machine.  If it's not wide enough, fold the dough in half (from end to end & not side to side) and run it through again.  Do this until it is the width of the pasta machine.
  • DO NOT lay the made sheets of pasta on top of each other, they'll stick! You could try to add flour between the layers, but you'll have a harder time sealing the pasta to itself for ravioli.  If you're going to make another type of pasta, it might be ok to do that....
Finally, get out your ravioli ingredients & start to stuffing! Lay out the sheet of pasta & put little dollops of filling down the long side, spaced about the size of your thumb apart.  Fold the pasta sheet (long side to long side) over & press around the mound of filling.  (press a bit hard to seal 'em up!)

Then take a knife & cut them apart, being sure to seal any edges that may come open (use some water if you need too).  This is what they look like:


There is a bit too much flour on these, but they are ready to be boiled! Cook them like you would any other pasta.  Our filling was already cooked so you don't have to worry too much.  We did add egg to the filling (you'll have to ask Zach why, though) but you'll cook 'em long enough to cook the egg.  

There should be another attachement to your pasta machine that will make spaghetti or fettucini, if you're interested.  Just run it through there & you'll be set!

All your hard work, it will take a few hours (!!) will turn into this yummy, yummy meal

Bon Appetit! 

(ps. all these photos were taken with my iPhone! Pretty good quality this time!)


10.30.2011

Sum up Sundays // Lazy Life

This week I've been super lazy.  I've not been blogging, I've not been doing much of anything.  I had a small birthday dinner for one of my friends Saturday night & that was a great night for my new man to meet some people in my life.  Then today he made me a delicious lunch:

I gave him a few ingredients from a recipe on pinterest I wanted to try & he went at it.  He said "I can either follow the recipe or wing it." I let him wing it & it totally came out different yet delicious.  A take on this Chicken Marsala recipe.  We added linguini to make it more of a pasta type dish since there was a lot of liberal improvisation with the wine/chicken stock.  Add some of his wonderful green beans & onions, & our fave crescent rolls!

The only thing I was in charge of was making sure the crescent rolls didn't burn, pouring the milk, & loading the dishwasher.  Cooking is not my forte!

I am glad I finally got to (help) make something I've pinned on pinterest. Aided by this man.


Isn't he cute?  Knows how to cook & all!

How was your weekend?

10.12.2011

Columbus Day & Last Week Wrap Up

This past Columbus Day I spent in a Naval History Museum.  It was pretty cool, kinda weird to be in an 'Age of Exploration' exhibit on Columbus Day.  We watched a little film about the recovery of the turret from the USS Monitor after it sank outside of the Outer Banks during the Civil War.  We saw a lot of maritime history things, what the inside of cabins looked like on the Monitor, learned more about the Titanic, etc.  A neat place to go.

I've also embarked on an endeavor that I don't want to mention just yet for fear of a jinx. But it involved eating a delicious meal:

Do you see this lunch here?

baked potato, green beans & onions, chicken & pasta.  Epic Lunch time!  It was so delicious but so large.  I didn't eat it all.  Oh, for the record...someone made this for me.  They. Made. This.  I was impressed.

Over the weekend before Columbus Day, we went camping.  It was really nice even though I think it stirred up my allergies which may or may not lead to a cold.  I've been taking Airborne, but we'll see what happens.


We headed out Saturday night & built a great campfire.  We cooked some weenies & some smores & played with the puppy.  He liked camping because he realized he could pee any where pretty much.  We made sure that #2 was done elsewhere though.

My room mate told me that the puppy dog didn't really get the concept that just cuz they were sleeping on the floor didn't mean the whole floor was the bed.  It was a bit chilly & I had one of those mummy sleeping bags which was great except I like to sleep sprawled everywhere.  That was not possible with that sleeping bag!  Our other friend who moved away was visiting so it was a great catch up with her.  We talked about dating, jobs, life, etc.  Commented on the fact that my room mates have been married for about two months.  It was a good friend session!

We improvised with pancakes (maybe I'll tell the story later) & then headed out that morning.  It was nice to get away for a little while.

What did you do this past weekend?
Hope you are having a wonderful Wednesday!