Showing posts with label diy bracelet. Show all posts

6.26.2017

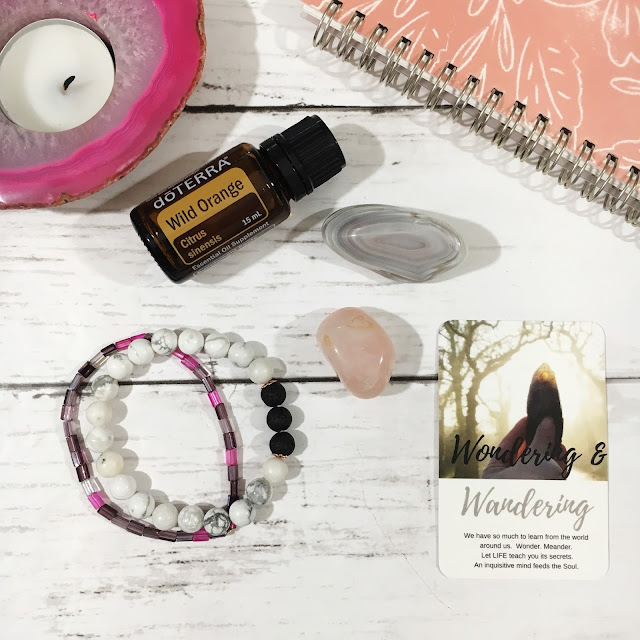
Make it Monday // DIY Howlite & Lava Stone Diffuser Bracelet

Howlite is a great stone for calming anger, anxiety, & the overactive mind.  It is a stone that seems to aid in balancing many emotions, which makes it perfect for a diffuser bracelet.  In addition to the Howlite stones being calming, Lava stones are also grounding and balancing.  These porous stones work perfectly with Essential oils.
DIY Essential Oil Diffuser Bracelet
this post contains affiliate links, please read my full disclosure here
.
Today I want to share another diffuser jewelry DIY with you - check out the first necklace DIY here.  I love bringing my oils with me everywhere - and jewelry is the best way to do it!  You can breathe in the calming (or invigorating) scent all day.  This diffuser bracelet is very hip but very bohemian and the pop of rose gold metal is very trendy!

Shop Supplies on Amazon!


supplies :: howlite beads, lava stone beads, elastic, super glue, charms (optional)
how to make a beaded bracelet
Cut a length of elastic and thread half of the howlite beads onto the strand.  Add a bead cap, then thread on the 3 lava stone beads.  Finish with another bead cap and the rest of your howlite beads.  The amount of howlite beads may vary depending on your wrist size.

Once the bracelet is big enough to fit around your wrist, tie a knot in the elastic and drop a dot of super glue to keep the knot in place.  This elastic can be kind of slippery so the knots don't hold well by themselves.
If you'd like to add some charms to your bracelet or a tassel, add a jump ring and attach it

Add a few drops of your favorite single essential oils or essential oil blends to the lave stone beads & calm your mind while you work or play!  You may want to make a few bracelets so that your oils don't mix and create unpleasant scents.
Essential Oil Diffuser Bracelet
I keep a bottle of the Balance essential oil blend on my desk at work.  Half the time I've already run out of the house with out my diffuser jewelry so this little stash is perfect.  Uncapping the bottle and breathing in the scent allows me to calm an center myself in just a few breaths.  Scent is a powerful way to make connections - so when you use Balance to consistently calm & center yourself, it becomes easier to do so as you associate that scent with that feeling.
Nurturing Essential Oil
For this lunar cycle, I'm personally focusing on nurture & structure - so the Wild Orange scent is very nurturing and supportive.  I'm also working with Botswana Agate (for security) & Rose quartz (for love).  All of these work beautifully together!
Diffusing Essential Oils with Jewelry
This is currently my favorite nurturing blend - Wild Orange is very uplifting and nurturing, Bergamot is citrusy & bright, while Myrrh balances out the brightness of both citrus oils.  You can find a few more of my favorite blends in this post, too.  I purchase all of my essential oils through Doterra, let me know if you'd like to learn more about the oils!  Find the specific oil blend recipe in the NEW Five Sixteenths Facebook group!  Click here to join!

Essential oils have become a huge part of my spirituality and everyday wellness!  I can't wait to share more with you!

 Do you use essential oils?  Any tips you have for using them daily?

xoxo, Moe

*any advice given in this post is not intended to diagnose or treat any ailment.  Please consult a licensed practitioner for advice.  All information on essential oils is taken from the Doterra website & my personal research.

Ready to get started on your Essential Oil Journey?  Click here to learn more about doTERRA!

5.08.2017

Make it Monday // DIY Diffuser Necklace + Inspirational Blends

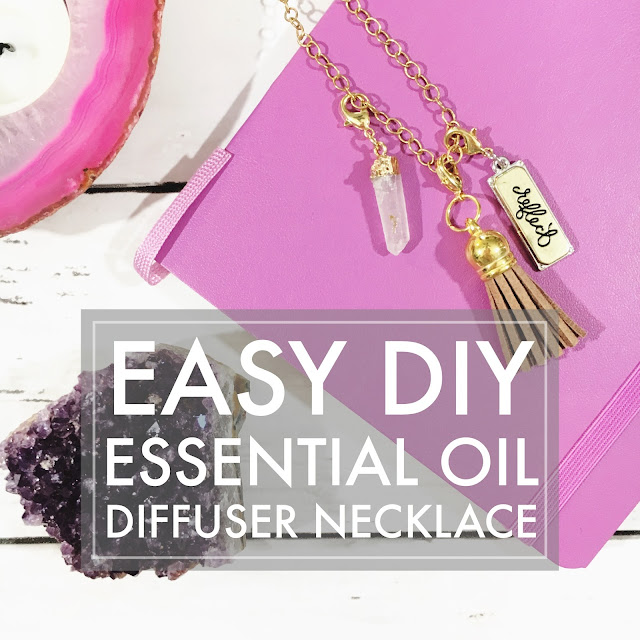
A long while ago I shared this DIY on how to make an inspirational charm bracelet.  I came up on some of the supplies again and thought about another jewelry DIY that these tassels would be good for.  A DIY essential oil diffuser necklace (or bracelet!).
Easy DIY Essential Oil Diffuser Necklace
this post contains affiliate links, please read my full disclosure here.
Essential oils have become a key part of my daily life.  I use them to ground myself & to open myself during meditation.....and, more practically, to clear my sinuses and open my chest when I'm sick.  You may think they are little bit out there, especially if you see some of your friends trying to peddle the oils to you, but believe me if they give you nothing but a nice aroma its worth it.  I use my Origami Owl diffuser necklace nearly everyday.  But I know that sometimes DIY is life so here's an easy way to bring essential oils with you day to day.
DIY Diffuser Necklace Supplies
Shop Supplies on Amazon!


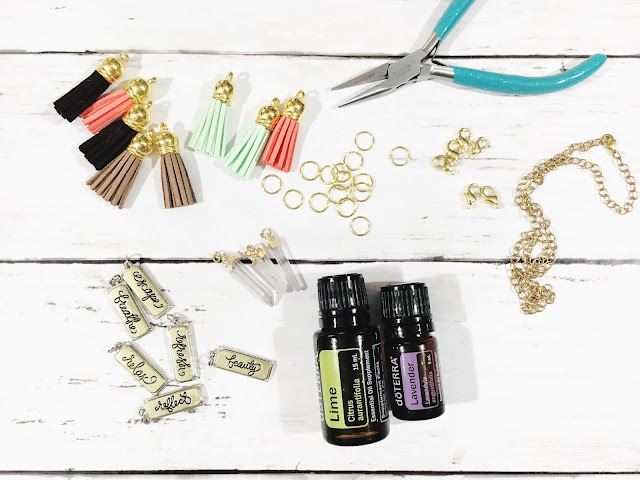
supplies :: small craft tassels (here or here), necklace chain, pliers, inspirational jewelry tags/findings (similar), quartz charms (similar), lobster clasps, o-rings, essential oil, optional - small storage bags + sharpie
Properly Open a Jump Ring Jewelry Making
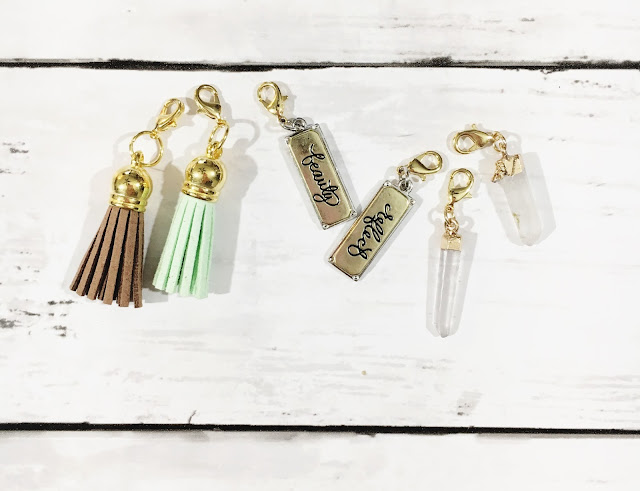
Start by opening an o-ring (another demo in this tutorial) and adding a lobster clasp & a craft tassel on to it. Close the o-ring.  Repeat for all the colors of the craft tassels you'd like to use.  It is important to use one tassel per type of essential oil so that you get the most pure scent.  You can create oil blends, of course, but mixing too many oils on one tassel may not give the desired aromatic effect.
DIY Diffuser Necklace Charms
Next, create the inspirational charms by opening an o-ring and adding a lobster clasp and charm.  If you have a few tags/sayings make a few charms.  You can use these as mantras when wearing your diffuser jewelry to further enhance your relationship with the scents you're using.  Adding the clips makes it easier to change out the tassels and mantras daily.
Add Essential Oils to Diffuser Necklace
To wear your necklace - add a few drops of your favorite oils or oil blends to the tassels.  The oil will make the tassel a little bit darker, some blends may discolor the tassel as well.  To attempt to avoid this, spread the tassel open and add a few drops to the inner area.  Let dry for a few minutes then choose a mantra and clip to your necklace chain.  Letting the oils dry on the tassel will ensure that there's not transfer to clothes.  If you have extremely sensitive skin, please be careful - either test the oil to see if you will have a reaction or wear the necklace so that there is a layer of clothing between your skin and the tassel.
DIY Diffuser Necklace
Working with essential oils has really made my days so much better.  I usually wear the Balance blend from Doterra everyday because that is what I meditate with usually (because it is very grounding and I don't have to make decisions!).  But different scents can give you different effects.  There are some standard ideas on what various oils & oil blends do - like lavender is relaxing - but I think it's important to try different blends to see what you resonate with.  Maybe lavender doesn't really relax you...and that's OK!  There are different blends for everyone.  I save a ton of blends I want to try to my Essential Oils Pinterest board.
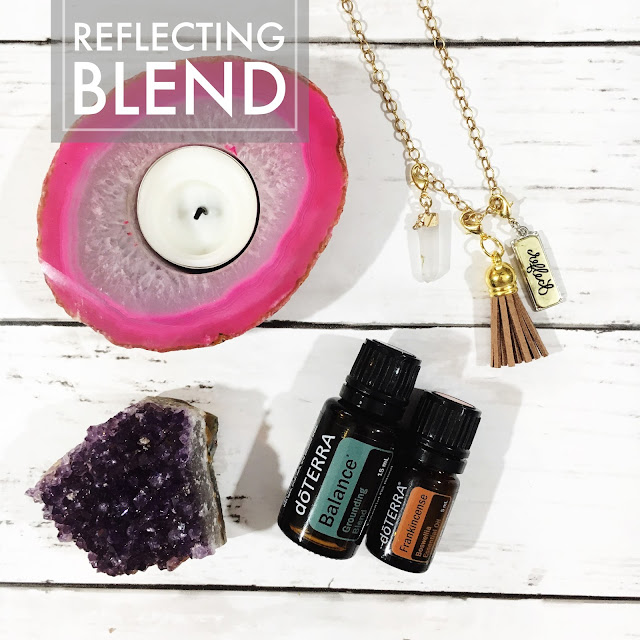
Essential Oil Reflecting Blend

Reflecting Blend

Doterra Balance & Frankincense
mantra: The quieter I become, the more I hear.  Everything I need is within me.
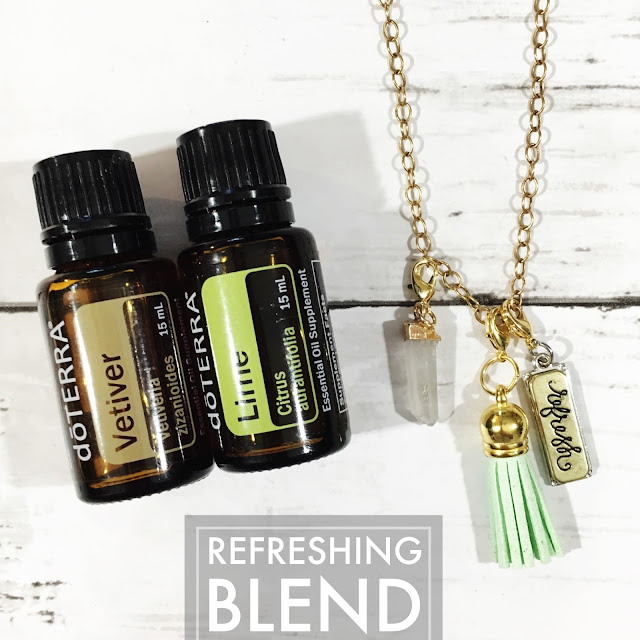
Essential Oil Refreshing Blend

Refreshing Blend

Doterra Vetiver & Lime
mantra: I am thriving.  I am growing. I am brand new.
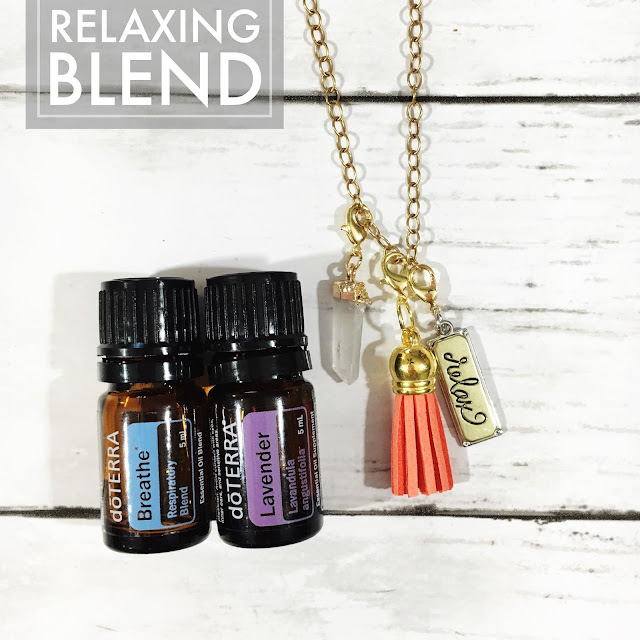
Essential Oil Relaxing Blend

Relaxing Blend

Doterra Breathe & Lavender
mantra: I release anxiety. I feel peace in this moment.

Be sure to designate one tassel to each blend or scent.  Though the scent will fade, to get the best results only use one oil or oil blend per tassel.  To sort and store the used tassels (and to differentiate the used from the unused tassels) place them in small plastic storage baggies.  Use a permanent marker to write the name of the scent on the baggie, then store them with your other jewelry.
Essential Oil Necklace
Being able to diffuse essential oils with you wherever you go will increase your connection to the feeling you get when using them. Since scent is a powerful sense and we associate memories with scent, being able to smell the same scent that made you feel relaxed, refreshed, or grounded will enhance that effect.  If you'd like to know more about Dottera essential oils, let me know!

How do you use essential oils in your everyday life?

xoxo, Moe

Ready to get started on your Essential Oil Journey?  Click here to learn more about doTERRA!

10.26.2015

Make it Monday // Inspirational Charm Bracelet

When fall rolls around not only do I bust out the knitting needles and crochet hooks, I suddenly become an arm candy queen.  I don't know why - maybe it's the boots and the scarves - but I will stack up the bracelets like to tomorrow.  My favorite are charm bracelets with lots of dangly things.  I found some cool little charms in my stash and at the craft store the other day, so I knew I needed another 
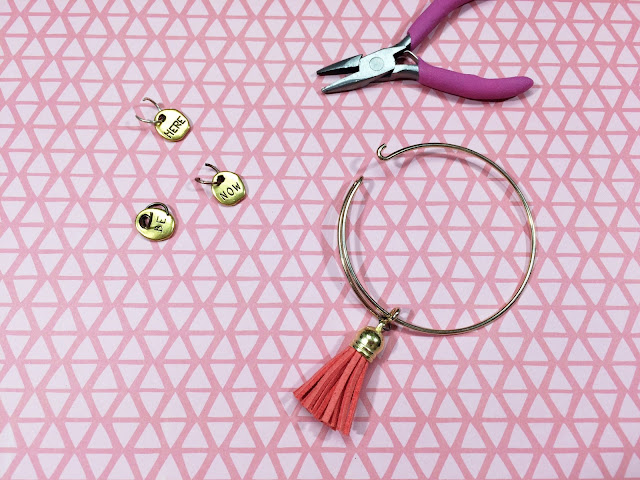
Supplies :: charm bracelet base (like these, found mine in the Joanne's clearance section), tassel charms, inspirational charms, pilers, assorted jump rings.

If you're unsure of where to find inspirational charms, check all your craft stores in the jewelry aisles.  I found these a bit ago and find any excused to use them.  This DIY is also about how to properly open a jump ring.  If I have one creative pet peeve it is the improper opening of a jump ring.  Instead of pulling the two edges apart, twist the jump ring apart.
Using the pliers in one and and your thumb and forefinger (or second pair of pliers) center the opening between the two.  The edge in the pliers twist toward you and the edge between your two fingers twist away from you.  You don't want to stretch the ring out as you want it to be able to go back to it's original shape.  Twisting it like this should do the trick.
Attach the charms to the loop on the bracelet so that the charms don't fall off.  You could also use a bracelet that is in a continuous circle for this DIY as well.
I love the sentiment of these charms - Be Here Now - is something that I'm really trying to work on.  When Zach is here I try to take the time to enjoy us together.  But of course I get wrapped up everyday things.  I need to try to enjoy the time we have more.

How do you remind yourself to enjoy the moment?

xoxo, Moe

5.13.2013

Make it Monday // DIY 3 Simple Chain Bracelets for Summer

I've been drawn to delicate, simple chain bracelets lately.  Just a little something to add a hint of classy arm candy to an outfit.  But I haven't really been on the hunt for any lately.  So I decided to raid my jewelry making supplies to see what I could dig up.  Luckily I found a few strands of chain, some bits & bobs, clasps, & jump rings.  To add a bit of color I snatched up a bright pink nail polish - believe me, it's like neon pink the photos don't do it justice!
DIY Knotted Silver Chain Bracelet:
With your wire cutter, snip three equal lengths of chain longer than you think you'll need to fit around your wrist.  Open a jump ring & slip all three chains + one end of the clasp set then close the jump ring.  Gather all three lengths & tie an over hand knot in the center (or as close to it as possible.)  Now wrap it around your wrist & eyeball how much extra chain to take off - or you could gauge it on a bracelet you already own - and use your wire cutters to snip off the ends.  Next open a second jump ring slip all three chains + the second half of your clasp and close the jump ring.  You're done!

DIY Tri-Colored Beaded Chain Bracelet:
Like you did before cut three equal lengths of chain - to fit around your wrist, this time - in three different colors (gold, silver, & an antiqued copper), add a jump ring, & the first half of your clasp.  You'll need beads with holes large enough to thread one length of the chain through.  Add your beads.  Open up your next jump ring slide all three chains on + the second part of your clasp.  You're done!

DIY Circle Loop Chain Bracelet:
Same deal - three lengths of chain (doesn't matter if they are the same but they need to be long enough to fit around your wrist).  Add a jump ring & clasp.  I found some silver circles in my bead stash that I painted with nail polish for an enameled look but you can use any bit of chain or repeat my process if you like.  Now open up a jump ring, slide on your loop, & pick a place on the chain to place your circle, attach the jump ring & close it.  Now using your cutters snip off the excess.  You'll attach this excess right back on the other side of the circle with a jump ring.  Now repeat that with your second circle, staggering it on another chain.  You can lay this bracelet next to the others do get an idea of the excess you need to snip off.  Then open a jump ring, slip your three chains on & the second half of your clasp.  You're done!
Now you have three pretty cool bracelets for Summer!  I love them because they add a little bit on interest to an office look - even though my office is pretty laid back - or adds a bit of class to a pair of jeans.  Love it!

xoxo, Moe

Connect on Twitter // Follow on Pinterest

5.09.2011

Make it Monday: Another New Twist

I love DIY's like these:


Make some pretty cool bracelets from twine/rope/cord & some S hooks:


full tutorial here from Honestly...WTF


PS. Don't forget to check out the link parties in the Side Bar or click here!

12.05.2010

Sum Up Sundays: Bracelet Tutorial

So on Monday I posted about my love for some beaded bracelets I saw over on Free People.  I decided to tackle trying to make a few.


Here are the supplies:

- Needle nose pliers
- Beads
- Memory Bracelet wire (you can find this at any craft store & even Wal-Mart)


step one:
cut off enough of the memory wire to wrap around your wrist a few times.
bend a little loop at one end to keep the beads on the wire.

step two: 
string the beads onto the wire.
fill the whole length of the wire with beads.

step three:
leave a little "tail" once you've strung on all of your beads.

step four:
use that tail to make a little loop like you did in step one
to secure the beads on the wire.

this is what you get


add some charms if you want
(I know that silver & gold aren't supposed to go together)
(sue me lol)


For the single bangle:
cut a length of straight wire 
(non-memory, I don't remember what gauge. But your seed beads need to fit on it...so not too big)
repeat steps 1 - 4
to finish, bend around soda can/bottle to create shape. 
open one loop & hook it through the other loop.
close opened loop
now you have a bangle!

Here they are styled together with some bracelets I have.


 PS. Don't forget to check out the link parties in the Side Bar or click here!

11.29.2010

Make It Mondays: DIY Bangles

I have posted so much about bangles on this blog.  This week I am going to tackle making a few bangles from beads, string, wire, & crochet.

Here is some more bangle inspiration from three of my fave stores:

this one from Anthropologie would be fun to make on memory wire.
It would be easy to stack a few up your arm, they'll never lose shape! I think it would look great either solid or with multi colored beads.

This from Free People is stretchy.
I love the look of multiple bracelets, can you tell?

And this Best Friends Since ID bracelet from Urban screams gift to me.  
I need one for the first friend I ever met in college & another for a very dear friend I met shortly after.
I love them both to death!

I swear, if I don't buy it from Urban now I will definitely get this down the line from another engraving place.

PS. Don't forget to check out the link parties in the Side Bar or click here!