One thing I've really, really wanted to start and complete is a creative journal. I've tried to create art journals in the past and I've also participated in the 30 Days of Lists challenges...but I've never committed and completed a project like this. I never felt I was able to and recently I think I've figured out why - I didn't start out with intention. Prior to now, I've sort of just said 'I want to do this' and I've done it. But for some projects....this isn't the best approach.

this post contains affiliate links, please read my full disclosure here.
A creative journal filled with ephemera, decor, and just a place to paste things I like would seem like a project where when the inspiration takes you..you go with it. But for me it never worked out. Finally I had the idea that I need to plan out what I was going to do. To give myself resources to pull from, and to have an intention when it came to working on this project.
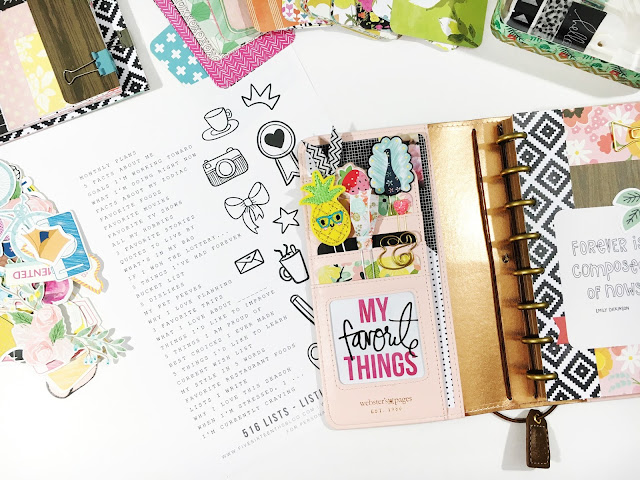 So I put together some ephemera, some journaling cards, and some paper scraps into on of my vintage train cases so that I would have everything I would need in one spot. This has helped so much with my planning - having one thing with all the things so I know where the things are - so I thought it would translate well into this project. I love that I can just crack open my case and play, then pack it all away.


Eventually I will do a video about the supplies in my train case but for now the images above sort of sum it it. A little bit of this and a little bit of that. It has been fun to work on this project and I can't wait to share with you some of my lists and pages on Instagram! I am journaling in a mini notebook I made using the MAMBI Happy Planner Punch and I've slipped the back cover into a Traveler's Notebook from Webster's Pages. I love this set up because I don't have to commit to a bound notebook but I can have the feel of a Traveler's Notebook.
If you would like to follow along as well (or you're just looking for fun listing prompts) I've put together a PDF and a Silhouette file so that you can list along with me. Download them both at the link above. Remember, all printables on the blog are for personal use only. Please do not sell the design or the printed images, or distribute them in mass quantities. If you would like to share this with your friends or pin to a Pinterest board, please pin this blog post and not the digital file. Thanks for playing nice!
Hope you'll follow along!
xoxo, Moe


 So I sat down to see if I could make a few of my own and wanted to share some tips and a how-to so you could attempt to make your own!
 From your inspiration images, begin to sketch out the shapes. It helps to visualize the wire as a line with a start and end point. This should help you sketch out your ideas and work them into wire if you keep this in mind. Rather than trying to visualize the clip as a whole, visualize the turns and bends as if it were a line on a page. The sketching portion helps with this.
 Next, pull off a good length of wire. You can keep it attached to the spool or coil or trim it - just make sure you trim enough off. If you think you have enough....pull off a little more.
 Trial and error is a big thing here. You may find that some shapes are harder than others so try starting at different ends or adapting your shape to something you're capable of doing.
 Once you've finished your shape, trim the excess wire and keep creating more! I found that a variety of colors of wire kept this project interesting and less frustrating if I could change up what I was looking at every so often.