Showing posts with label blogging. Show all posts

11.15.2018

Boost your Blog // 6 Productive Things to do When You're Stuck

I took off the month of October to focus on enjoying life and being married...so when I tried to get back to the grind of blogging and creating other content I had a bit of a struggle.  Thought I've created a content calendar outline (click here if you want to read about my OG blog planner!) and that's helped me get back in my routine, sometimes I still feel a little stuck.  
this post contains affiliate links, please read my full disclosure here.
When I feel this way there are a few things I like to do to get my full mojo back.  I work with existing content I've created and I interact with content that I love hoping to spark inspiration within myself!  Sometimes I just need a little push.  So I hope that these 6 tips help you to get back into your groove:

Choose a hashtag. Like, Comment, Repeat

Whenever I want to find new creators to interact with I choose a hashtag that I use frequently and flip through some of the images under that hashtag on Instagram.  When I'm scrolling through I will like and comment - genuine comments not just the heart emoji! - and follow who I find inspiring.  I'll save some of their content to my inspiration folders & try to pin what I can.  That way I'm paying it forward for them!  Then I choose another hashtag and repeat!  Check out this post on how to authentically gain Instagram followers.

This helps me because I'm getting inspired and because some of the people I interact with pop over to my feed to give my content some love.  Sometimes I get a follow as well! But the goal is to interact and drive traffic to my content.


Automate Something

There is always something that can be automated - right now I'm contemplating automating my Instagram posting.  Automating something means you're taking the hassle out of a task that can now leave you time for something else.  One of the few things I've automated are pushing Instagram posts to my Facebook page, publishing blog posts & YouTube videos over to my Facebook page, and batch scheduling series posts for the Live & Create Facebook group.  I've also created automated emails through MailChimp that go out when you subscribe to certain lists. 

This helps me because I don't have to worry about a few mundane tasks that I always put off.  The biggest task I put off is batch posting to the Live & Create group so to be able to sit down and schedule posts right within Facebook saves me money and allows me to focus on other things that need to be done!  (Track you social media posting with these free printable stickers!)

Create Something Outside of your Online Space

If you're not finding inspiration with in your online space break out of it!  I have a few hobbies offline but even if I find myself wanting to make something just for me, I do it.  I haven't filmed a Plan with Me in ages because I just want to sit down with my planner, my tea, and Ancient Aliens in the background while I have some me time.  And that is ok!  Take a class over at a craft store or community center if you need a little push to get started.

This helps me because I connect back in with my creative self with out the pressure of perfection.  I don't need to take pictures, I don't need to share, I can just be myself.  When we create for ourselves we can focus on our true creativity.

Pin Content to Group Boards

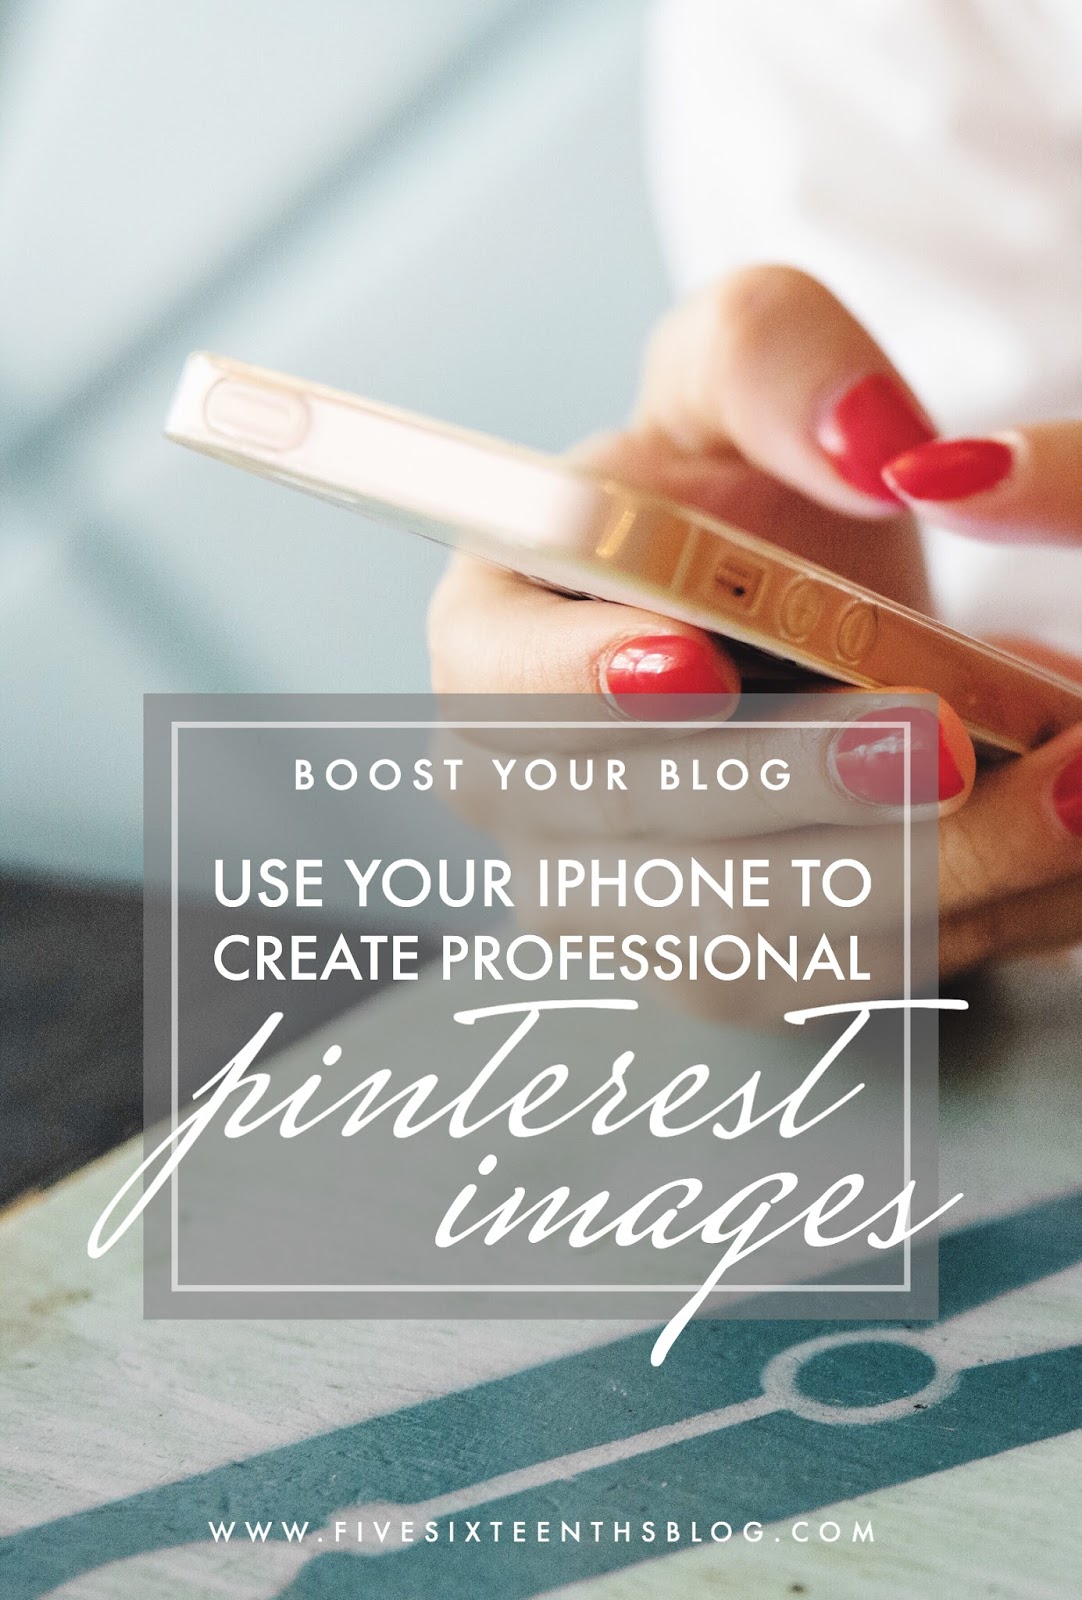
Group Pinterest boards are a great way to get your content noticed by other bloggers & creators.  By finding & joining these boards you're able to get your content in front of other people interested in your niche.  You'll pin your content there, then you'll pin content from the group board to your boards.  Other members will do the same and their followers will see your content.  This is why creating Pinterest friendly images is important!  Consider creating multiple images as well!  You can watch an easy to follow tutorial on using Canva to create your blog images over on the YouTube channel and find an easy way to use PicMonkey for branding here.

This helps me because, again, I'm immersing myself in inspiration.  I'm sharing my content but I'm also finding content to share.  This is a great way to find things to share in your Facebook groups too! Plus I may find an article like this that sparks something in me!

Beef up an Old Blog Post

We all have some old blog posts that can use new graphics, monetization, updated links, restructuring, or new info so choose 5 posts and beef them up!  Add in a call to action, create a graphic to pin, add in some affiliate links/ads and then turn around and promote that blog post!  Repin it, share in on social media, send it out in a relevant newsletter, etc.  Do just a little to drive traffic to older but super awesome posts.

This helps me because I don't have to write a brand new post, I only have to beef one up.  I may also find inspiration to write a follow up post or create a series of posts related to that one.  I can also monetize something that I'm linking to in other posts to hopefully reap those benefits.


Research Hashtags

And let's go back to the hashtag - I have a love-hate relationship with hashtags.  They are great because they help people find your content but they are annoying because they are often misused and I don't know what to do with them!  I use the Preview app to find my hashtags but I'll also flip through Instagram to brainstorm more hashtags to use.  I also write down hashtags for the products I promote - brand hashtags (like the Happy Planner), any challenge hashtags that are currently relevant, any app hashtags (I use A Color Story, A Design Kit, & InstaSize), etc - so that I can show up in those searches.  

This helps me because I'm making sure I'm optimizing my reach.  I want to make sure I'm using relevant hashtags and not just vague words that get likes.  We're looking for engagement here!

These six things help me get me back in the right head space to keep creating content!  I'm in a bit of a rut/struggle now so I've been going through a few of these things to get me re-inspired.  I've written a free ebook on how to get back your blogging mojo and if you're feeling a bit stuck, I hope you'll download it below!


Be sure to check out the past Boost Your Blog articles here and keep a look out on this playlist over on my YouTube channel.  I hope to make more design videos for bloggers!  Ready to get some creative inspiration?  Join the Live & Create facebook group for mindful living, creative planning, and personal development tips.

What do you do to get inspired when you're in a rut?

xoxo, Moe

2.22.2018

Boost Your Blog // Create Pinable Blog Images with Your iPhone

I've said it before and I'll say it again - my iPhone is a key part of my blogging arsenal.  I use it to take & edit photos, I use it to organize blog files, I use it to share blog posts, and I use it to create cover images for those blog posts.  There is a lot of power packed into this tiny thing and I am all about harnessing it.  Blogging doesn't have to be a chore and, honestly, it shouldn't be.  Creating a space that is supportive & expressive is right at your fingertips.
this post contains affiliate links, please read my full disclosure here.
I've been blogging for over 10 years and Pinterest came into the game for me right around the time I decided to take my blog to the next level.  But it wasn't until recently I started to optimize my blog posts with the vertical images best suited for Pinterest.  As website traffic grows increasingly from mobile users, vertical media is being prioritized over the square or horizontal format.  Not only are we consuming media in a vertical format, but the tiled style of your Pinterest feed allows for vertical pins to rule.  The more real estate an image takes up the easier it is for us to see on our small, mobile screens.

Since we're already on our phones all the time, we can take our blogging tools on the go.  I can't tell you how helpful it is to have an handy computer in my pocket to work on blog tasks - especially with my 9-5 job.  I can edit videos, photos, and blog posts quickly and on the go!  But let's get started with the step by step on creating Pinterest friendly images straight on your iPhone:

First, Start with the Perfect Canvas

Create a your photo library

I often use my own blog photos to create the pinable cover photo for each blog post.  But sometimes I don't have a photo specific to a blog post.  This post is actually a good example of that!  If I don't have a photo, I'll pull from my own library of styled photos or from an online, royalty free stock photo site.  Unsplash is a great resource as it allows you to create a library as you browse their site and I use it quite often.

Plenty of bloggers use stock photos, so don't feel like you're cheating!  Here are some tips to make sure you're choosing the best stock photo for your post.  You can also find some free styled photos here on the blog.

Image size is important

The best aspect ratio for a pinable image is 2:3.  This means you're image is longer than it is wide.  You don't have to be terribly precise if you're cropping a photo, but many photo apps offer a ratio scale so you can crop your image perfectly.  Vertical images straight from your camera roll fit this 2:3 ratio perfectly.  When you're taking your blog photos, or searching for the perfect stock photo, consider where your text will fall on this image.  Sometimes you can use any 'ol image you take but sometimes you'll want to take a specifically framed image so that your text will balance nicely on the image.

If you want to step up your iPhoneography game, I've got a ton of posts with photo tips here.  Make sure your lighting is even and when in doubt, just make it black & white!

Adjust, Edit, & Include your Watermark

Subtle edits to create cohesiveness

If you're using a stock photo you'll want it to fit in with your current editing style.  Since you're starting with an image that fits the post and fits in well with your blog, you'll want to make sure the over all aesthetic of your blog is matched with any edits you normally do to photos.  Subtle edits work the best - these edits correct & balance with out creating an overly filtered effect.

I have two apps to recommend for these types of consistent edits - A Color Story & AfterLight The perk of both of these apps, and why I recommend them, is that you can save your edits as presets to use over and over again!  Talk about consistency!

A Color Story is my all time favorite app to use and I honestly use it on the daily.  The free Essentials filter pack is all you really need for subtle natural edits plus you can batch edit (which saves a butt ton of time) & you can see how your photo would look on your Instagram grid.  All of these features are part of the free version of the app!  Say what?!?!

Add branded text & watermarks

The key part of a pinable image is the text that draws in the reader.  Add the blog post title or other related key words to your pinable image as well as the web address for your blog + the watermark if you have one.  It is important to watermark photos with at least your web address because pins lose their links all the time.  Others also try to hijack images to claim as their own so your watermark deters this behavior.

My favorite app for this is Phonto.  It is super simple to use, you can save text as presets, and you can upload your own fonts.  So it is perfect for your branding!  Another app that is newer on the scene but seems amazing already is A Design Kit.  This app comes from the creators of the A Color Story app so they can work seamlessly together.  I don't believe you can save any presets, the there are quite a few text options available.  I also just reviewed an app called PhotoMarks that works amazing to add branded text!

Finally, organize your files

Push images through to your other devices

I've used my iPad for blogging before so my photo library is shared between my devices.  And if you use a Mac, it would be even easier to grab your files from the cloud.  I use Google Drive to push my files & photos between my devices.  I find it is the easiest and gives me the most storage to work with.  Once the photo is uploaded from my phone I can rename it in Google Drive and upload it to my blog post.

I will also have the images available to post to various social feeds, no matter what device I'm on.  Previously I would need to email myself the images so I could download them to my computer.  If I needed to edit or change something, it became a huge hassle!  This type of cloud sharing would be great for teams or blogging partners to collaborate.  Or even if you are a part of a group of bloggers that work closely together on content.


It is seriously that simple to create amazing, pinable blog images right on you iPhone.  I've been thinking of upgrading my phone to an 8 plus for the bigger screen since I do so much blog work on it!  These little guys pack a huge punch when it comes to convenience, creativity, and quality!


If you've got some older blog posts that need some TLC or you just wanna take the time to make sure you're starting out on the right foot, I've got a FREE ebook for you!  This guide to revamp your blog is an easy to follow 10 page book filled with 5 simple tips to get your blog working for you.  Plus you'll be on the 516 newsletter list!

I hope this post inspired you to start making your Pinterest images in the palm of your hand.  Sometimes I think we put a lot of pressure on ourselves when we blog to have the best software, the best camera, the best gadgets when really there are amazing ways to get things done simply & easily.  I want to share all of that with you!  So check out more of the Boost Your Blog series here and get to blogging!

How do you create pinable images for your blog?  How do you save time & work efficiently?
xoxo, Moe

2.21.2018

App Review // PhotoMarks

One of my favorite apps to download are font overlay apps.  These apps that allow you to add text to your photos in a professional way.  I was contacted by PhotoMarks to test & review their font overlay app and let me tell you it is a great app to add to your arsenal...especially if you are a blogger!  This app has a feature I love - you can save different templates (known as profiles) so that you can add your branded text to images over & over again.  You don't have to start from scratch each time!  This is also great for adding a watermark or logo to you photos as this app supports an uploaded logo!

What it is 

This is your basic font overlay app.  You load a photo, add your text, save to your camera roll.  While this app doesn't have the most sleek design, it does have great function.  It is a very intuitive app.  If you've used any app to load or edit photos, you'll be able to figure this app out.  You can customize the appearance of your photos by adding text or logos - you can even upload your own logo.  
PhotoMarks from Bits&Coffee is an elegant solution for visually watermarking or annotating your photos. Easily protect your copyrighted images or add beautiful text comments to your photos before sharing on Instagram, Facebook, Twitter, Email, or other options.
With PhotoMarks you can completely customize the appearance of your text and logo marks. Working with multiple layers is an easy and visually pleasing experience. Brand, trademark, and copyright protect your pictures with ease!
The app costs $4.99 on ios and it seems there are no in-app purchases, so you're getting the full experience right off the bat!  Plus, there is a desktop version in case you're not one to go to your phone for this kind of thing!

What it does

This app allows you to create seamless, branded photos with just a few taps.  Supporting full resolution & multiple layers, this app is a powerful too for your social media presence.  The best part is that you can save your work as a template (known as profiles) and then load them later to keep with your consistent branding.  The mutli-layer function allows you to add different text options & logos for easy arrangement. Exporting to your camera roll is easy & the app supports sharing to social media.
PhotoMarks can be a powerhouse design tool right in your pocket.  It offers quite a few fonts to choose from so you'll be able to find a similar font, if not the fonts you may use for branding.  You can also easily upload a transparent logo to use over & over again so that your photos are protected.

How it helps you

Consistency is key when building your blog/brand.  I've mentioned the idea of a style guide over here on the blog before and I personally find it important to stick with your one to three fonts across your platforms.  It is very tempting to change things up, espeically if you're a creative person, but when people see a photo they should easily recognize it as yours.  
I'll say it again, the best part is saving a template to use again & again for your blog or social media sharing!  This is so helpful when you've got a quite a few blog posts written but need to make your blog graphics quick.  I use my phone for nearly everything when it comes to the blog.  I only write my posts on a computer & everything else - photos, editing, blog graphics, etc - is done on my phone.  That makes my blog work so easy for me.  So having something like this powerhouse app is wonderful for my productivity.  So if you've got a 9-5 like me you can take a lunch hour to edit photos & create blog graphics, then drop them into any blog copy you have written.,
I've only got two downsides to this app - it doesn't support custom fonts and it's not that pretty.  If you can't find your font in their extensive collection, odds are you can find something similar.  However if you use a custom font there is no way to import that font into the app.  If you're also down for a pretty app - an app that really inspires you to use it - you may find this app a little chunky.  It functions well and is a really intuitive app to use, its just not that pretty.  So if function is more important than form you probably won't be bothered.

All in all this app is a great standalone or companion app to the apps you already use as a blogger.  The logo upload option means you don't have to have the image saved to your phone at all times to overlay in another app.  And the template or profile option allows you to pull branded content in easily.  Super functional app!

Download PhotoMarks here & get your branding on!

xoxo, Moe

8.09.2017

Three Side Hustles for Talkative Bloggers

In addition to the 5 zillion other things I like to do....I like to talk.  I like to listen to myself talk, I like to talk to people, I like to talk to myself, I like to talk when I shouldn't (like at work, not at the movies).  Getting in trouble for talking when there were substitutes in school was like my number one offense.  I just like to talk.  So blogging doesn't always do it for me in the way of expressing myself.  Sometimes I just wanna talk.  
this post contains affiliate links, please read my full disclosure here.
A few years ago I started my YouTube channel and I love uploading videos because I can express myself in a different way.  Most of the time my videos are only a few takes, editing is minimal (unless its a long ass plan with me where I'm flipping through every single sticker I own!)  I feel like I don't have to edit or curate as much.  And the planning is different from planning a blog post.  I don't do as in depth videos as some...but I still think they are informative.

If you like to talk - or want to talk more - here are 3 side hustles for you

Start a YouTube Channel

If you don't already have a YouTube presence, I highly recommend it.  Diversifying your content is enough reason to start!  YouTube is a go-to for a lot of people searching for a lot of things.  So if you have a steady YouTuber presence you'll drive traffic (and income) to your channel but also that traffic will trickle over to your blog.  It is super simple to get started! I use my iPhone, iMovie app + Windows Movie Maker when needed.  Voice overs are done with my iPhone headphones straight into the iMovie app or if I'm doing a screen cast I use my new (super affordable) mic.  Most of the time I'm editing my vids on my lunch break at work.  If I have to, I do a voice over in my car!  Believe me the iPhone headphone mic is perfect.  I've got two videos on how I film for YouTube - this one is an intro to how I film on my phone and this one is my whole set up for filming plan with me videos.  I recently updated my lights to super professional studio lights too.  (They are really affordable on Amazon!)

What I'm trying to say is that it is easy and very affordable to start a YouTube channel.  Consider what you could offer as an extension of your blog/brand or even think about something totally new & exclusive to YouTube for your followers.  The best thing about YouTube is that it sort of promotes itself if you use the right titles and tags.  You can make money by playing ads before your videos & directing others to you site.


Start a Podcast

There are tons of ways to get a podcast out there.  Any medium that will host audio files (or you could film it & upload to YouTube, too) will work.  I just discovered this app called Anchor that you can record an audio file with and share it!  I'm seriously thinking of starting a podcast mainly because I like the idea of talking to myself!  But a podcast is a great way to interview people or host guests with out you all in the same room.  Sometimes I think this is more professional than a group video conference or chat.  You can get a better, more even quality with audio than you can with conference style calls.  So, since I love the way that my iPhone picks up and records sound from my iPhone headphones...I'm assuming recording a podcast can be just as easy as recording a video, you just don't need any lamps or tripods!

If you don't get your podcast on a big platform like iTunes, you will have to do your own promoting.  Anchor does seem to have a social aspect to it but it also seems small in comparison.  However, if you already have a base of followers on social media & your blog you can totally cross promote.  Put a link in your posts or add a call to action somewhere on your blog or website.  Other social media platforms - like Facebook - are a great way to share your podcasts.  You may find it harder to monetize this platform as sponsored casts might not be feasible when you're just starting out.  However, affiliate sales can be a great way to monetize.  I find if I'm talking about what I love & I can link it, that equals some affiliate traffic.  You can also direct listeners to your site, newsletter, freebies, etc in order to gain them as followers & thus more likely to shop your links or products.

Shop Related Products on Amazon

Host a Webinar

Webinars are the new black.  And they are the new way to reach followers!  Webinars are popular because people like to learn.  You can plan a certain class or even re purpose blog content into a new class. Screen casting from your computer is not that hard & it can be free! I use a free software called Open Broadcast Software.  It is compatible with casting to YouTube or to Facebook so you can stream to either platform.  Facebook would be a way to create an exclusive event in a private or closed group but a live webinar on YouTube would be a great way to introduce an established audience to exclusive content you might start offering.  There are other webinar softwares out there but I haven't really researched any for free.  

Webinars are a great thing to monetize especially if you have something super great to offer - how to double your Instagram following, how to do more with Pinterest, etc.  They are great if you're getting into coaching or teaching and want to offer an exclusive community for followers to participate in.


As a seasoned blogger, diversifying your content can help you branch out & earn more.  You may even find a platform your obsessed with!  Remember the old saying 'Don't put all of your eggs in one basket'?  I've got a free ebook on how to revamp your blog while you're at it too.  I have been blogging for nearly 10 years...but there are quite a few things that have slipped through the cracks!  This ebook will help you gain back your blogging mojo if your a veteran & inspire you to keep up the momentum as a new blogger!  Sign up below to grab it!

If you like to talk & you like to plan, these three ways to get your gab on are perfect.  I'm excited to branch out into the last two of these guys.  Podcasts just seem so fun!  More of a conversation, stream of conscious style connecting with followers.  I think it is a great way to connect - I listen to them to sort of get in the head of my favorite bloggers, makers, and creators.  You can also learn a lot from them!

If you've got something more to say, I hope that you start one of these three media outlets.  Do let me know if you do!  I wanna listen!

In what ways do you share new content?  Have you started a new venture?

xoxo, Moe

8.03.2017

How I Turned my Lunch Hour from Nap Time to Power Hour

If you didn't know, I work a regular ol' 9-5 job Monday through Friday.  All the content for the blog is written on weeknights and weekends while I ignore my cleaning list and laundry.  Yeah, I do that.  But recently I've been trying to step up my game.  I've been blogging for nearly 10 years and I think it's time, now, to take it to the next level.
this post contains affiliate links, please read my full disclosure here.
There are only so many hours in a day right? Correct!  However, I just gained one more that I usually slept through!  My previous lunch break was spent in my car taking a mid-day nap - now it's my Power Hour.  I usually go to lunch from 11:30am - 12:00pm & I try to get a few things done that need to be done for the blog.  Mainly this is promoting!  Here's what I do in the 60 minutes I get for lunch while I sit in our company's break room:

Join in on Facebook threads

I am apart of quite a few blog centered Facebook groups.  During my lunch hour I participate in the various threads per day in the various groups.  Usually this involves adding your own link - blog post, Instagram, Facebook page, twitter account, etc - and the following, commenting, sharing other's links.  This is three fold - One, I'm promoting my own blog.  Two, I've got content to share on my other platforms. Three, I'm connecting & building relationships on my platforms.  I think it's super great to connect with others, share their work and have them share yours.  I'm reminded of the Major Arcana card, the Star, in the After Tarot deck.  In this card a woman is in a pool watering herself & watering the ground beside her.  You can see a few streams of the water that is being poured into the ground heading out in various directions.  One stream, however, makes its way back into the pool where the woman is sitting.  So, spending this time giving to others will make its way back to you! I love this card!


Pin all the things

Part of posting in these Facebook groups means that I can share my Pinterest content but also find great content for my boards.  I am a part of a few group boards on Pinterest which I pin my content to and then pay it forward by pinning content from those boards to my own.  One thing I haven't figured out is how to get my feed to not look all wonky by repinning things multiple times to multiple boards.  Pro tip though - pin your blog posts to one of your boards - mine is called Five Sixteenths Blog posts - and then repin those posts from that board.  That increases your repin count!  Pretty awesome.


Share things to the Five Sixteenths | Live Creative Facebook group

While I haven't quite figured out the exact direction of the Live Creative Facebook group, I do like to post things that are inspiring or about being creative.  Being a part of these blog centered Facebook groups means that I can find amazing content to share with the group.  Of course, my hope is that individuals will share my content with their groups, pages, social media accounts etc.


Tweet, tweet, & retweet

I'm not that active on Twitter, so in addition to scheduling Tweets through HootSuite, I use this time to retweet others that I follow & share content from the Facebook groups I'm participating in during this hour!  I can build followers, favorites, and my own retweets as I interact with others on the platform.  My twitter account only has around 400 followers...so it's a goal of mine to grow it a little bit.  I also use the GIF function of twitter as my main way of interacting!

Instagram it up

I promote my blog post or YouTube video of the day & try to promote one other image.  It doesn't take too long to write a caption & add some hashtags.  I am thinking about using an Instagram planning app to make sure my images sort of fit in with my theme on my page.  I've never been one for Instagram themes....my instagram is a hodge podge of everything I'm interested in and I'd like to keep it that way!  But I've found that similar photos fit better & are received better on my page.  I also interact with other accounts that are posted in the various Facebook groups I'm in.

*****

Not sleeping isn't always the way I want to spend an hour of my life in the middle of the day...but it has been helpful.  I've found that it is rejuvenating to focus on something I love for a little in the middle of a seemingly monotonous day.  It also breaks up the day nicely!


The other benefit is that I wasn't doing this before.  At home, I wasn't promoting the blog like this...at home I'd write and do my regular Instagram thing.  Now, by adding this Power Hour into my day I'm gaining more exposure and I don't have to worry about it later.  I've seen an increase in my Pins, page views, and comments on my blog.  The way I found these groups was just by searching blogging groups on Facebook!  Once you join a few, Facebook will recommend more to you.  I've joined and left a few that weren't suiting my needs and I'm always on the look out for more to join.  Some will fit you and give you results...others may be a waste of time.  It takes some trial and error to find groups that work for you!

I hope that you find a way to regain an hour in a day - the lunch hour is the best for me - in order to get things done.  In case you're wondering when I actually eat....I make my food at the end of my lunch hour and eat it at my desk.  Luckily, most of the time the half hour after my lunch isn't too busy once I get back to my desk.  The real craziness starts at 1pm!

Have you reclaimed your lunch hour?  What do you do to fit more things into the day?

xoxo, Moe

7.10.2017

Make it Monday // Branded Blog Image Templates Using PicMonkey

A while ago, PicMonkey introduced Templates to their photo editing options.  These are great for making graphic projects like cards, invites, social media posts.  But, I think the greatest thing you can use this feature for is to create branded blog images!  Pair the template feature with Hub + some stock photos and you've got yourself a consistent look in no time.
this post contains affiliate links, please read my full disclosure here.

Start by choosing a template to work with.  You may want to choose from the Long Pin tag or the Pinterest tag.  To show the template tags (these act like categories) look on the left hand side.  You may have to select Show More Tags to see other options.
Choosing a template that is longer than it is wide is the best way to ensure peak performance on Pinterest.  I used to be a horizontal girl, and it wasn't until recently - like last week! - that I decided to take the leap into vertical images for my blog.  One of the key points to remember when adding images to your blog, though, is to use maximum real estate in the body of your blog post - make your image the width of your body content (learn how to find the width of your blog post here).  PicMonkey limits the width of each of the Pinterest templates to 600px.  If that is too small, you may need to try something like a 6 x 9 inch template, filtering by size.  Additionally, subscribing for the Premium or Supremium account will get you access to many, many more templates (and fonts, and what not!)
Once you've chosen your template, its time to add your image.  Stock photos are a great resource for this if you don't have photos you already take for your blog.  Here's a list of a few stock photo sites I love as well as some tips for using stock photos on your blog.  Today, I'll be using some of the free stock photos I offered here.
Add your image by selecting the butterfly icon on the left hand column, then click on the Your Own button, and selecting My Computer.  You can also use images from Facebook, OneDrive, Flickr, & DropBox.  A little note here - make sure you have permission to use the images you choose commercially.  Free stock photo sites are plentiful, so don't steal any images from google!
Size them, stack them, do whatever you need to do to get the layout you need.  You can also create a collage in PicMonkey first (tutorial here) then upload that collage through the same process.

One of the new features I love is the layers pane.  This places your elements in front of or behind each other to achieve the look you're going for.  Send your pictures behind your text using the down arrow on the pane.  You can also use the Overlay pane to flip the images horizontally or vertically depending on the design you're going for.  I chose to use one image, flipped vertically for this example. 
If you've made a style guide for your blog already, get that info out.  A style guide is a way to keep your blog cohesive, it is in line with your branding.  You'll most likely have 2-3 fonts & colors that you'll use consistently through your blog design, images, and other materials.  Here's another blog post on pairing fonts.
Use these colors & fonts to create a cohesive look to your image.  PicMonkey allows you to access fonts already on your computer as well though their library is pretty extensive too.  If you're designing your blog header in something like PicMonkey you can stick with the fonts they have.  You can even choose fonts that are close enough to the fonts on your template and get away with it.  For example League Gothic is a lot like Bebas Nueue, Didactic Gothic is close to Centruy Gothic, etc.

Change the sizing of the text as needed,  Pay attention to how it looks here - you don't have to be a design pro to understand when something looks yikes!, meh, good, or great.  If it looks off, change it...don't just settle for meh!
Once you have the image the way you like it, select the Save button with the little monkey by it on the top of the screen.  This will save your image to the Hub.  The Hub is PicMonkey's cloud storage system.  This way you can edit the template (or photos) over & over again.  This is GREAT for creating branded blog images!  You can go back to your template, with your custom colors, and your custom fonts again, and again, and again, and again!  In order to access hub you'll need a Premium or Supremium plan - it's totally worth it for the access you get to fonts, overlays, storage, etc.  I currently have the Premium plan that only allows 50 hub images.  If you're just creating templates there's really no need to save the image you create every time so you may not even use up the 50 images.  If you create a lot of brand images, the Supremium plan will allow you to categorize your images through Hub.  I suggest upgrading!  You can start a free trial too! Sign up here!

To save the image to your computer, click the Export button at the top.  This will save the image locally to your computer or you can choose either DropBox or OneDrive.  Next, upload the image to your blog post, size it properly, and you're ready to share!  When you're ready to add an image to your next blog post, simply open the image from Hub, Save it as a copy, and edit away! Easy peasy...no complicated software to work with.


I've recently created a FREE ebook called Five Ways to Revamp your Blog Today!  This 10 page book will give you great tips on reviving old posts, automating your process, and keeping you on the right foot!  You can download it by signing up for the newsletter above or by clicking here!

I hope this tutorial inspired you to try PicMonkey for your blog branding.  Its always hard when you're new to something to get a grasp on the process.  PicMonkey makes it super easy to create perfect Pinterest images with out shoveling out hundreds of dollars on design software.

Check out even more of the tutorials on the blog using PicMonkey here!

Happy blogging!

How do you use PicMonkey? Let me know in the comments below or over on the Five Sixteenths Blog | Live Creatively Facebook group!

xoxo, Moe

6.08.2017

Boost Your Blog // 5 Tips to Optimize Mobile Blogger

Back in 2015, Google announced that it would add mobile optimization as a search engine ranking.  Meaning that if your site - like your blog - wasn't mobile friendly, that would affect its ranking in a search.  This solidified the fact that mobile is king, baby.  The Blogger platform (read why Blogger isn't bad for bloggers here) makes it super easy to optimize your blog - simply enable the mobile template - but when you do, you'll get a serious case of the generic website blues.  I'm here to tell you that you don't have to hire a blog design wiz to get the most out of your mobile blogger template.  There are some edits you can do to spruce up your online space.
5 Mobile Optimization Tips for Blogger
The mobile template for Blogger is pretty simple - header, page list, posts, footer/attribution.  You'll see a little bit of your CSS come through with in the posts title and link colors but you won't get the full effect of a mini, mobile version of your site.  You'll have to do a little bit of behind the scenes work.  Even if you're not an html maven, you can get these done rather easily.  Before you start be sure to back up your current theme by selecting Theme from the sidebar of the dashboard and then selecting Backup/Restore in the upper right hand corner.  Anyway, here's how to make your Blogger blog better optimized for your readers:

Enable Mobile Template

If you haven't already done so, enable the mobile template for your blog.  From your Blogger dashboard, select Theme.  Under the Mobile section select the gear option.  Check Yes to show mobile theme on mobile devices and from the drop down menu choose Custom to adapt your current design for the mobile platform.
Enable Mobile Template on Blogger
Once you've done this you can check out your mobile site on your mobile device or by typing in /?m=1 after your web address on your desktop computer.  You can also use several Chrome browser options and extensions (like this one) to test your mobile site across many devices.  It might help to call up some friends and have them take a peek at your site to see how it looks on their device too.

Show/Hide Widgets on Mobile Template

Blogger defaults to showing only a few widgets from your blog on the mobile site.  You'll have your blog title, page list, & blog posts.  For readers to get the most from your mobile site you'll want to add a few more widgets to give them the full experience.  The most successful blogs I've seen & the ones that speak to me the most as a reader have an about me section, popular posts, and a social feed.  This keeps your readers engaged with your site - if they have another place to go on your site and they can easily find it, they are less likely to leave!
Hide or Show Widgets on Mobile Blogger
Identify the widgets you'd like to show on your mobile template.  I've found that widgets from the side bar will appear after the blog post list or blog post itself.  That is followed by any widget from the footer.  From the Blogger Dashboard, select Layout.  Click Edit next to the widget you want to show on mobile.  In the pop up window, select the URL at the top.  Use the arrow keys to find the end of the URL.  At the very end of the URL is the widget ID - something like HTML10, etc.  Make a note of the ID & close the window.
Adding Widgets on Mobile Blogger
Once you have made a note of all the HTML widgets you'd like to show on mobile go to the Template and select Edit HTML.  From the Jump to Widget drop down box, one by one select the widgets you'd like to show.
Adding Widgets on Mobile Blogger Template
Add in mobile = ' yes ' (no spaces) after locked = ' false ' to show the widget in mobile view & desktop view.  If you want to only show a widget in mobile view add mobile = ' only ' in the same place.  To remove a widget from mobile view either remove the whole mobile = ' ' clause or add mobile = ' no ' instead.  Check that your site performs the way you wish.


Enable Labels & Tags

Mobile blogger does not show the labels and tags you've given your posts.  This is another way to keep readers on your blog and not moving away from your page.  Bounce rate is a real thing!  To enable the labels on your blog posts go to Template > Edit HTML.  Click inside the HTML box & use short cut keys ctrl+F or command+F to bring up the search box.  Paste " post-footer-line post-footer-line-1 " in the box and hit enter.  

Right after :
<div class='post-footer-line post-footer-line-1'>
 Paste :
<span class='post-labels'>
<b:if cond='data:post.labels'>
<data:postLabelsLabel/>
<b:loop values='data:post.labels' var='label'>
<a expr:href='data:label.url' rel='tag'>
<data:label.name/>
</a>
<b:if cond='not data:label.isLast'>
,
</b:if>
</b:loop>
</b:if>
</span>
Open your blog on a mobile device and verify that your tags show up under the post.  The key with tags & labels is to use them responsibly.  The tags/labels section is a place for you to categorize posts on your blog.  Labels are most successful when there are 3 to 5 labels listed.  These links will direct to readers to other posts of the same category.  For example, all DIY posts on the blog are labeled with DIY but these posts are most often on Mondays meaning they are also labeled with my Make it Monday tag.  That way readers will click DIY to find DIY posts but maybe click Make it Monday to find all posts I've done on Mondays.  Decide the few tags & labels that will work for your blog.  I talk more about labels & tags here.  This tip on showing labels on mobile is from Techchubber, a helpful resource for blog tips.

Change Mobile Thumbnail Size

What bugs me the most about the mobile blogger template is the tiny thumbnails on your main page when visitors head over to your website.  They are too small to really get a grasp on the post and just look very unprofessional compared to other mobile sites.  I found this post on Carrie Loves that helped me increase the size of my thumbnails and she will give that a much better explanation that I ever could.  It is super easy to do.

I have yet to find a tutorial on how to change the image quality on the actual blog posts.  They seem to be very low quality even though the image uploaded is a high.  It seems the images want to pull from a lower quality url (if you see /s280 in the img URL it is generating a lower quality/size image).  I looked around and tried various codes for like 6 hours....still cant get it to work.  This I guess is something for another day.

Elongate Post Titles

In the original mobile template the post titles are shortened and don't reflect the custom fonts & sizes you may have on your desktop site.  Customize this by selecting Theme > Customize, then scrolling down to Advanced>CSS and entering the code below:
.mobile-index-title {
margin-top: .5em;
margin-bottom: .5em;
width: 100% !important;
font-size: SIZEpx !important;
font-family: FONT NAME!important;
color: #HEXCODE!important;
}
Customize Mobile Blogger Post headers
Replace the SIZEpx, FONT NAME, and HEXCODE with the size, font, and hexcode for color that correspond with your post header attributes.  Additionally, if you've added any text transformations - like I have for an uppercase effect - add that CSS customization as well. If you can't find these easily, if you use the Chrome browser you can right click and select Inspect to see the attributes 
The right click to inspect tool is something I use a whole heck of a lot in Chrome.  It is my favorite browser for this!  I think other browsers have implemented this too - I used to use it in Internet Explorer, I think, but was unable to use it in FireFox way back when.  It is very helpful to access any hidden things that I may not be able to see in Blogger's template editor.  Pretty nifty tool.  This tip I found on Blogging Prince and I think it really bumps up the professionalism of a Blogger blog.


Easy-peasy isn't it?

These 5 tips will get your mobile blog looking pretty fly and give readers a good place to land.  The whole point of adding these things is to give your reader a similar experience on mobile that they would have on your desktop site - they easily know who you are if they are stopping by for the first time, they can easily direct themselves to similar content on your site, and they can see your social feeds.  If you have ads on your site you may want to consider adding this into your mobile site as well.  Personally, I find that ads are secondary to what I want a reader to gain from my site.  I use affiliate links in my blog posts so having ads show is just over kill, for me.

Hope this helped you get your Blogger blog to be an aesthetically pleasing powerhouse on mobile.

How did you optimize your blog for mobile devices?  What tips do you have to share?

xoxo, Moe

5.11.2017

Boost your Blog // How to Gain Respect (as a Blogger)

I originally titled this 'How to get people to like you (as a blogger)' - while that's super click-baity, I realized it's not that great for SEO!  In today's post I'm going to share with you how to be liked as a blogger in three easy steps.  Why?  Because there's no secret to it.  You're probably already like this in your everyday life and people - your family, friends, strangers in Starbucks - already probably like you for it.  This isn't just about a popularity contest - this is about building a relationship with your readers.  How to get readers to trust you, believe you, and see you as an authority in your niche.  We can all write blog posts about anything - but how can be we be seen as that blogger for something specific?
Gain Respect as a Blogger

Be Honest

First and foremost, be an honest person.  Share your experiences, honestly.  Share reviews, honestly.  Don't sell your self out to being paid for good or positive content.  You friends probably appreciate your truth to them, so give that much to your readers.  One thing that I've learned in my blogging journey is to say no to opportunities more than I say yes.  There are quite a few sponsor opportunities that I know I wouldn't be able to fulfill honestly.  I could do them.  I could make the post.  I could meet the requirements....but I wouldn't be proud of the content.  It has taken me a long while to realize that just because I can write a post doesn't mean I should.  Present to your readers in the way you'd discuss something with your friends.  If you wouldn't be able to casually talk about the topic with your friends.....you might not be able to easily create a blog post where your language seems casual and normal in comparison to your other posts.


Be Knowledgeable

You've probably started a blog because you want to talk about something you know about.  Great!  That's a good start.  Keep that in mind as you move through the life of your blog.  You may find yourself wanting to fit in and talk about a certain topic.  Are you knowledgeable in that topic?  If not, and you want to be, share your learning journey.  You readers will appreciate reading about how you learned what you know, some tips and tricks from a current learner, and reasons to star this certain topic from a seasoned pro.  However, if you think posting on a certain topic is an easy way gain page views and popularity while you're not really into putting in the work to learn more about the topic - consider generating posts on another topic you're passionate about.  Readers want to know inside tips, tricks, and personal experience.  Regurgitating facts can only go so far.  Don't be the click bait with no follow through.

Be Genuine

This is different than being honest.  Being honest is being free of deceit, while being genuine is being fully and completely yourself.   Don't sugar coat your life and perpetuate the notion that all bloggers have beautifully styled lives, because (honestly) that breeds jealousy.  Be a real person, with real flaws, and real messes.  Be a relate-able person with real experiences and opinions that correlate with your personal beliefs.  I find it incredibly hard to balance a persona different than mine so I choose to be the real me online and cultivate relationships that way.

These are the three things I strive to achieve in every post and these are traits that I like in other bloggers.  I strive to be the truest me....so I think you should strive to be the truest you.

There's not secret to being liked - be a good person, be just, and be honest.  It works online and off.  If you want to read more blog tips - both practical & unconventional - check them all out here.  Looking for a genuine place to hang out with fellow creatives?  Join the Five Sixteenths | Live Creatively Facebook group!

xoxo, Moe