Showing posts with label Colour Lovers. Show all posts

3.09.2015

Make it Monday // DIY Patterned Pocket Scrapbooking Cards

One of my favorite things to hoard are scrapbooking supplies - even before I started doing Project Life!  I've always been in love with scrapbooking supplies and one of my biggest problems was using them up.  I love the all the patterns and packs you can find, but I am always afraid that I will use the scrapbook paper in one layout and the immediately regret it.  I'm not good at committing I guess.  That's one thing I love about doing Project Life - you can change things easily as you make a layout.
This post contains affiliate links, please read my disclosure here.

But to solve the problem of my hoarding I've been making my own cards so I can print them again and again as I feel like I need them - that way I never run out!  In the sets I offer for free each month I like to include at least one or two fully patterned cards.  Today I wanted to share with you how to make different patterns using different online pattern generators a long with my all time favorite online mini design power house - PicMonkey!  (You can find some other DIY tutorials for making pocket cards on my blog here.)

Supplies - PicMonkey.com, printer, card stock, paper trimmer or craft knife and ruler, various pattern generators as mentioned below.

Create patterns with a pattern generator
First there are three pattern generators I want to mention - Tartan Maker, Stripe Generator, and BG Patterns.  Each of these creates a custom background based on the hex code corresponding to colors that you input.  I use ColourLovers to find palettes (or create palettes - tutorial here) and use those hex color codes in the patterns.  The hex code is the six digit combo of letters and numbers that correspond to colors.  ColourLovers gives you both the hex value and the RGB value of the colors in your palette.
Each website operates nearly the same, but for this demo I'm going to show you Tartan Maker.  There are many values you can play with - direction, yarn size, colors, etc.  Simply copy the hex code from ColourLovers and past it into the text field on Tartan Maker.  You can also use the color picker by clicking the solid color boxes next to the hex codes and picking a color you like.  Once you've input your values, click the make it over the preview.  You'll see a live preview of your pattern.
If you download this preview you're only getting a small tile, since we aren't in art school and no one will get mad at us, aaaannnnddd this method is totally acceptable for this project - we're going to take a screen shot.  Find the option to go full screen on the website and take a screen shot - If you're on a Mac Command+Shift+3 will take a screen shot and immediately save it to your computer.  If you're on a PC you'll use the Print Screen key and paste the image into a program like paint and save it.

Create and find patterns on ColourLovers
Another really cool place to find and create patterns is ColourLovers.  Using the search bar you can search for different patterns.  Use creative keywords - not just dots or stripes - because you never know what you might find.

Once you find a pattern you like, you can either download the 1600x1200 images under the share this pattern menu on the right hand side or you can color it yourself (by clicking color this pattern under the pattern image) with the hex codes of your color palette.
You can also use the create button to make your own pattern with different shapes.  These can get super complex or be super simple.  Make sure you change each shape to a different shade of gray so you can color each shape a different color when you save your pattern.  You can do this by clicking the square box of color under the layers menu on the left hand side.  The pattern maker is a fun tool to play around with.
Once you save your pattern design, color it with your hex codes, save it, and download the 1600x1200 image.  To create patterns and palettes you'll need to create an account.

Creating the patterned cards
Since PicMonkey is my favorite site for easy designing, I'm using it again today!  To create the cards open your patterned images or screen shots in PicMonkey.  
Using the crop tool, crop to the size you'd like.  Personally, I think that the 4x6 cards are great as plain patterns but creating 3x4 cards with patterns and text is pretty cute too!  Once it is cropped, use the rotate tool if you need to.
I used some fonts and overlays from the Royale feature of PicMonkey but the free version has some amazing fonts as well.  This powerful mini design machine is only $4.99/mo or $33/year.  Love it!
For the blue Spring card I used a pattern from ColourLovers, same as the Remember This card. 
The plaid card was made with the Tartan Maker.

Repeat this step with all the patterns you could ever think to make!  Save your images as a .jpg and print them how you wish (I use Picasa).  Trim them and slip them in your scrapbook or even use them in the Project Life app!

How do you get creative with your favorite supplies?  Any other tips you have for Pocket Scrapbooking?

xoxo, Moe

find more PicMonkey tutorials here!

oh, ps - if you want the set of three I designed for this post, click here!

10.06.2014

Make it Monday // Design Journaling Cards Using your iPad

A lot of my DIY inspiration has been digital recently.  A few weeks ago was a DIY desktop background to keep your organized using PicMonkey, then a few weeks before that was using overlays in PicMonkey.  Well now I'm onto using some apps on my iPad to get creative digitally.  I don't know if it was the recent release of the new Project Life app (side note: would you like to see an app review on that one?) or what but I've been feeling making some digital project life cards.  Of course, with any card you design you can totally print it out as well but sometimes it's fun to change it up a bit.  If I'm already creating a page on my iPad might as well use the same tool to make some cards!

For this DIY you'll need to spend a few bucks - the Stackables App is $0.99 in the iTunes App Store and TextMask is also $0.99 in the App Store (there is a TextMask lite, though I haven't played with it yet but you can check it out here, it's free!).  If you're not down for dropping two bucks for this DIY, I totally get it.  You can use the grunge option in an app like Snapseed, though you'll have little control over layers, opacity, and the like.  You can also use an app like Pxture for text masks that is also free.  If you already have Rhonna Designs on your phone ($1.99 in the app store) there is also text mask option there, too.  I chose the Stackables App and TextMask because they are apps I'd already invested in and have a lot of design options.  So if you're interested in dabbling in design these apps have a lot to offer when it comes to control.  Anyway, onto the tutorial.

First, from your iPad and an internet browser (Chrome, Safari, etc) go to the website ColourLovers.com.  I love this website for finding patterns, colors, and palettes when I'm starting a project.  (I've used Colour Lovers a lot on the blog, mainly in the Boost Your Blog section!)  Start by using the search bar to find a color you love.  Of course, I'm partial to purple which is what I used to create this card.  But for this one I want a deep pumpkin color.  (btw: I didn't crop out all the tabs I had open!  Can you tell we're shopping for a new dryer, trying to learn about casting, and are on Reddit a lot?)
Once you settle on a color, from the right hand side of the screen download the largest size possible of the color, usually it will be 1600 x 12000.  You want the biggest size so when you crop out the water mark on the bottom you'll still have enough resolution to print in wether you want to print the physical card or the final page created in the Project Life App.
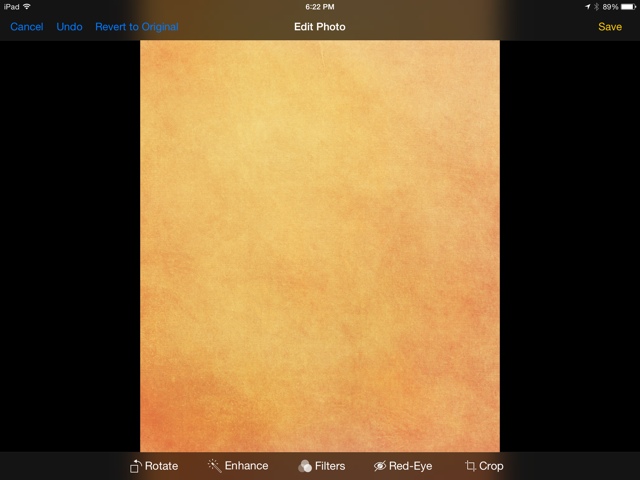
Once you've saved the image of the color you've chosen, open your camera roll and crop out the bottom watermark from the Edit option.  Use the original ratio and only crop enough to get rid of the watermark.  Don't crop too small or you will reduce the resolution.  Save the edits
Open the Stackables app.  Open your color image in the app.  You'll be asked to crop the image.  Skip this step by tapping the green check mark in the upper right hand corner.  You'll see on the left hand side is a column, this is your layers column.  On the right hand side you see a column with the textures.  To unlock some textures you'll need to follow Stackables on Instagram, others you'll need to buy.  But with what is provided in the app, you get a lot.
On your first layer, play with the textures on the right side.  Once you find one you like and want to keep, add a new layer by tapping on the + button in the lower left hand column.  Add another texture, and adjust the opacity with the slider on the bottom.  Once you're satisfied, add another layer.  Play around like this until you get a nice texture style going on that you like.  Make sure to add a new layer each time you want to try something new.  The whole point of this is to build up a bunch of fun layers.  I find that I can get a sort of watercolor effect by layering and playing around.
You can then use the menu at the top of the screen to scroll through textures, filters, color gradients, patterns, basic edits like brightness and exposure (this app is intended for photo editing but I like using it this way much better!), and your formulas.
If you like what you've come up with - your texture layers, etc - you can tap the green box in the corner and select Save Edits as Formula.  This way you can apply the same edits to the next image you work on.  If you're fully satisfied save your image to the camera roll.
Open your image in the Camera Roll again.  Crop again by selecting aspect ratio.  If you want to make a 3x4 card, select that 4x3 option and rotate vertical - but your image should already fit those constraints.  If you want a 4x6 card, select that option and this will crop your image to fit the correct size. Again, don't crop out too much as you still want to maintain the highest resolution.  You're not working from the most professional software here.  Make sure to save you're edits.

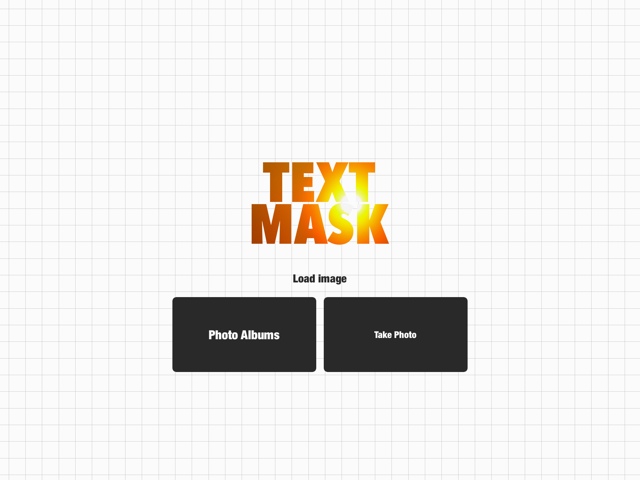
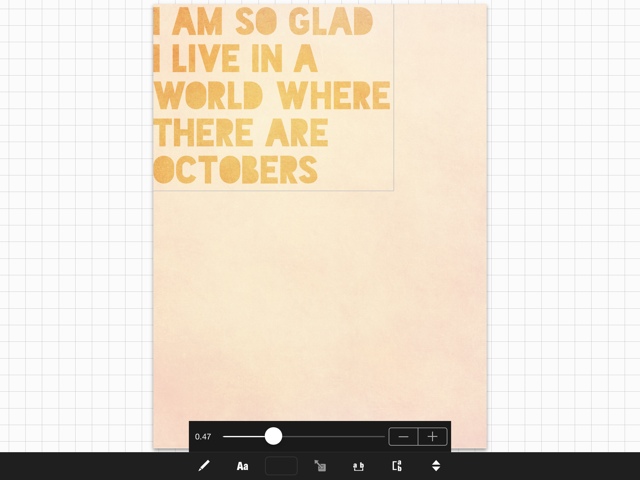
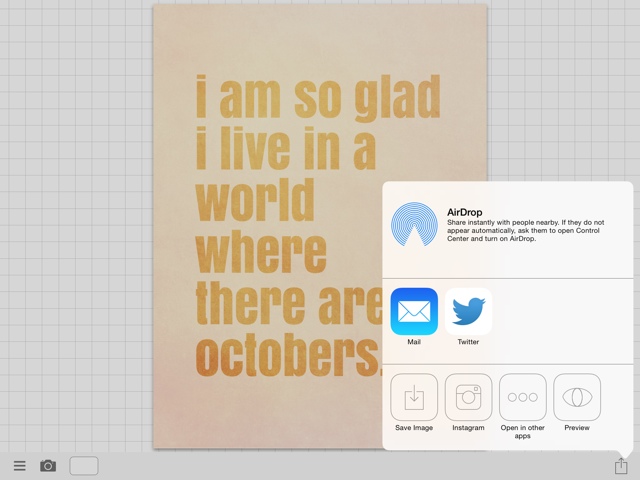
Now, open the image in Text Mask.  This app will give you the amazing mask effect and let the texture you just created show through.


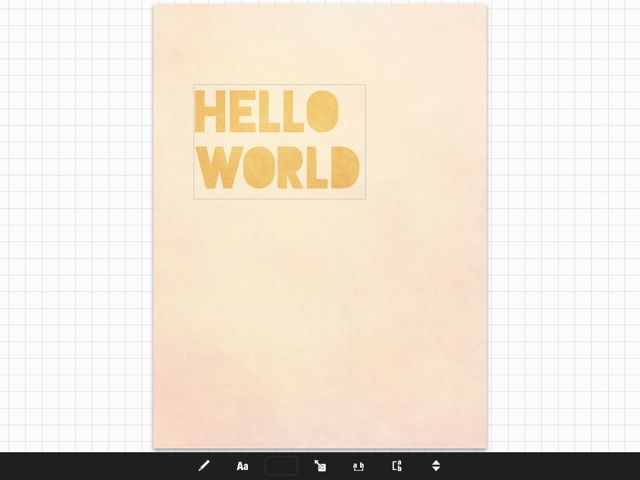
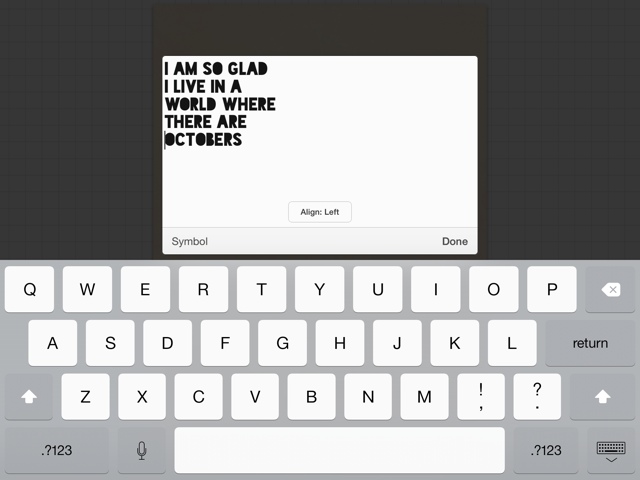
Add your text by selecting the little pencil icon at the bottom of the screen.  I pasted my text then formatted it the way I liked it.


You can change the size by tapping the square with a little, double ended arrow.

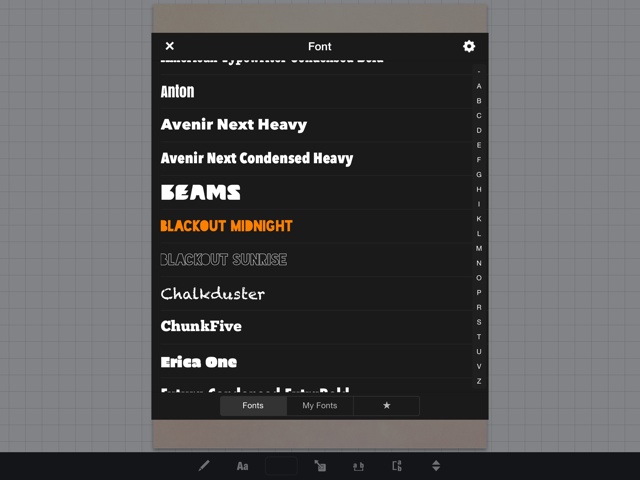
And change the font by selecting the Aa icon.  If you connect your device to your computer you are able to transfer fonts to use in this app.  (Here are the instructions.)

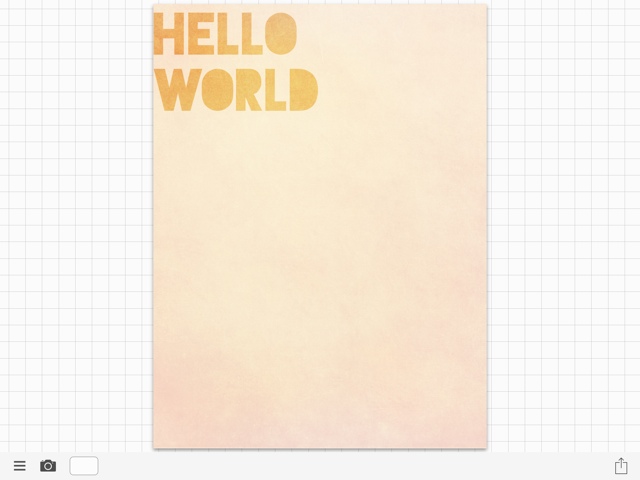
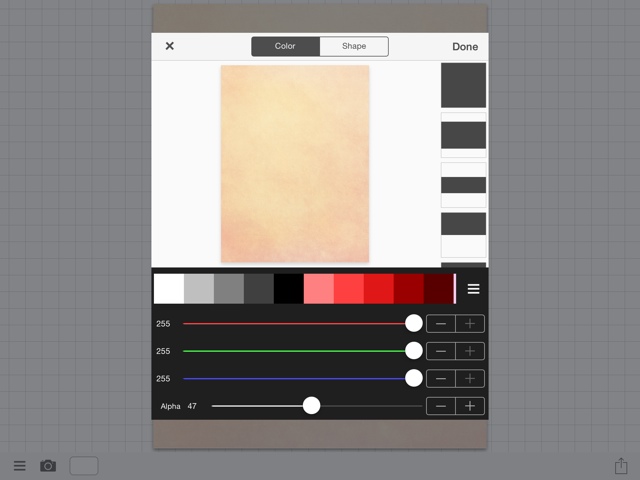
You can adjust the opacity of the mask by tapping the grid space outside of your image, then clicking the white rectangle near the camera icon.  The bottom slider called Alpha works the opacity scale.  You can also change the color of the mask from this screen.

If you poke around in this app you will find a ton more design features, fyi, so sit down and play around!  Now save your image to the camera roll.  Keep the app open and play around, saving as you go so you can have all the images you find interesting.
There you go!  Now you have a fun journal card that has a watercolor type feel.  These two apps give you a lot of design power for $0.99 each.  For a $2 investment you can create personalized cards for your digital - or print - Project Life or pocket scrapbooking projects!

If you want to print the cards you've made you can email the images to yourself - or use fancy DropBox, Google Drive, etc to get it from your device to your computer - and use this tutorial to learn how to print 3x4 cards easily with Picasa.

If you'd like to download the card made using the tutorial, click here for the image.  Just right click and save image.  You can get an 8x10 print, 3x4 journal cards, and iPhone 5/5s background of the pink card in this post.

How do you create digital products to scrapbook with?

xoxo, Moe

10.27.2012

Inspiring Colors // Colour Lovers

Here we are Saturday's post. I have been soooooo darn sick it's not even funny! I've been working on some orders & decided to let the blog slip a little for the past few days.  I think I'm coming out of the sickness though.  Sheesh, I really don't like being sick!


For this Saturday's inspiring colors, since I've been laid up in bed, I thought I'd find some good looking combos on ColourLovers.  You can see a few posts here on how to use ColourLovers for your blog like making color palettes & headers.


Right now I am loving delicate, feminine, fall, preppy colors.  Weird, I know.  But I've been drawn to these color categories & it's evident in the designs that will be launched in the shop in Novemeber.  I am actually pulling everything but blog & graphic design stuff out of the shop.  If you want a sneak peak of where it will be on January 1 as I reorganize, you can click here.


Connect on Twitter // Follow on Pinterest // Peep me at Hello Cotton

3.08.2012

Pinterest Color Palettes // Identifying Themes

Creating an online directory of all the lovely things you've ever even thought about liking isn't the only Pinterest is good for.  The other day while scrolling through my pins, I realized that there were definite color patterns that emerged!

Apparently I've been obsessed with color lately & I love finding ways to document color.  While scrolling through my pins, I realized that the things I pinned on certain days (or weeks even) all had a common color theme.  This is great for discovering your style.  If you are planning to redecorate a new room, looking for a color for your wardrobe, or (my favorite) planning a blog design, creating a color pallet from your pins is a great tool.

You can do this in your specific boards, too. You don't have to scroll through your entire pins like I did.  If you know you want to redecorate, why not focus on the board with Home Decor inspiration.  If you want to discover a great color for your wardrobe, scroll through your Style pin board.  The possibilities are endless.  In fact this would be great if you couldn't decide on your wedding colors! Oooooh, I am going to plan my wedding right now even though it is no where in sight :)

I am going to share with you a few palettes I've noticed through my own Pinterest boards.  I just scrolled through & took a screen shot when I noticed a color scheme that emerged.  I then used my fave website Colour Lovers to make the palettes.  Throwing them into my Photoshop Elements program I came up with some lovely themes:


All images can be found by scrolling through my pins here
This exercise is great if you want to get a feel of your aesthetic.  Identifying the colors that you are drawn to will help you keep your style or tastes in mind. You should see a theme emerging!  You can print these color palettes out or even pin the preview of your color pallet to throw in with your inspiration boards.  Doing this every once in a while will also show how your tastes in color have changed. You may see that colors change for the seasons, by your mood, etc.

Learning more about your visual style is a great afternoon activity, it helps me to stay true to myself & keep with my style here on Five Sixteenths & in everyday life.  Pinterest is a great way to get to know yourself better!

How do you use pinterest to identify your style?