Showing posts with label planner tips. Show all posts

5.13.2020

5 Mommy Routines to Track in your Planner

As a new stay at home mom, there are several things I didn't know I'd need to keep track of in my planner!  With a little guy at home my routine has been shaken up, to say the least.  And then every dang month the routine changes.  Of course this is how it goes, right?  But when you're thrust into this for the first time, plus add in mom brain on top of that, keeping track of things can get daunting.
this post contains affiliate links, please read my full disclosure here.

I'm a planner girl and a planner person by nature.  With Marcus home for the first 3 months I was searching for anything that would give me a sense of structure.  It wasn't until he was about 4 months old that we got any semblance of a routine.  Then we were throwing starting food in the mix, gotta brush the teeth, now we're eating solids 3x a day, AND at one point he had a prescription to take.  That's a lot of stuff for one mamma to handle.  I've got like 77 habit trackers in my planner right now!
Before we dive into the 5 routines stay at home mom's should track in their planners I want to share with you two things: first, check out this video on how I made a daily routine page for Marcus at 6 months & second, check out this post on tracking spirituality in your planner because some of the tools can be the same.  But lets jump into the list.

Cleaning Routine

If you've been following the blog for a while you'll know that one of my biggest goals EVER is to have a sustainable cleaning routine.  I've got post after post on cleaning here on the blog but my two favorites are this one on creating a cleaning routine and this one on the 3 Waves Cleaning Method.  Just like with the old house, when we moved I broke our new house up into zones or sections and clean one zone a day.  I created a routine page for my planner and then each day I clean that zone for 30 minutes.

Morning/Evening Routine

Getting ready and unready for the day can really set the tone for yourself.  Waking up with intention and going to bed with intention can mean you get the most out of each part of the day.  I have a few chores I like to get done before the baby wakes and after the baby goes to bed.  It is also important to prioritize your time and couple time when you're a mom (or a dad).  Baby's shake up a lot of stuff and getting down a simple morning and evening routine that can revitalize you is important!

Feeding Schedules

I am obsessed with structure.  This is hard to manage when naps and appointments and big poop blow outs can throw things off.  But you can create a general daily schedule for yourself and the baby to track in you planner using hour stickers, daily pages, or an hourly planner.  I have a loose idea that Marcus will wake up at 7 am and eat, then eat cereal at about 8:30 am, then go down for a nap around 10 am.  I started with an app on my phone when Marcus was born to kind of gauge his schedule, but again it didn't get really cemented until about 4 months.  So don't stress about this in the beginning!  I don't want you to get stressed out when the baby's needs are all over the charts but I can understand the need for some semblance of a schedule.

Bath Time/Teeth Brushing

We bathe Marky boy everyday as a part of his night time routine.  (Night time routines are important for babies, why the heck wouldn't they be important for us!?!)  But not everyone does.  The Happy Planner has a Pregnancy sticker book with bath time stickers.  Use these to mark the days you give the little beeb a bath.  Things can get busy so maybe you can't bathe them one night.  If you start to track it then you'll know if you've gone a little two far between baths.  Marcus has just broken two teeth so we've been starting to brush his teeth and gums.  I can't tell you how many times I've forgotten to do this though!  So I have a habit tracker dedicated to it in my planner now!

Meal Planning

Of course we all know at the end of a long day - whether you're a stay at home mom or work outside of the home - the last thing you want to do is make dinner.  I stink at this right now but meal planning is a great thing to track in your planner.  Use something like a weekly sticker to write out what you're going to make and track the use of leftovers.  I've not been doing this like at all!  Even at the beginning of the day I don't want to think about dinner! And now that Marcus is eating food I've got to think about feeding him too?!?! I share in this post 3 ways I prep food easily for him.


Being a new stay at home mom has created a new routine for me and I need to keep track of it!  Whether you use different stickers for different routines or a planner layout (like the Teacher planner layout), tracking what needs to be done when can give you an idea that you've got your day under control!  I really have loved creating these little daily schedule pages for my planner.  Marcus is constantly growing so it's been wonderful to see how his schedule has changed as he's grown.

What mom life routines do you track in your planner?

xoxo, Moe

listen to this blog post below:

1.13.2020

Best Sticker Books to Bullet Journal your Planner

If you've been following me for a while you'll know that my current favorite planning system comes form The Happy Planner.  The Happy Planner was introduced in 2015 I'm pretty sure and I've been using it since at least 2017.  I posted this unboxing/review video in November of 2015!  Can you believe it?  
this post contains affiliate links, please read my full disclosure here.

The Happy Planner has come a long way since 2015 with both their planner styles and assorted stickers.  I have no idea exactly how many sticker books they've released but it's a flipping ton! I remember when their tabs weren't laminated and we all came up with hacks to make them sturdy.  I also remember when morning, afternoon, and evening were printed on the side of the columns.  I also remember when their stickers were really glossy and thick.  The best adjustment Happy Planner made was to make their stickers thinner and on a matte paper so we could write on them better.  The planner community and planner brands have seen a glow up since 2015 (remember how crappy the Webster's Pages launch was and how crappy the planners were?  They have become a leading planner company too!)

In 2020 I am going to completely Bullet Journal my planner by using the oodles of filler paper I have and the bazillion sticker books I own.  My goal this year is to not buy any more planner supplies!  Lord knows I don't need any more stickers!  Creating your own planner layouts is super simple especially with the amount of sticker books The Happy Planner has created!  Here are the Top 4:

A Color Story Books

These books are great because the stickers are already curated for you.  These books are great for beginners too because of the curation of the stickers.  If you're not too sure about creating layouts and using different elements these books offer full decorative boxes, empty boxes for appointments, and some deco all curated together.  With these books you pick a few pages and use the elements there.
Sometimes I get overwhelmed when flipping through and entire themed sticker book like Simply Lovely because there are so many elements that can be used.  With the A Color Story books you get 4 pages of coordinating stickers so you don't have to figure out what really goes together.  You can also create one of my favorite planning trends - the sticker cluster!

Journaling Stickers

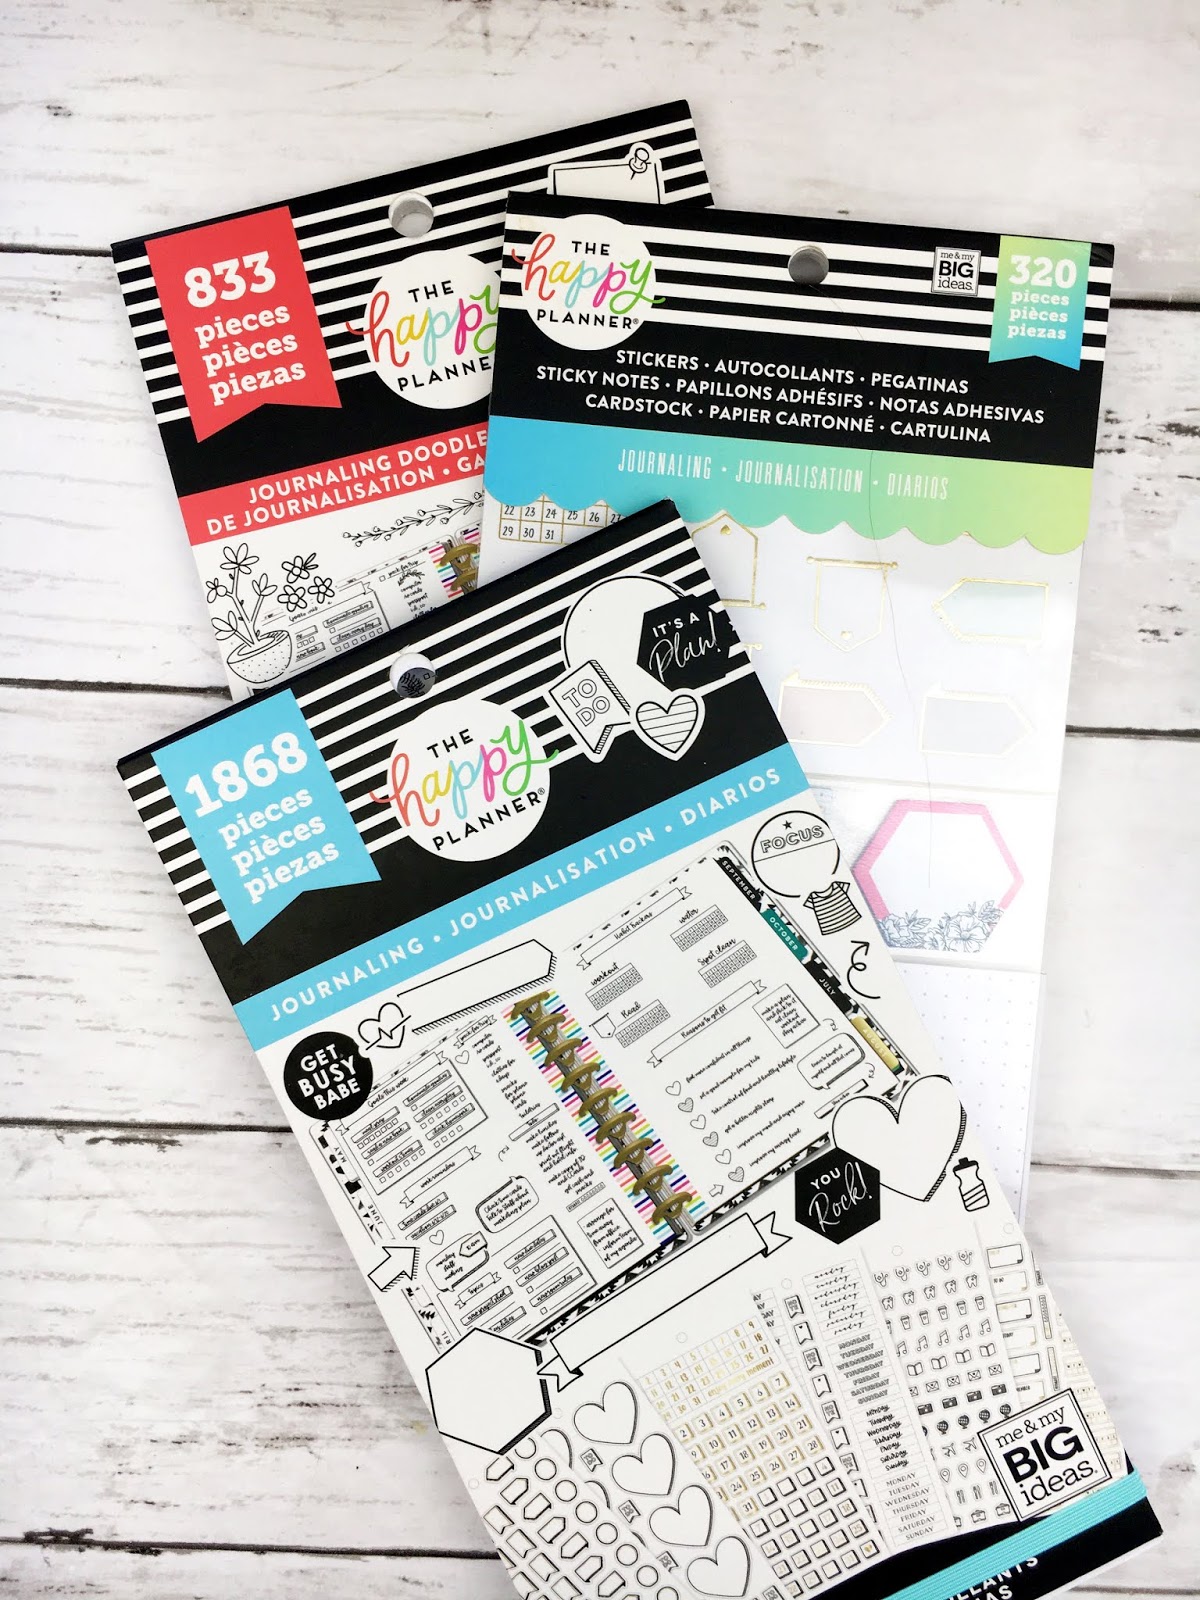
Bullet Journaling is traditionally done with just a pen.  Some use highlighters and color coding but the majority of the spread is in pen.  The Happy Planner came out with a few journaling sticker books that can help you achieve that aesthetic with out having to doodle everything!  These sets have functional habit trackers, dates & days, boxes, etc but the book also have cute doodles to spice up your planner spread.  Since they are black and white (or have a little bit of gold foiling) you can keep your spread basic or color in the elements.
I've seen planner peeps create mood trackers out of some of the elements and then color them in daily.  I use these books mainly for the days and the date stickers but I'm hoping to branch out to a pen only spread!


Brights Sticker Book

Another sticker book that offers a lot for bullet journaling is the Brights sticker book.  This one has days of the week and number stickers for dates but it also has some washi style stickers that can help divide your page and some tabs to help you break up or section off your planner.
This is one of the first books I thought of when it came to creating a bullet journal style.  Like the name of the book says, the stickers included are very bright but still pretty functional.  If you had to get one sticker book to start you off on creating your own layouts I'd say grab this one because it's got so much.

Dates & Holidays

An essential part of creating your own layouts is having numbers and months to add to your planner.  These books allow you to create some fun monthly layouts since they have the months of the year and some holiday stickers.  You could knock out all of your monthly layouts in one sitting (or a couple, it take a lot to make these damn spreads!) without worrying which stickers to use.
Plus you'll achieve a more cohesive look across your planner when you use the same type of stickers through out.  Sometimes that is important to me because I love consistency!  There are ton of dates and holidays type stickers too and if you've ever gotten (and *ahem* not used) various extension packs, those work too.

I'm so excited to use the Happy Planner stickers and filler paper to make my own planner in 2020! The Happy Planner system offers so much customization its inspiring.  You can check out my first bullet journal spread of 2020 in this video and you'll peep a quick view of my classic happy planner set up.  Be sure to subscribe to see more planner layouts this year!

Want more planner blog posts? Check them all out here.

What are your favorite sticker books to use?

xoxo, Moe

9.06.2018

How to Write Actionable To Do Lists (and Why You Should)

To do lists are a big part of my planning routine.  They don't usually reside on my weekly pages (though there are exceptions to the rule!) because I like to write specific and actionable lists - so I break things down.  This requires extra space in my planner - either graph filler paper, extra inserts, or sticky notes.
this post contains affiliate links, please read my full disclosure here.

If you've ever looked at your planner and felt complete overwhelm, then an actionable to do list might be something you should focus on.

How to Write Actionable To-Do Lists

Brain Dump

First, you may find there's too much in your head to keep anything straight.  Make it a habit to brain dump all your thoughts & to do's into one master list somewhere in your planner.  This is going to be the place you turn to when you need to get it all out...it will be your master list (and it will be messy!).  Give yourself permission to get messy, scribble, and get it all out.  From here you can prioritize and even eliminate.  Refer to this list often - you will add to it and you will subtract from it, but you may also find you will eliminate the things that are either no longer important, not worth your time, or are unnecessary.

Get Specific

From your brain dump it is time to get specific.  Which projects are you working on?  Which big tasks can you see?  This is especially helpful if you're running something like a blog - instead of marking down write posts, get specific and write down exactly which posts need to be written.  Then you can, again, prioritize from there.  It may help to have a few different sections in your brain dump area - one master list, then other lists around certain areas of your life.  But don't make this too complicated.  Come up with a method that works that you can quickly refer to and fill in as time goes by.  Make it something you'll actually use.

3 Action Steps

Once you've prioritized your list - like outlined the specific posts you'd like to write on your blog - then you can get to the action steps.  I am a big fan of 3 action steps under each to-do.  This helps you realize exactly what needs to be done & shows you your progress as you move through the steps.  It also makes completing the whole task easier because you're seeing the bigger picture.  Once you get into this routine you can also start to see how certain actions over lap to other tasks and you're more likely to complete them out of habit!  It can be as simple as outlining laundry in your planner - wash, fold, put away.  For me seeing the steps means even if I haven't completed everything I can check my progress and feel more productive.

If your to-do is a bigger project you can make a project planning page in your planner to house everything that needs to be done.  For inspiration, check out my wedding planning video where I use the project planning pages to outline this big project!  I also use the project stickers from the Student Sticker Books when I need to plan out projects.  

Why You Should Write Actionable To-Do Lists

Short answer: because you get more done!

Actionable to do lists help us plan better.  They help us allot time in a more efficient way, help us prioritize tasks, and help us say no to things that won't or don't serve us.  Through actionable to-do lists we can meet ourselves where we are and eliminate overwhelm.  We can understand how long it takes us to complete tasks & that can help us estimate our abilities in the future.

When we're breaking up tasks into their moving parts we're seeing the bigger picture and are able to understand a timeline better...even if it's just a Sunday afternoon and we need to get laundry done for the week!

Ever since I started creating a plan of action rather than a running to do list, I've been able to get projects done on a better time line!  No parts are missed, nothing is left to the last minute, and there's nothing unexpected.  One of the best parts is being able to translate what I've learned from one project or task into another, similar task or project.  I've also sort of been able to create 'templates' of reoccurring tasks to help me in the future.

Want to find some printable planner inserts that can help organize your life?  Check out the Etsy shop here for A5 & Personal Size inserts. Or join the Printable of the Month Club over on Patreon for an exclusive printable each month!

How do you write to do lists?  What helps you get the most done?

xoxo, Moe

8.15.2018

Three Tips for a Successful Planner

Planning has become an obsession of mine.  I started out with just a mini binder from Target and now I have too many shelves of planners that I don't know what to do with.  But while those guys sit unused, I've been focusing on my Mini Happy Planner for ages now.......but just to switch things up I'm playing around with a Classic Size! What???
this post contains affiliate links, please read my full disclosure here.

Something I hear a lot about in the planning community is planner peace.  While this looks different for everyone it is often a long journey & sometimes feels unsuccessful.  Planning should be two things:

  1. About you & your needs
  2. F U N
Yes, we're using this system to get things done but we should also be focusing on how planning affects us.  If we're having fun and feeling inspired we're more likely to get things done & feel productive.  That is why I like to functionally decorate my planner.  Sometimes pretty does serve a purpose...if you want to live an inspired life you've gotta surround yourself with inspiring things.

Here are my 3 tips for a successful planner

Watch YouTube Videos

Now, when you watch these guys don't go getting a case of #FOMO (fear of missing out).  You're watching these videos to get ideas on what you may want to include in your planner.  I can't tell you how many times I still watch a Mini Happy Planner set up video to see how others are using their planners.  When it comes to the Happy Planner line a lot of people call this style of planning frankenplanning because you're taking different parts of different planners or accessories and putting them together.  I don't think I have a Frankenplanner....I just think I have a set up that works for me!  If you want to see my most current Mini Happy Planner set up for some inspiration, check it out here.


Plan your Planner

Now that you have an idea of the sections you might want to include in your planner it is time to figure out how you'll use them.  I love to plan my planners and you can often find a section in my planner about ideas for my planner.  This is all about making the planner work for you.  

If you have a plan then you're not out there all willy nilly buying planner supplies you don't know how to use.  If you see something out there you like consider how you'll use it.  Make a plan for it.  This will save you money & save your sanity!  This goes for any planner system, not the just the Happy Planner!

Experiment

The final tip is to just see what happens!  If you find yourself really interested in a system but you're not quite sure how you'll use it just go for it.  I recently used a 50% off coupon on a teacher planner from the Happy Planner just so I could see if I'd really like to use it as a social media planner. (spoilers I LOVE IT!)  I'm gonna make a good go of it and if it doesn't work out then I didn't spend too much and I can probably pass the rest on to someone else.

When you feel the call to do something...sometimes you shouldn't ignore it!  A system you're interested in may end up working perfect for you or you may learn something else about your needs that you can switch up later.  


There is no right or wrong way to plan.  Hell, even just putting a sticker down on paper serves a purpose for you - if it's inspiring just do it.  Planning is a creative & productive outlet for me so don't let anyone tell you that your way of planning isn't the right way.

If you'd like to test out some printable inserts to see what might work for you in your planner, check out the etsy shopI use some of the personal size inserts like the budget & week on one page in my Mini Happy Planner and love it.  You can also join the Printable of the Month Club over on Patreon to get a brand new planner printable each month.  Subscribe for only $3 here.

What planner system works for you? What have you tried that hasn't worked out?

xoxo, Moe

5.31.2018

5 Happy Planner Extras for Productivity

I've been knocking things off my to do lists left and right recently and I think its because I've been using my planner to the best of my ability!  This has to do with a a couple of things, I think - one of which being all of the productivity extras from the Happy Planner to make the whole thing work for you.  As you know, I use the Mini Happy Planner exclusively and I am so happy that there are a ton of extras for this size!
this post contains affiliate links, please read my full disclosure here.

Three Parts to Productive Planning

When it comes to the actual doing of the stuff there are a few important points that need to fall into place in order to mark these things off of our to do list.  It isn't just enough to make the list, we've got to organize, prioritize, and make plan to execute.

Organization - organizing your tasks, due dates, and appointments means you'll know exactly where each item lies so that you can find it quickly & easily when needed.

Prioritization - prioritizing you tasks and events means that what needs to get done first, happens first.  Then you can push other things to the back burner or reevaluate when something else might need to be done.

Project Planning - this sort of has to do with execution.  If you outline what needs to be done, you'll be able to execute things in a timely manner rather than stumble over tasks.

The Happy Planner line has quite a few things to help us get through all three of these to make sure we're reaching our goals!


Planner Extras for Productivity

My Mini Happy Planner is a conglomeration of quite a few add-ons & extension packs, which is great because the whole system is disc bound!  I can add and remove pages as needed to create a functional system that works in my best interest.  Not to mention there are a ton of functional sticker packs out there that make organization, prioritization, and execution colorful as well.

These are new to my arsenal and I haven't quite mastered them yet as I prefer the project stickers found in some of the sticker books.  However, these guys can be great for long term or multi-step projects that need a little bit more attention.  By creating an actionable time line, you'll be better able to execute tasks to complete your project or reach your goal.
These inserts feature a colorful page with sections for sketching & brainstorming, planning action steps, and assigning due dates.  Since these guys are the same design back & front, I like to add in another page of graph paper for extra notes.  I wish the back was dot or grid paper!  That would make my day!

The Mini Monthly Extension pack I use for social media planning mimics the style of the limited edition Trend Setter planner.  This 6 month extension has an undated monthly view, a sort of monthly tasks view, daily to do pages, then two blank lined pages at the back.  
I've customized the task view with some letter stickers from the Happy Planner sticker books and other alphas.  This helps me break down all the checklists in to specific areas organizing my content into groups.  This insert also lets me prioritize a top three for the month so I'm on track!

Personally I haven't found a use for the daily to do pages as they don't seem to fit in with how I use my planner.  But I am thinking about using them to plan my Instagram posts.  The blank lined pages at the back I am thinking about pairing with the project pages!

These guys are great to break down your busy daily schedule but they can also be used as an extra dashboard if needed.  Featuring an hour by hour breakdown starting at 6am, you'll be able to organize your day efficiently.  
Areas for prioritization include a daily focus & two checklist sections.  One of the checklists says Do This Later which can help to get tasks out of your brain but not necessarily scheduled right away.  The back of these inserts features a brain dump section that is great for notes during the day or outlining bigger tasks.

Productivity Stickerbooks

Currently there are two productivity stickerbooks from the Happy Planner and I love both of them!  The original sticker book features project planning & goal setting stickers allowing you to outline projects & priorities.  The second sticker book focuses more on habits, time management, and organization.

Both work well in the mini or classic size planner and are perfect to add to the graph filler paper to create your own inserts.  The original Productivity book does come in a mini size, though I find those to be a little too wide and not as aesthetically pleasing as the stickers designed for the classic planner.
This is something brand new to my Mini Happy Planner and its not even designed for it!  These Focus Half sheets are designed to fit the Classic Size planner but a little trim keeps all the important bits and it fits right in the mini.  The front page is great for a targeted goal list for the week, outlining the top five must do tasks.
The best part about these is that the back is graph paper - perfect for all my notes.  It can also be used as an extra project planning section or to outline the steps of future tasks.  I was  using this as a wellness tracker/insert but that didn't seem to work out too great for me. I'm thinking of making it a brain dump sheet to put all that tasks that float through my brain but that don't need action just yet.

Housing everything all in one place is made so much easier by these different add ons, extension packs, and the disc bound system of the Happy Planner line. Some of the extras I mentioned can be found in a cool little bundle here on Amazon (yay for Prime shippng!) but you can save the most when you shop Happy Planner stuff over on Blitsy.

The only way to use a planner is to find a system that helps you rather than hinders you.  I like to write a lot out - I am a multi step person - so having specific areas that can help me organize, plan, and execute means that I'm working on my goals successfully!

Lunar Newsletter

Get on the List!

* indicates required


If you'd like to read more about productivity, check out these posts on the blog.  You can also join the Five Sixteenths | Live Creative Facebook group where we talk about creative planning, inspired productivity, personal development and intuitive goal setting!  Click here to join!

What are your favorite planner extras for productivity?  How do you use your planner effectively?

xoxo, Moe

5.23.2018

5 Supplies you (Kinda) Need to Start Memory Planning

Have you jumped on the memory planning trend?  If you have, you've probably seen there are a zillion ways to do so!  Just like with everything in the planner community there are a ton of people that want to tell you the right and the wrong way to use your planner.  Well I'm here to tell you the only right way is to actually use it!  Memory planning can help us keep our memories close with out being intimidated by scrap booking.
this post contains affiliate links, please read my full disclosure here.
Tons of people memory plan in personal size planners, in A5 size planners, in Mini Happy Planners, in Classic or Big size Happy Planners.  Some people use Erin Condren planners, some people use recollections planners, and some people even use Traveler's Notebooks.  I equate how you plan to how you take your coffee - it doesn't matter because it's personal to you!

However, I do identify that there is something I call planner anxiety.  We feel pressured or intimidated because we're maybe over stimulated with ideas.  We don't want to touch the pages because we don't want to mess up this beautiful book!  I have faced this and I feel that it is a valid fear or struggle to have.  As creative people we're often subject to judgement and we don't want to hear the criticism...even when it is just from ourselves. 

Well I'm here to tell you the only five supplies you need to get started and give you some examples of things you may want to include in your little memory keeping kit.  

Planner

There are a few planners designed for memory planning but let me give you a tip - any planner can be used for memory planning!  In previous years I've used a vertical Erin Condren planner but this year I'm attempting to use a Classic Size Happy Planner that is horizontal.  I tried using the Happy Memory Keeping Planner but since that is 8.5 x 11, I found it to be way too big for me.  There's even now a horizontal Carpe Diem spiral bound planner that I thought of using this year, so any planner can be used as a memory planner....if you try hard enough!
It is really going to depend on you & your preferences for the size, I can't tell you how to live your life!  But I can show you the differences in sizes & how different A5 planners look.  Check out the video below to see the best planner to use for an uncoiled Erin Condren planner.

Printer/Photos

You'll need some memories to put in your memory planner.  Most likely you'll be putting pictures on the pages (or in some pocket pages) as you go.  I've compared the ways I print photos in this post, but here's a little rundown - you can either print the photos yourself or have them printed for you.

Print at Home Options
Obviously you can use your home printer and print on photo paper using either your computer or an app like Print to Size for iPhone.  Or you can get a smaller, more portable one like the Polaroid Zip, HP Sprocket, or LG Pocket Printer.  A sort of mid-size photo printer is the Cannon Selphy.  This one happens to by my favorite as it prints the best quality photos and is quasi portable.  Recently though I've been using my Zip as it is a lot more portable than my Selphy! 
Print & Ship Options
I'm sure you've used something like the Walgreens 1 hour photo to print your images for you so you can scrapbook or Memory Plan.  But I don't really like going out to get them, you know?  So I use a free app (yes, it is free) to print my photos and have them delivered to my doorstep.  It is called Free Prints.  You get 85 4x6 prints each month delivered to your door just for the cost of shipping!  So if you like to do some memory keeping all in one go you can totally order a batch from the previous month, no printing or running around involved.

Stickers/Decor

There are several sticker sets out there designed specifically for memory keeping.  The Happy Planner has a line of stickers just for memory planning but you can also use any stickers, washi tape, and decor that you'd like to use.  Journaling cards can even be a nice touch to your planner pages.  Washi tape & stamps can also make a really cool memory spread.
I like to mix it up between stickers designed for the Classic & Big sized happy planners.  Since sometimes I use my memory planner as more of a journal and I like smaller sized pictures, I'll opt to use the Classic sized books.  If I'm doing a more photo-centric spread, I may use the Big sized or Memory Planning stickers.

You're also not limited to a certain sticker book or style if you're using different sized inserts - if you're using an A5 planner it might be fun to use oversized stickers.  This process is for you!

Pens

I think the best type of pens to use for memory planning are those that have a felt tip.  I personally like the U Brands pens because of how find the tip is & because they are much easier for me to hold.  I am one of those people that believes her handwriting is affected by a certain pen!  Another popular brand of felt tipped pens is the PaperMate Flair pen.  Then there's the Le Pen felt tip pens.  All of these guys come in a ton of different colors so they are perfect if you like to color code or just get more creative in your planner.
You may also want to consider something like the Tombow brush tipped pens if you're attempting to learn to hand letter.  Though there are a ton of videos on YouTube on how to do faux hand lettering too!

Pocket Pages

Another thing that's been introduced to the world of planing for many different planners are pocket pages!  If you're going to be adding in photos that aren't on the actual planner page, these pocket scrapbooking pages are the best.  The Happy Planner has them sized for the Mini, the Classic, and the Big/Memory Planner.  This is great because you don't have to worry about punching a plastic pocket page!  The way these are sold, however, means you'll get multiple page layouts in each pack so if you fall in love with one style you'll have to buy a full pack just to get that specific one.  So a coupon is always nice!
Webster's Pages has come out with pocket pages for the A5 & Personal size.  The best part is they aren't just for their specific planners!  These pocket pages will fit any standard 6 ring binder!  You can also buy them in different design packs - so if you like let's say Design C you can buy just a pack of Design C pocket pages.

If you're using something like an uncoiled & hole punched Erin Condren planner the standard 6x8 pocket pages will work great!  They come with 2 holes already so you'll just need to punch 4 more and they will line up with your 6 ring A5 binder.  I have a whole video here on finding the best A5 planner for an uncoiled Erin Condren Life Planner!

Of course there's a whole ton more you can add that you'll find helpful but hopefully this inspires you to get started!  You can find some printable stickers here on the blog to get you started.  (Be sure to tag me on Instagram when you use them!)

Memory planning opens up a whole new world of getting creative.  I love that planning can mean so much to different people and I love that we all get to express ourselves the way we feel most inspired to do so.

If you want to check out some more posts on memory planning you can find all my posts on memory planning here.

How do you memory keep?  What inspires you to get creative?

xoxo, Moe

5.08.2018

Three Ways to Use a Full Box in Your Mini Happy Planner

If you haven't figured it out by now, the Mini Happy Planner is my favorite planner EVER.  I am seriously contemplating purchasing another one that starts in July just because I can.  Speaking of which, have you see the new stuff that is on the Michael's website?  Apparently it's supposed to be available the end of May?  I. Am. Stoked.  I was hoping to link it here for you all....but I can not seem to find it!!
this post contains affiliate links. see my full disclosure here.

I love that there are so many stickers, accessories, and creative possibilities with this planner line.  Probably the number one reason I love planning is because I get to be creative.  I get to turn a blank page into something beautiful to look at for a week....and then I get to do it again!


The Happy Planner line has had their sticker books designed for the classic size planner out in circulation for quite a while.  It has only been in the last year, I think, that they've released them for the Mini Happy Planner.  This means the majority of my sticker books aren't designed for the planner I use.  But I'm here to tell you that is 100% A-OK!  We're gonna talk about 3 creative ways to use a full box sticker in your Mini Happy Planner

Background for a Checklist or Quote

Since these boxes fill up a good chunk of space in on the spread, using them as a background for something else is a fun way to optimize space.  I usually stack and layer stickers all over my planner spreads.

Geometric Accent

Cutting up the full boxes and using them to layer with fun geometric shape adds interest to your page.  This can be a fun way to decorate if you want to leave a little more white space in your spread.

Sticker Cluster

This is one of my favorite things to do in my planner!  I have a whole post here about the sticker cluster.  You can usually find these clusters on the lower right hand corner of my spreads as I like to cover up the little square in the notes box.

60off Happy Planners
My favorite place to save moolah on the Happy Planner Sticker books is BlitsyThis amazing site offers a ton of discounts on planning supplies from various brands and other craft supplies.  Not to mention their sale & clearance pages have even more discounted items!  Be sure to join here because I know you're going to love this site!!

Like I said, getting creative is my favorite part of planning. I just love to express myself & look at how fun the spreads are all week.

How do you use full boxes in your planner?

xoxo, Moe

5.01.2018

three ways to meal plan in your planner

Meal planning is something I've been doing recently to make sure that I'm not only on budget but that I am eating well.  I can't tell you how many times I've just poured myself a bowl of cereal because it was convenient and I was lazy.  So meal planning (and my instant pot) have helped me to be accountable in two areas of my goals this year - budgeting better & eating better!

I don't like to make my planning process overly complicated with extra planners and the like just for meal planning.  I also don't write out breakfast or lunch in my planner because I usually eat the same thing everyday.  Breakfast is spinach, eggs, and a little bit of cheese and lunch is usually leftovers or a chicken sandwich with snap peas.....see, easy peasy.  Meal planning is also a task that is done every two weeks to coincide with each pay period.  I also make sure to buy ingredients that will last the two weeks and plan meals according to freshness.  That way I don't  have a head of cauliflower rotting in the crisper drawer that I forgot about!


Housing everything in one planner is the way I go and there are a couple of ways I've used stickers & inserts to track them.  I just added these ombre weekly stickers to the Five Sixteenths Etsy shop so I thought I'd highlight three awesome ways to meal plan simply in your planner:

Weekly Ombre Sticker

This is one of my favorite stickers.  I used to use it to track my daily tarot pulls (I need to get back into that!) but they make the perfect meal planning stickers.  These stickers are compact enough not to take up too much room on your weekly spread and totally functional.  I also use the frixion pens in my planner just in case something changes.....because usually it does!

Week on One Page Insert


My Mini Happy Planner is the perfect size for all the things!  It also fits personal size inserts rather nicely.  So most weeks I will put a week on one page personal size insert right into the weekly spread.  These in the shop have a week on one side and then a weekly habit list and to do list on the back so you're getting double duty on the productivity!  Since I get my groceries delivered through Shipt, I don't really need a grocery list in my planner.  I add everything to my Shipt cart as I'm meal planning then check out.  The groceries show up at my door and everyone is happy!

Stamp (or Write) it Out

Planner stamps are another great option to add meals into your planner.  If you get in the mood one day just stamp all your pages with a 'dinner' or other menu planning stamp and you won't have to worry about matching stickers!  These two stamps are from The Happy Planner stamp set called Meal Planning.  I found them on Blitsy so be sure to sign up here to save some money on planning supplies!!  I love that stamps create simplicity in your planner and can make it look like the page was pre-printed with your own custom sections.

So there you have it!  Three easy ways to meal plan right in your planner.  I am actually waiting on groceries to be delivered as I type this.  Shipt is so dang convenient.  I really do not like going to the grocery store....it just is not fun and I've got a ton of things that I'd rather be doing.

How do you keep it simple in your planner?  Any meal planning tips?

xoxo, Moe

4.12.2018

Three Big Tips to Actually Using Your Planner

I'm pretty sure one of the biggest questions when it comes to actually diving in to using a planner is 'well, how will I remember to actually use it?This can cause some hesitation and make you believe that you may not even really need a planner (spoilers: I think everyone can benefit from a planner!)  You may also be thinking 'that is a silly question', but not everyone can easily see how a planner can help them in their daily life.
this post contains affiliate links, please read the full disclosure here.

I think one of the keys to using, and getting the most out of, your planner is mindfulness.  I talked a lot about mindfulness last year, but the basic gist of mindfulness is being conscious & aware.  We often rush around our lives leaving our lunches on the counters & forgetting important papers on the train.  The easiest way to do more of something is to make it a priority - we must be mindful of what we want in our lives and we must take action to make it so.  Mindfulness can create routine and routine will create habit!  So here are some tips on how to actually use your planner:

Make it a habit

Remember that thing I just said about routine?  If you make using your planner a part of your morning, evening, or daily routine you'll begin to rely on it and eventually that will free up your mind from remembering all the things!

Put your planner in a place you'll see it

Do you have a command center at home?  A main desk you're always working at?  Put your planner in this location so that you'll always know where it is.  Write in important things when you know them either on sticky notes if something is tentative or on your main calendar if it's already become a  plan.  I love using Frixion pens for my planner so just in case something changes I can quickly erase it.  These sticky notes fit perfectly in a lot of different planner systems - from personal size to A5 - with out taking up too much room.  You can also use these page marker style post-it notes for shorter items.

Carry your planner with you

Each day, grab your planner from its designated home and stash it in your bag.  I used to not bring my planner with me because I didn't really use it at my 9-5.  Now I use my lunch break as a social media power hour so having my planner has become a necessity.  If you don't use you're planner as much outside of the house, you may find the more you carry it the more helpful it is.  You won't be double booking yourself on occasion and you'll have everything you need at your fingertips.....just in case.

Schedule planner time

Creating a routine around your planner will increase your chances of using it.  Schedule time to plan out your week on Sunday evenings, schedule time to check in mid week, and then schedule time to celebrate your wins on Fridays!  This can also double as a little self care time if you're getting creative or if you just really feel happy when you're working in your planner.  I love that this little functional habit actually makes me feel creative!

Make it your master plan

There are different schools of thought on what should be in your planner.  There are even debates on whether using multiple planners is necessary.  I'm here to tell you that you should do you boo boo and that my Mini Happy Planner is my master plan....it holds everything!

Vision board

If you planner holds everything, make sure it holds your vision for the year.  Create a mini vision board to store in your planner so when you open it you'll be reminded of what you're working towards this year.  You can also create smaller, actionable lists that you can refer to to make sure you're reaching your goals.  I use the Mini Happy Planner graph fill paper + the pocket pages to create mini vision boards.  Learn more about using graph paper here.

Monthly view as the big picture plan

For your master plan, use the monthly view for the bigger picture.  Create an overview of your month so that you know due dates, appointments, & activities.  This will give you an idea of when things are happening & when you're free.  It will help you schedule your time better.  Personally I have two monthly views in my Mini Happy Planner - one for family stuff (like bills, appointments, gatherings, etc) and one for social media (editorial calendar, sponsored content, etc).  I still house this all in one planner though so I can easily see what time I have.

Weekly view for plans & tasks

Your weekly view will be what you'll look at the most.  This is where you can transfer obligations, due dates and appointments from your monthly view and then outline tasks to reach greater goals.  I use personal size week on one page inserts from the Five Sixteenths shop for menu planning.  This insert also has a weekly habit tracker and two checklists on the back.  The Happy Planner brand makes these little notepads I use as a 'side bar' of sorts to store weekly to-dos that don't have a specific day.  Your weekly view is how you can make progress on your bigger goals!

Make your planner work for you

And finally, the only way you're going to actually use your planner is if that planner works for you.  The key here is not to choose the prettiest or the most popular planner.  The key is to choose a planner that you can make the most of and that fits your lifestyle.  There are a ton of factors that go into finding a planner that works for you and you may find just the right system where you only have to tweak it just a touch.

Create specific areas for specific tasks

If you're going to be in the habit of looking at your planner everyday you'll want to make sure you know where the info you need is stored so you can quickly retrieve it with out flipping all through your planner.  One of the easiest ways to do this is use icon stickers to denote specific tasks.  That way you can easily scan the planner page and then find exactly what you're looking for.  You can also create different sections in your planner for different areas of your life.  I've got a whole video on the routines & sections in my planner here.  Though it's changed over the years, that's still a video I recommend!

Add in other pages

My favorite planner, the Mini Happy Planner, allows for the adding (and removing) of pages very easily.  Six ring binder planners allow for this too.  Part of making your planner work for you is feeling like you've got control over what you do with it!  For me that means the ability to customize - I like to add in graph paper + the other extension packs offered by the Happy Planner brand but there are a ton of printables on Etsy that can help you add in pages or even build the planner of your dreams.  Check out my shop for planner printables for both personal & A5 sizes.


If you follow these three tips you'll be a planner queen in no time.  Life is too short to take everything so serious, so be sure you're having fun with your planner.  If it makes you happy you're more likely to use it, but don't feel pressured to plan a certain way!  You're the only one that will benefit from your planner so make sure it's working for you.

If you'd like to find more planner posts on the blog, click here.  If you'd like to watch more planner videos, check out my YouTube channel here!

xoxo, Moe