I've been dying over numeric decor lately. You may remember this
post where I shared some inspiration & mentioned picking up a cardboard 5, 1, and a 6 for my office space. Well, I still can't get numbers out of my head! When I was picked to participate in the Folk Art &
Handmade Charlotte Stencils
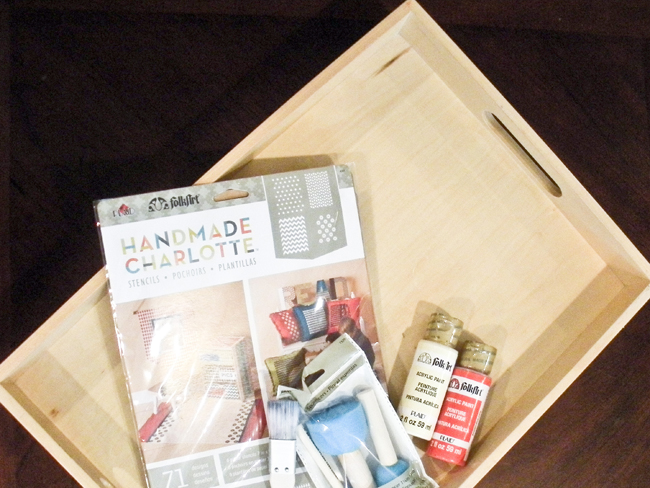
and Paints campaign through Blueprint Social, I was delighted to receive a set of cardboard stencils with none other than a set of number stencils! The best part is that they were all on one page & all different sizes. Talk about super easy mis-matched chic. This stencil pack had some more stencils - chevrons, polka dots, letters, hexagons, etc - but the numbers had me at
hello.
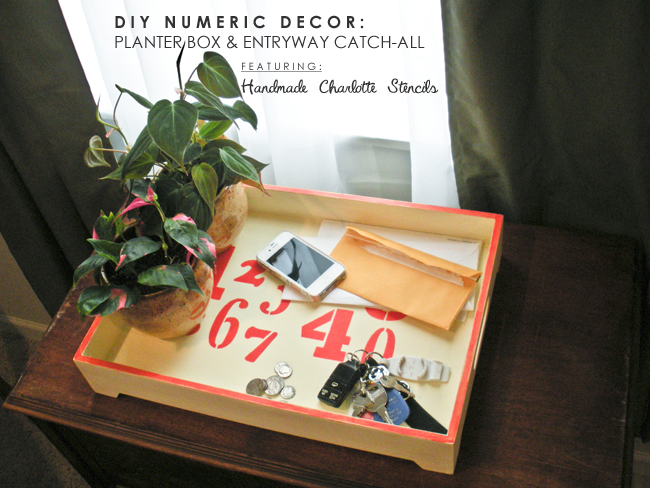
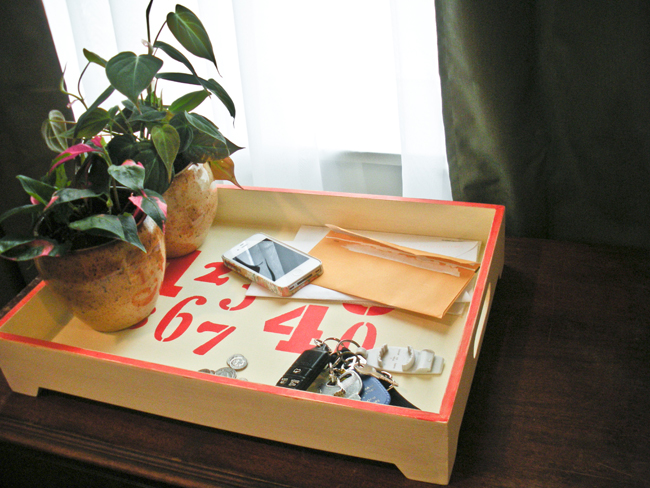
Since moving in, we've been working on a lot of big projects. It was nice to sit down to work on something small. After debating what to make to showcase this cool stencil, I decided to revamp an old tray into a windowsill planter box & catchall for our entry way. We come in the side door of the house & with no where to put keys and mail, this large tray has solved both our problems.
SUPPLIES: Handmade Charlotte Stencils (by Plaid & Folk Art), small pouncer, two shads of paint in contrasting colors (I used a cream & bright orange red), paint tray or paper plate, large tray or box. optional - sandpaper & sealant.
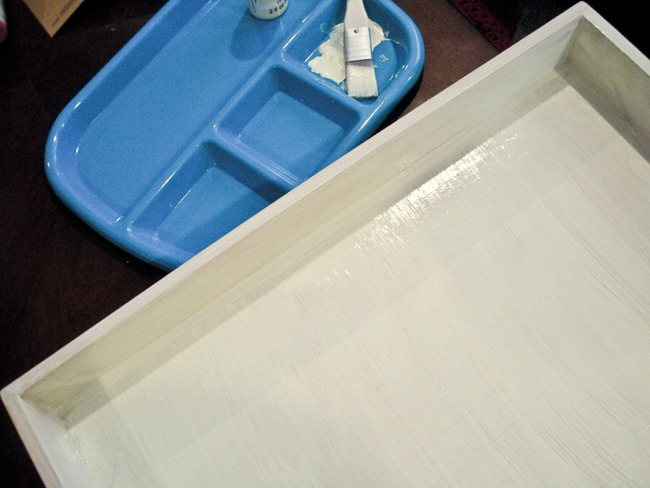
step one - Sand your surface if it's glossy so the paint will cover better, you don't necessarily have to do this, but it will help with the longevity of the piece.. Apply two coats of your base paint with a wide brush. Allow to dry an hour between each coat.
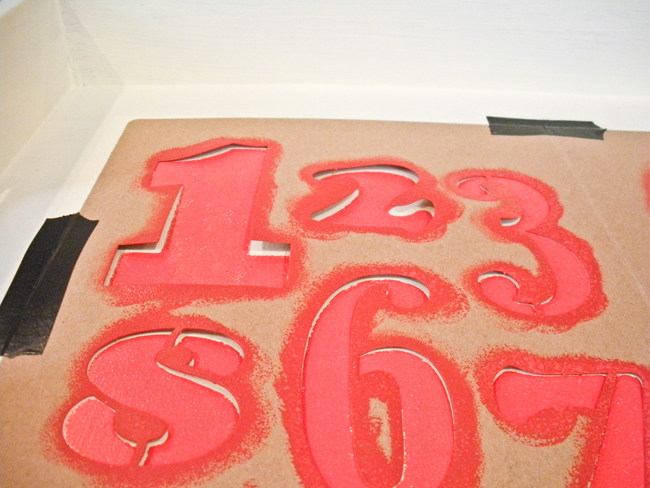
step two - place your stencil down & tape it to your work space. A lot of the other stencils in this set are repeating patterns, so you will need to to reposition your stencil to create the repeating effect. Taping those stencils may not be the best idea unless you don't need to reposition it on your project. The numbers were on one large sheet, so repositioning isn't necessary.
step three - use your pouncer to pounce on the second color of paint. When loading your pouncer be sure to pounce off excess paint so as not to flood the area causing it to bleed under the stencil. Another way to avoid bleeding is to make sure you are holding your pouncer completely vertical, at a 90 degree angle to the surface you're stenciling.
These stencils are made of cardboard & as they get wet from the paint they start to warp & pull up from the surface you're working on (as seen in the picture above). Take care to hold down the edges & work quickly but accurately. If you make sure to use as little paint as possible it is likely you'll get more than one use out of the stencils. The only disadvantage to these stencils is that they are paper. I imagine if you were working over a larger area your stencil would become warped. However, after letting the number stencil dry it more or less went back to it's original shape.
step four - paint your contrasting edge.
step five - apply sealant if you choose to keep your work in wonderful, lasting condition.
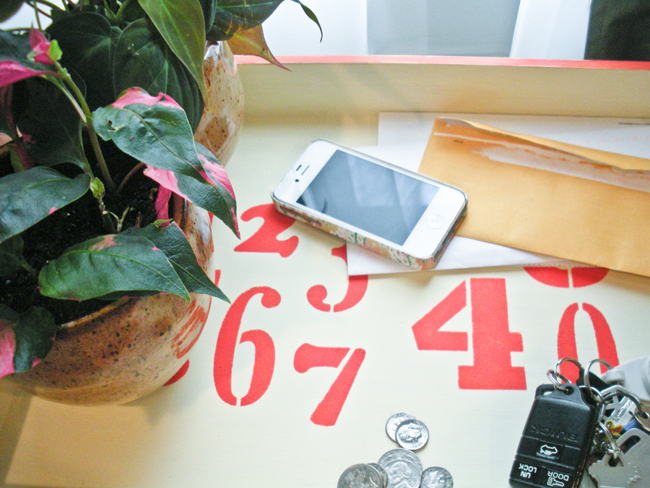
I love the look of the stencil. I wasn't too sure I would but it looks really rustic & vintage....perfect for our aesthetic! Using the pouncer & ensuring a vertical angle to the surface spread the paint evenly yet let there be a little blur at the edge of the numbers that gave it a rustic look. Sometimes when you find these distressed home pieces they look a little too
perfect. The nature of this stencil made it look truly aged. I'm looking forward to seeing how this becomes more distressed with use!
Disclosure: I wrote this post as part of a sponsored campaign with Plaid and The Blueprint Social. All opinions in this post are my own.


 ,
,  , &
, &  for some more awesome inspiration!